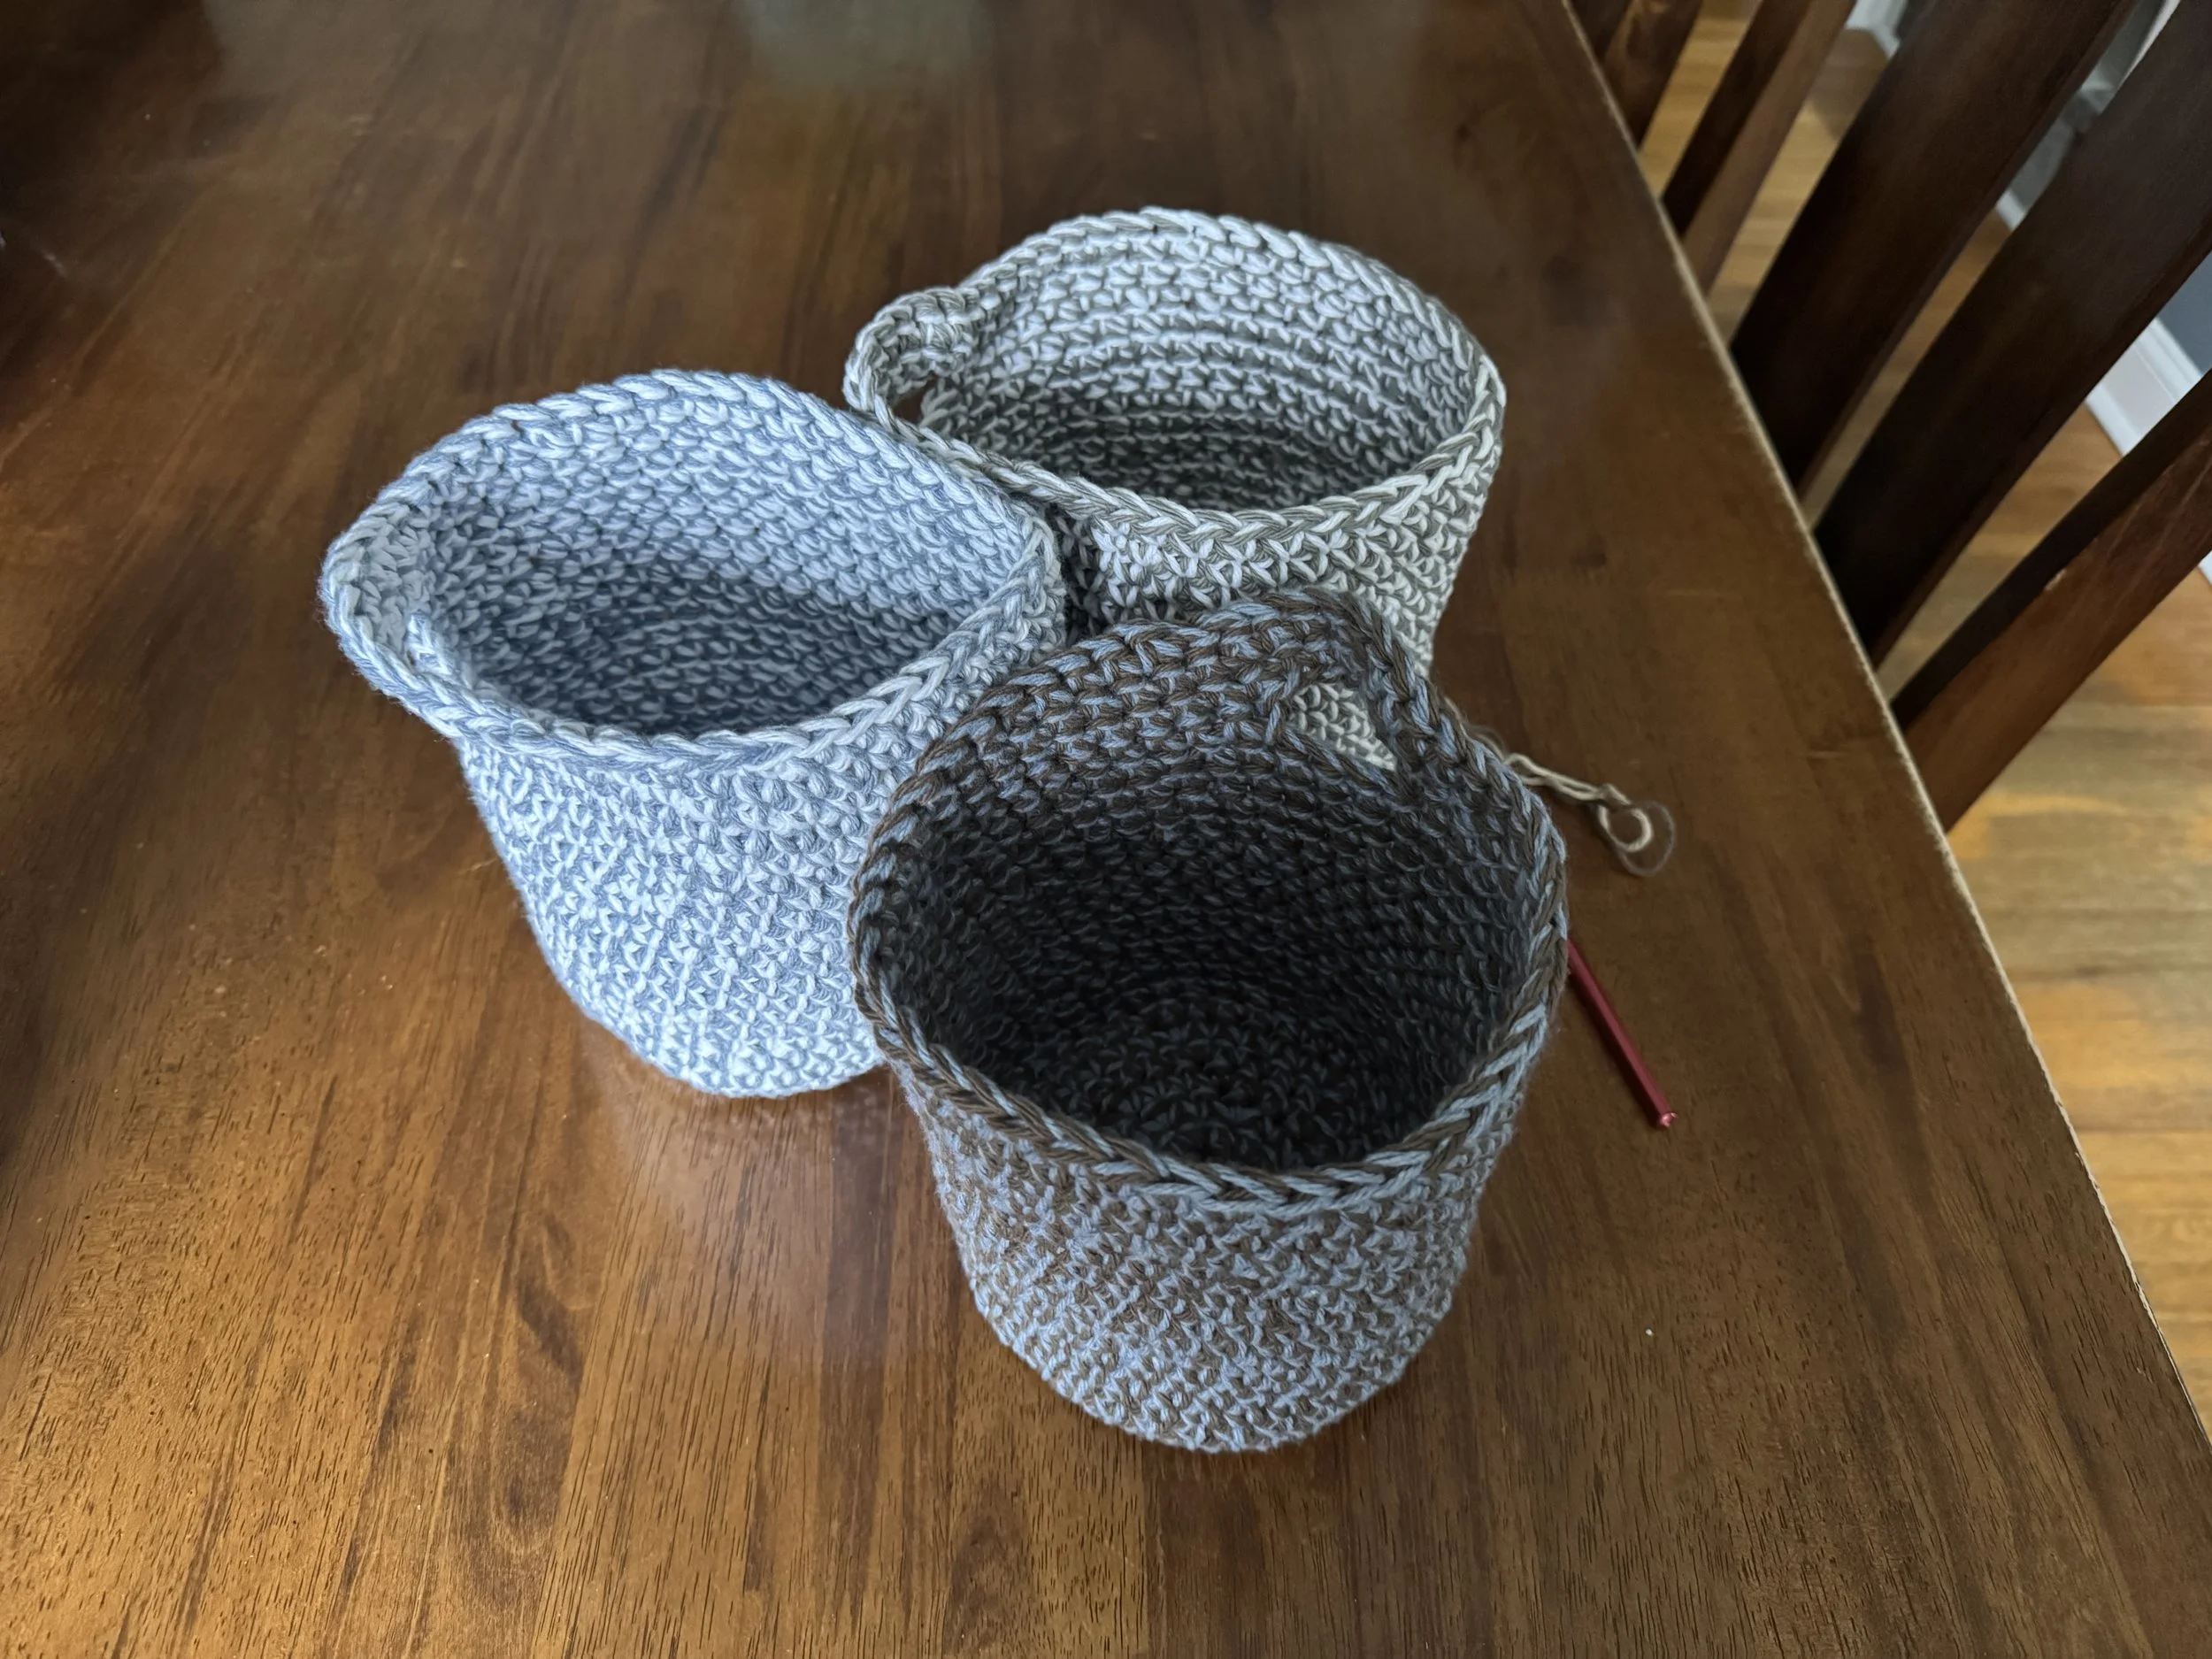
managing toilet paper
-
an extra roll is essential
At our house we used to hold our extra rolls with those metal hooks that hang onto the edge of the toilet tank. A tragic side effect is that the hooks eventually rust, and the rust ends up inside the toilet tank. I will speak no more on this subject.
(I will acknowledge, however, that I am including a crocheted project in my knitting section. It is the first of its kind and I did not want this fact to go unmentioned.)
-
fiber to the rescue
I thought that maybe I could make something that would be less hazardous and more durable, and I think I have succeeded. It does require installation of a Command hook (or something of that ilk) on the side of the tank, but that is easy, and we have been using these for several months now and no one has complained.
-
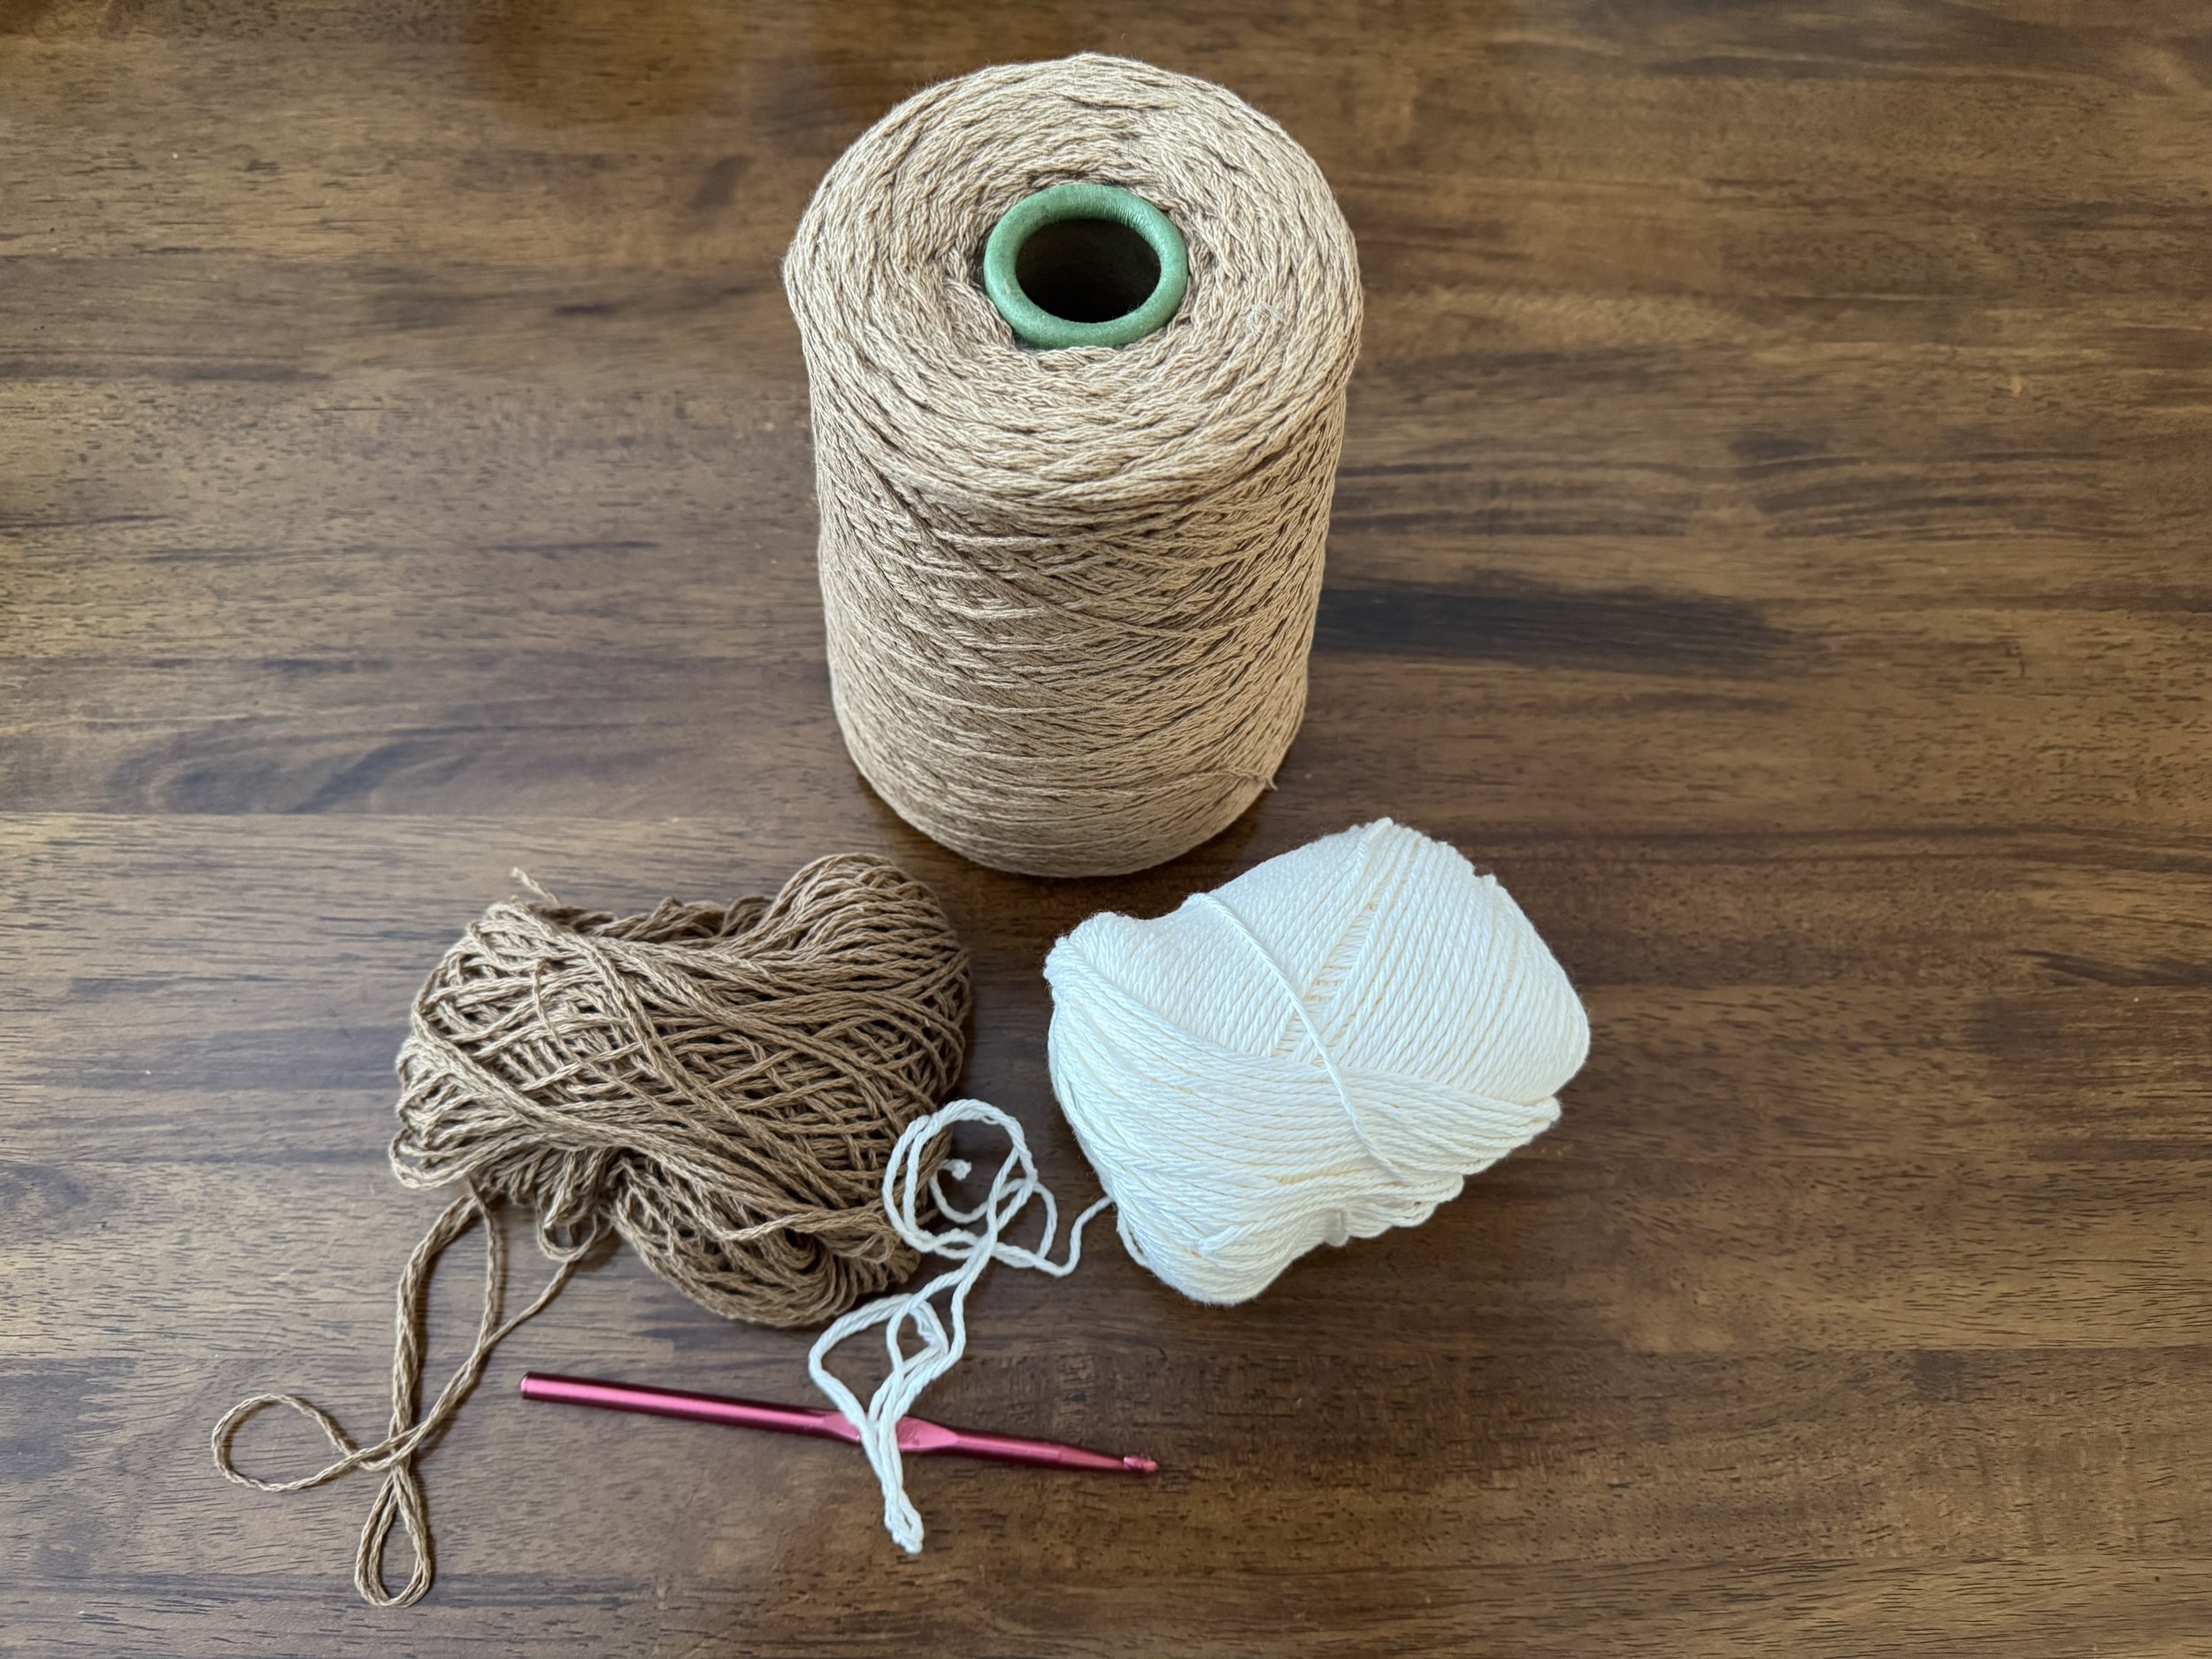
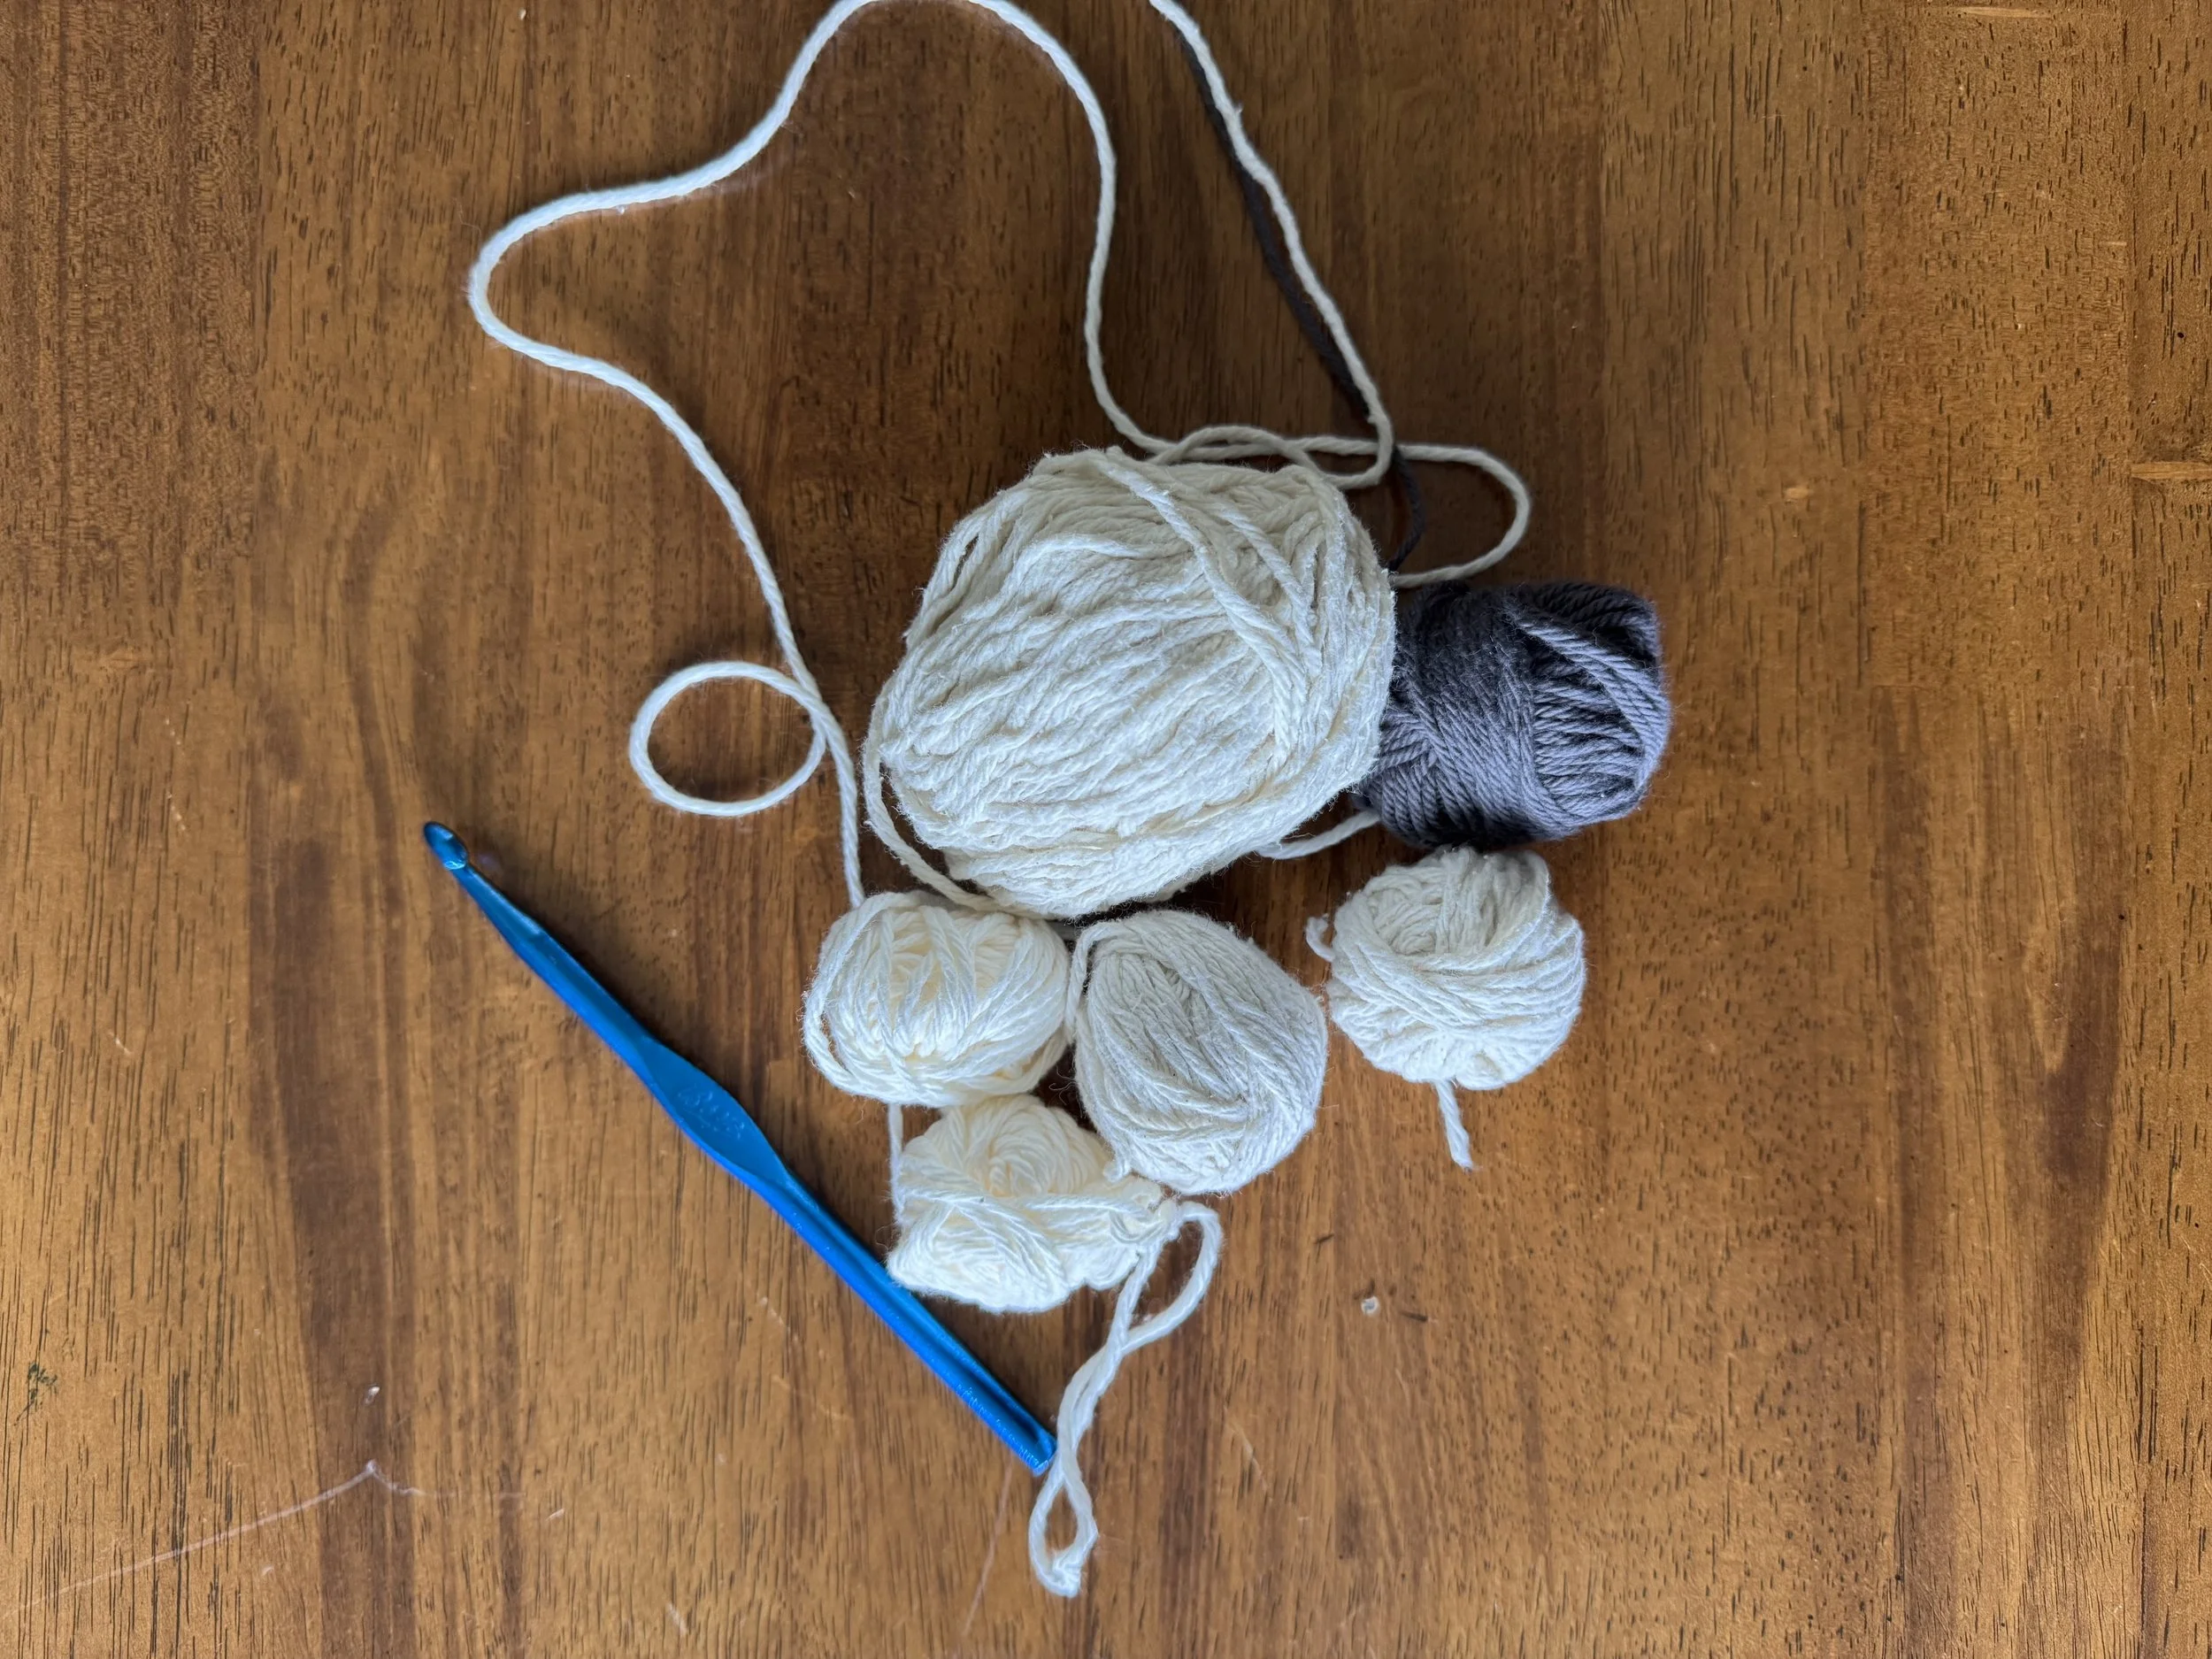
start with some cotton and a hook
Two skeins of basic craft-store cotton will be plenty for this. I am using one such skein along with some very extra very fancy cotton from EcoButterfly. Two strands of one color would be nice, too. I am using a size J crocket hook.
-

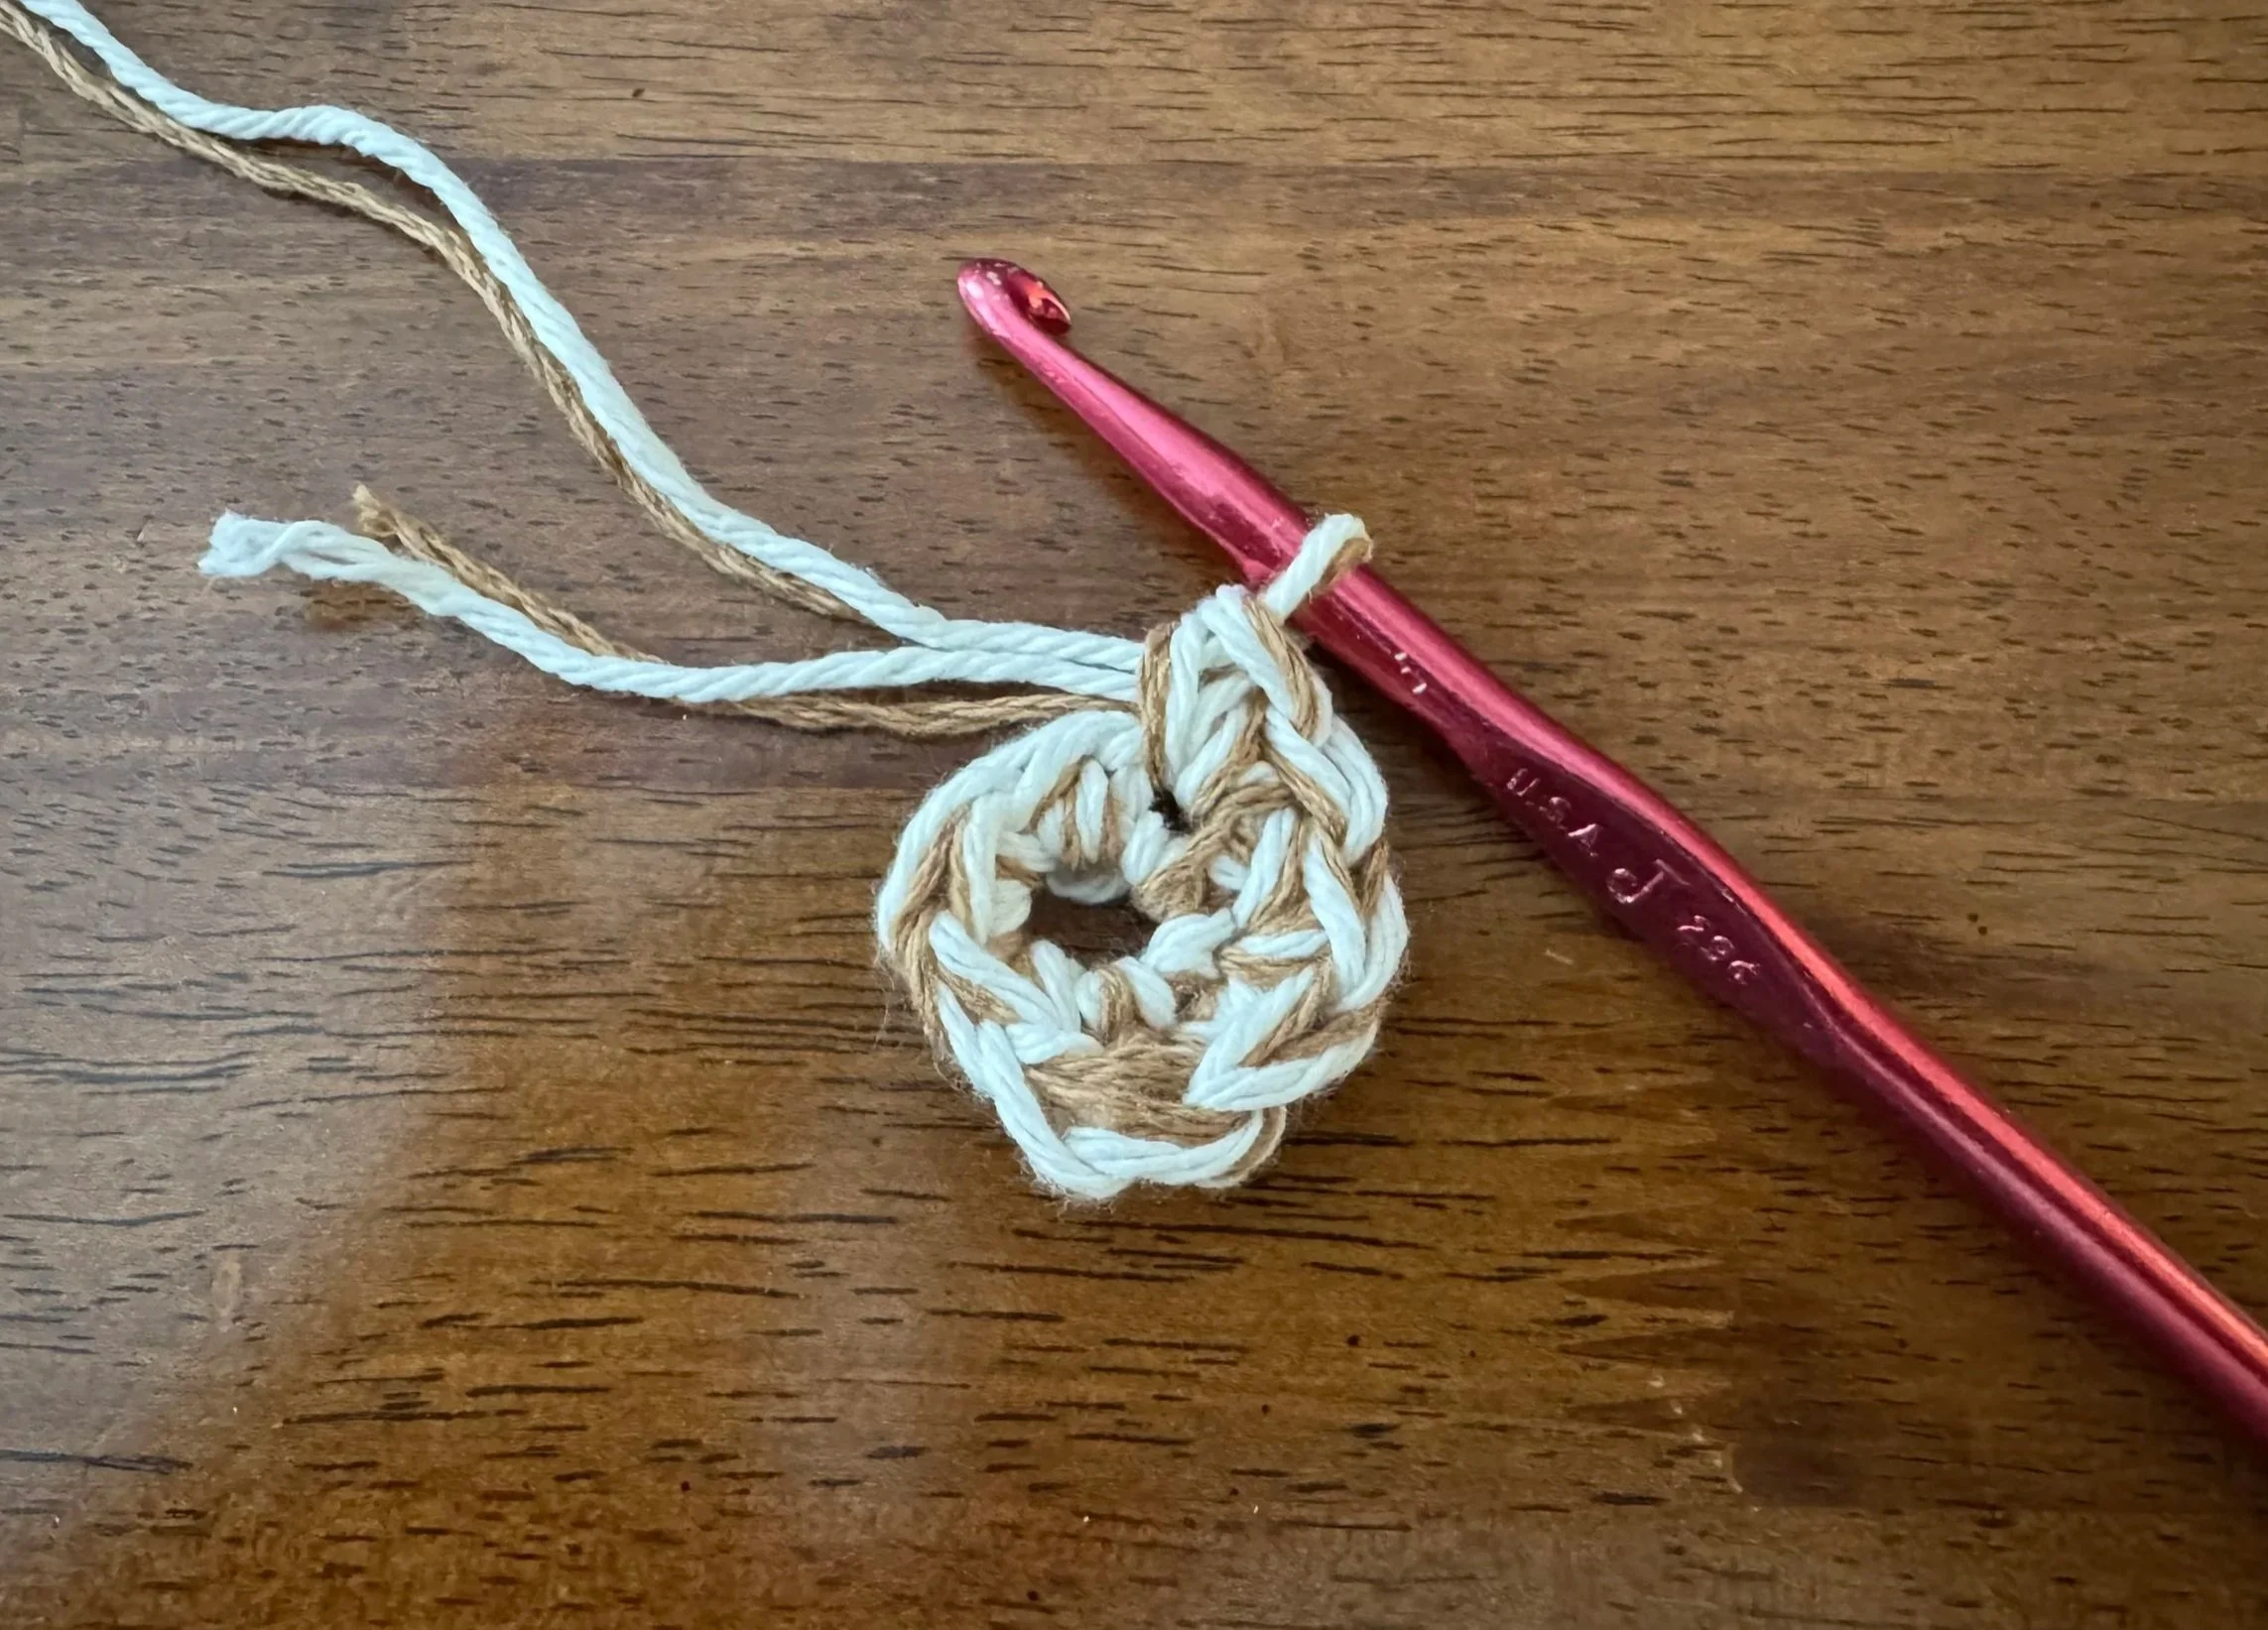
we begin
Using both strands held together, chain 2.
-
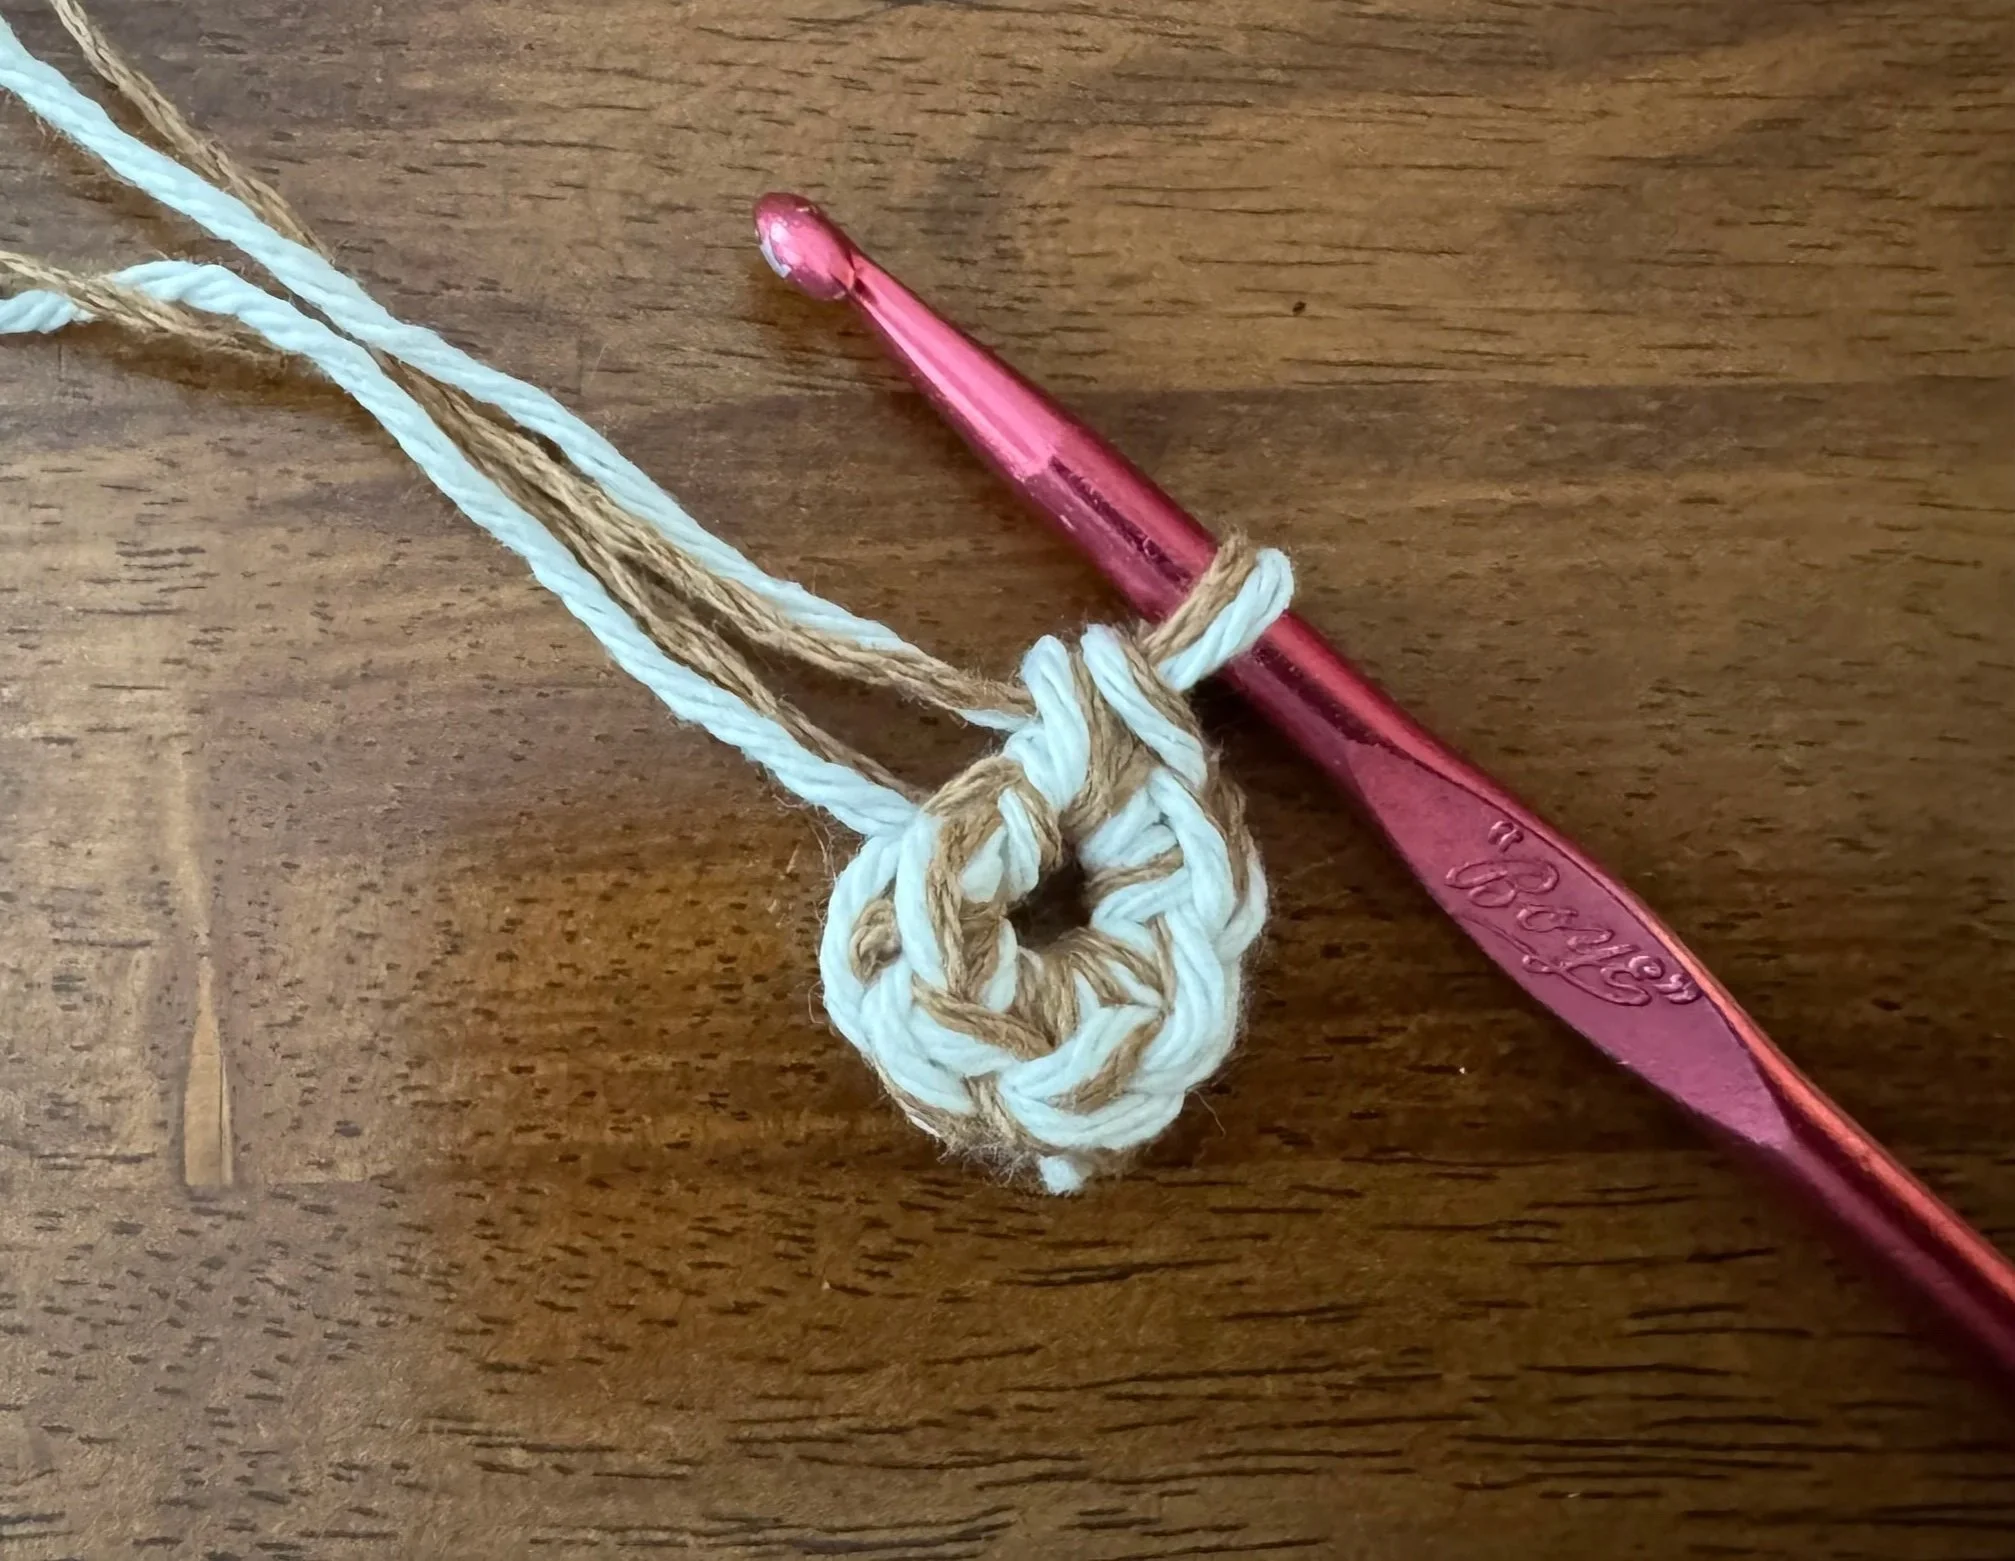
start the base
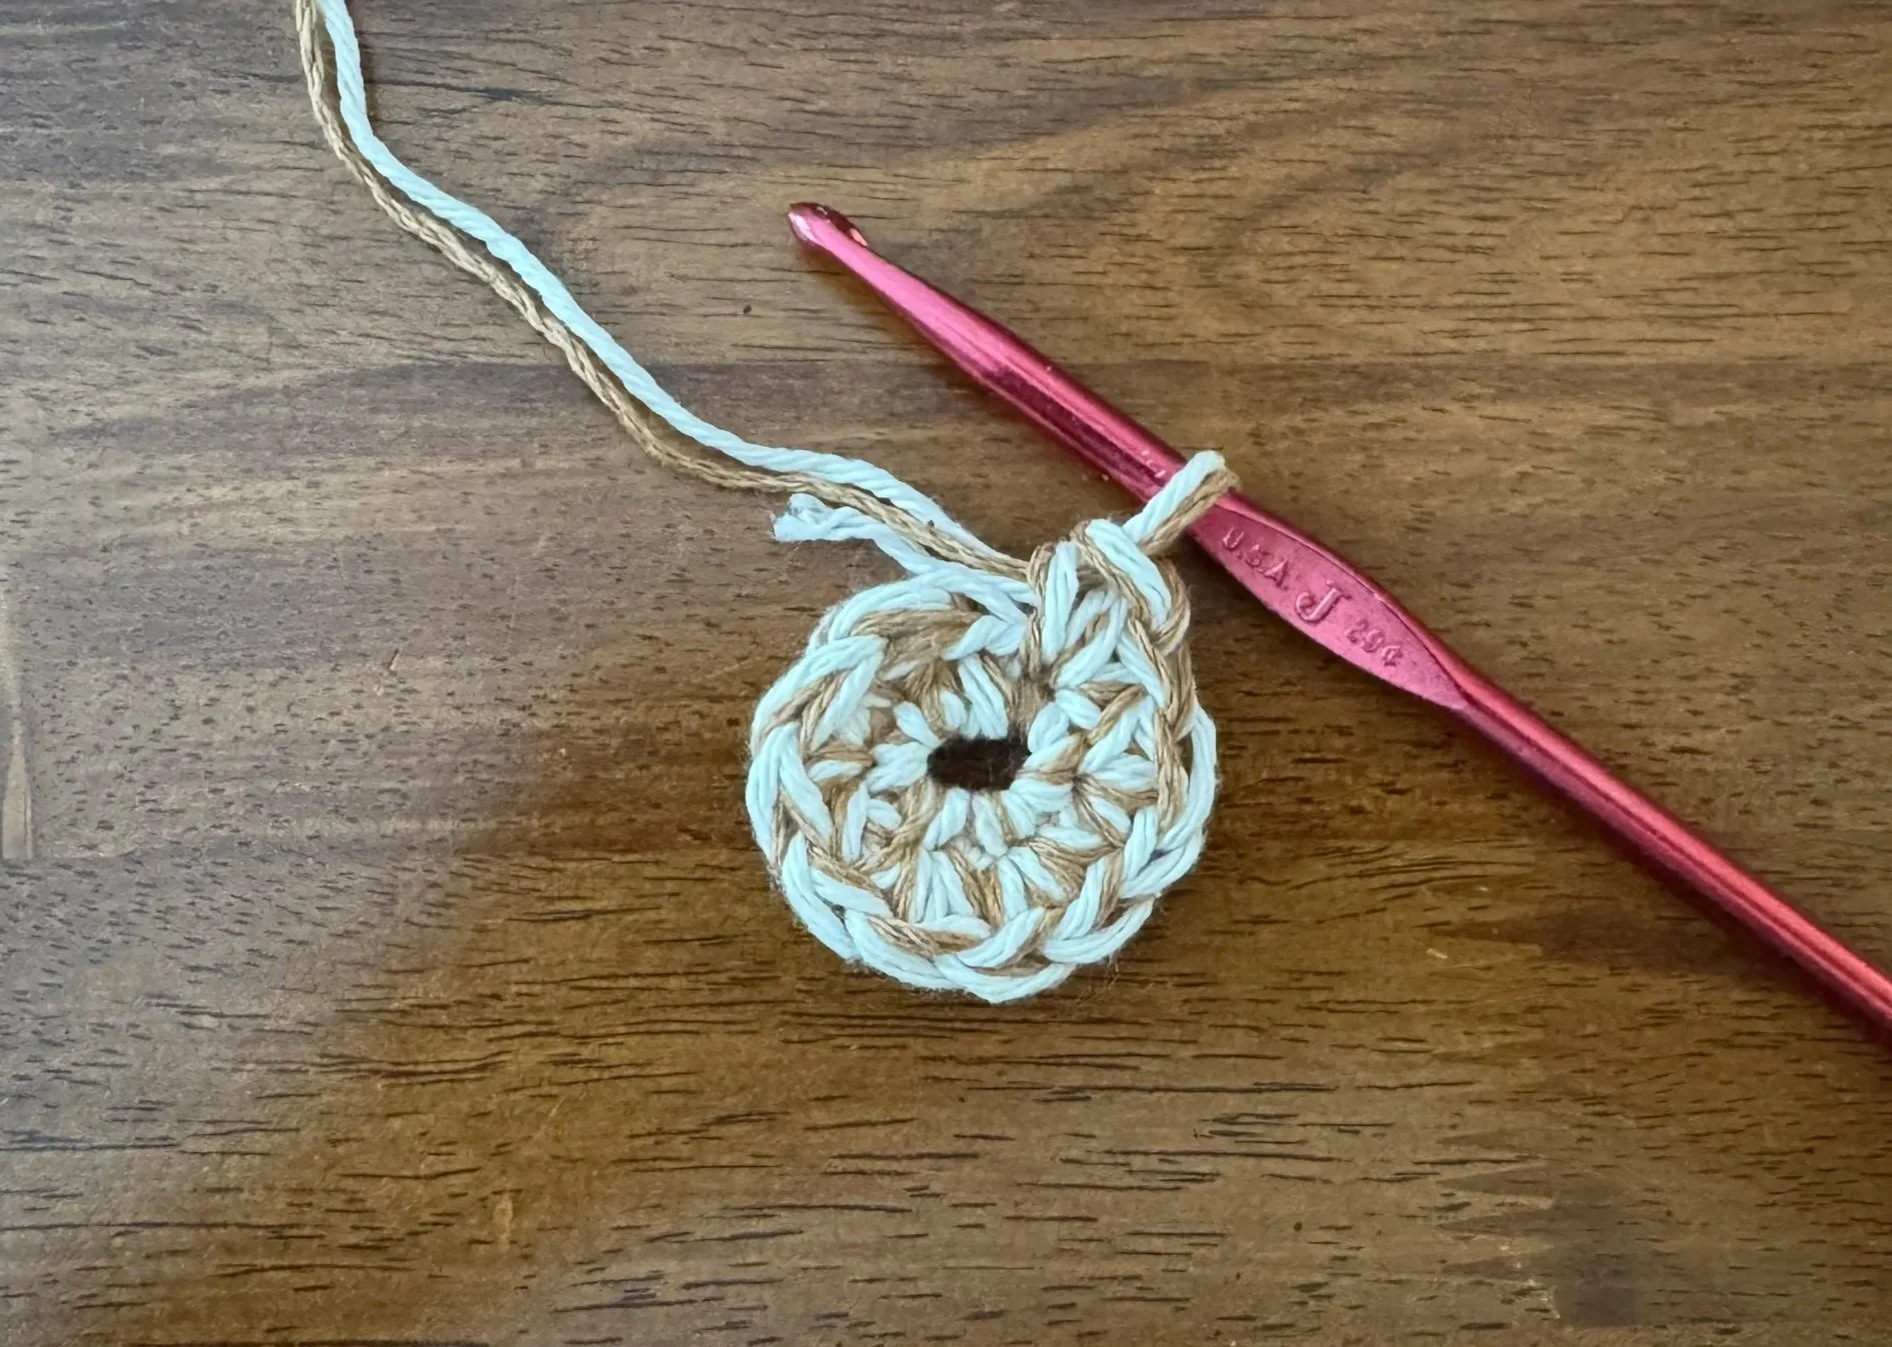
Round 1: make 6 single crochets (henceforth “sc”) in the second chain from your hook (that is, in the first chain you made). You might have to work a bit to squeeze the last couple of crochets in there.
-
now increase 6 stitches per round
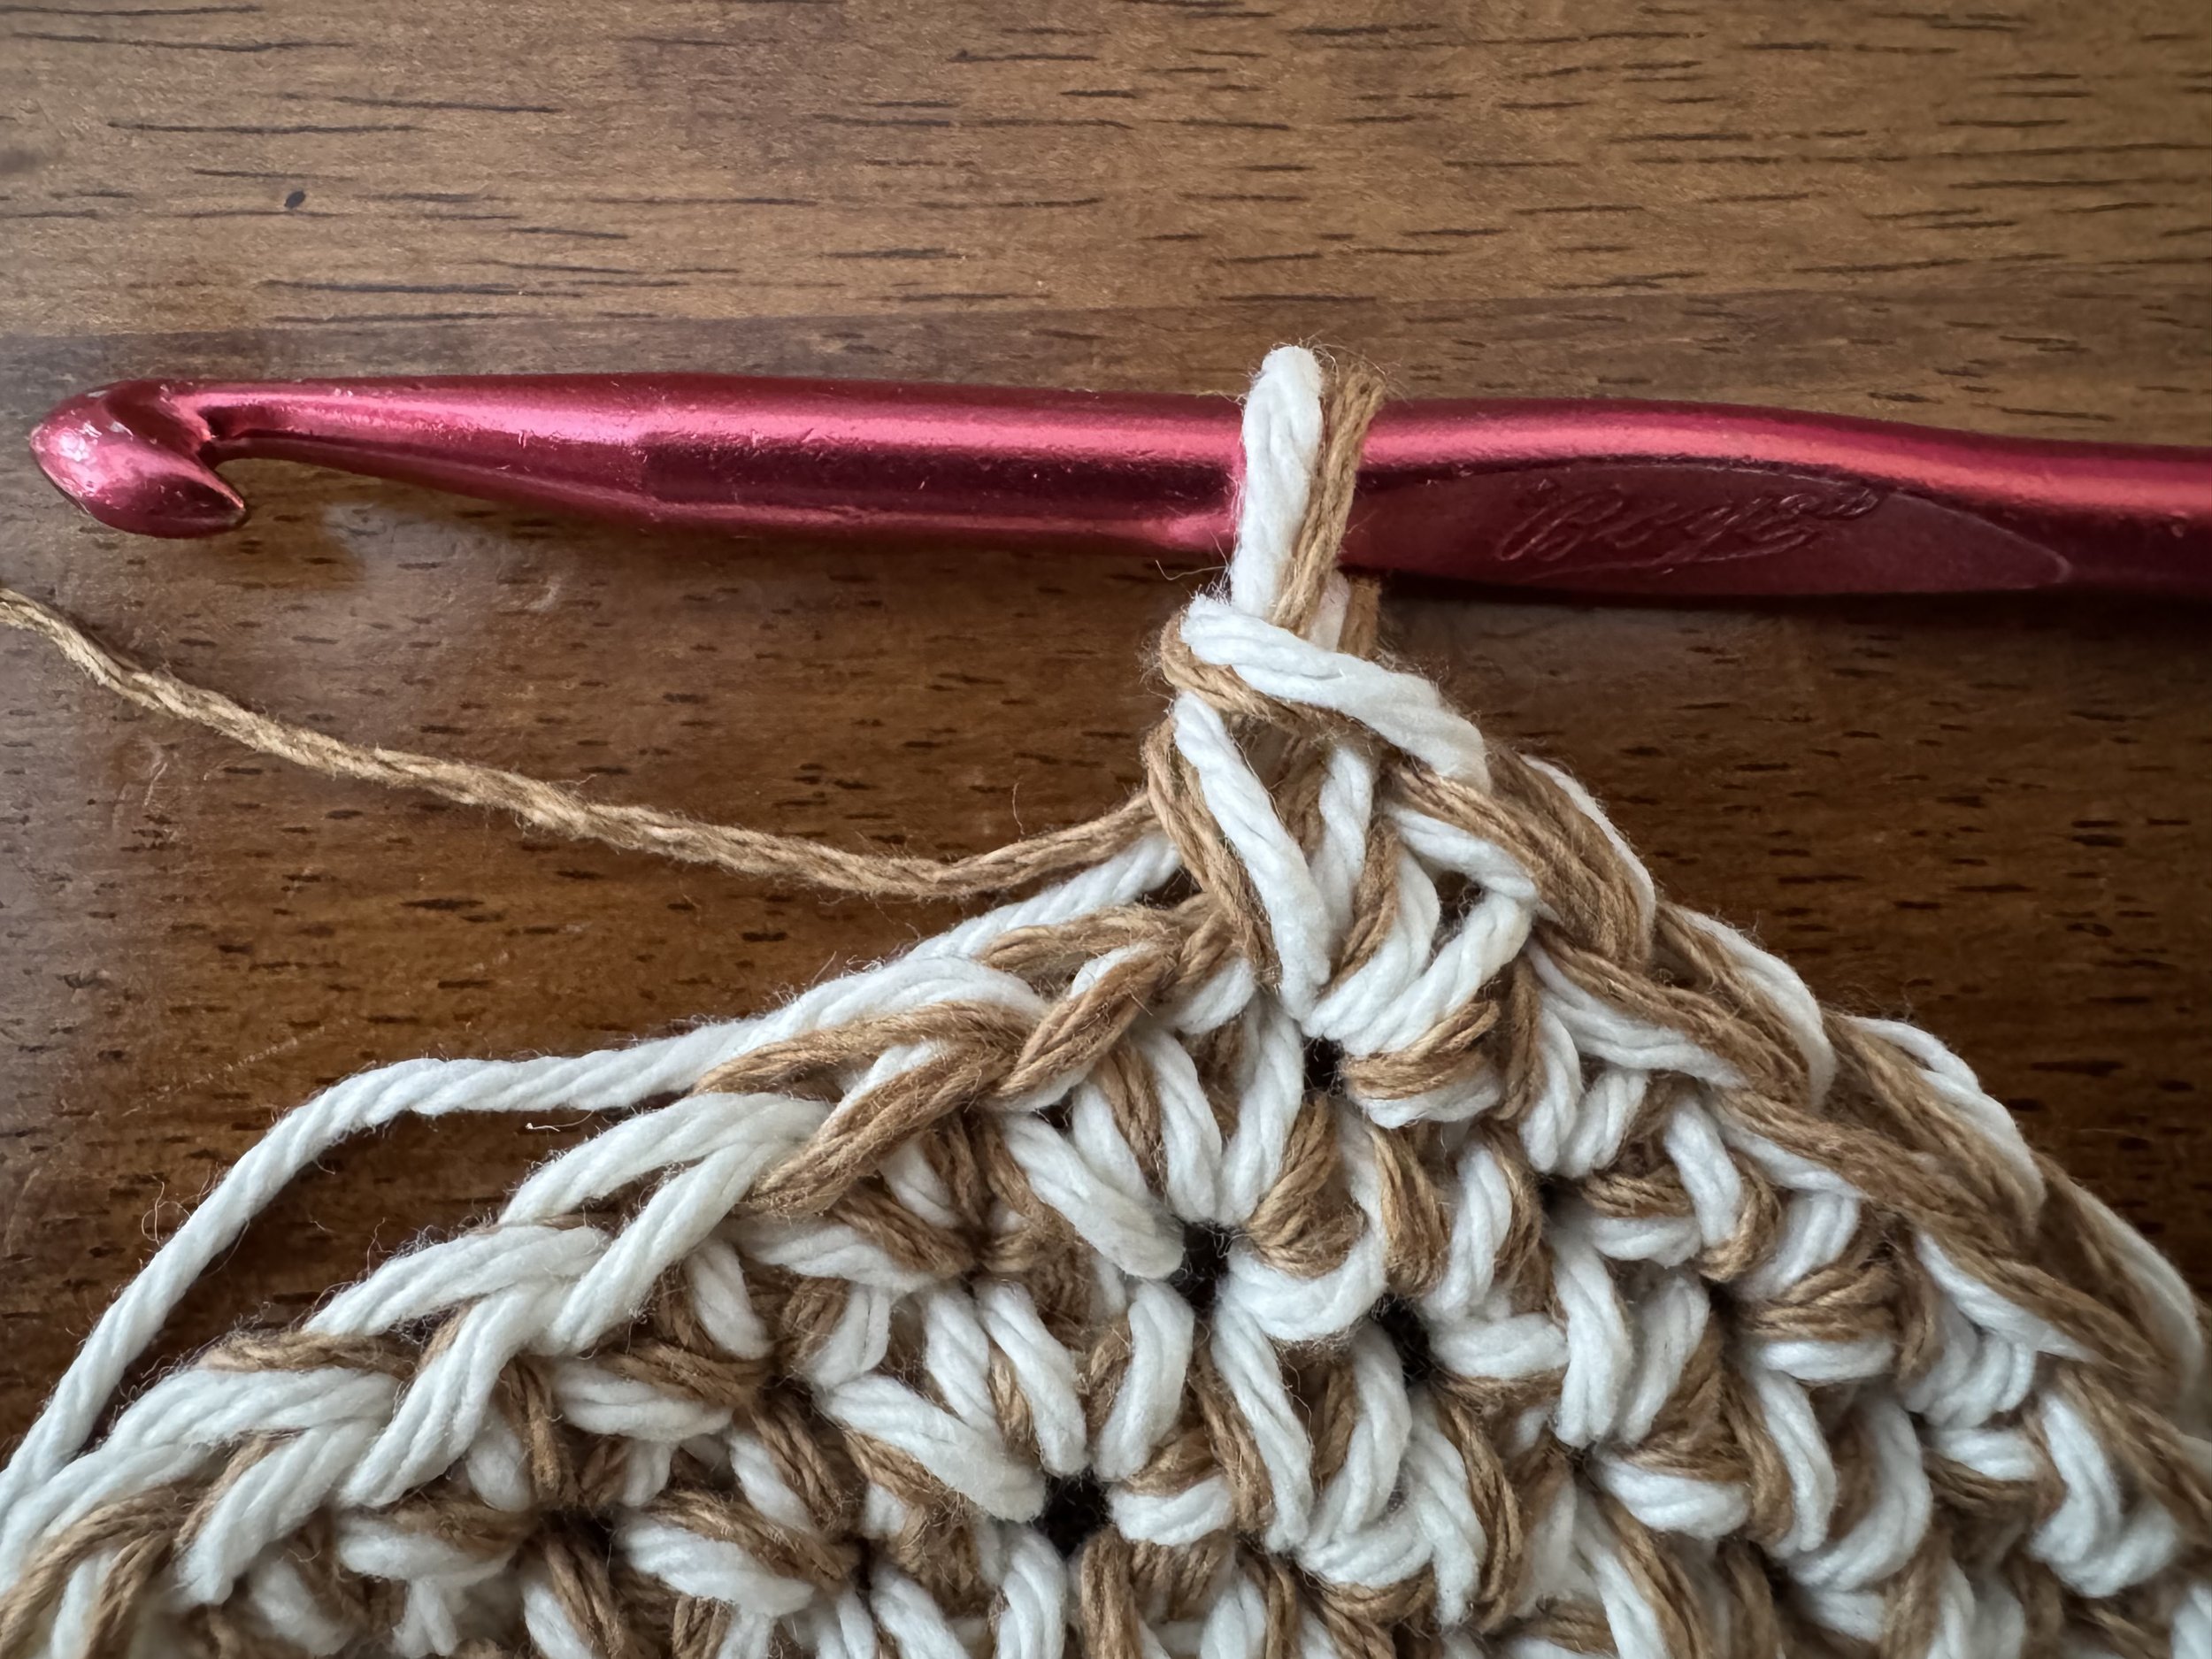
Round 2: make 2 sc in each stitch. 12 stitches total. If you hate weaving in ends after you are done making things, you can hold the tail on top of the stitches you are working and incorporate it by crocheting over it. This photo shows 6 of my 12 stitches worked and the tail is sitting in between the old round and the new one.
By the way, I insert the crochet hook through both loops of the previous stitch. This makes a nice, tight basket.
-
and there is our round of 12
That tiny bit of tail can be cut off when the whole thing is done.
-
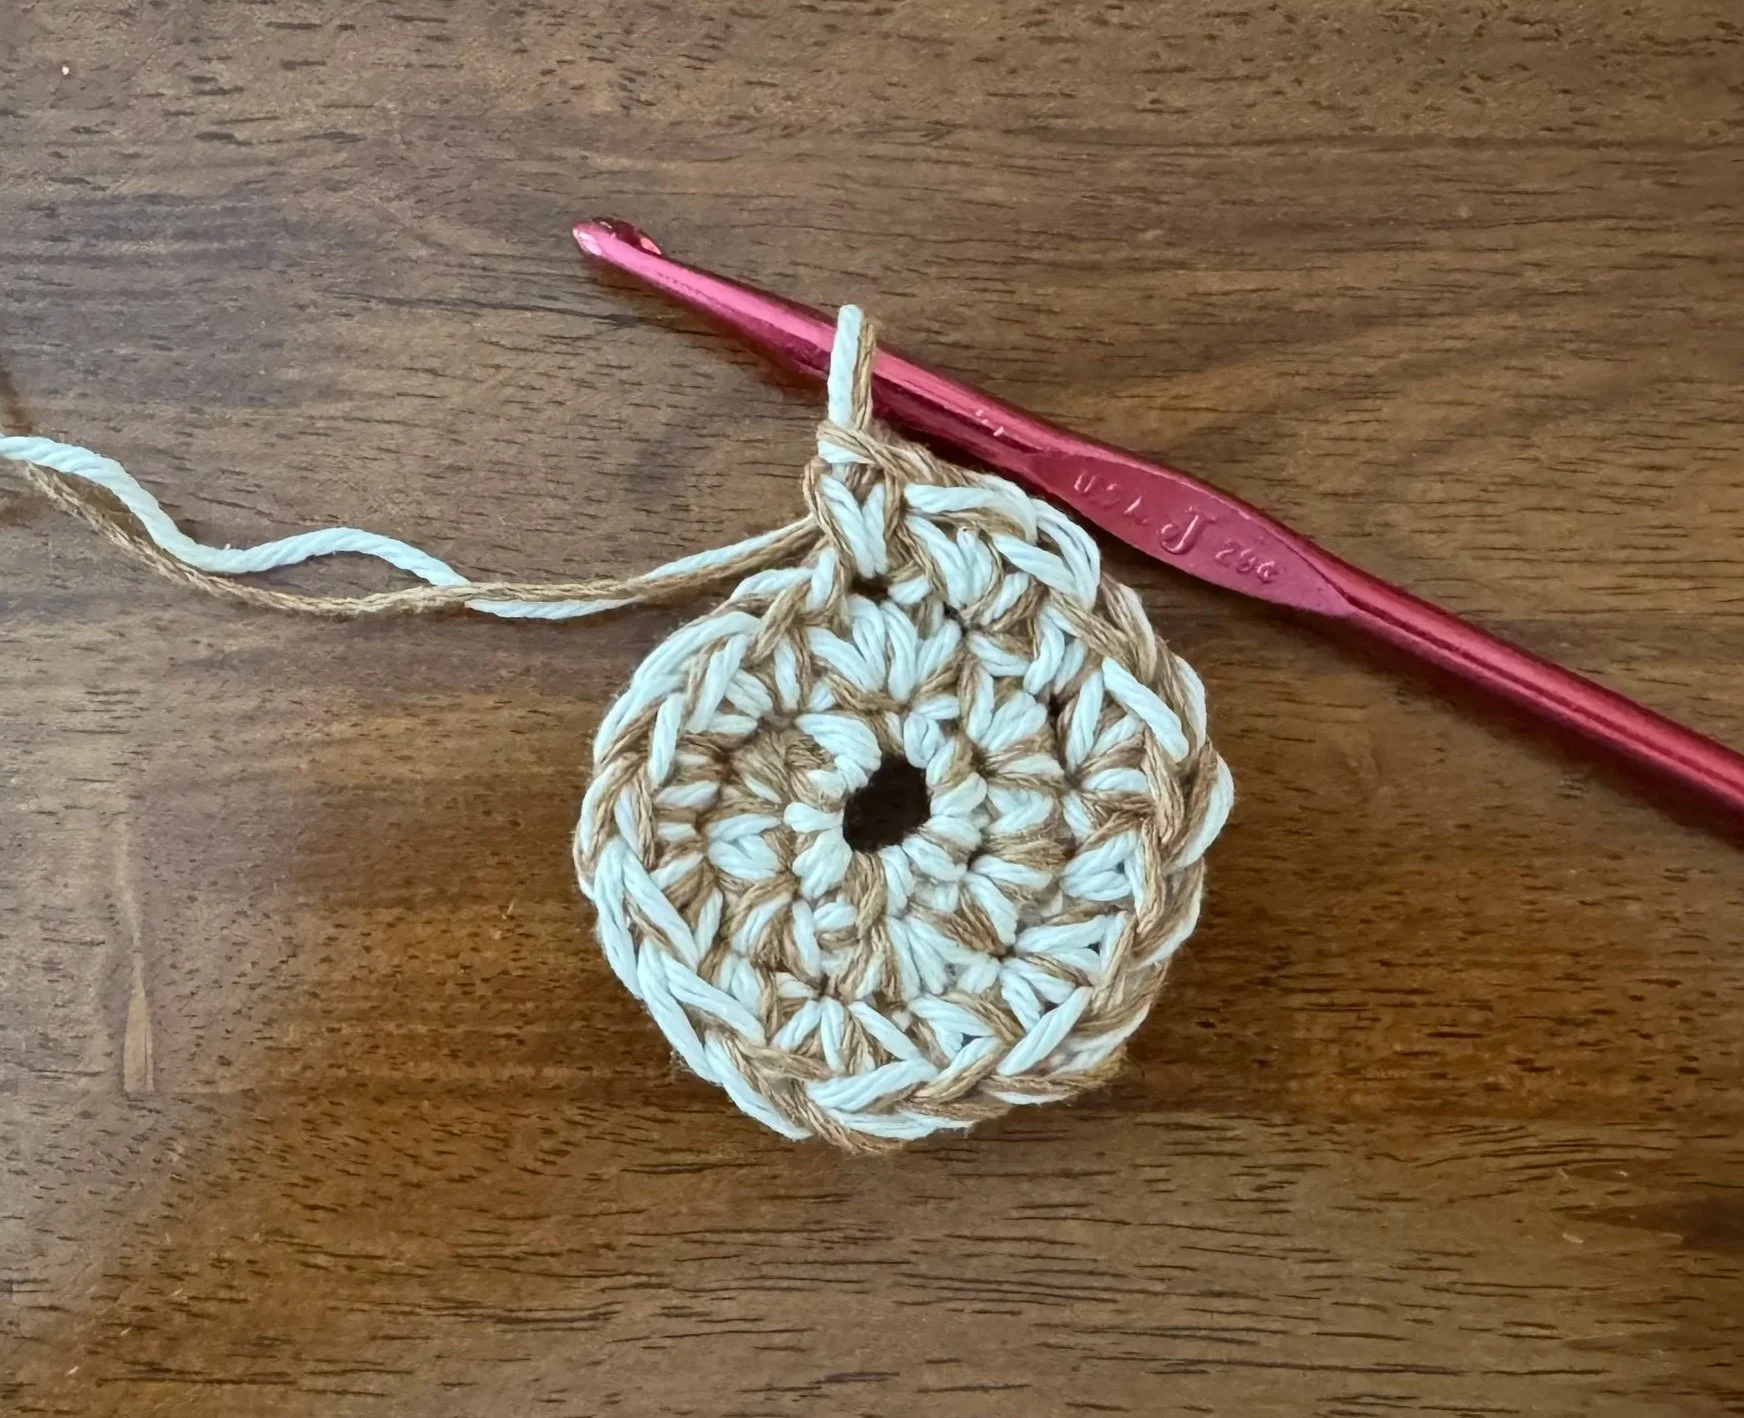
Round 3
Make 2 sc in the first stitch, sc in the second stitch, and repeat around. 18 stitches total. In order to eliminate any anxiety over not starting in the right place, I count backwards from my current total (here, 18), and start working in the last (which is really the first) stitch.
-
Round 4
Work 2 sc in the first stitch and then work 1 sc in each of the next 2 stitches; repeat around. 24 stitches total.
This is how I keep myself organized: I know that I have 6 sets of stitches, so my total number of stitches has to be a multiple of 6. And in each successive round, I will have one more stitch in each of my 6 sets.
In this round, for example, I will have 6 sets of 4 stitches. I count each stitch as I work it, and when I reach 24 stitches, I know I have finished the round.
You could of course use a stitch marker, but since crocheted rounds tend to slant to the right, the marker might not be of all that much help, unless you move it every round.
-
onward and round-ward
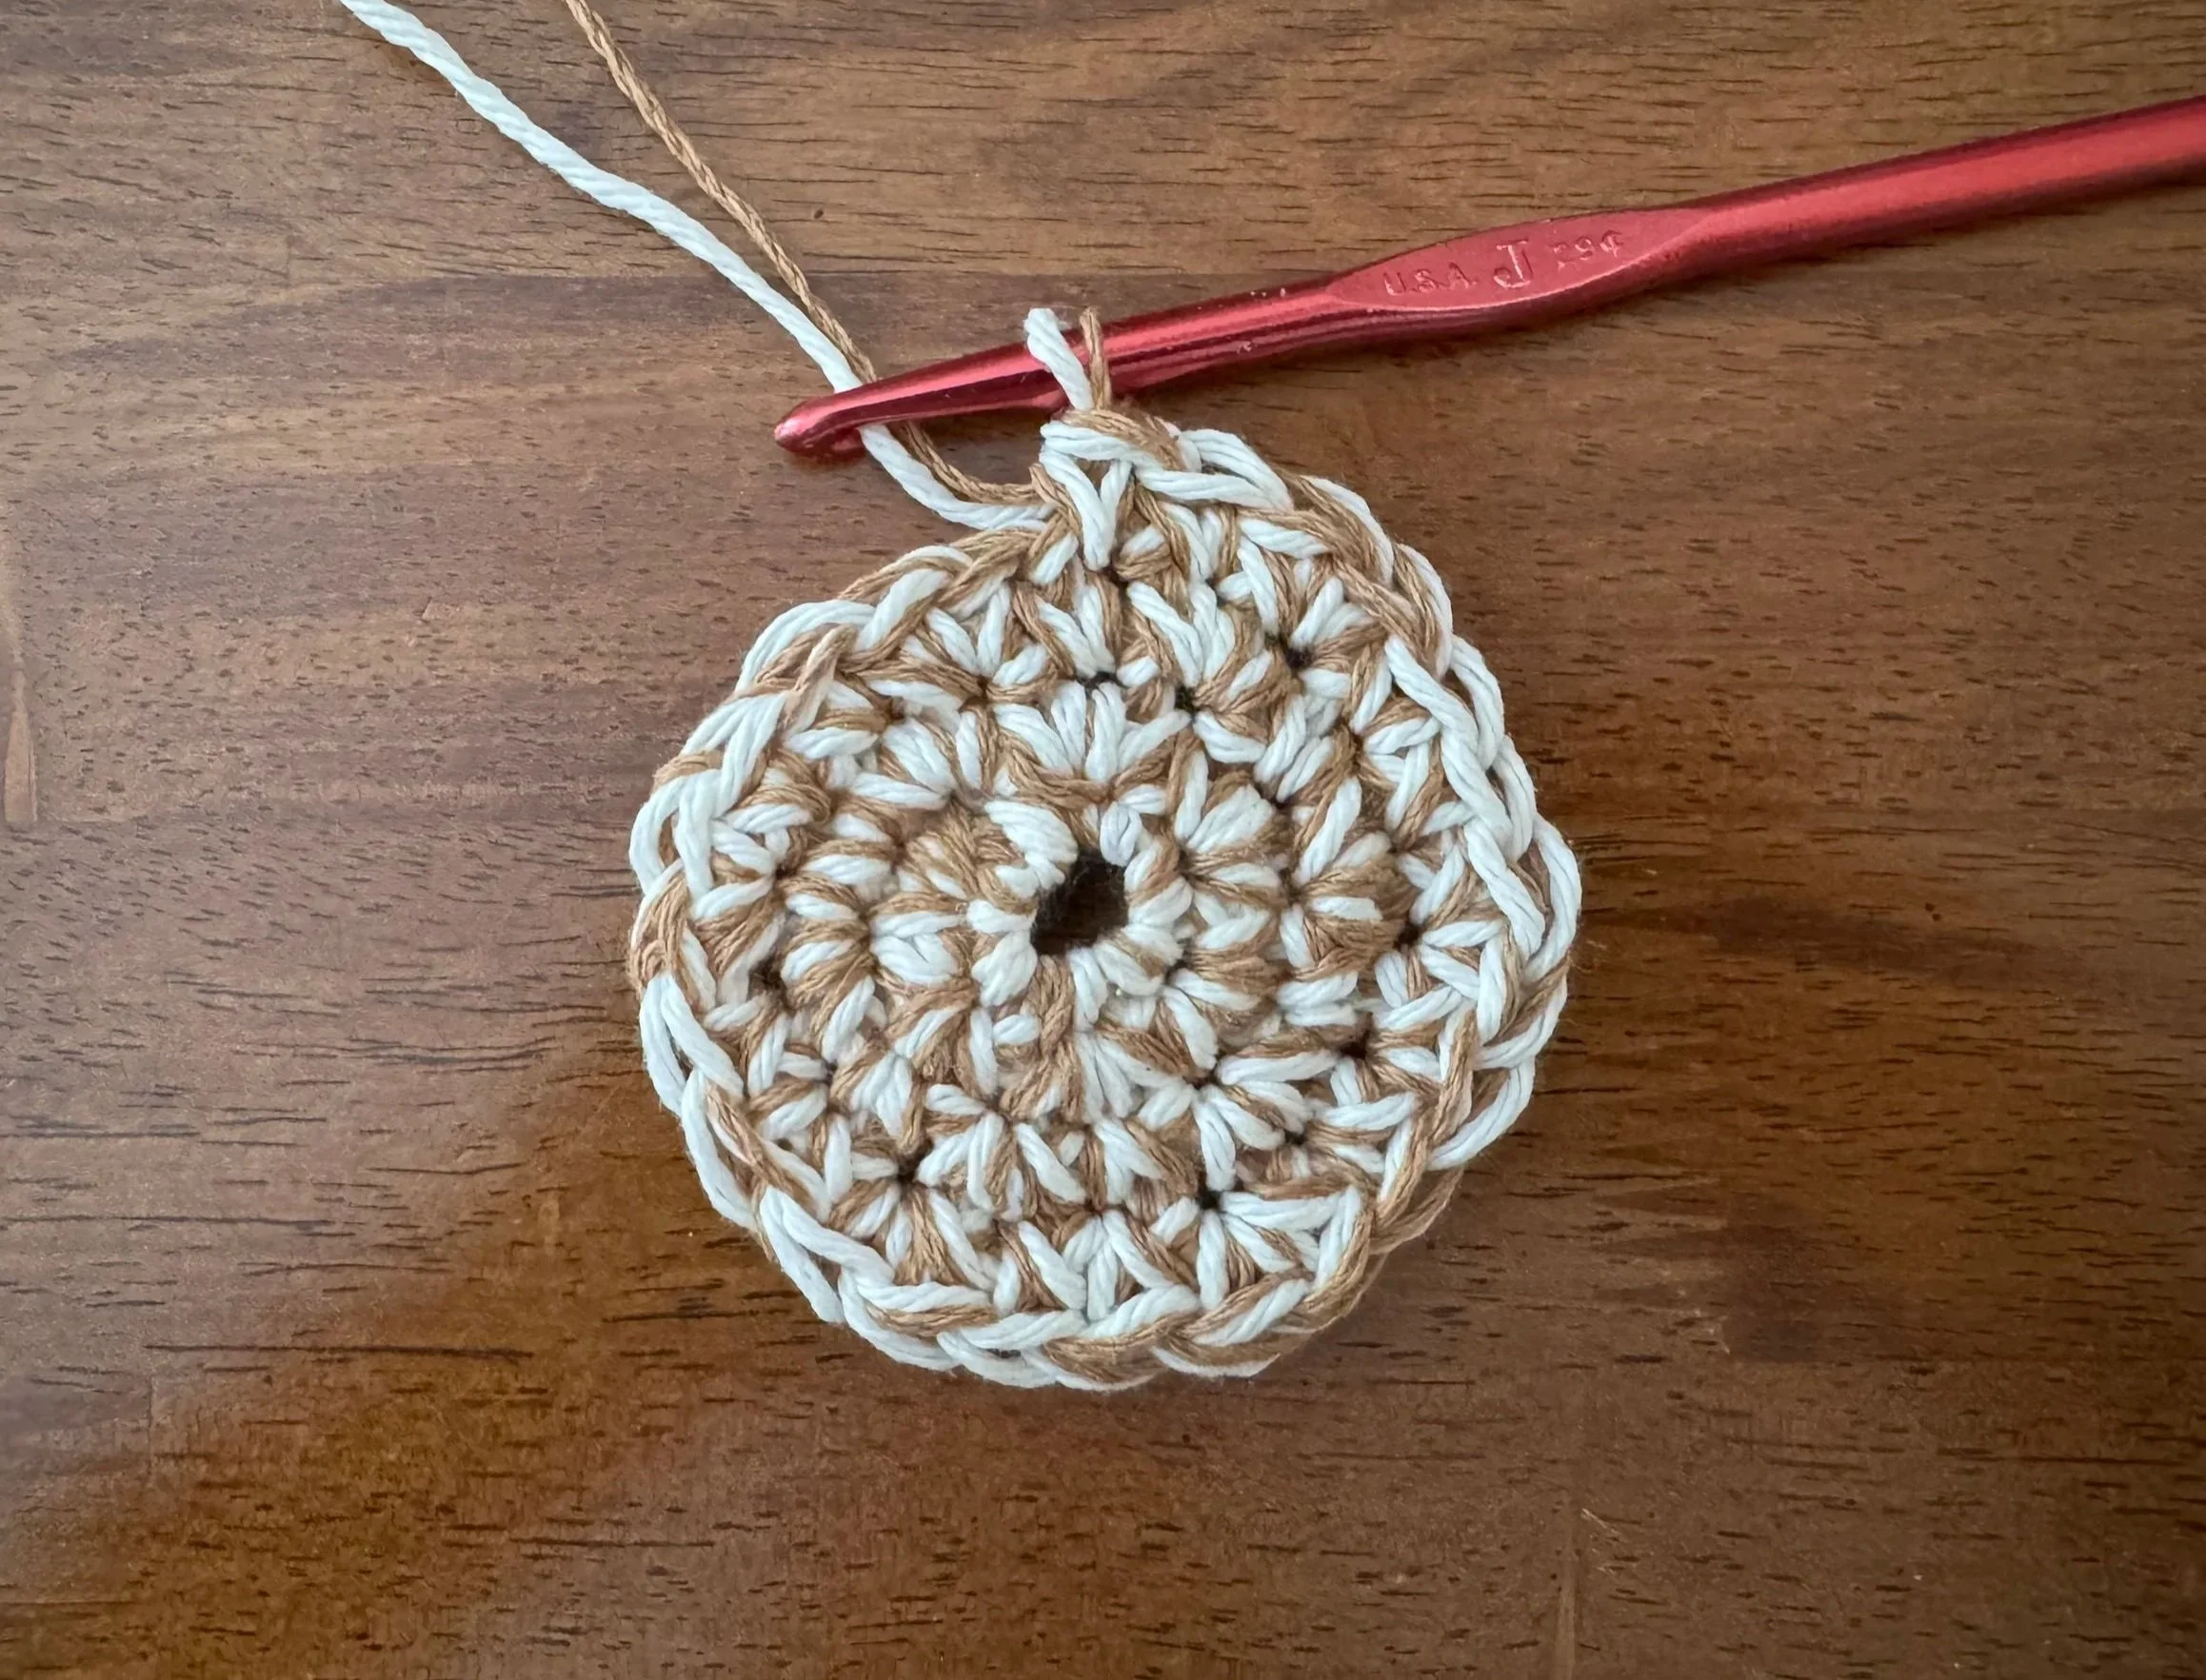
Keep going, working Round 5: 2 sc in the first stitch and then 1 sc in each of the next 3 stitches; repeat around. 30 stitches total.
Round 6: work 2 sc in the first stitch and then work 1 sc in each of the next 4 stitches; repeat around. 36 stitches total.
Round 7: work 2 sc in the first stitch and then work 1 sc in each of the next 5 stitches; repeat around. 42 stitches total.
At some point, you will be able to “read” your work. You will see that the first stitch in every set of 6 looks different from the other stitches in the set; it has (duh) two stitches in it and you want your next doubled stitch to live in the first stitch of the last doubled stitch.
The point is that you can make use of what you have already done to be sure that what you are about to do will continue the pattern you desire. Life advice?
-
an example
I just finished working 2 sc in the first stitch of the doubled sc in the previous round. So many words.
-

after a while I count differently
Once I reach about 6 or 7 stitches per set, I tend to fall into counting the groups instead of individual stitches. I count “1” for the first set of stitches, “2” for the second set, “3” for the third, and so on. That way all I need to remember is how many stitches are in each set. When I get to 6 sets, I am done with the round, and I multiply by 6 to get my total stitch count.
-

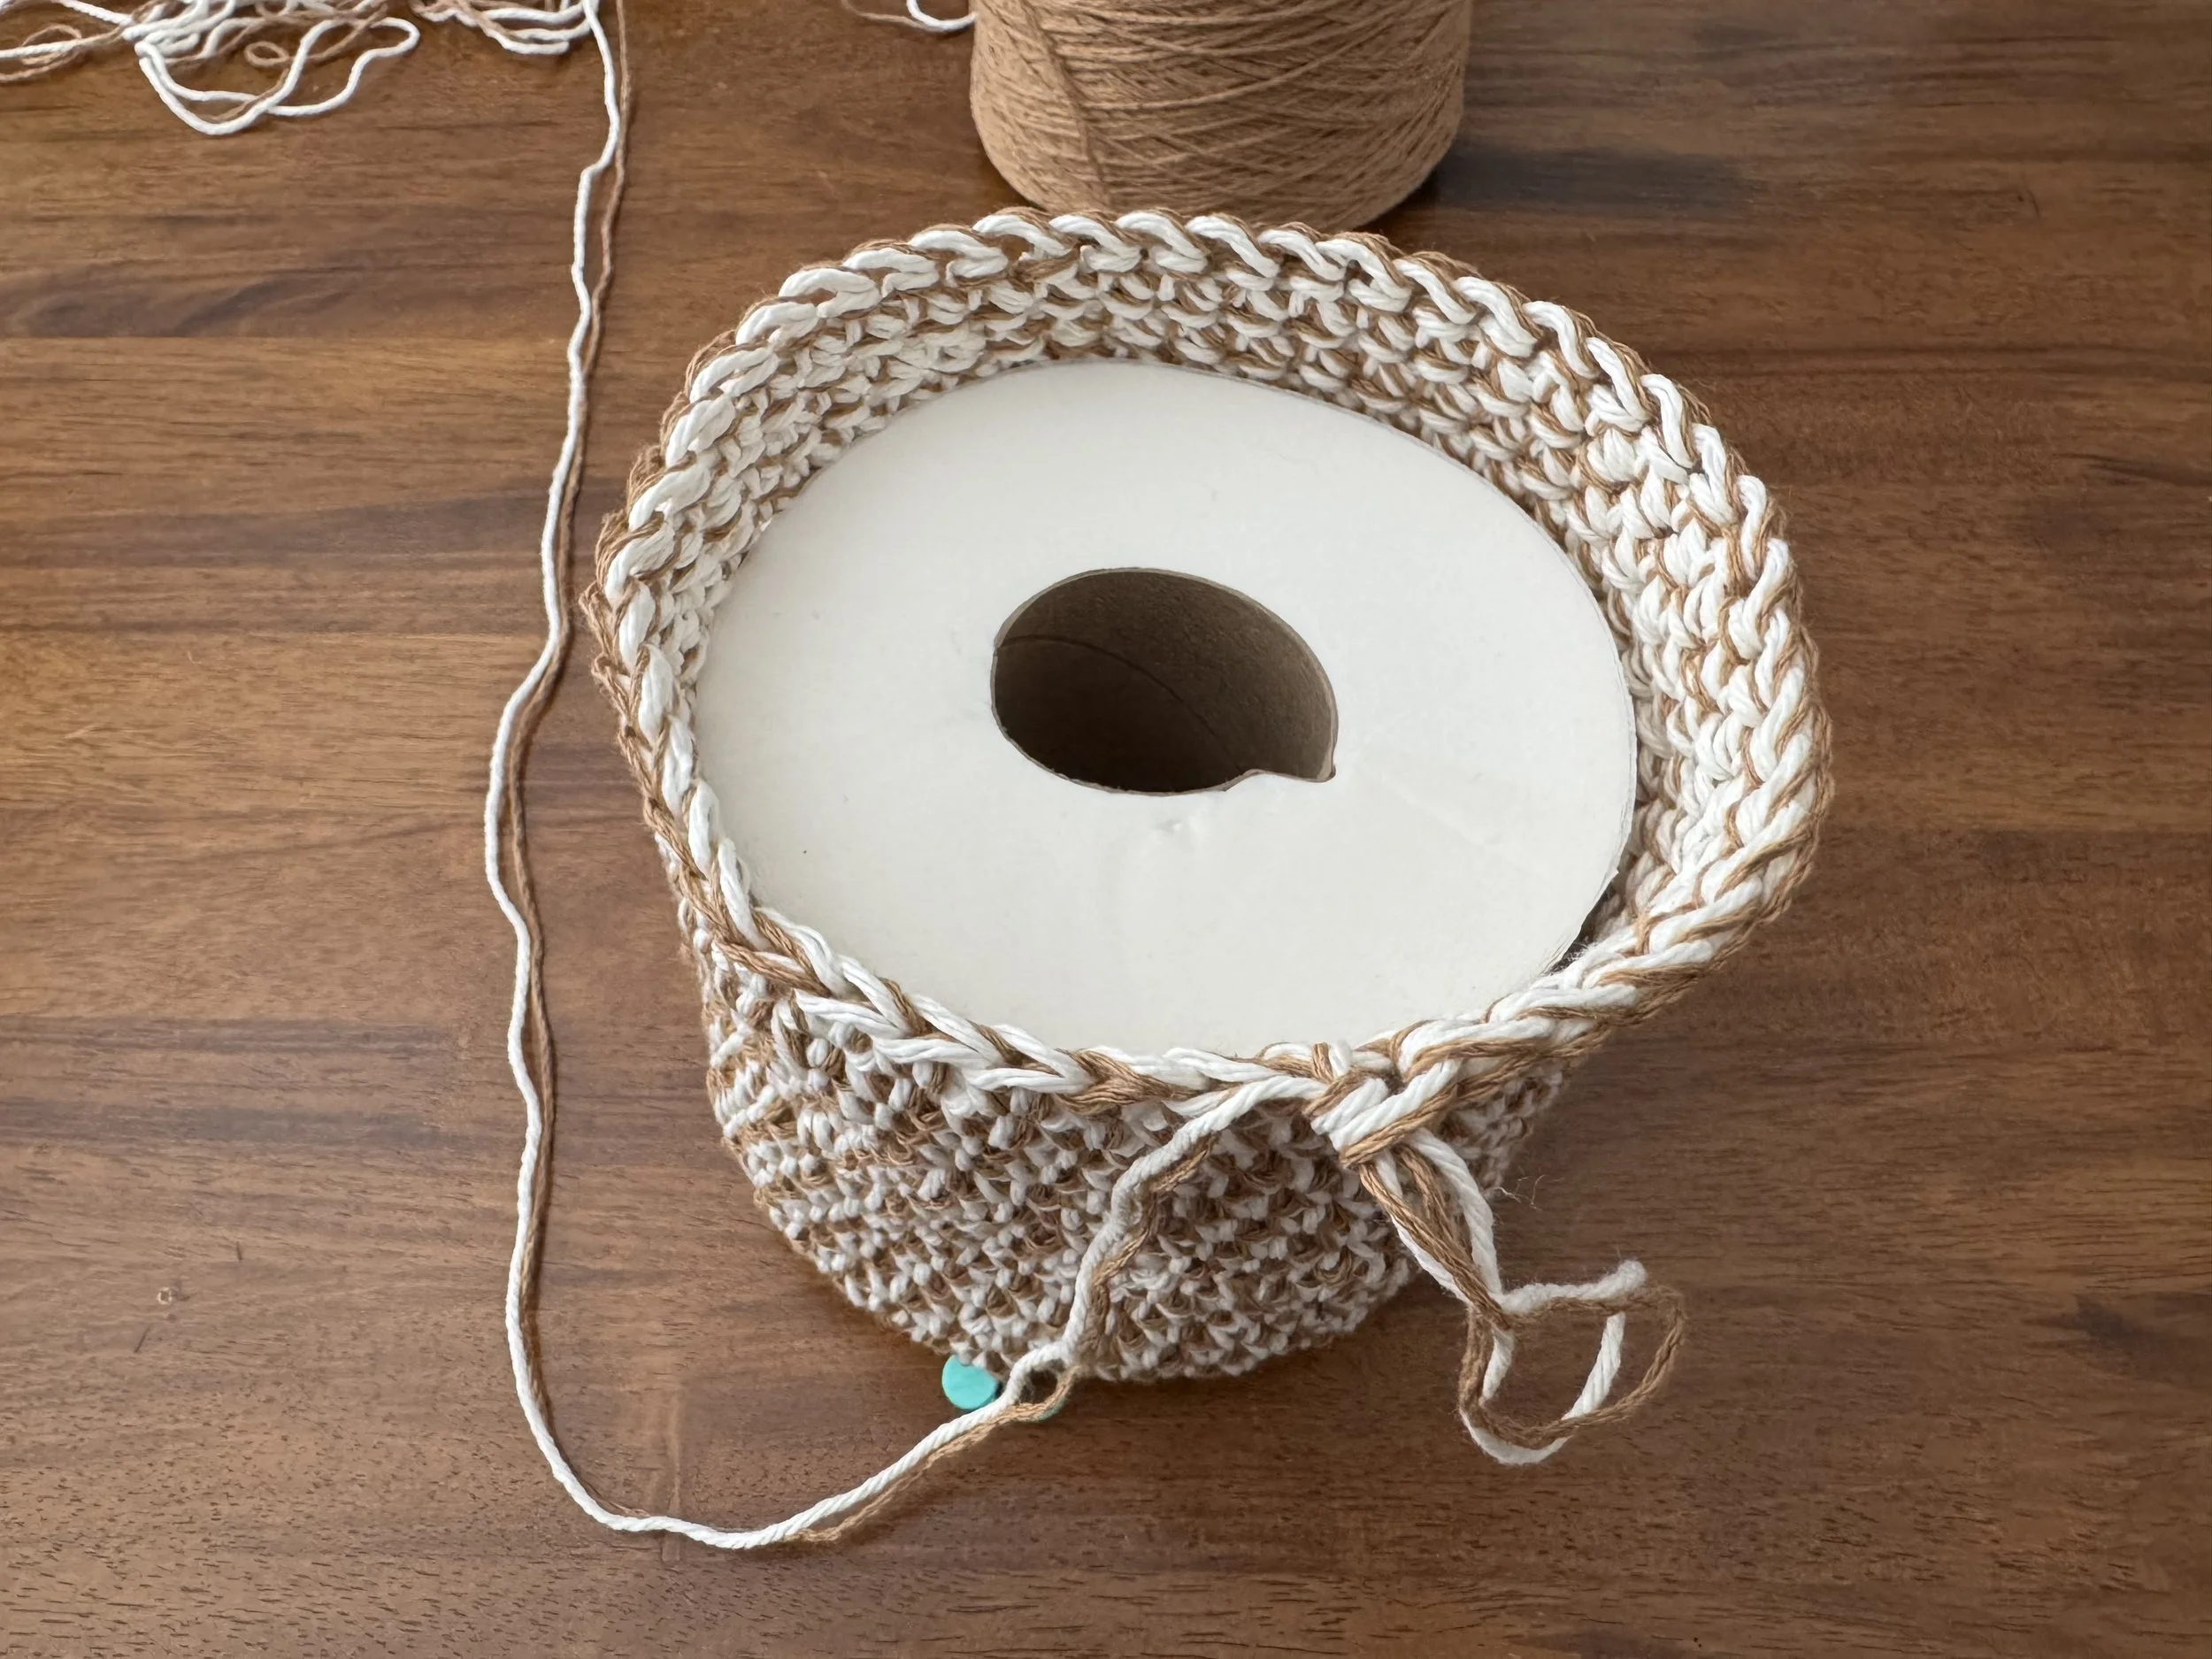
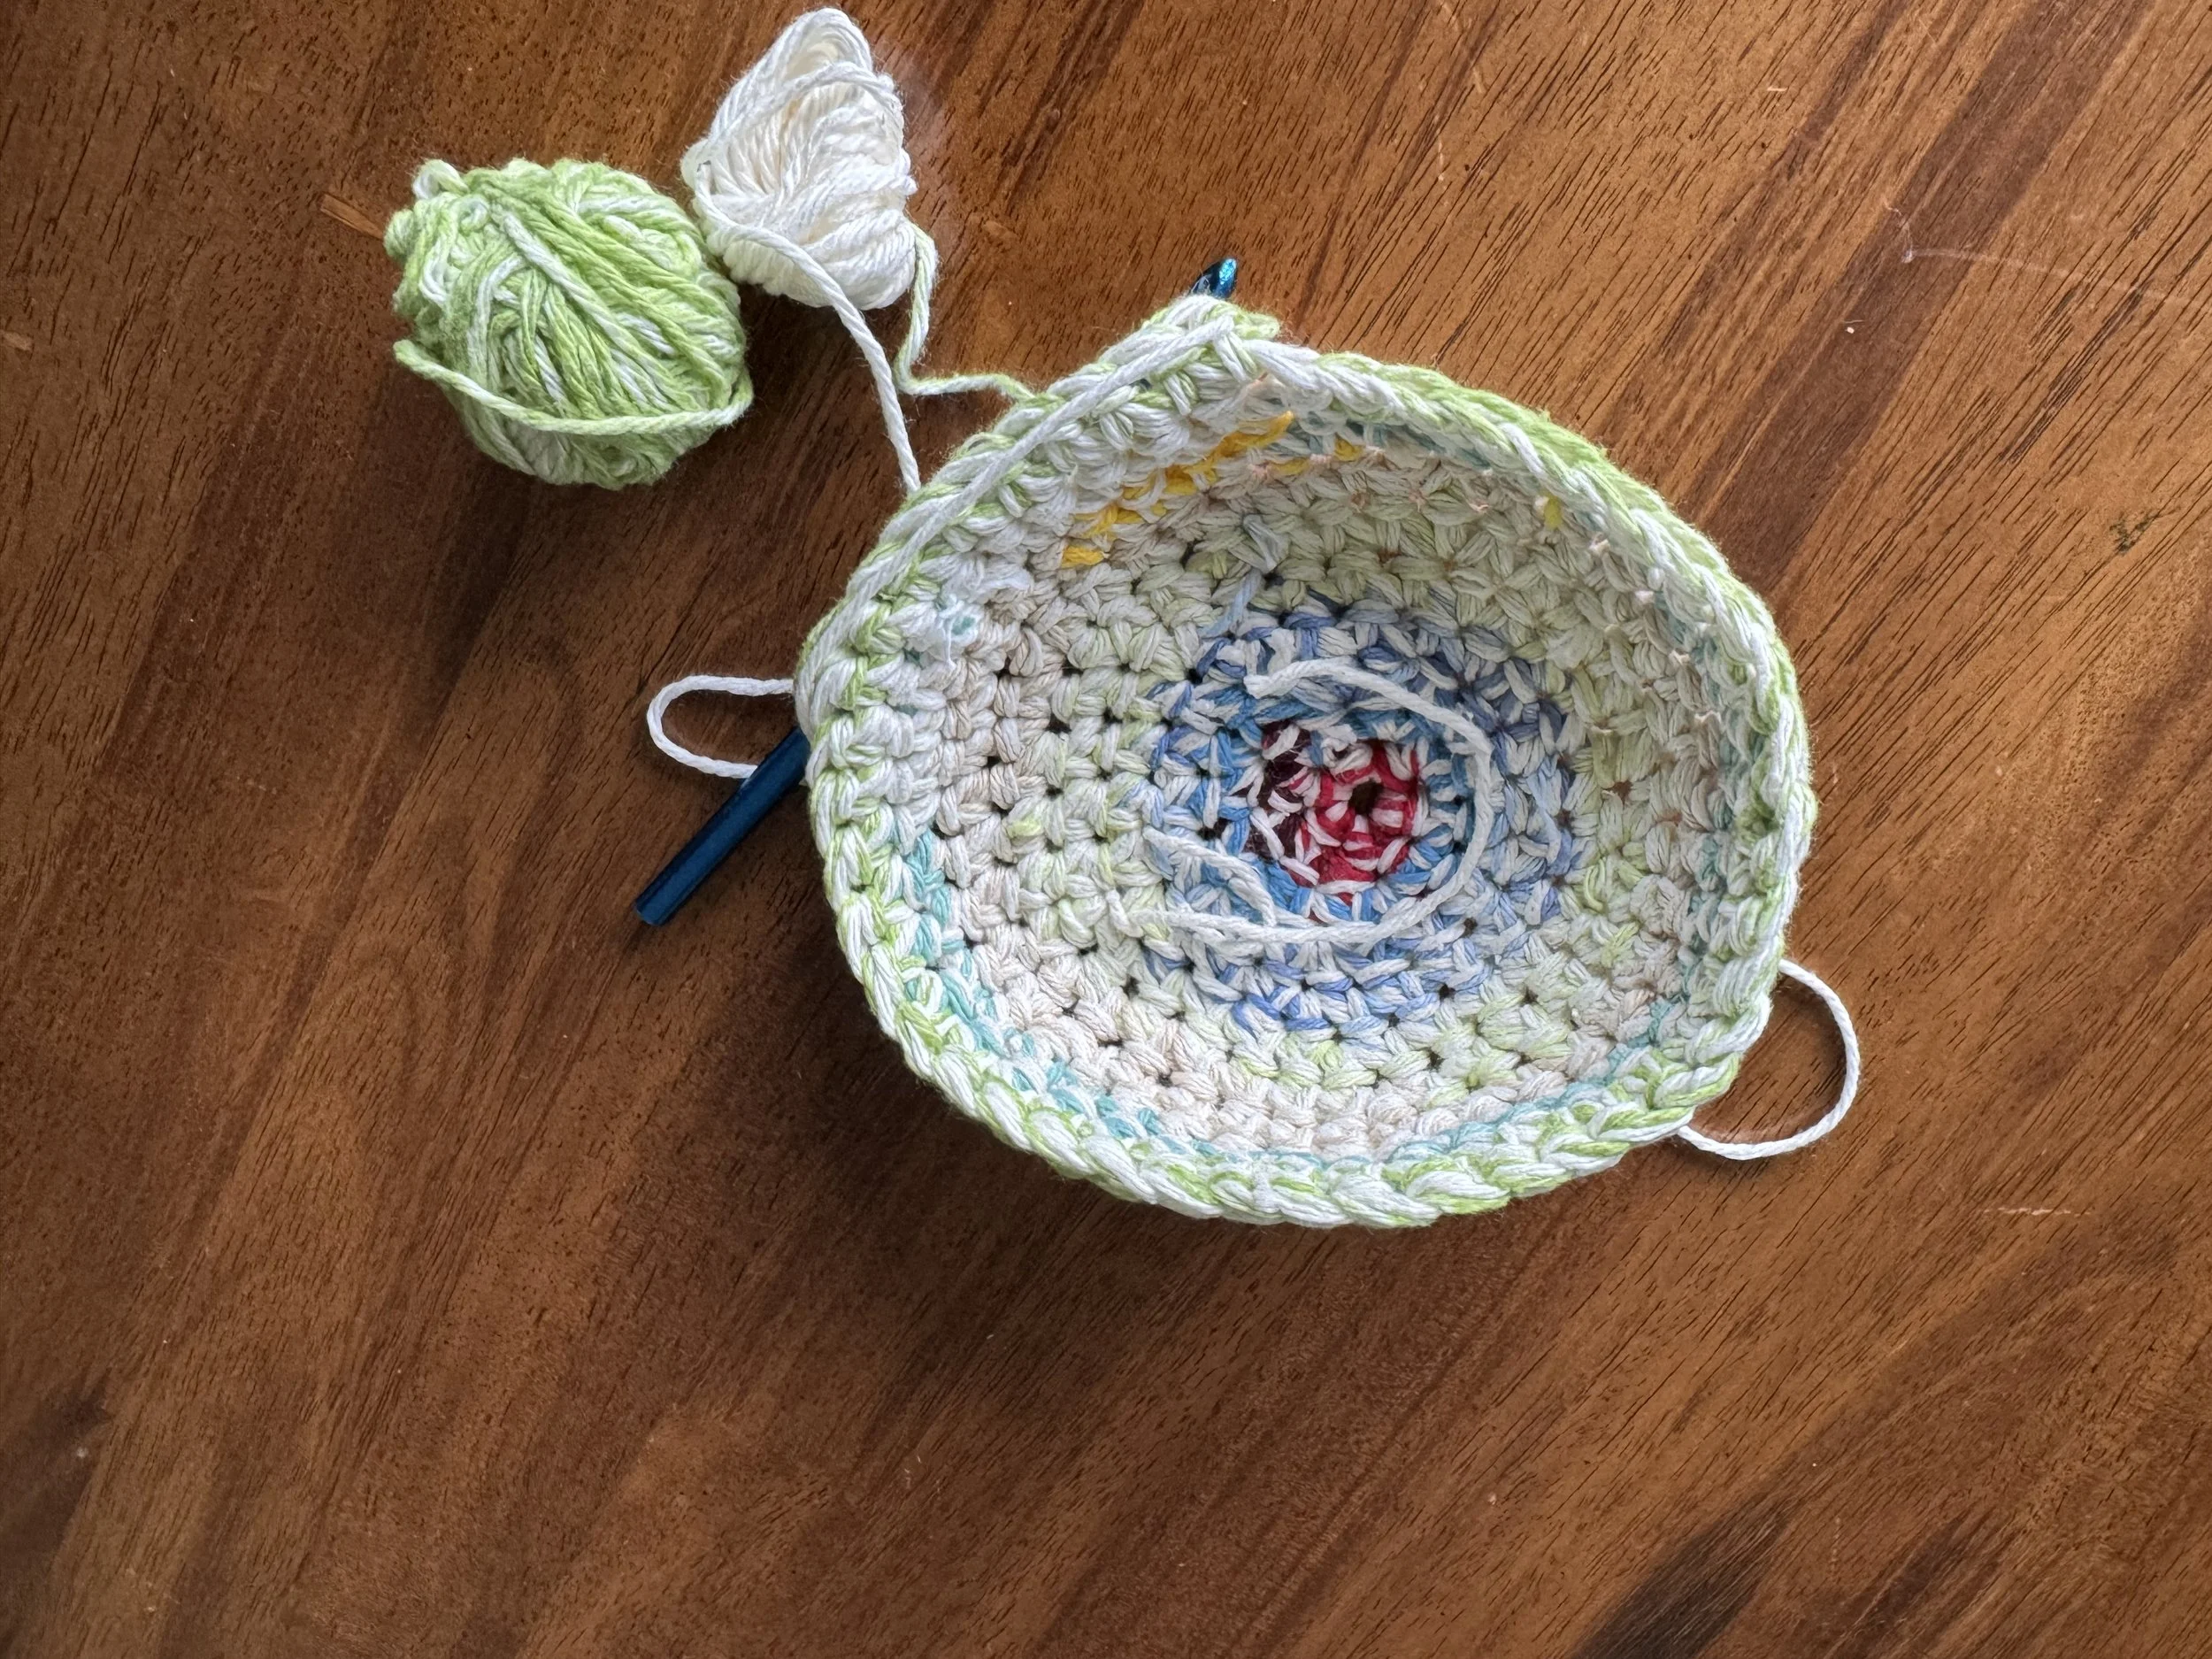
not all rolls have the same diameter
Nor is all cotton the same size.
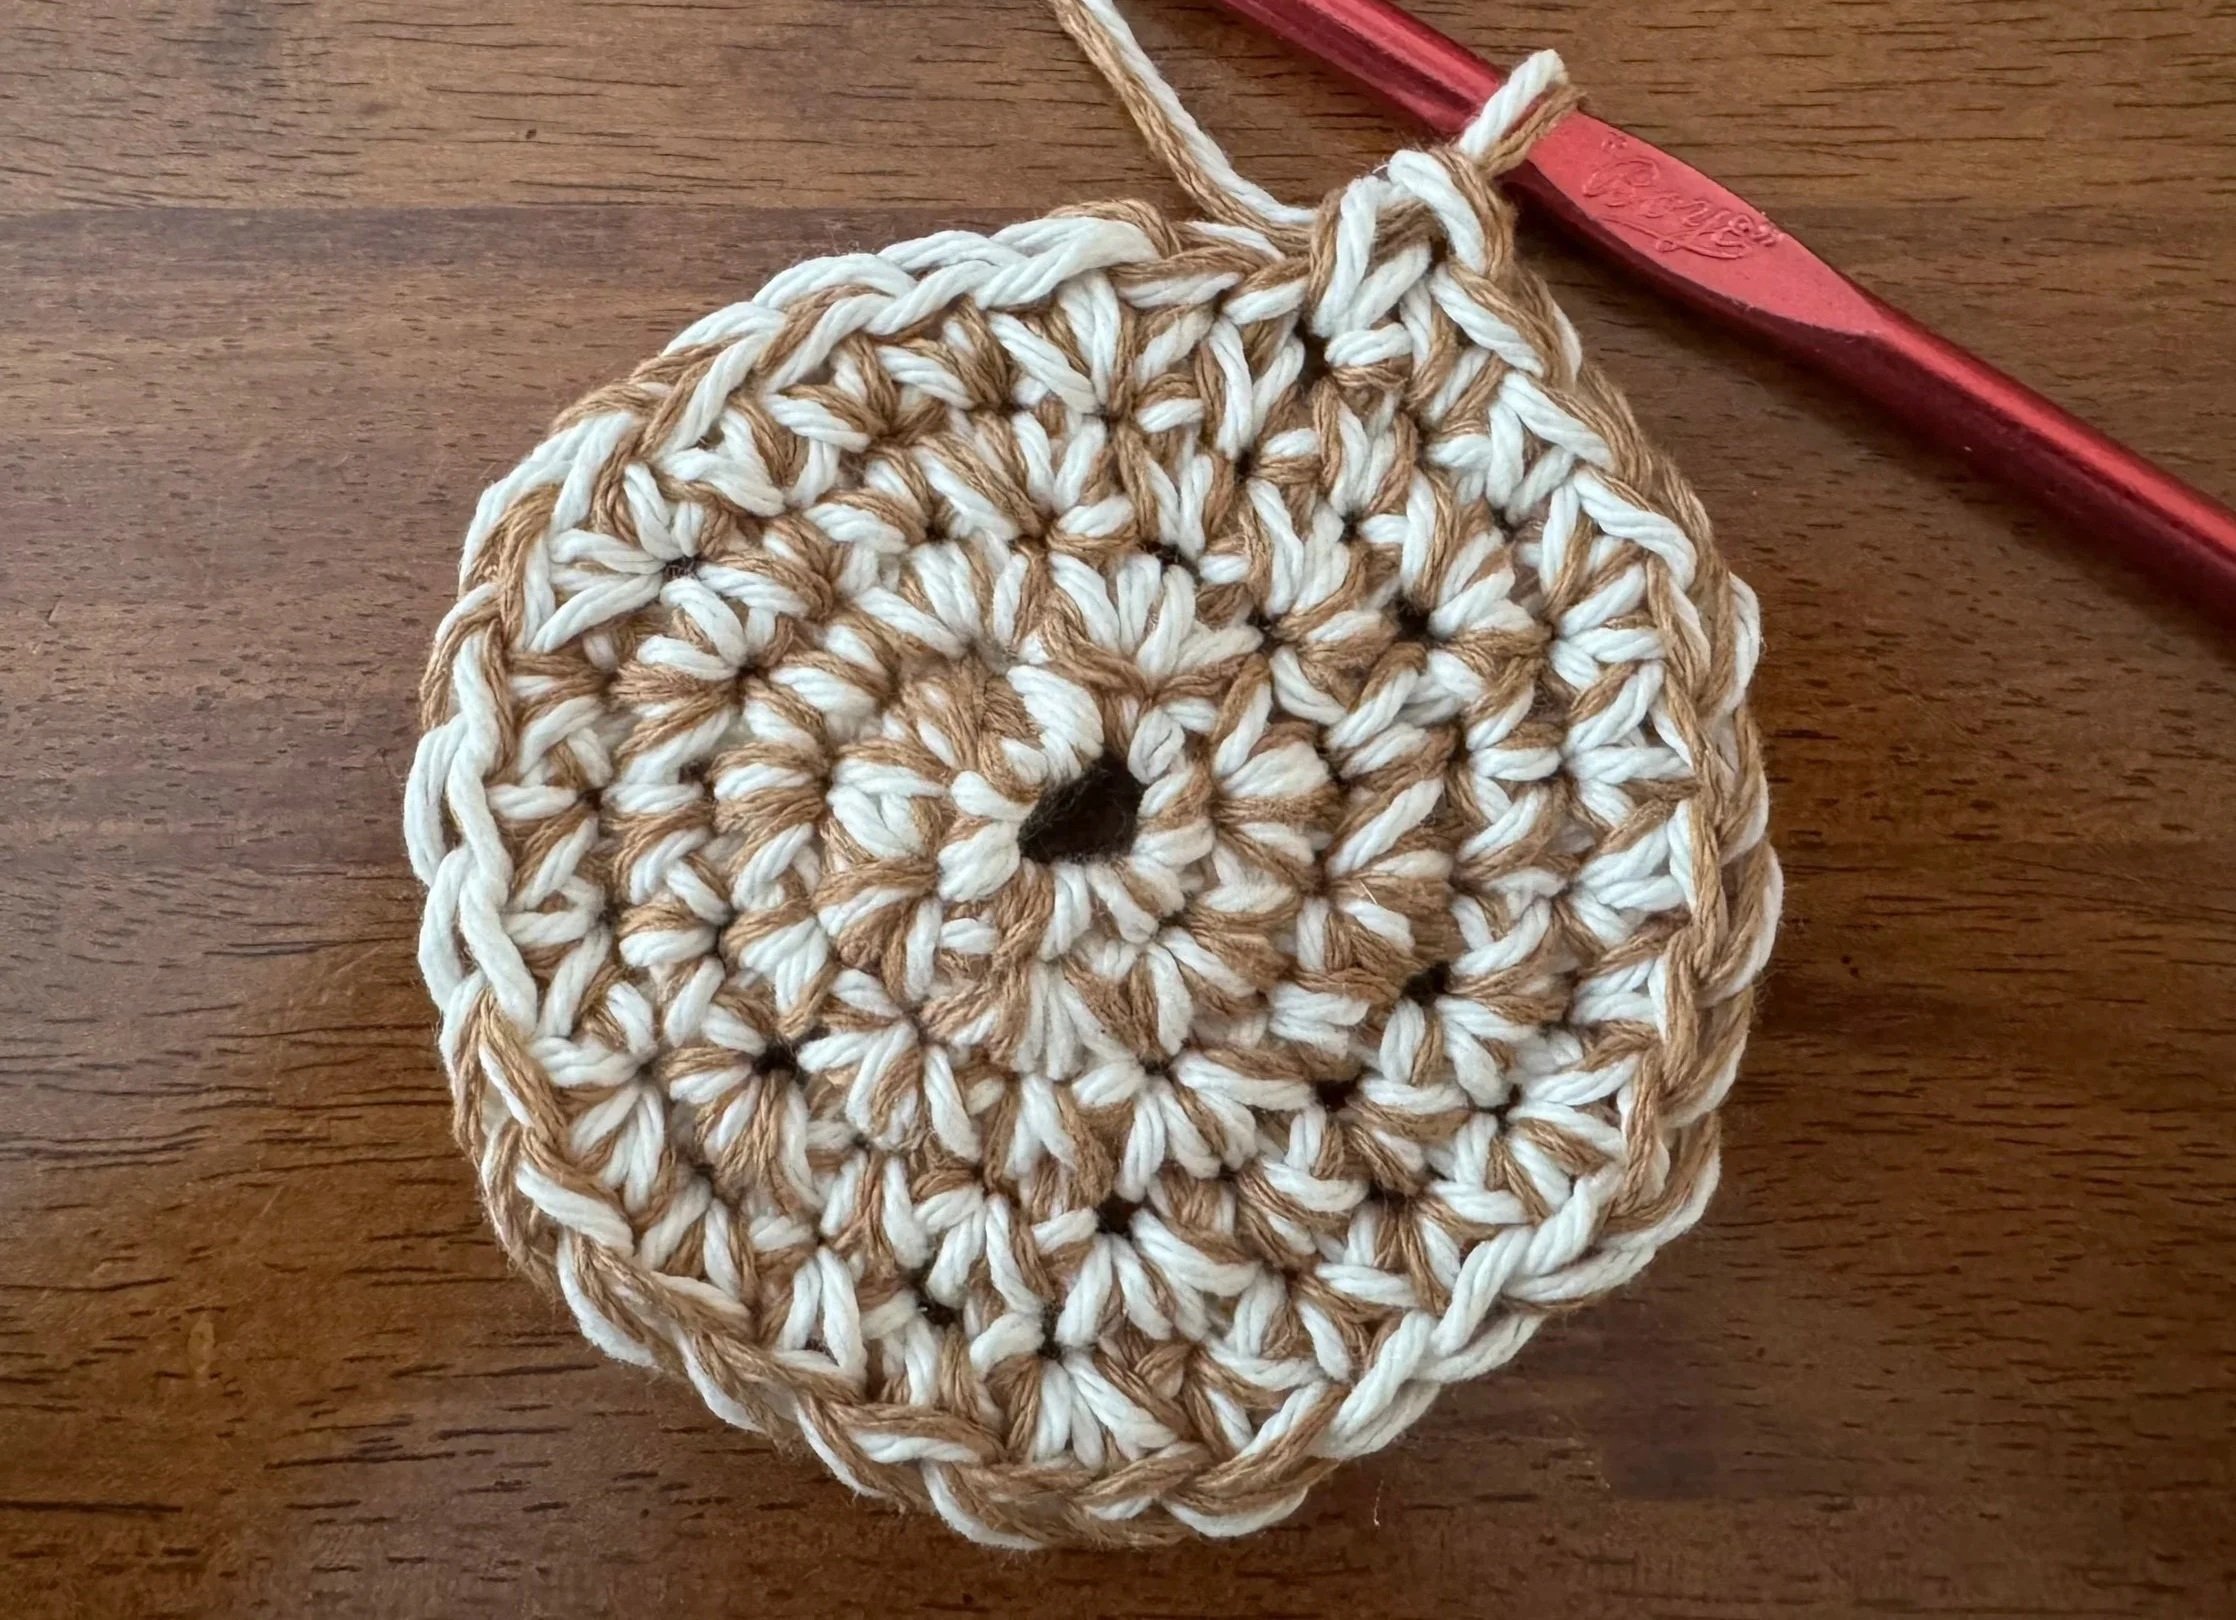
Find a roll of toilet paper and put it on the base. That is one impressive looking roll. But we will attempt to overlook the majesty of the roll and focus instead on the base. If the base peeks out from underneath the roll, the increasing portion of the project is complete. For this roll I need 42 stitches to form a good base. That means 6 sets of 7 stitches. We buy cheap toilet paper, but if you buy the fancy stuff you might need more stitches and so you might need to work another round or two. You do you.
-
now just crochet every stitch
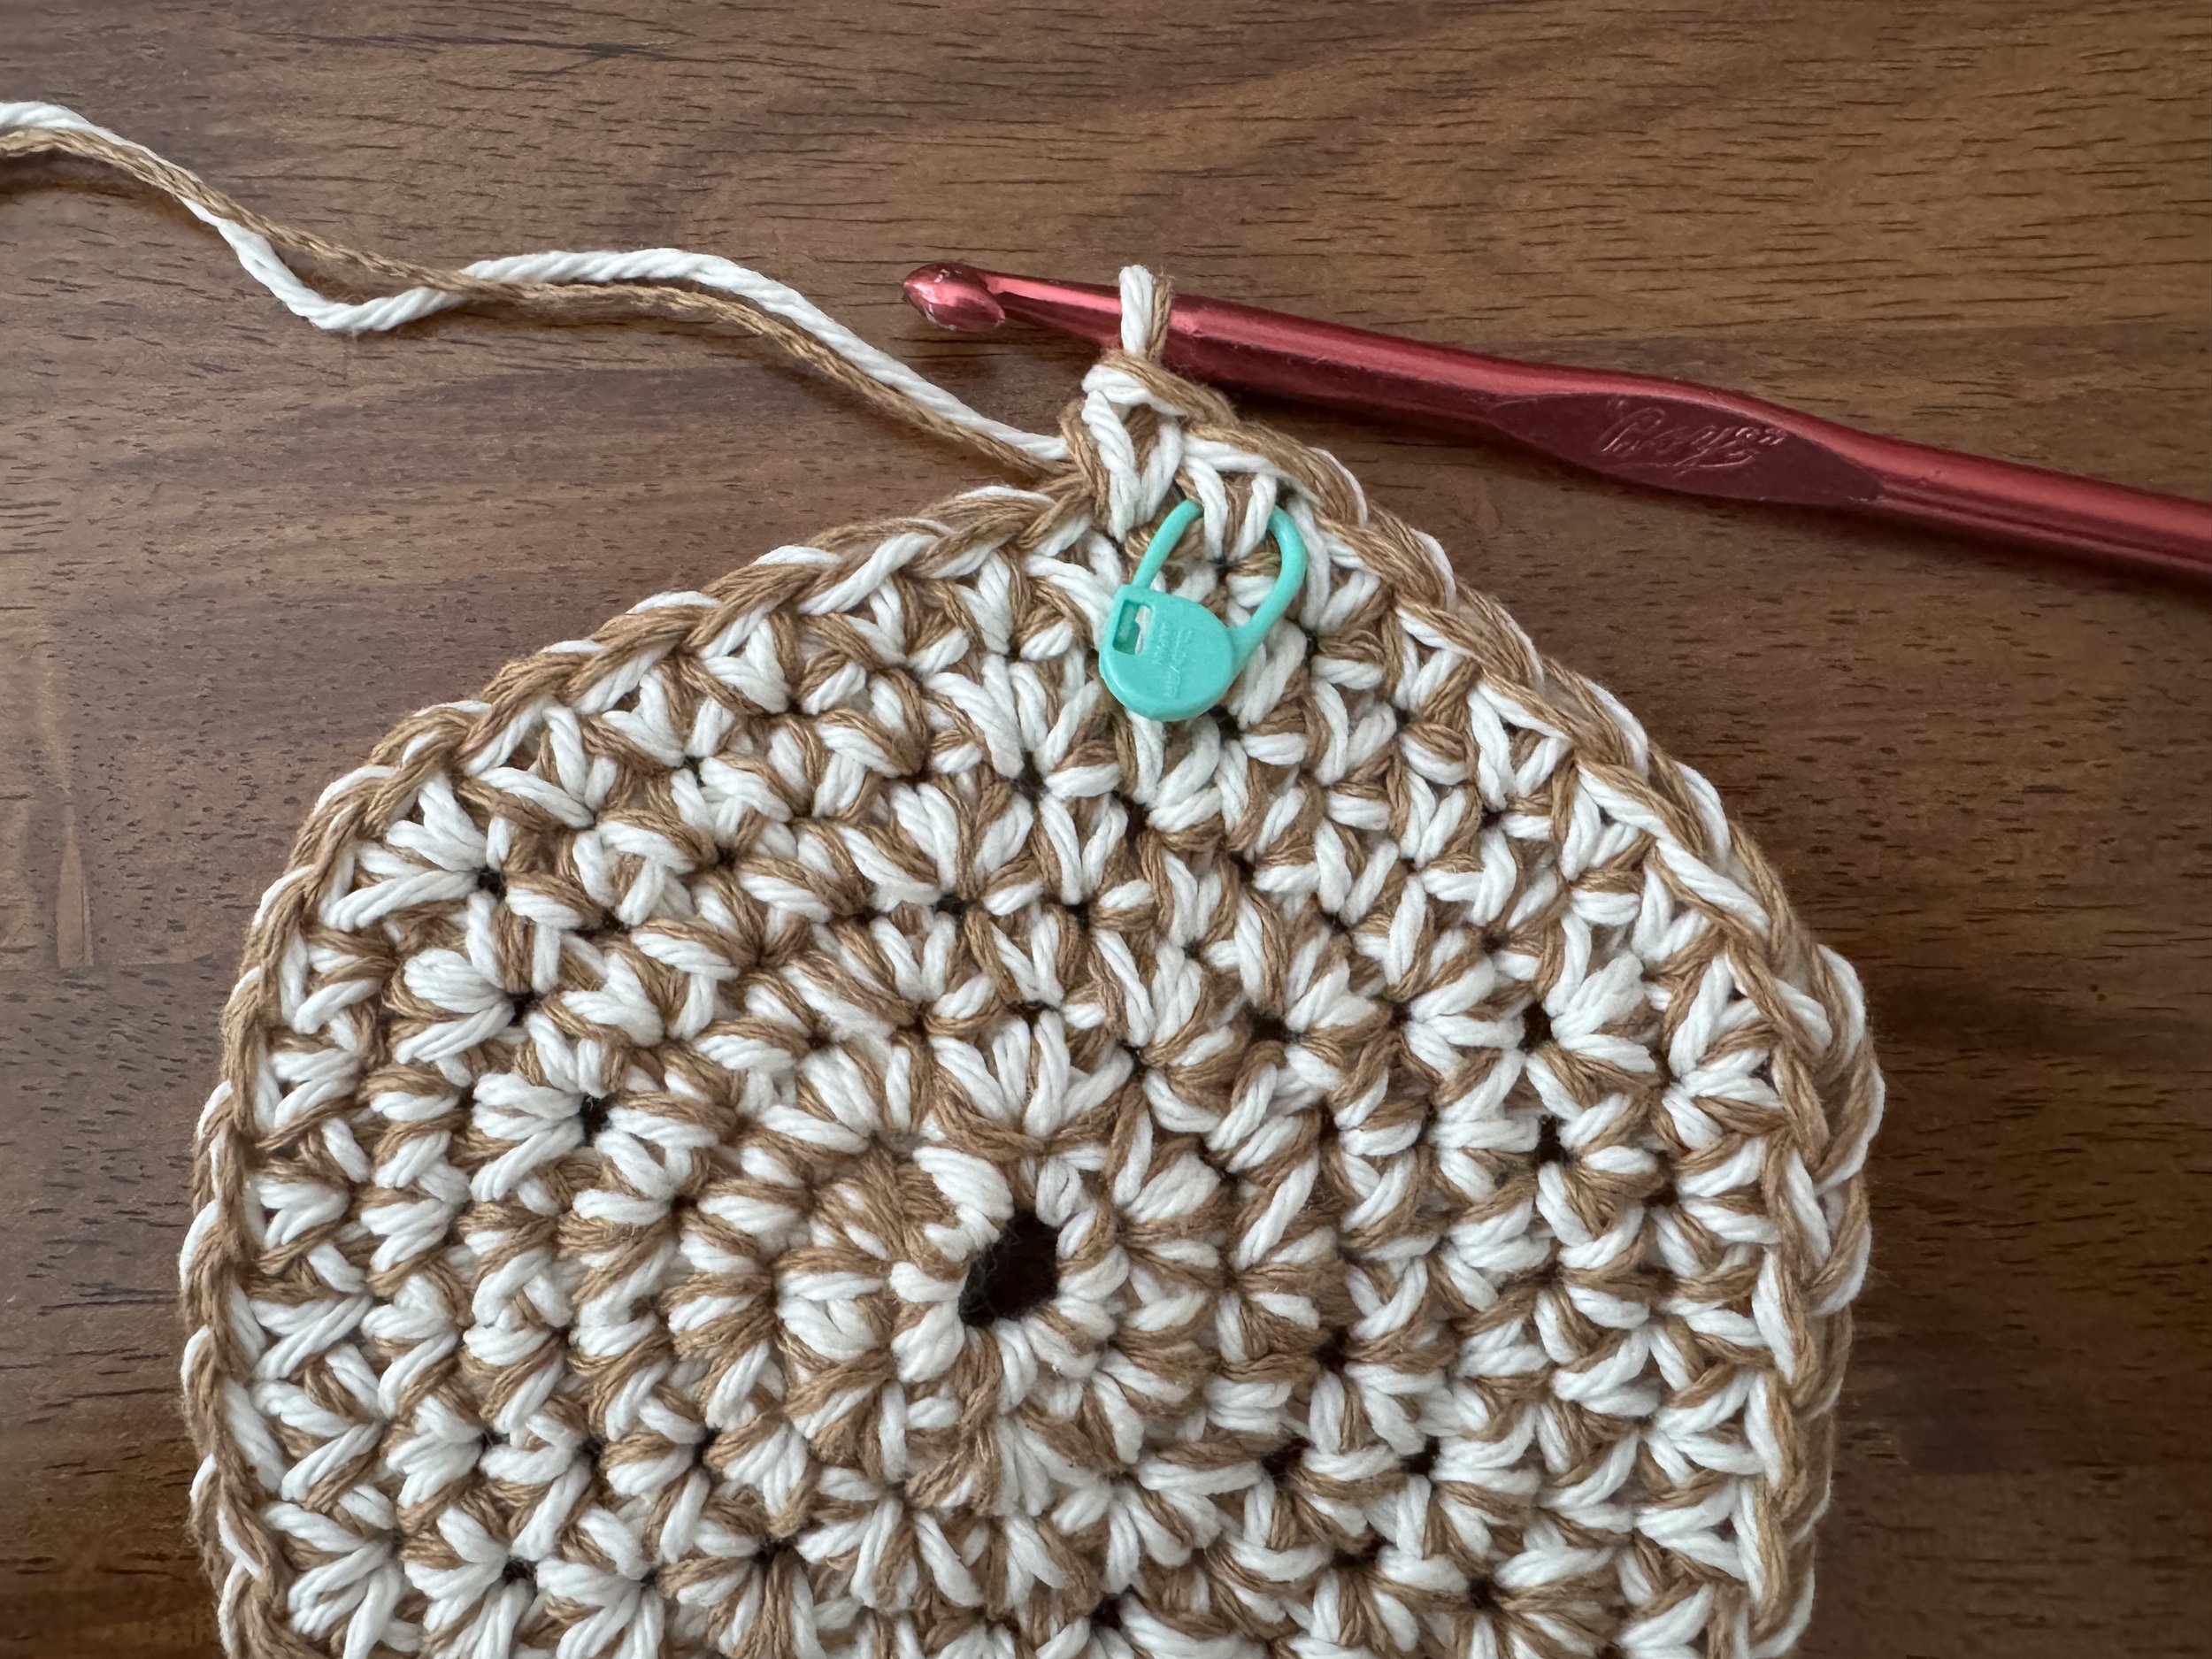
I like to mark the first stitch in the non-decrease section. This makes it easy to count how many rounds I work after the increasing is done. And, crochet can be a bit deceptive - the thing seems to grow a bit more for a couple of rounds, even after you stop increasing.
-
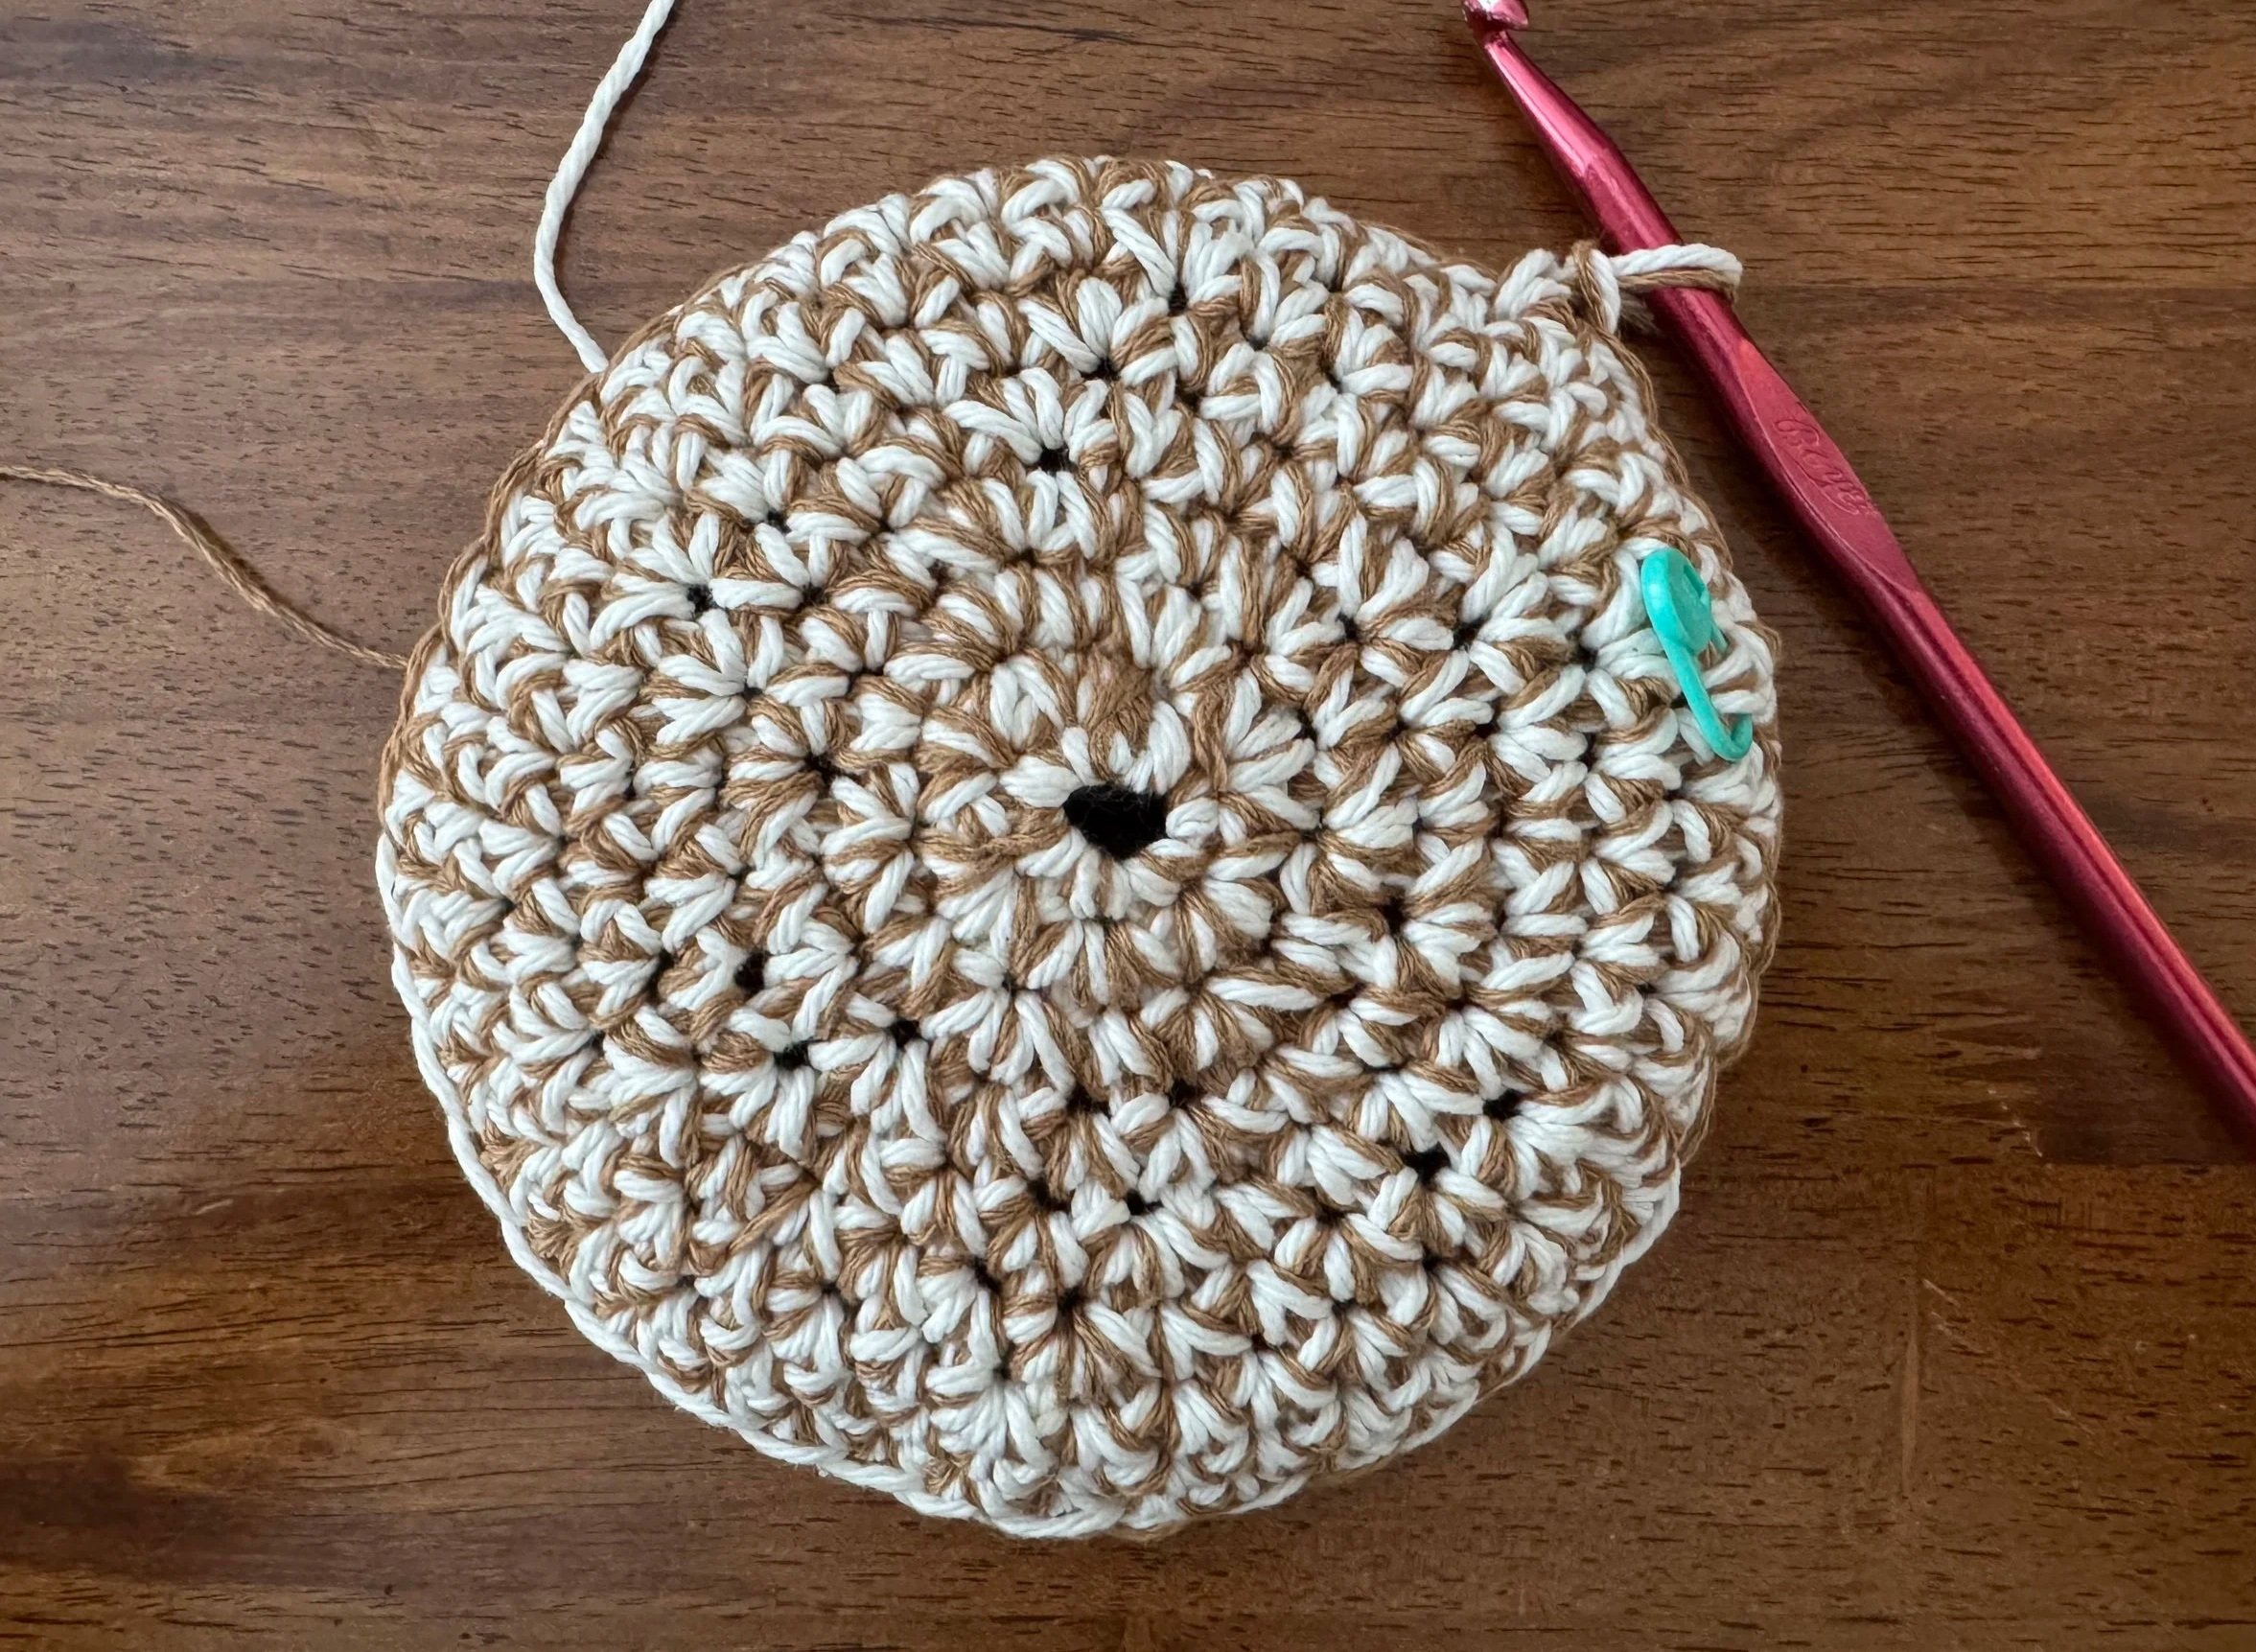
see what I mean?
-
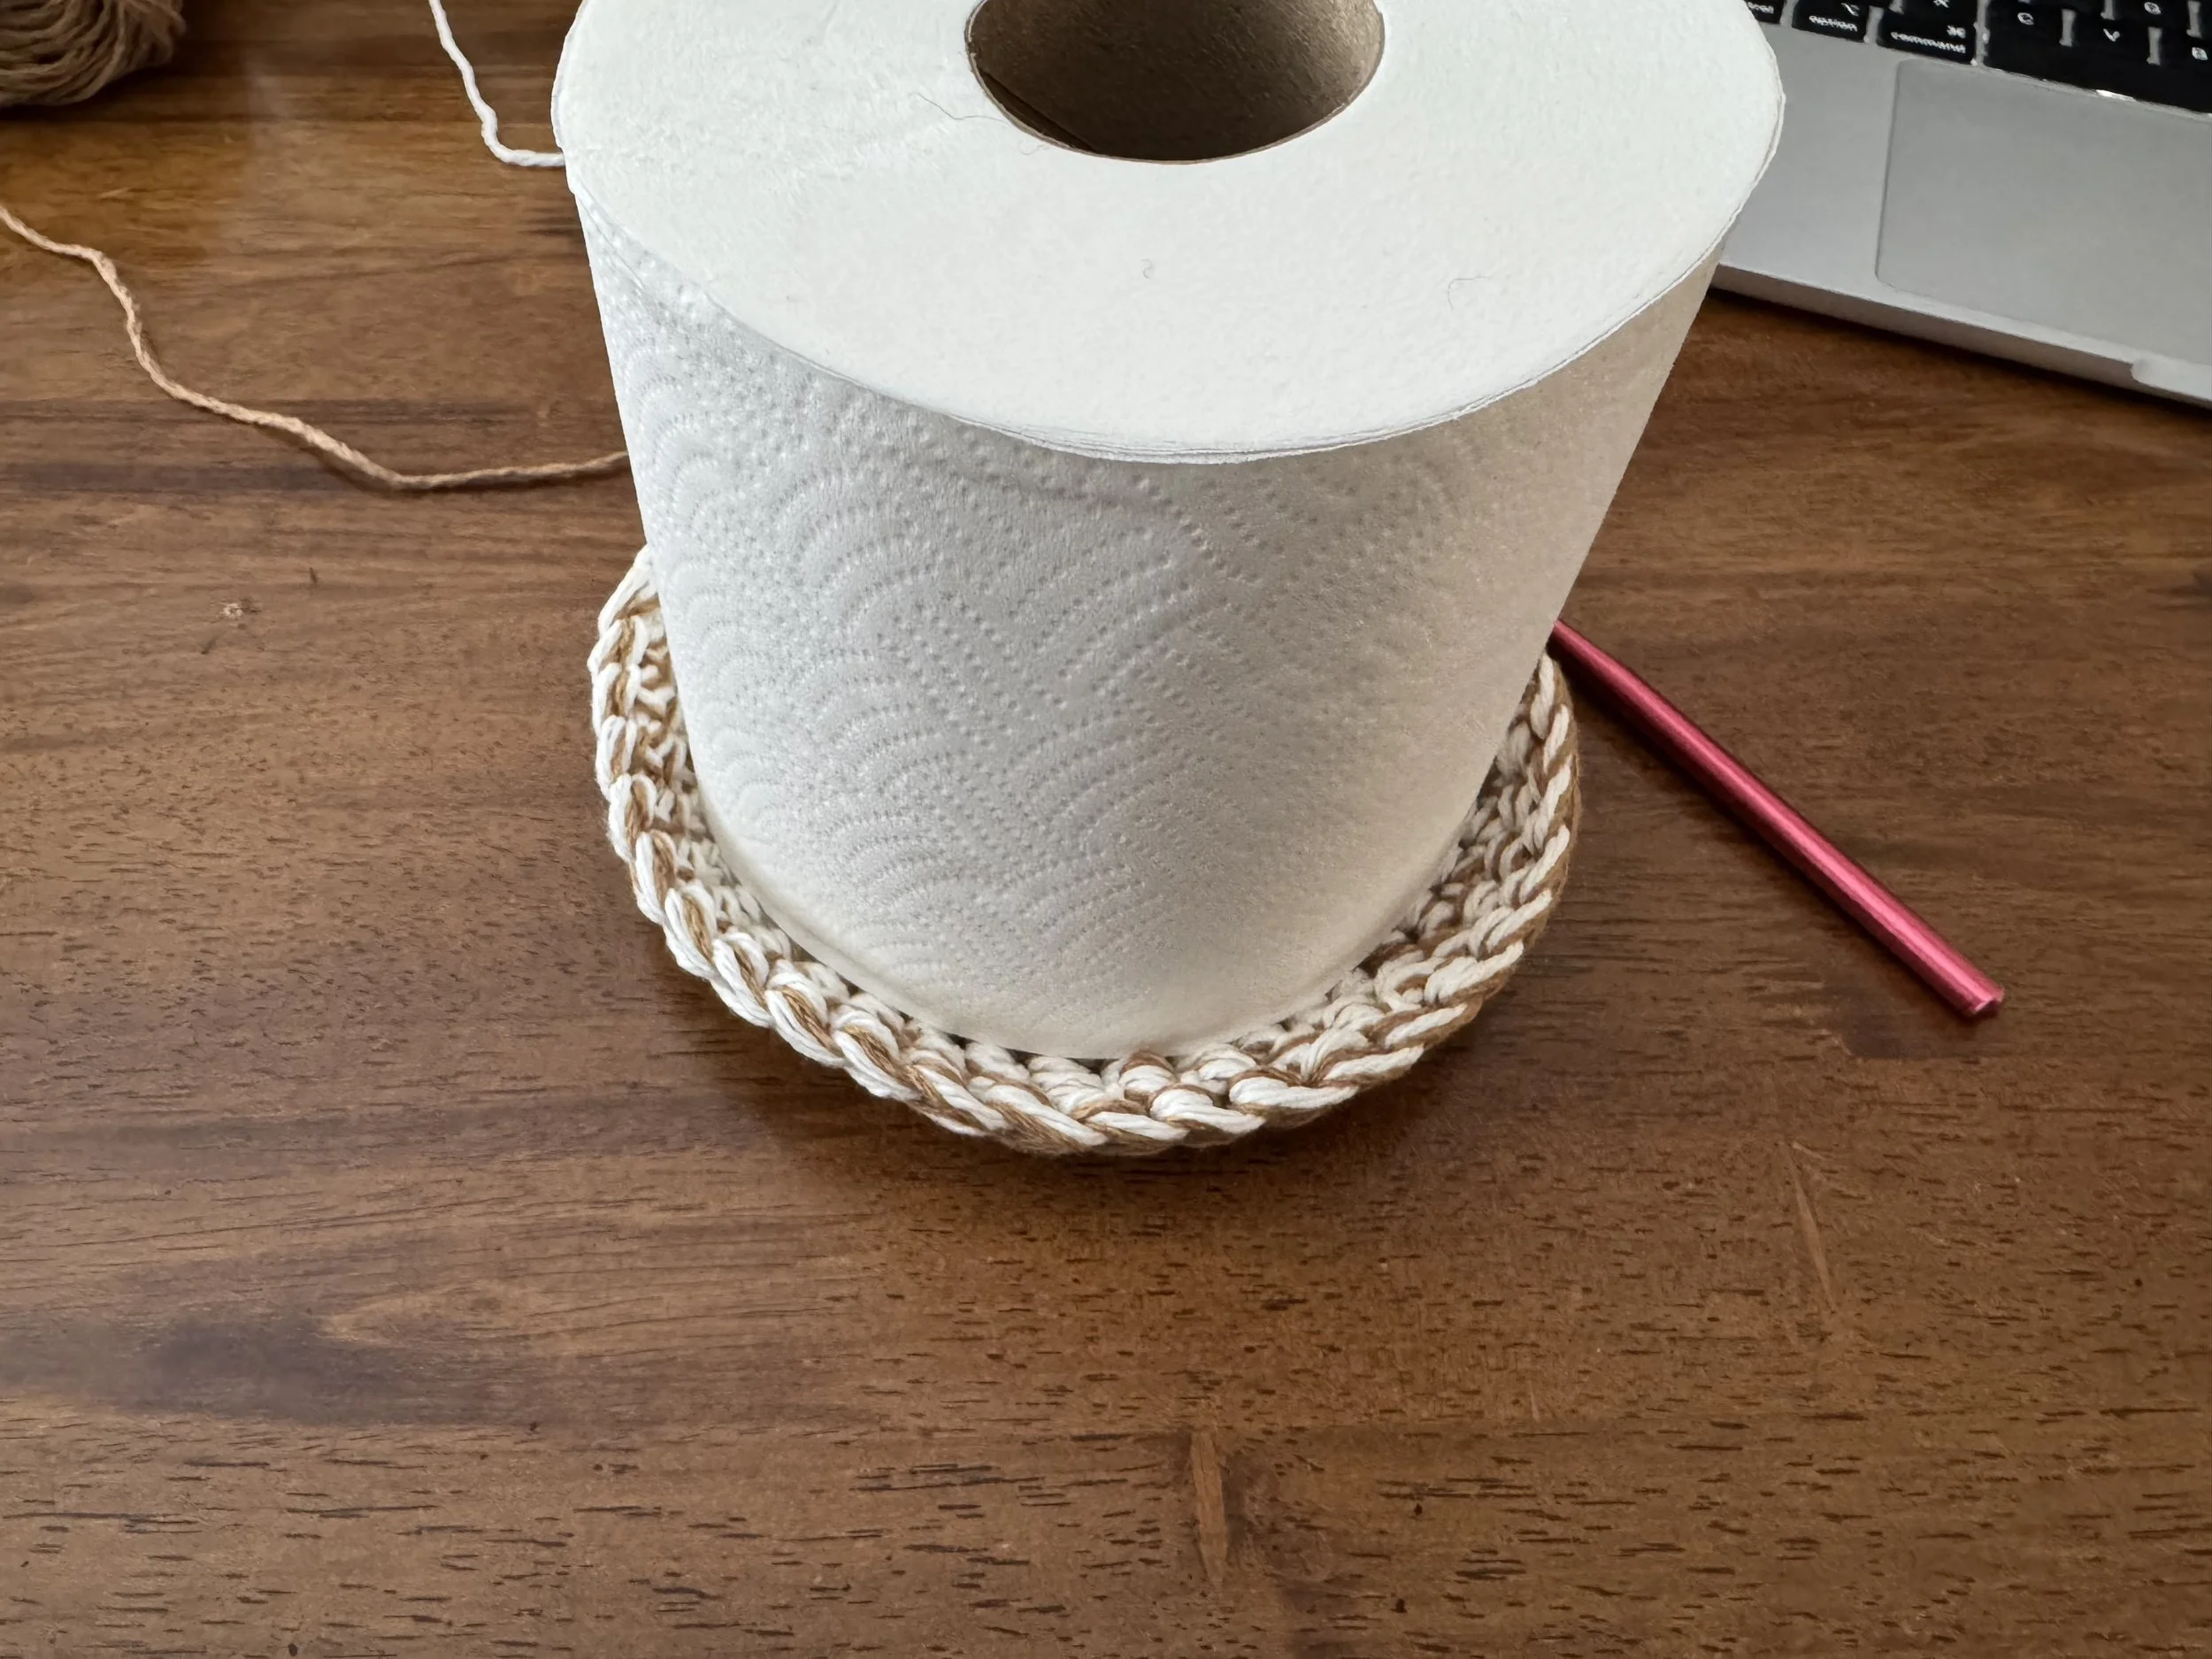
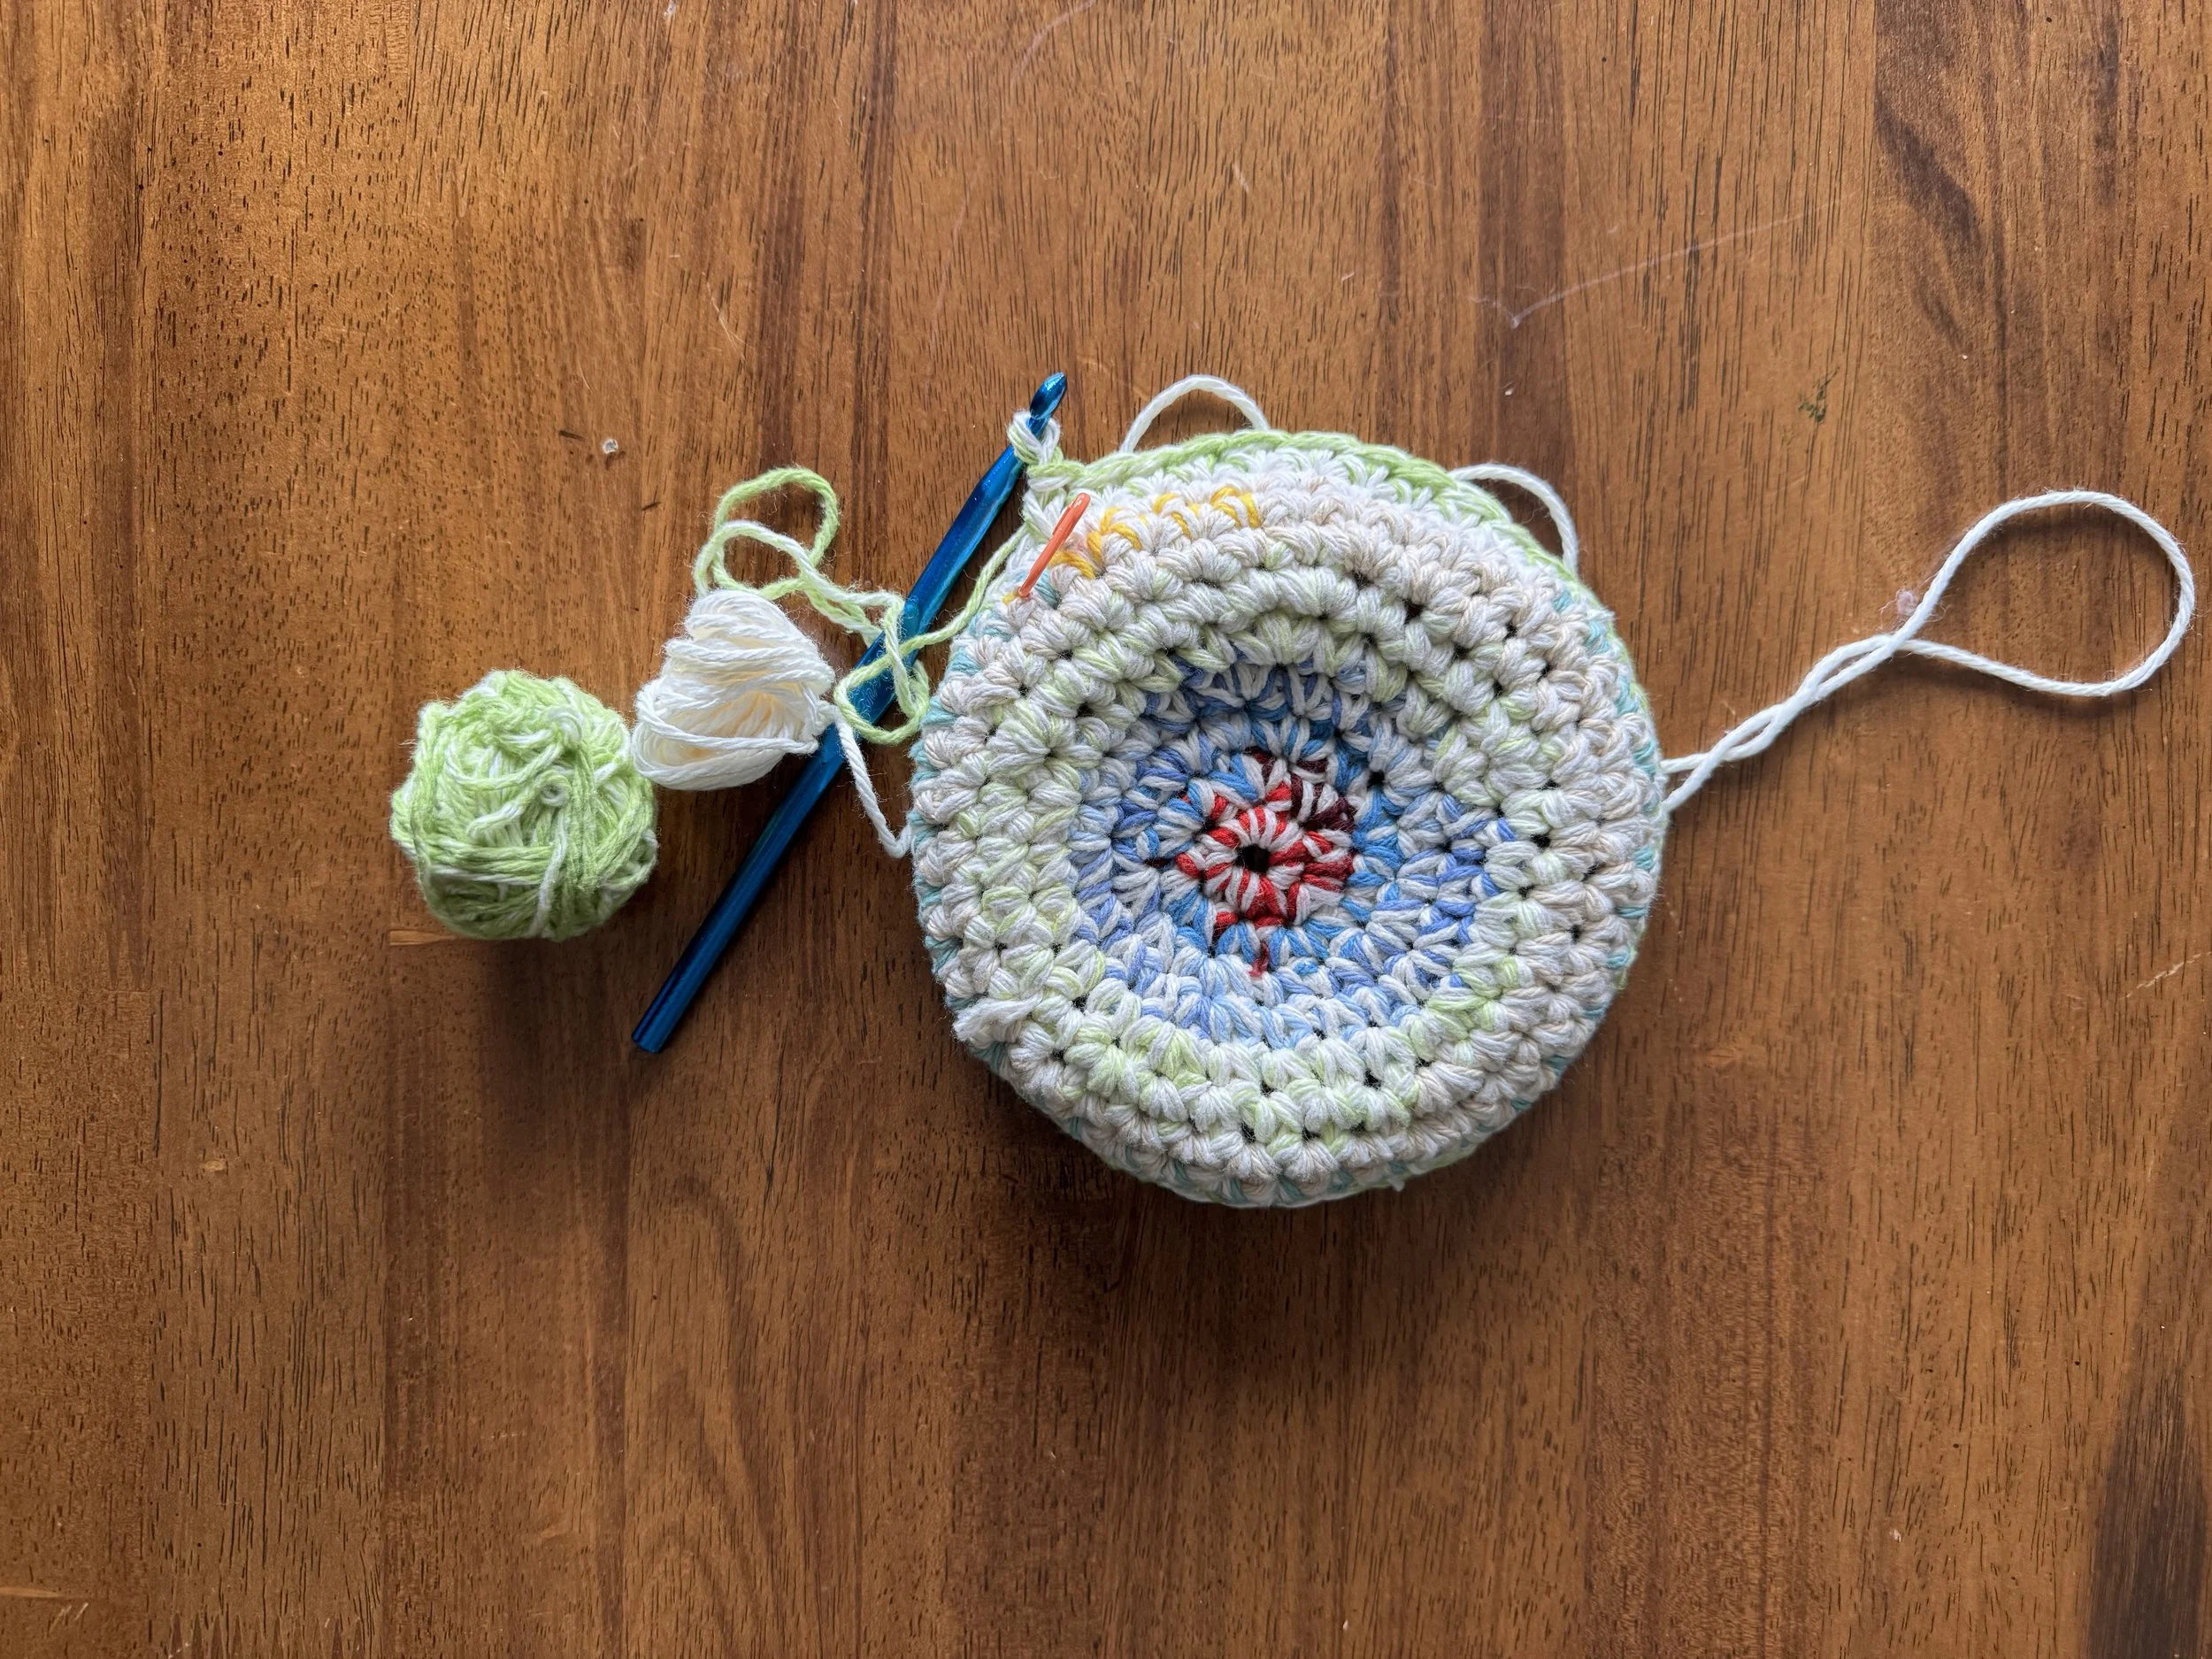
room for a bit of movement
There is some wiggle room here; the roll needs to be extractable, after all. I have been trying really, really hard not to make poopy puns and it has been a trial.
-

I need about 17 non-decrease rounds
I want the basket to be a bit longer than the roll of toilet paper, so that it can feel safe and happy in its little house.
-
the stitches rise at an angle to the right
I am about to begin the 7th round since starting the “work even” section. The beginning of the round keeps shifting to the right by one stitch, every round.
-
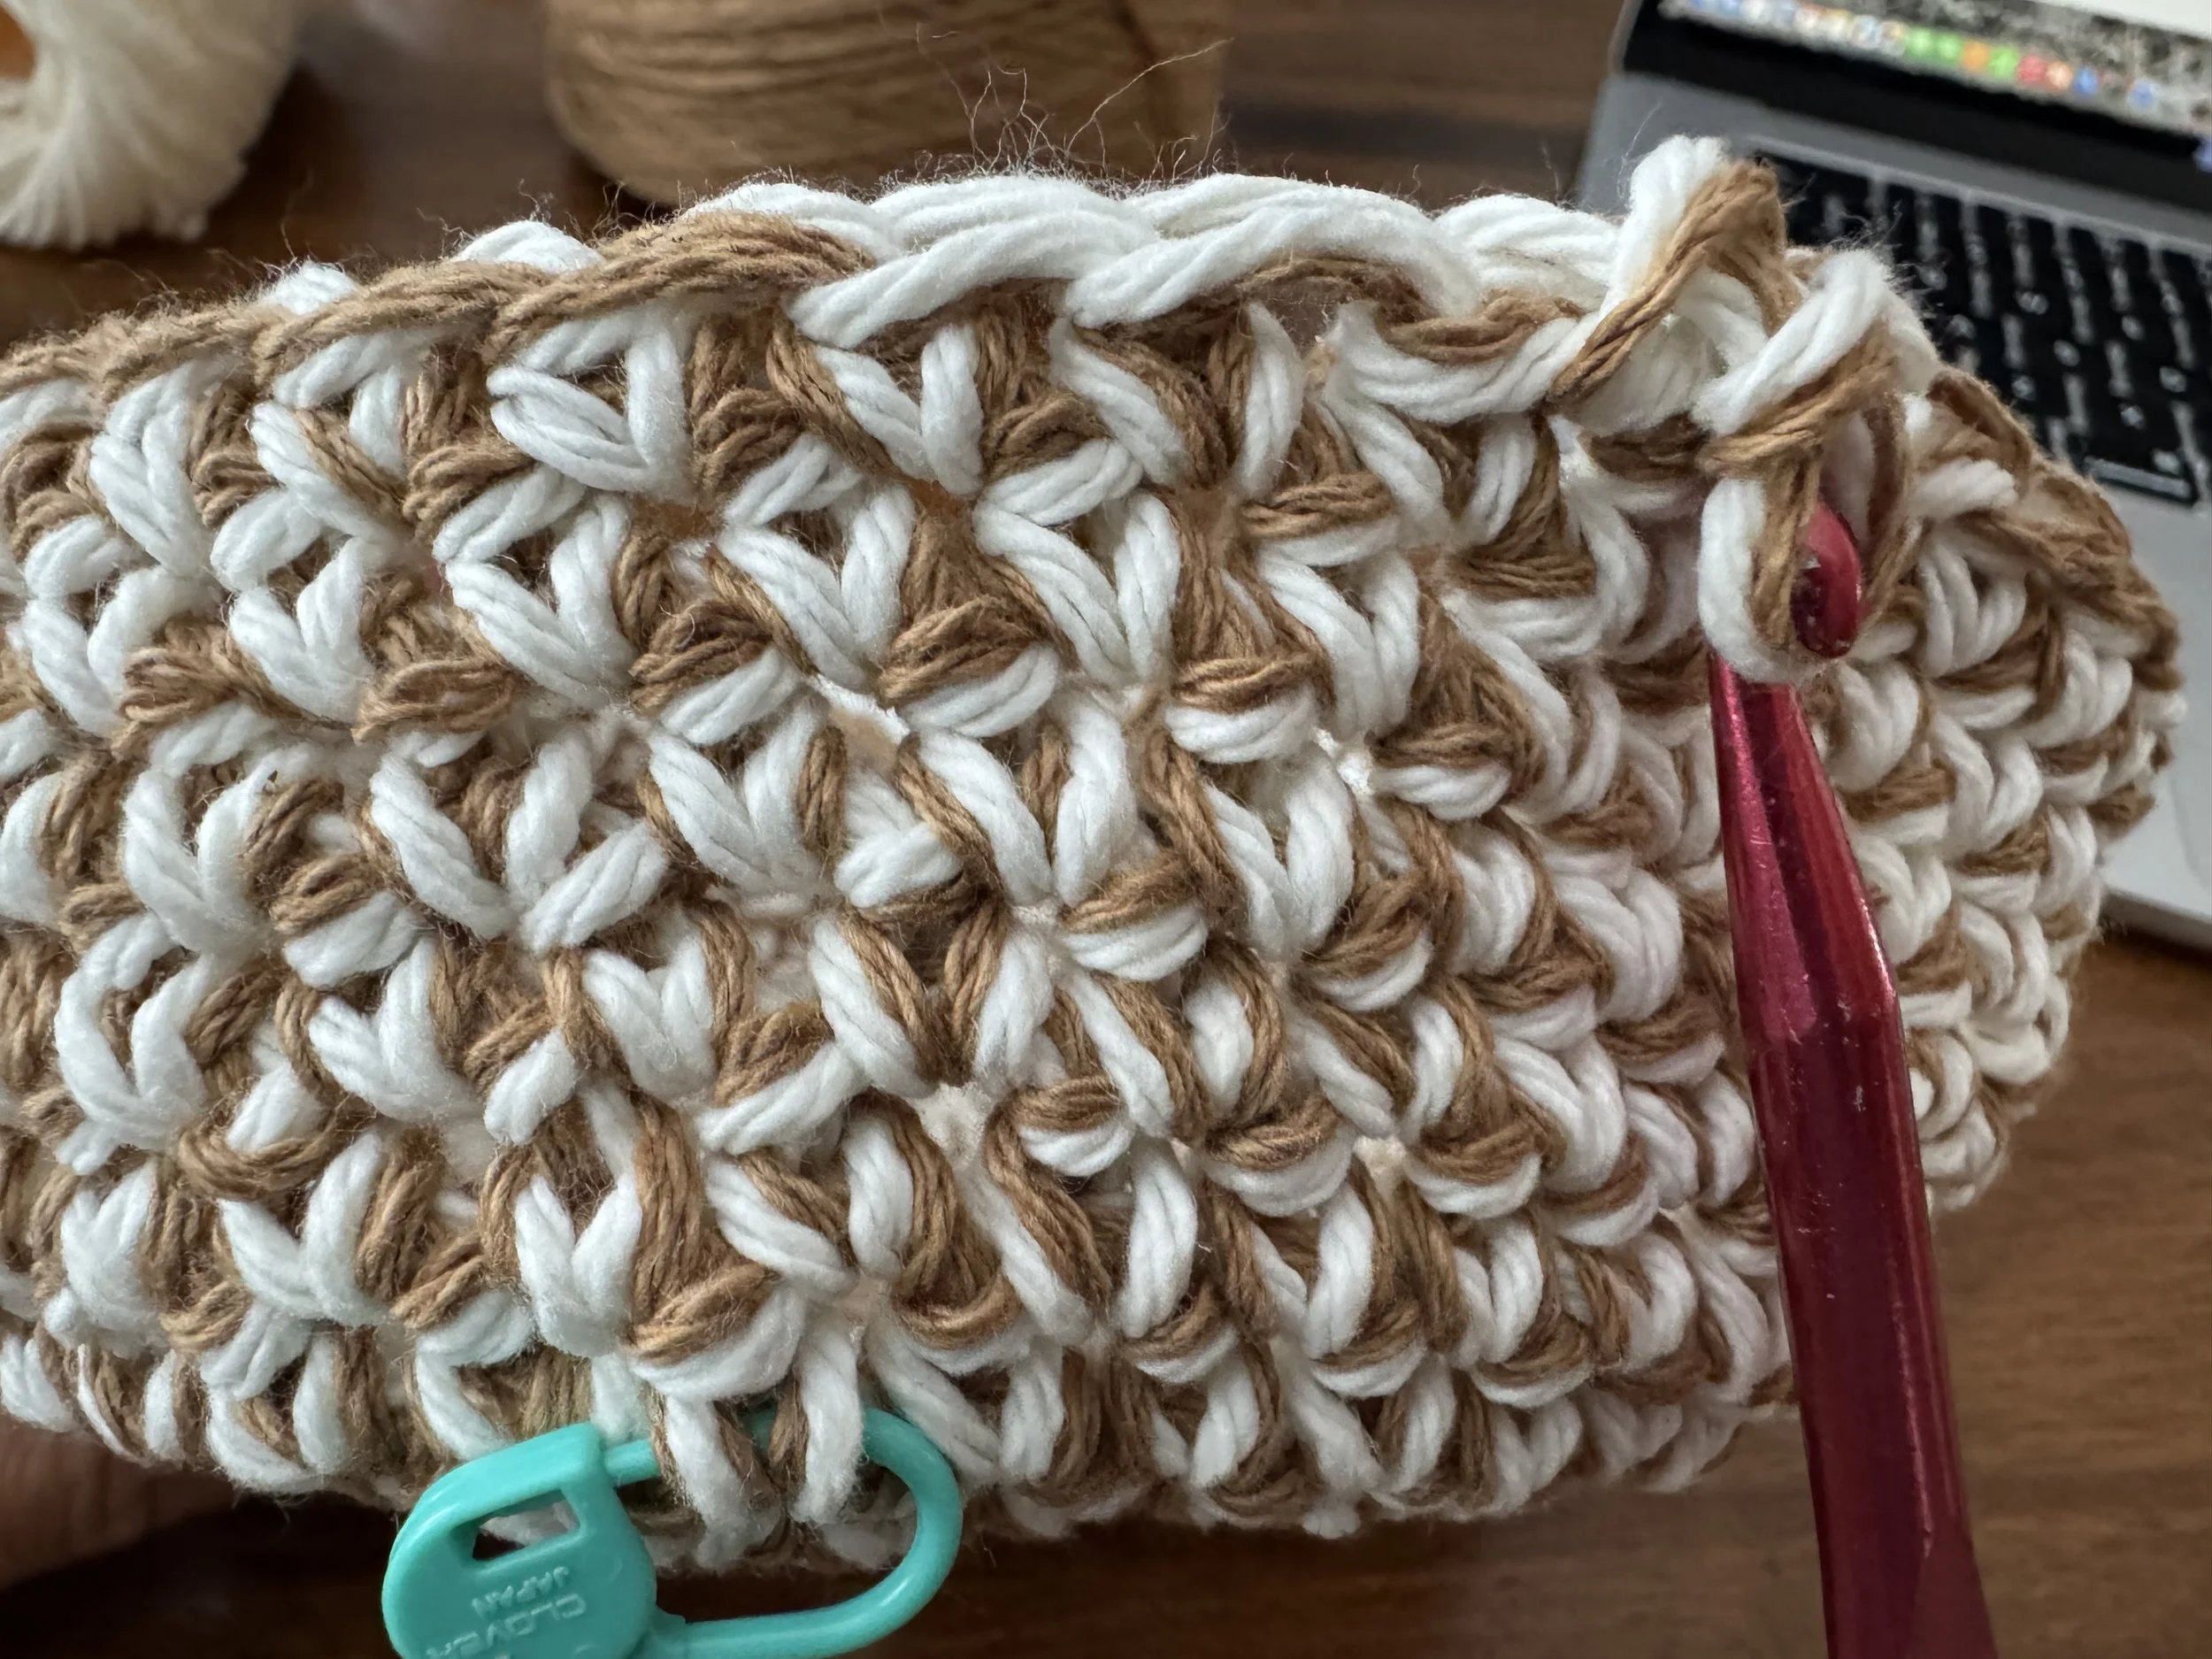
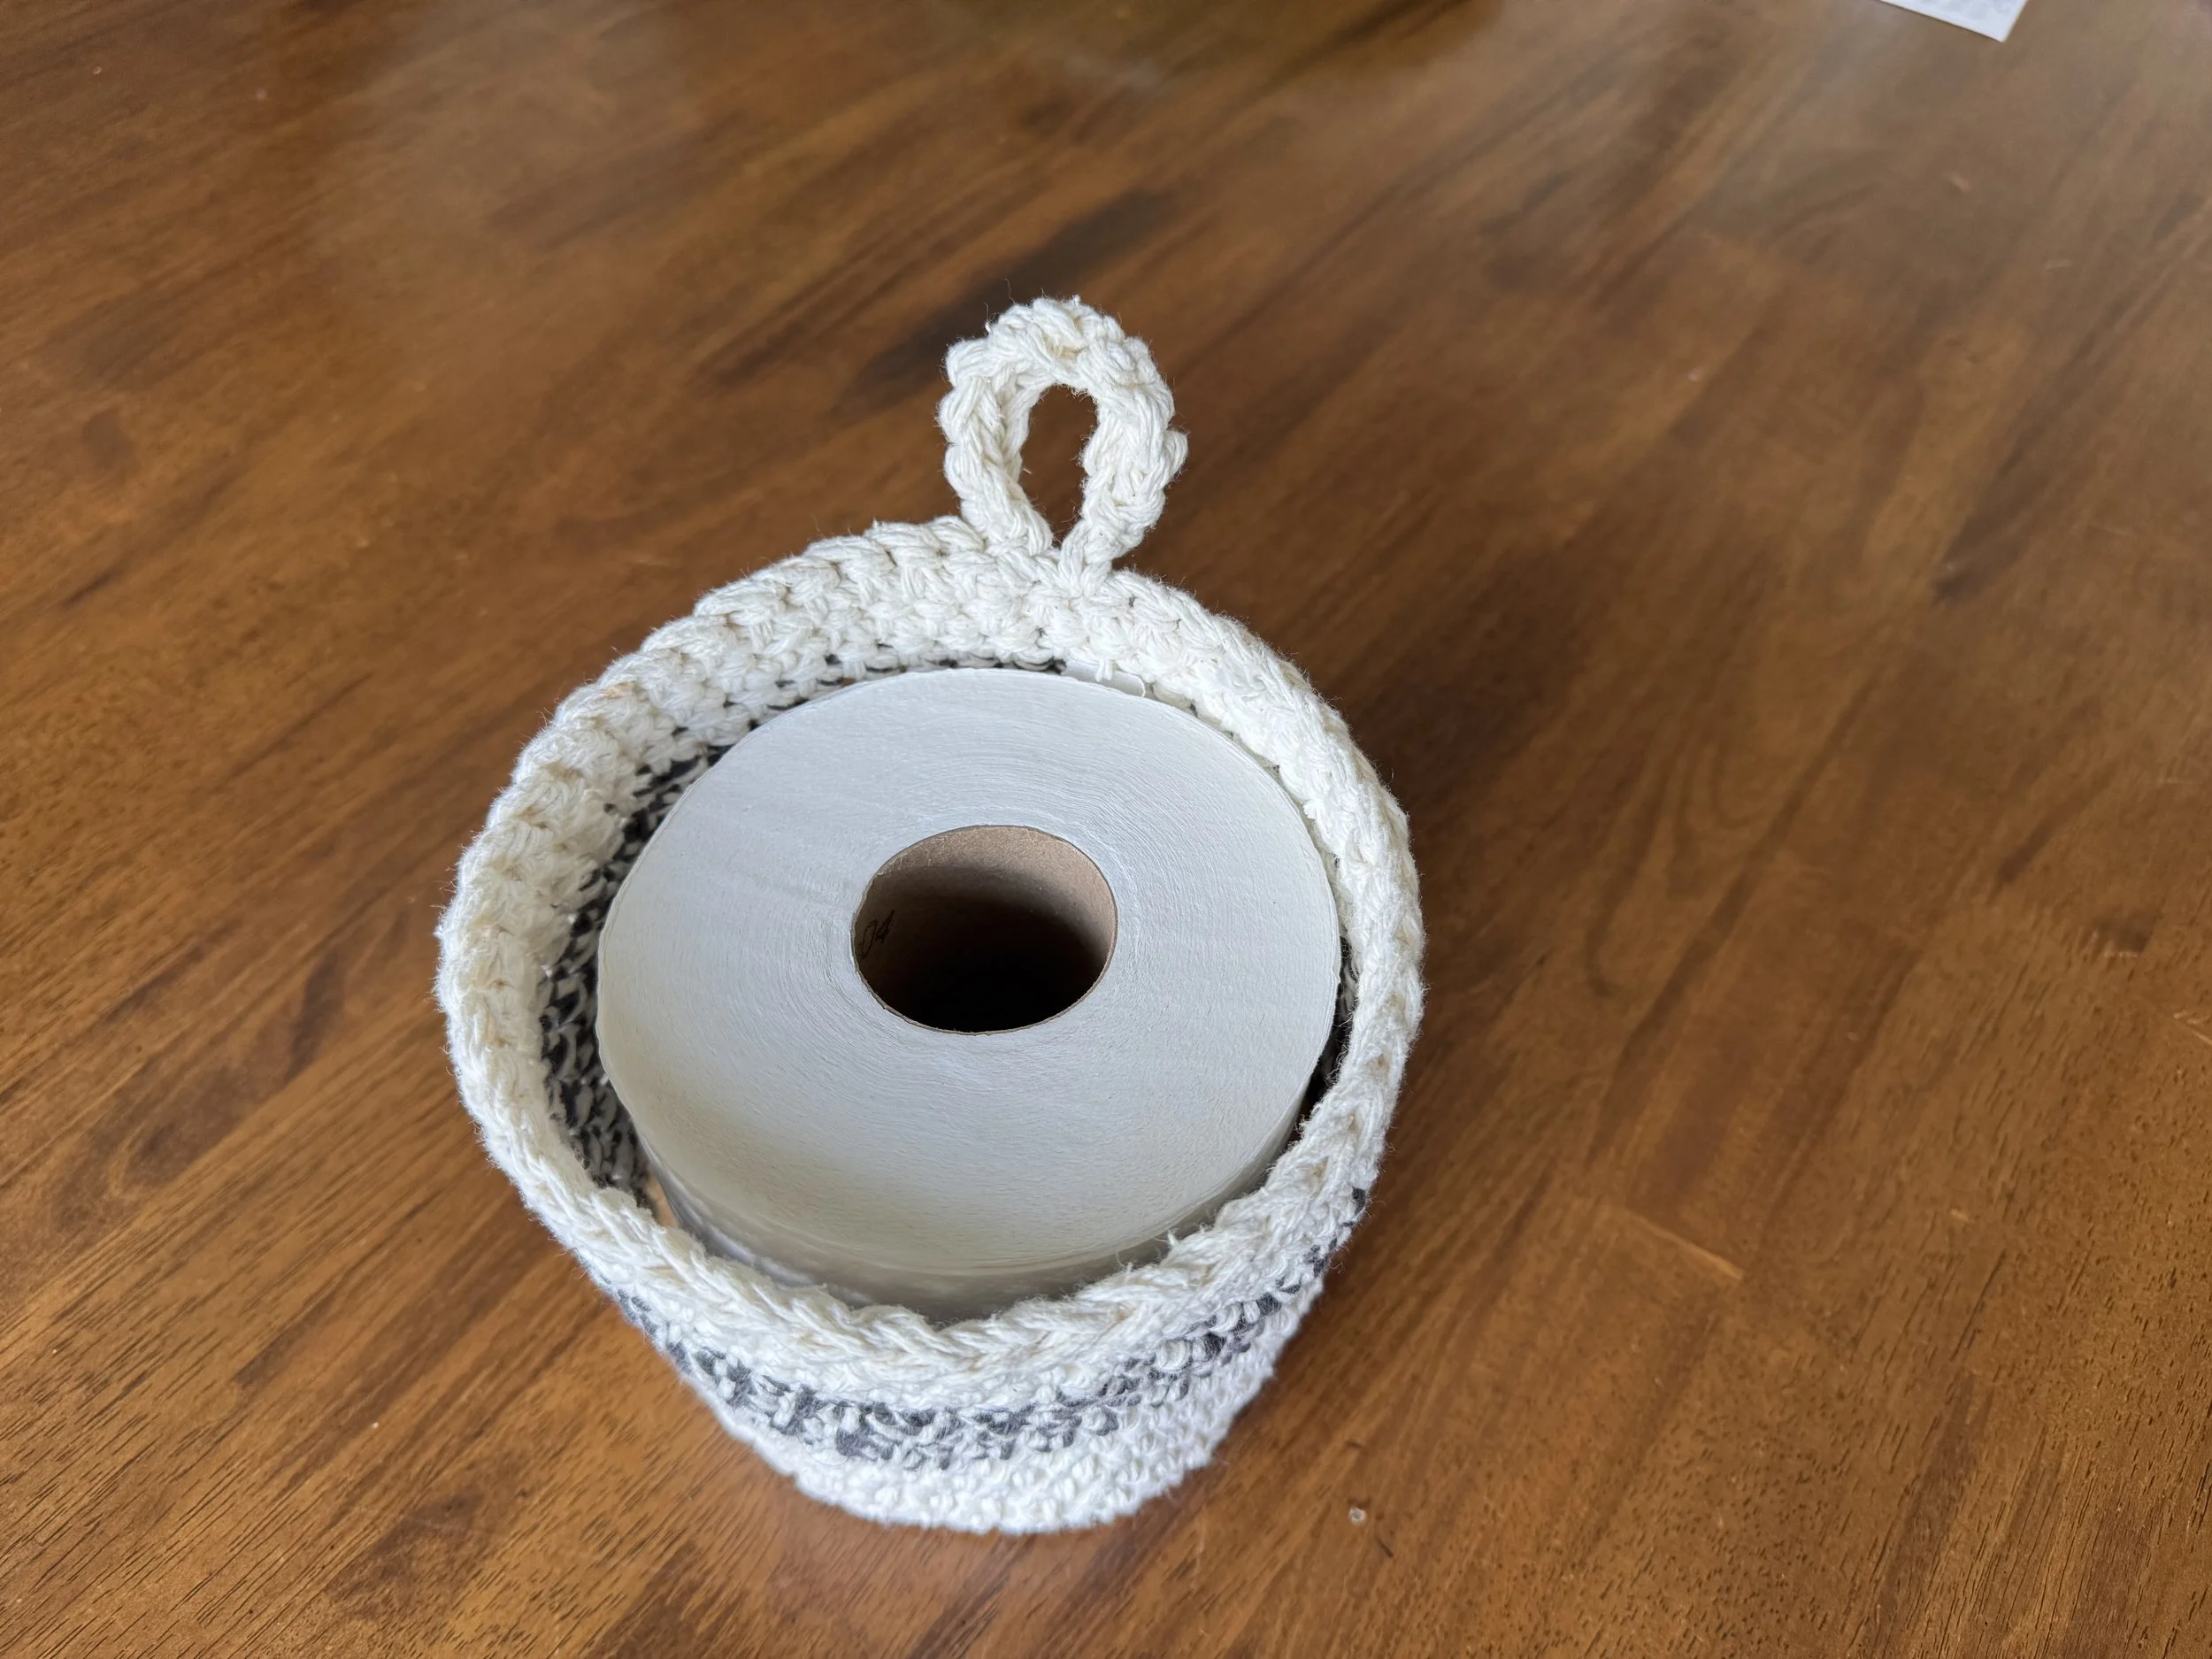
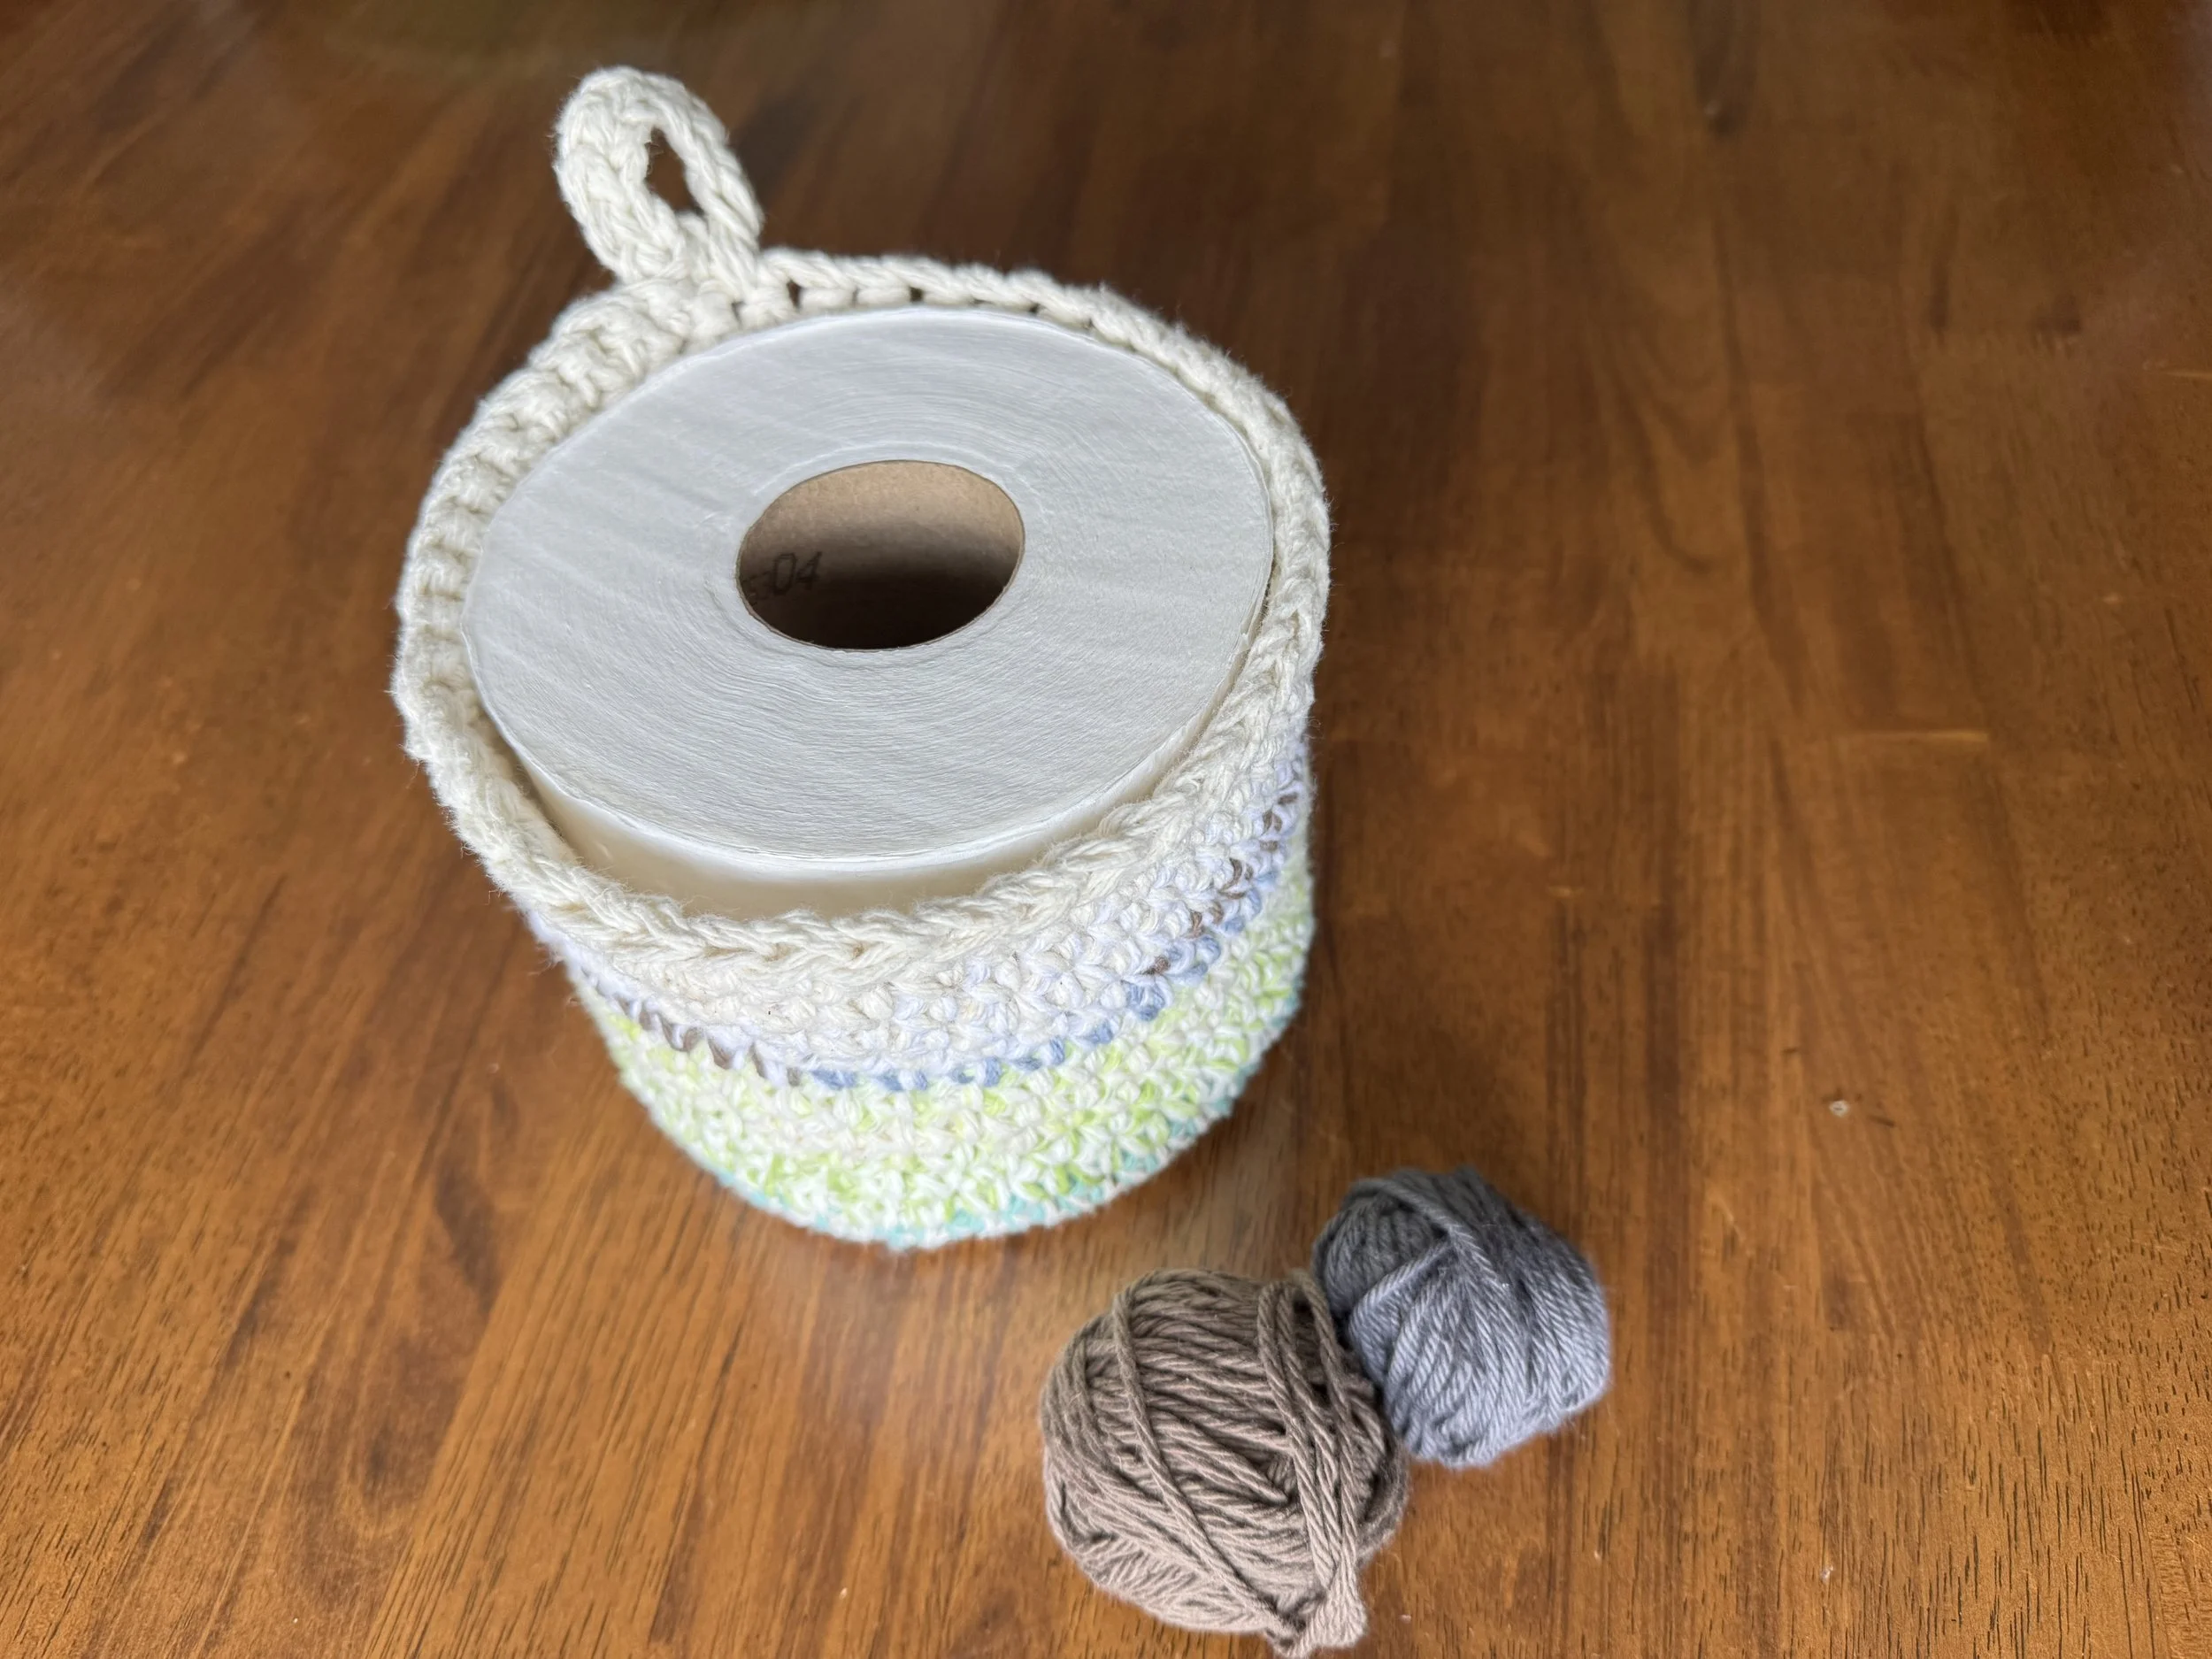
after 17 rounds we are ready for the handle
The height of the basket is at the discretion of the maker. I make my baskets a bit deep, so that when they are washed and dried, a bit of shrinkage will not render them useless.
-
making the handle
This is just a little loop. I chain 10 stitches, skip 3 sc, and then go back to crocheting around.
-
sc across the chain
I crochet into the back loop of every chain stitch.
-
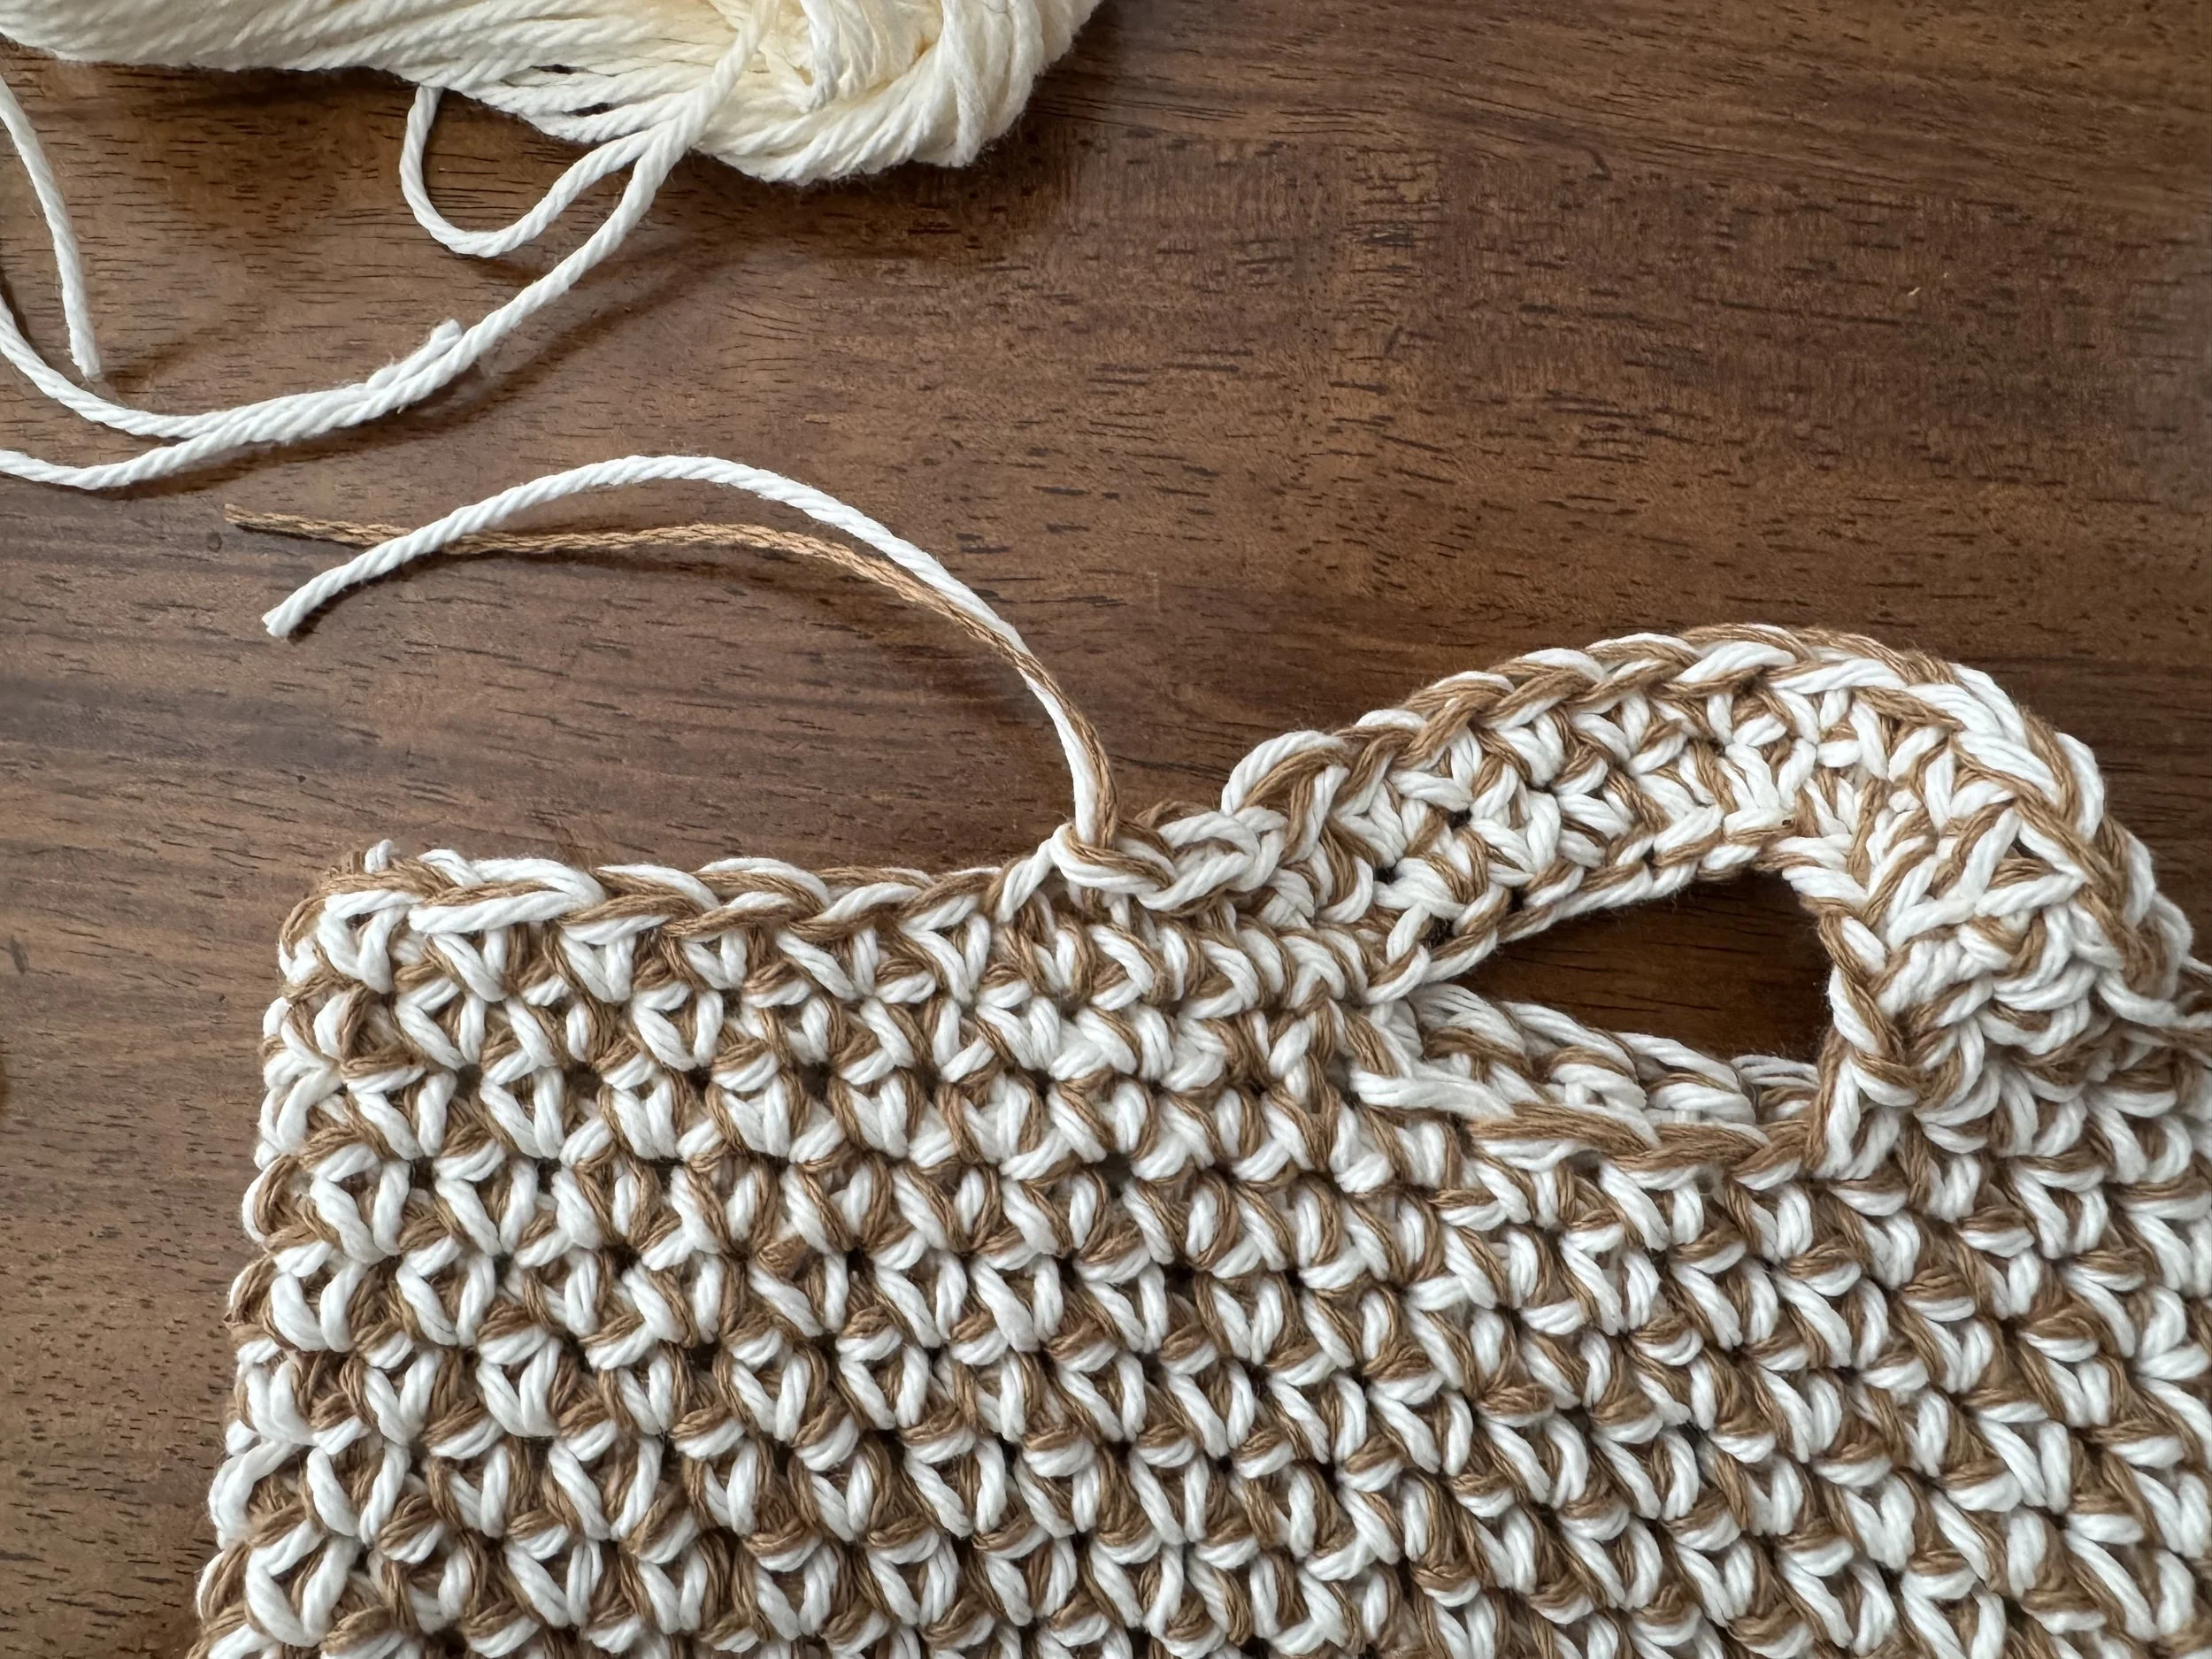
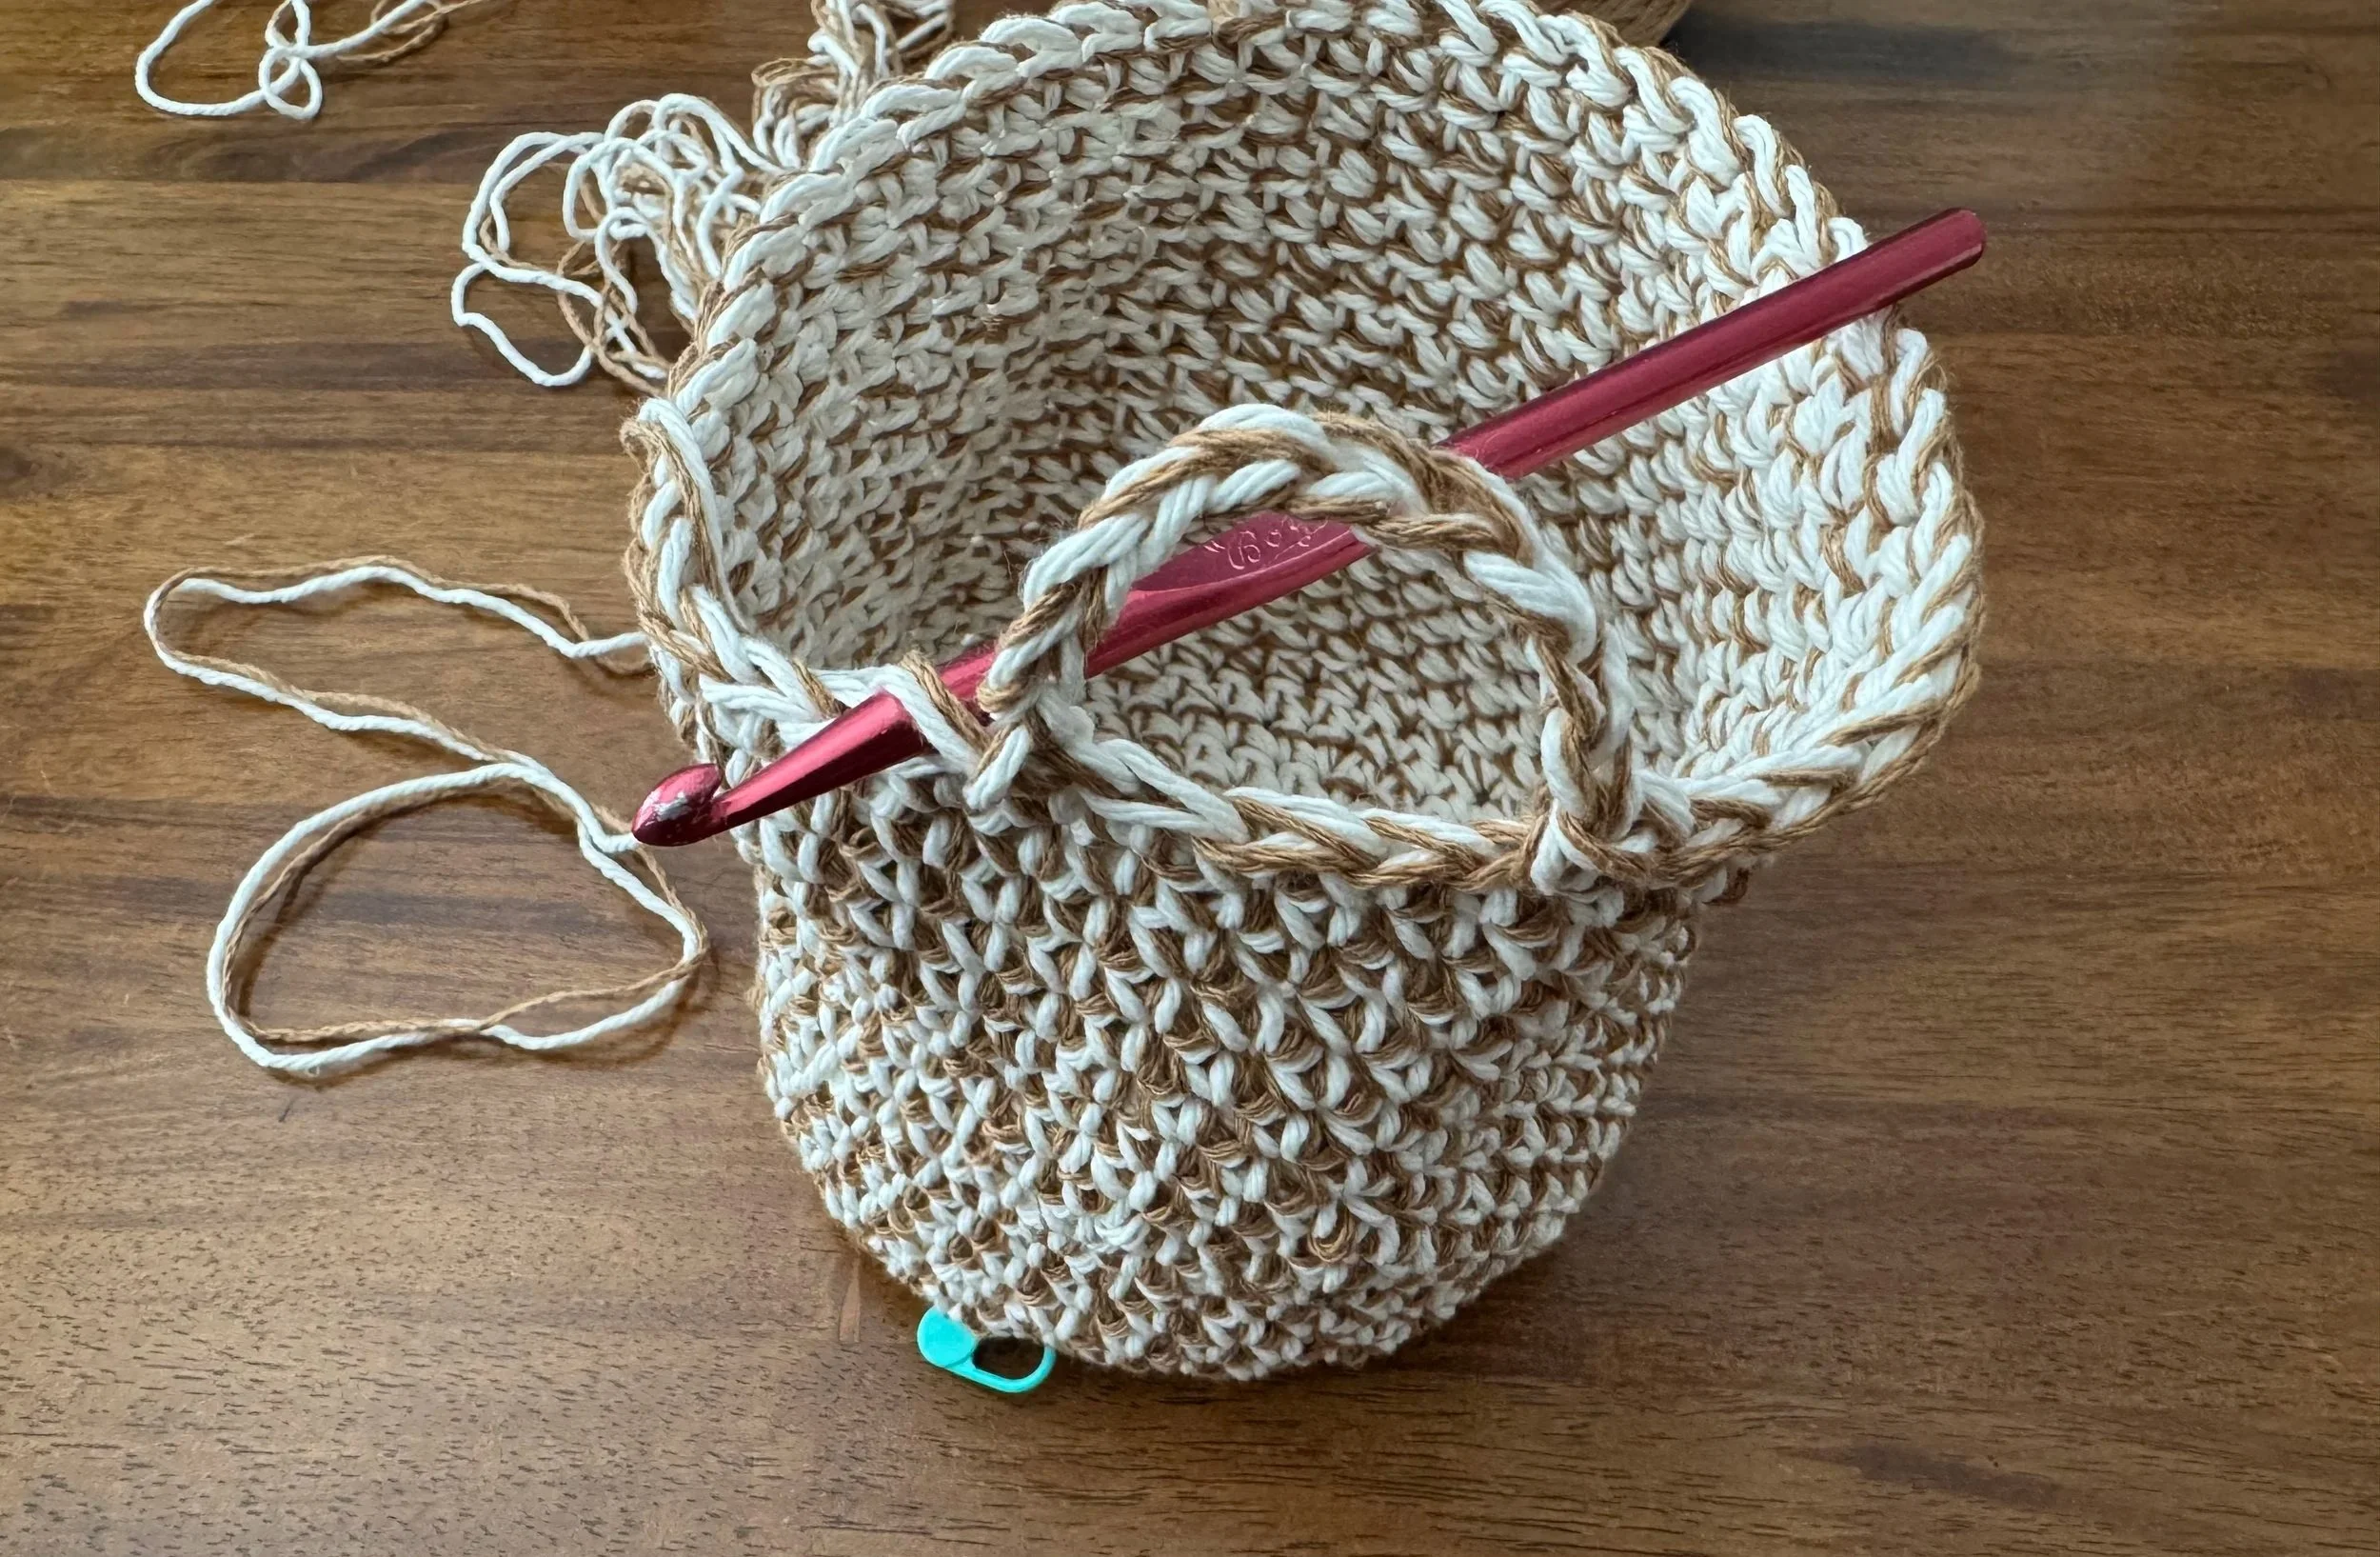
go around twice for the handle
After the last stitch on the handle’s second sc round (again, so many words), I slip a couple of stitches, make a giant loop and cut the yarn.
-
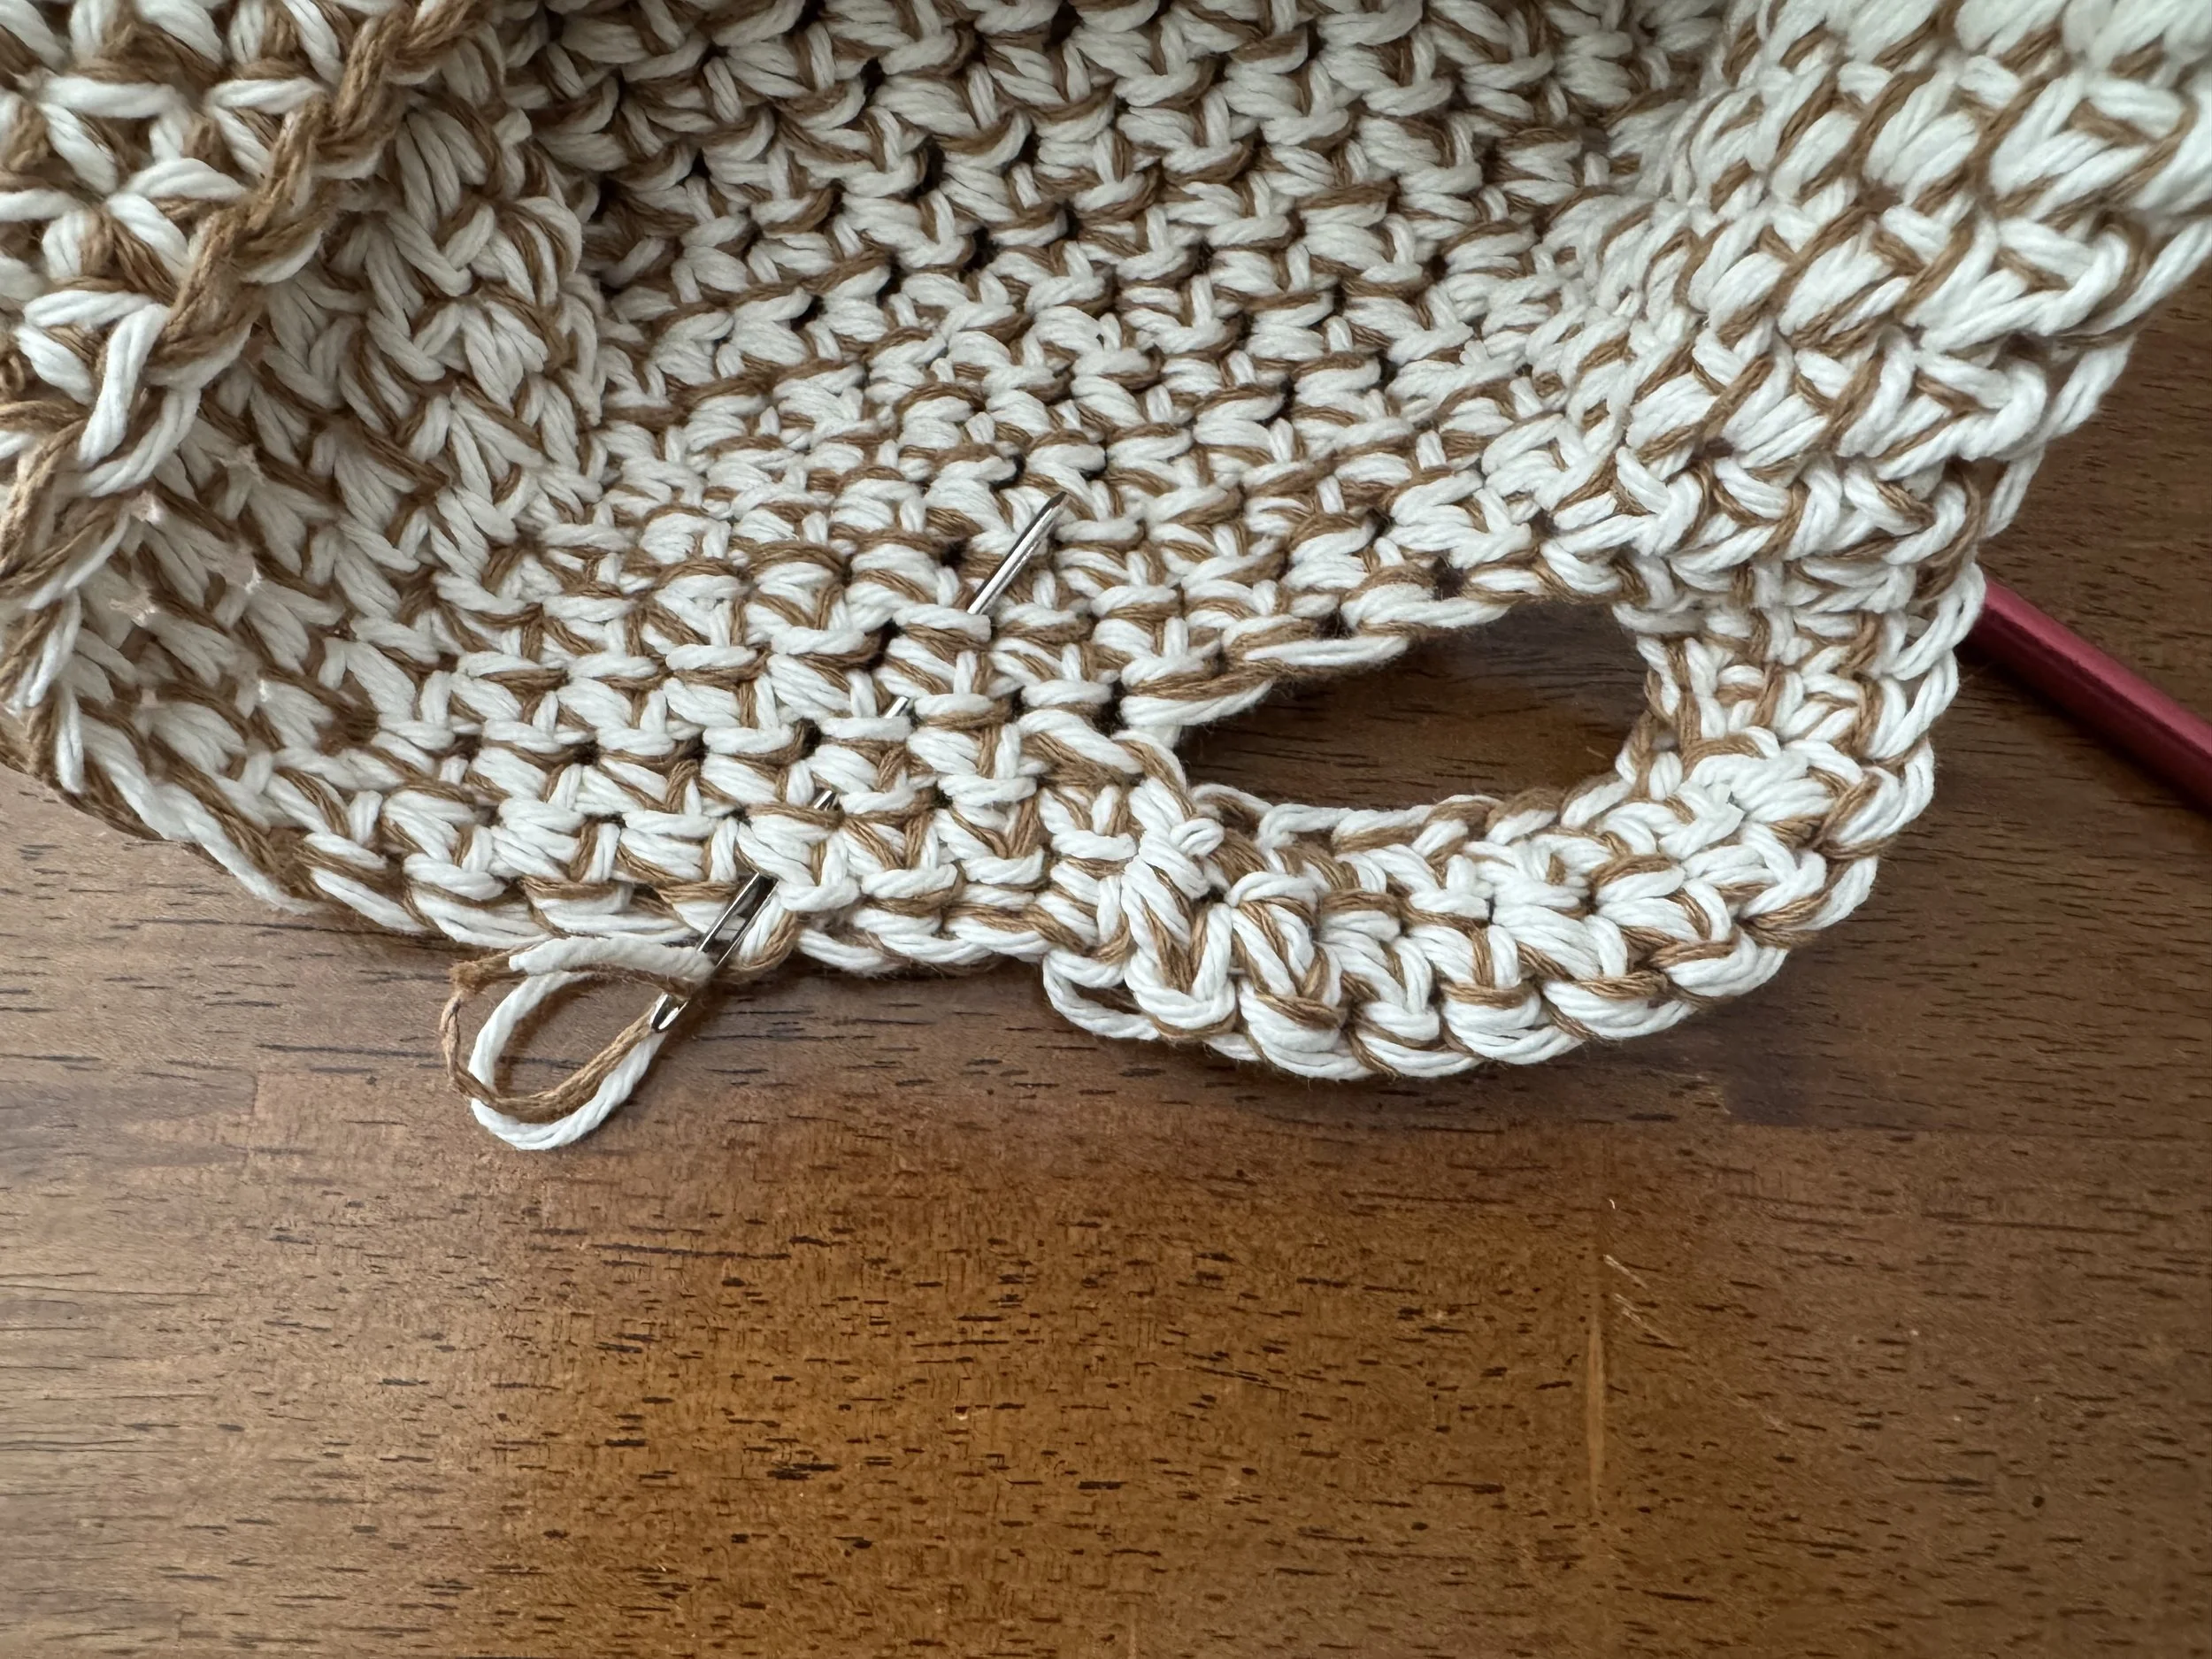
weave in the ends
-
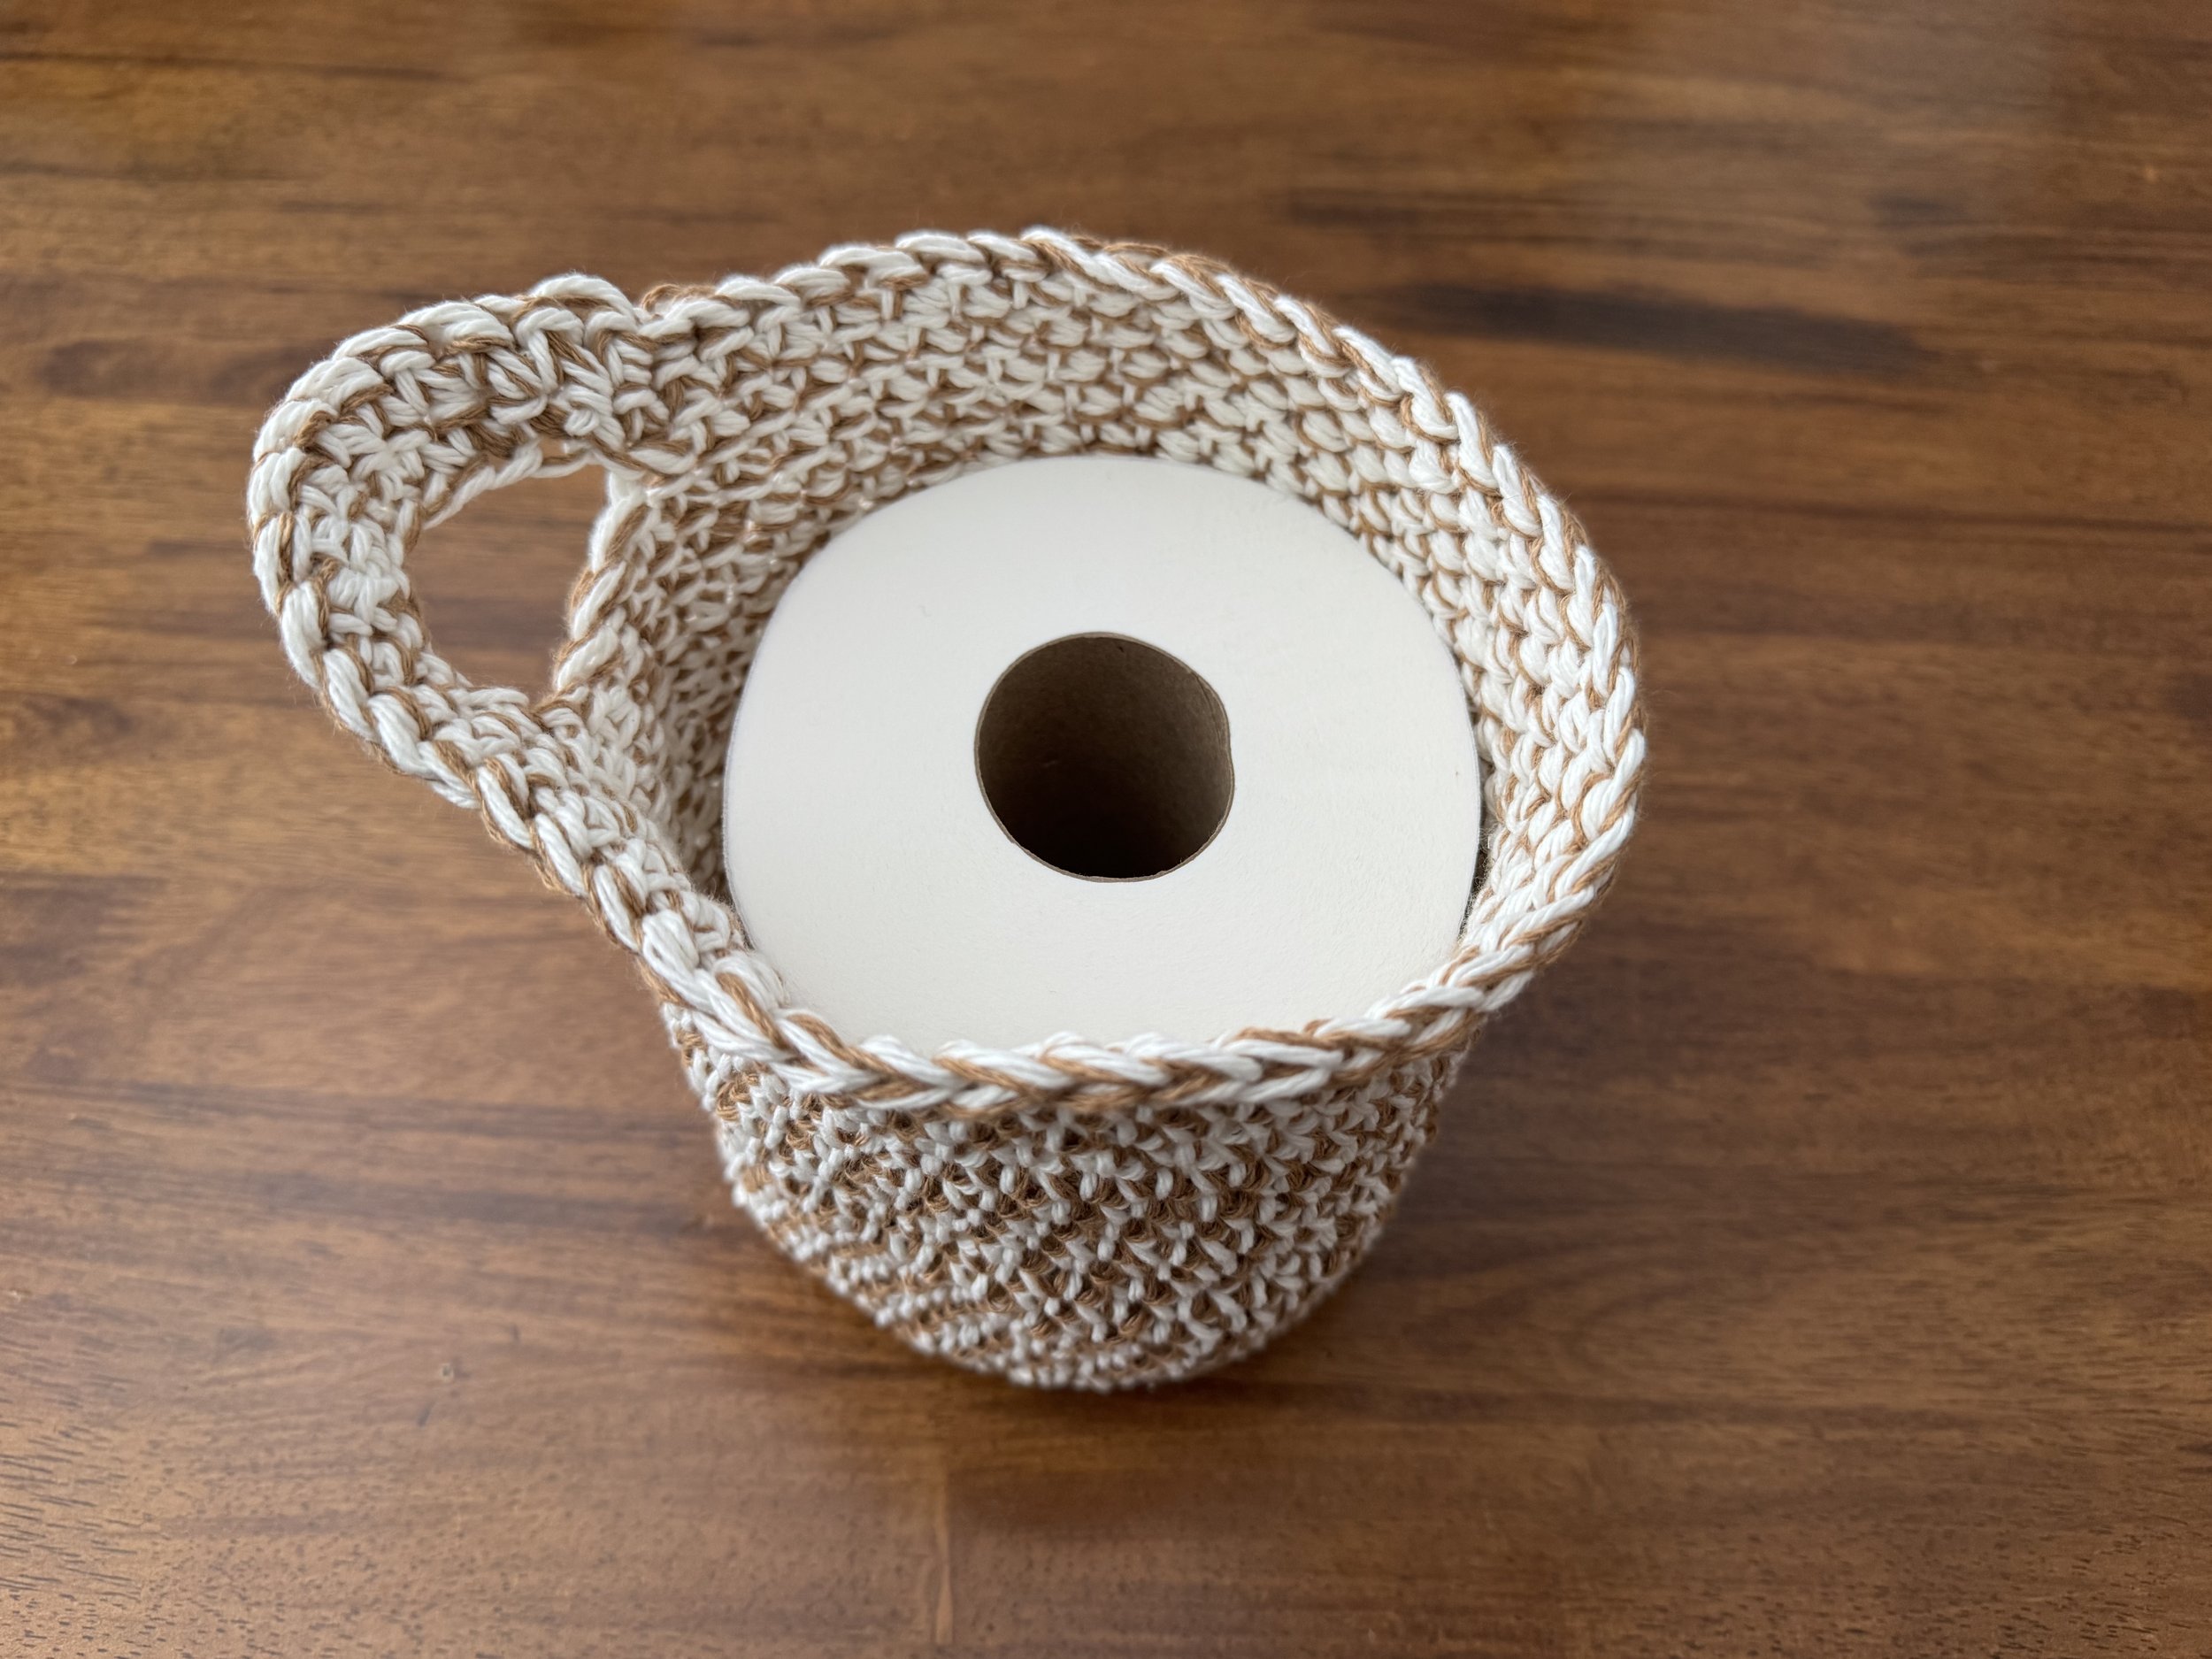
all done
-
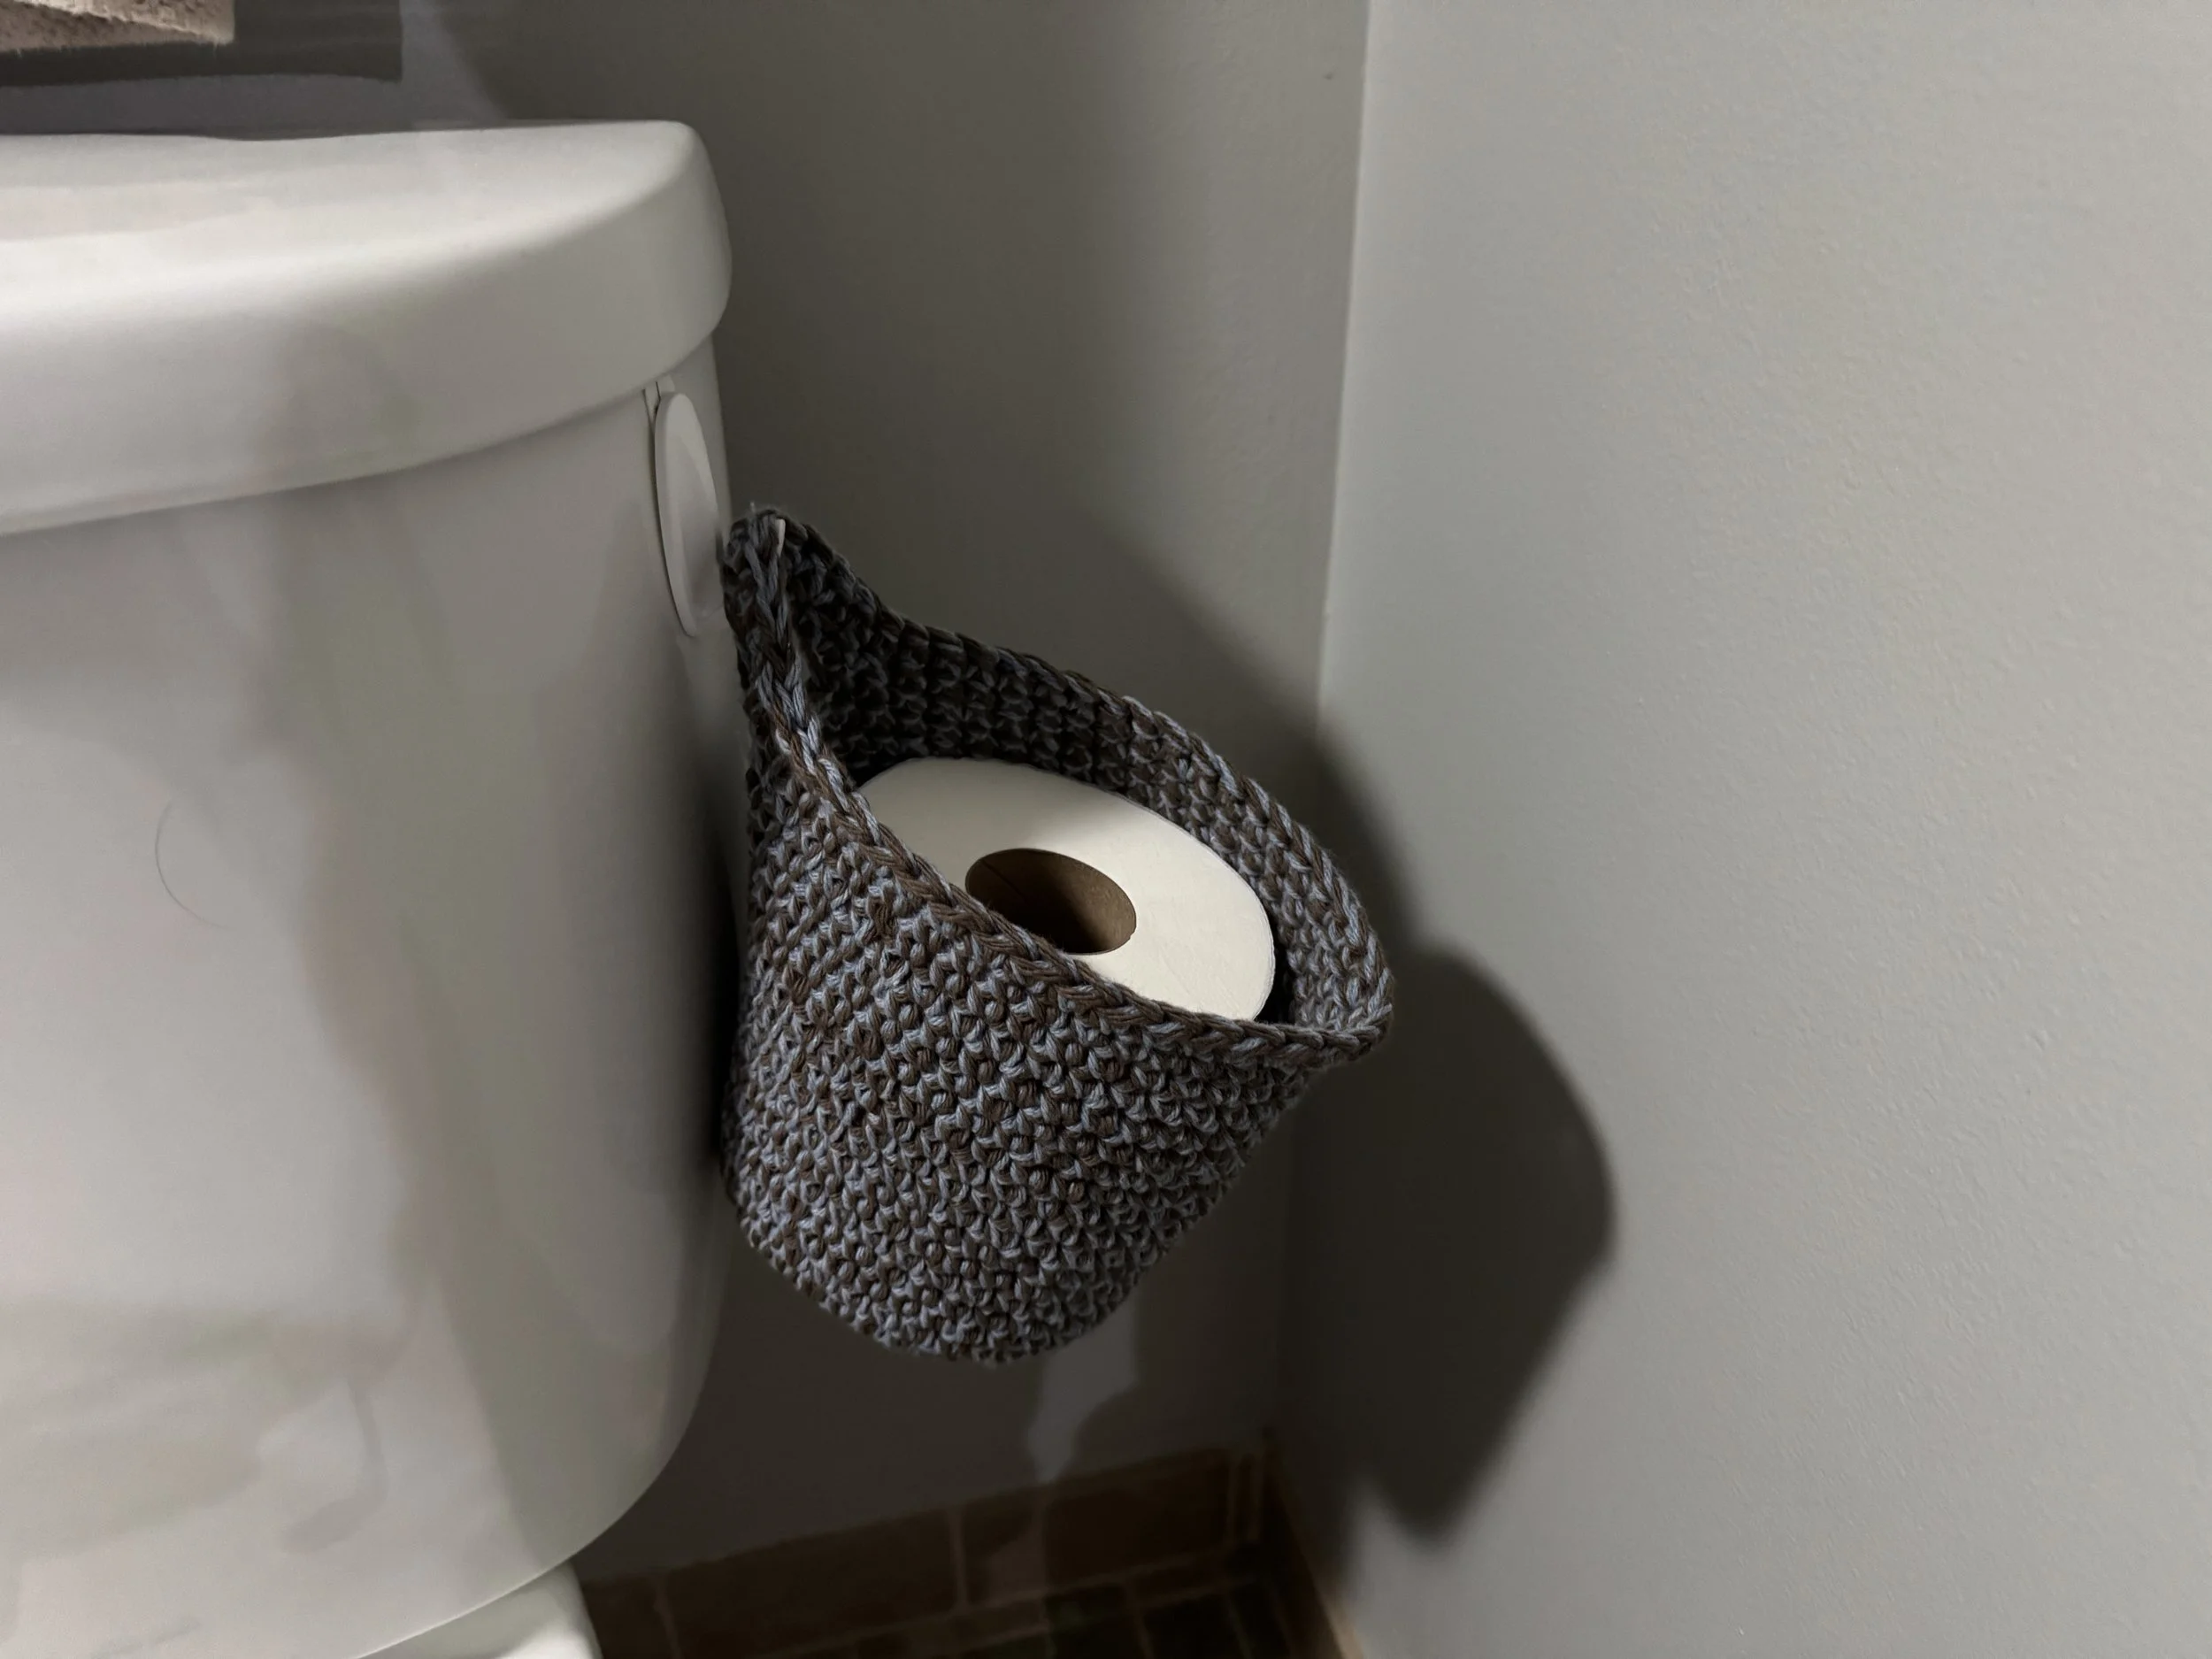
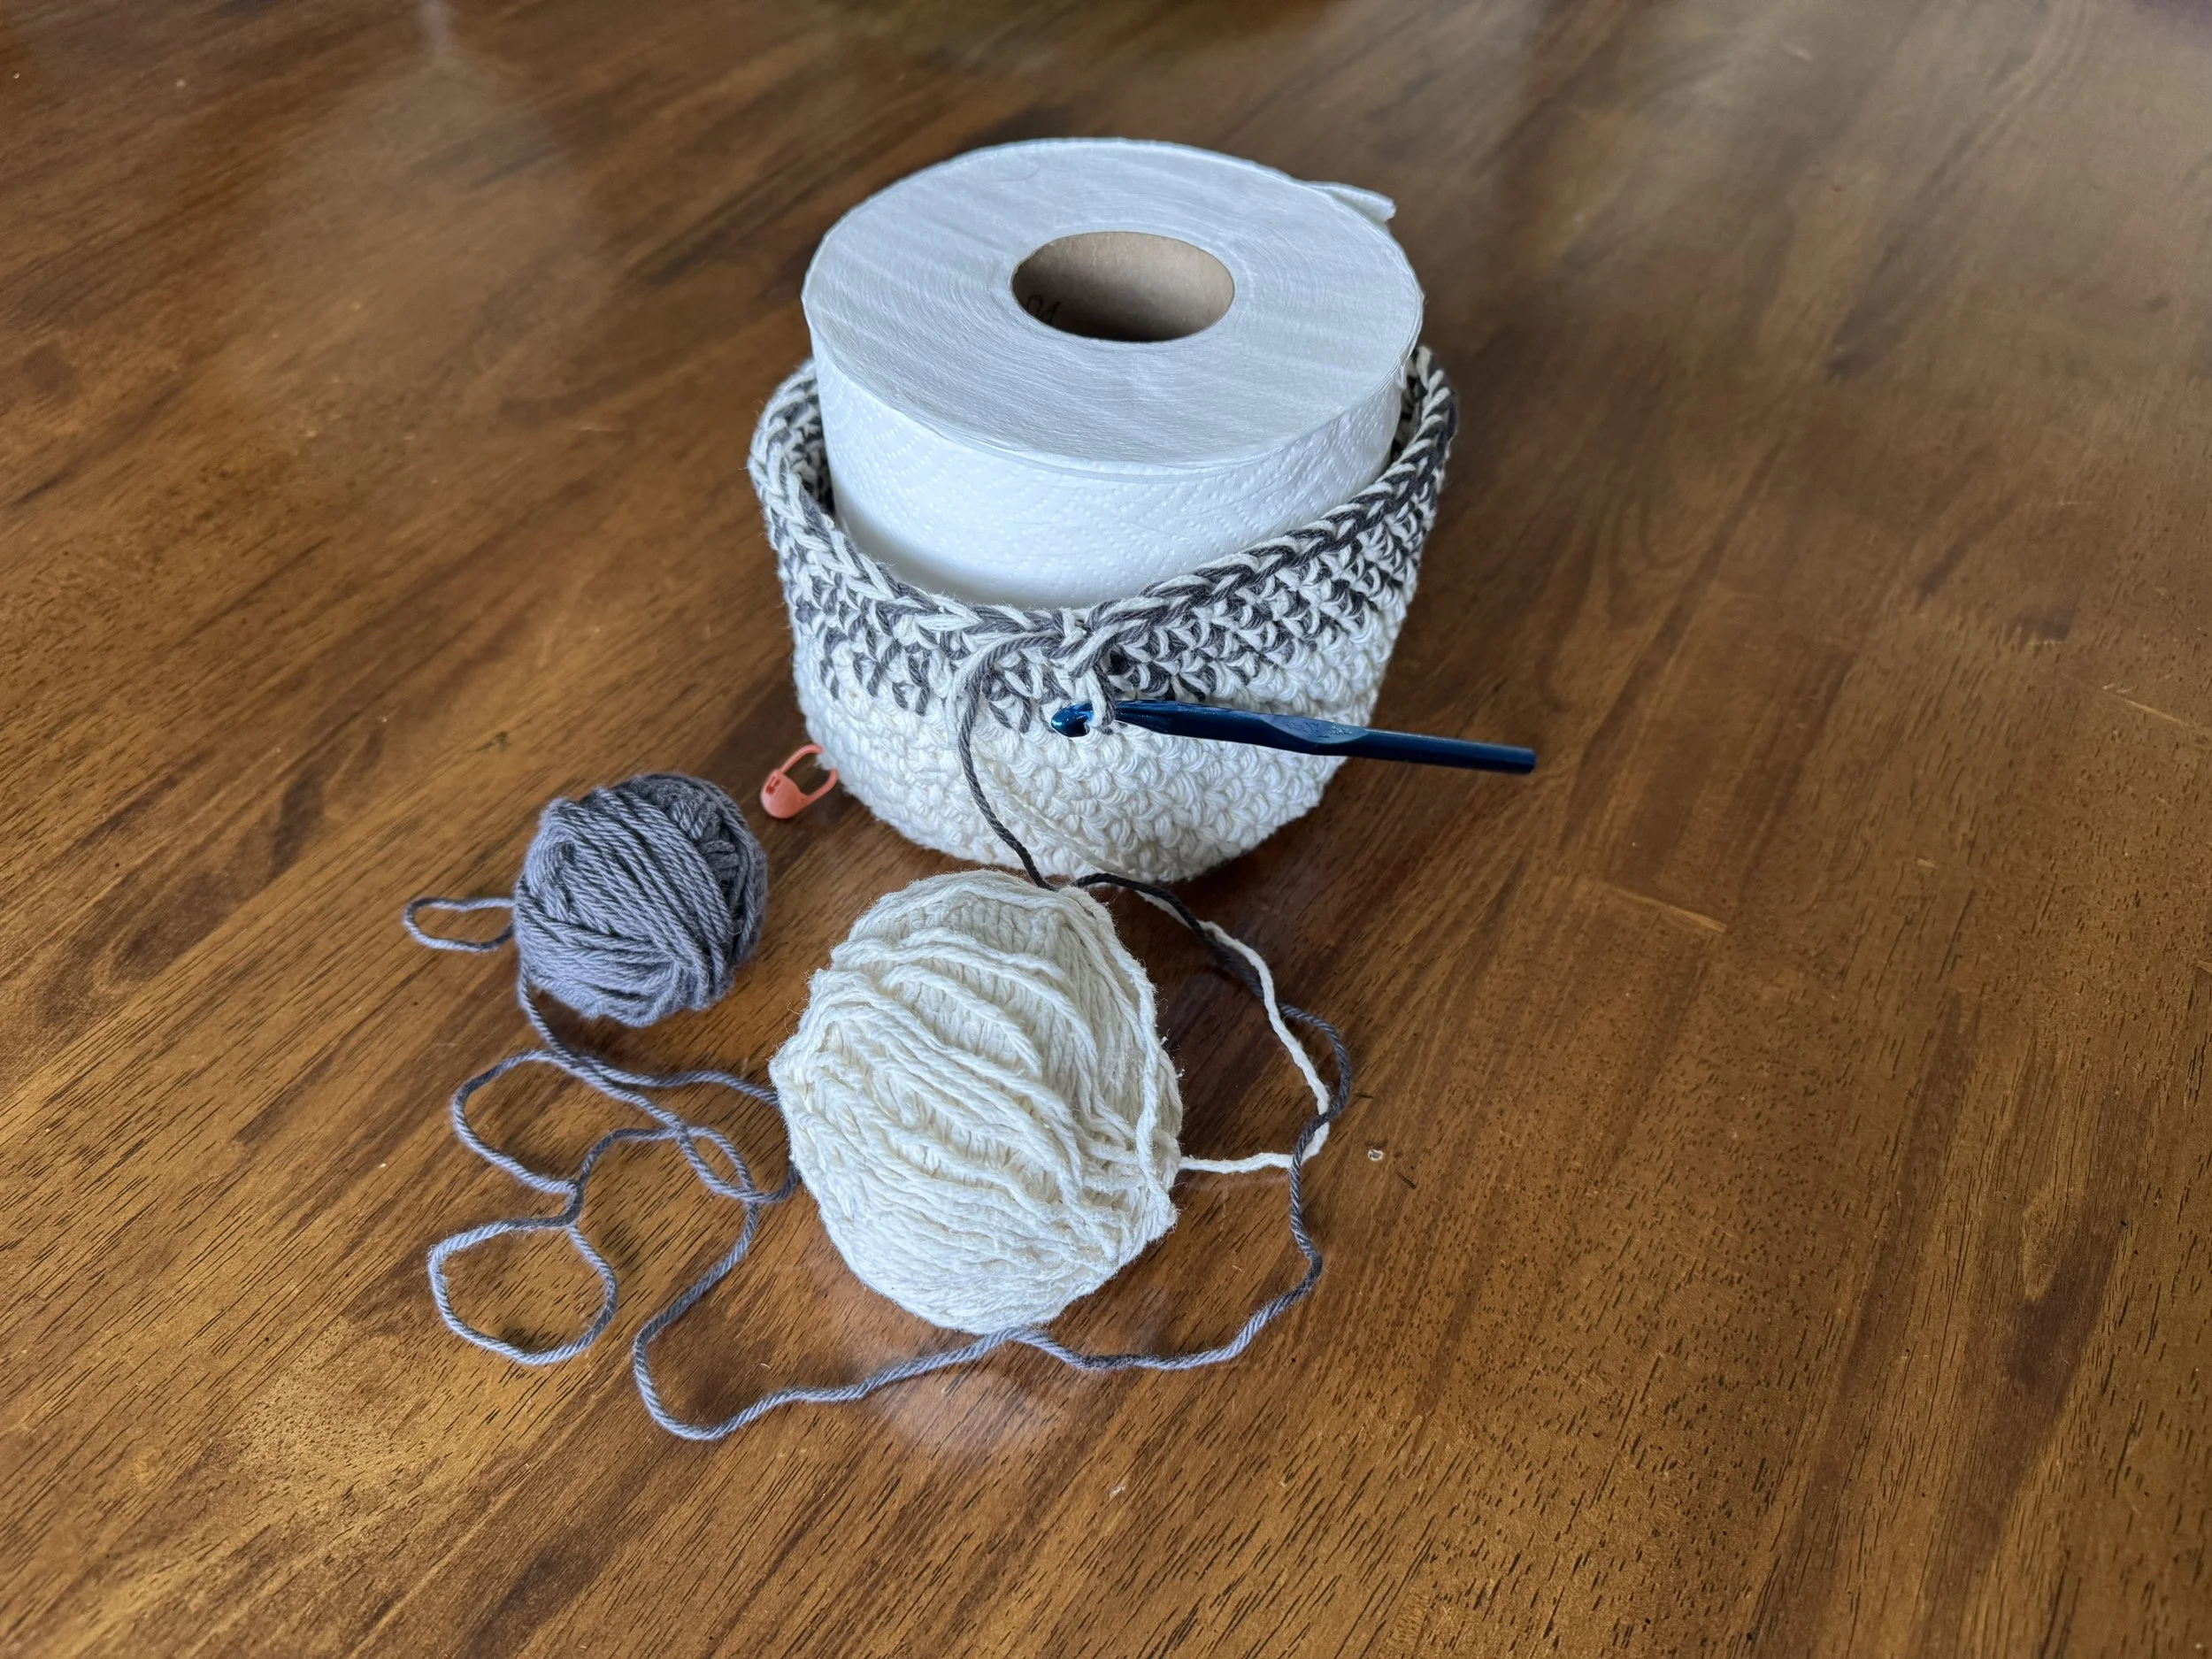
here is one in action
or rather, waiting for its turn to shine.
-
just a couple more
I am so very close to using up all of my random cotton bits that I am going to try to make two more.
-
cumberbund
For our elegant new bathroom in the farmhouse, I though a white one with a strip of gray in the middle would work well.
-
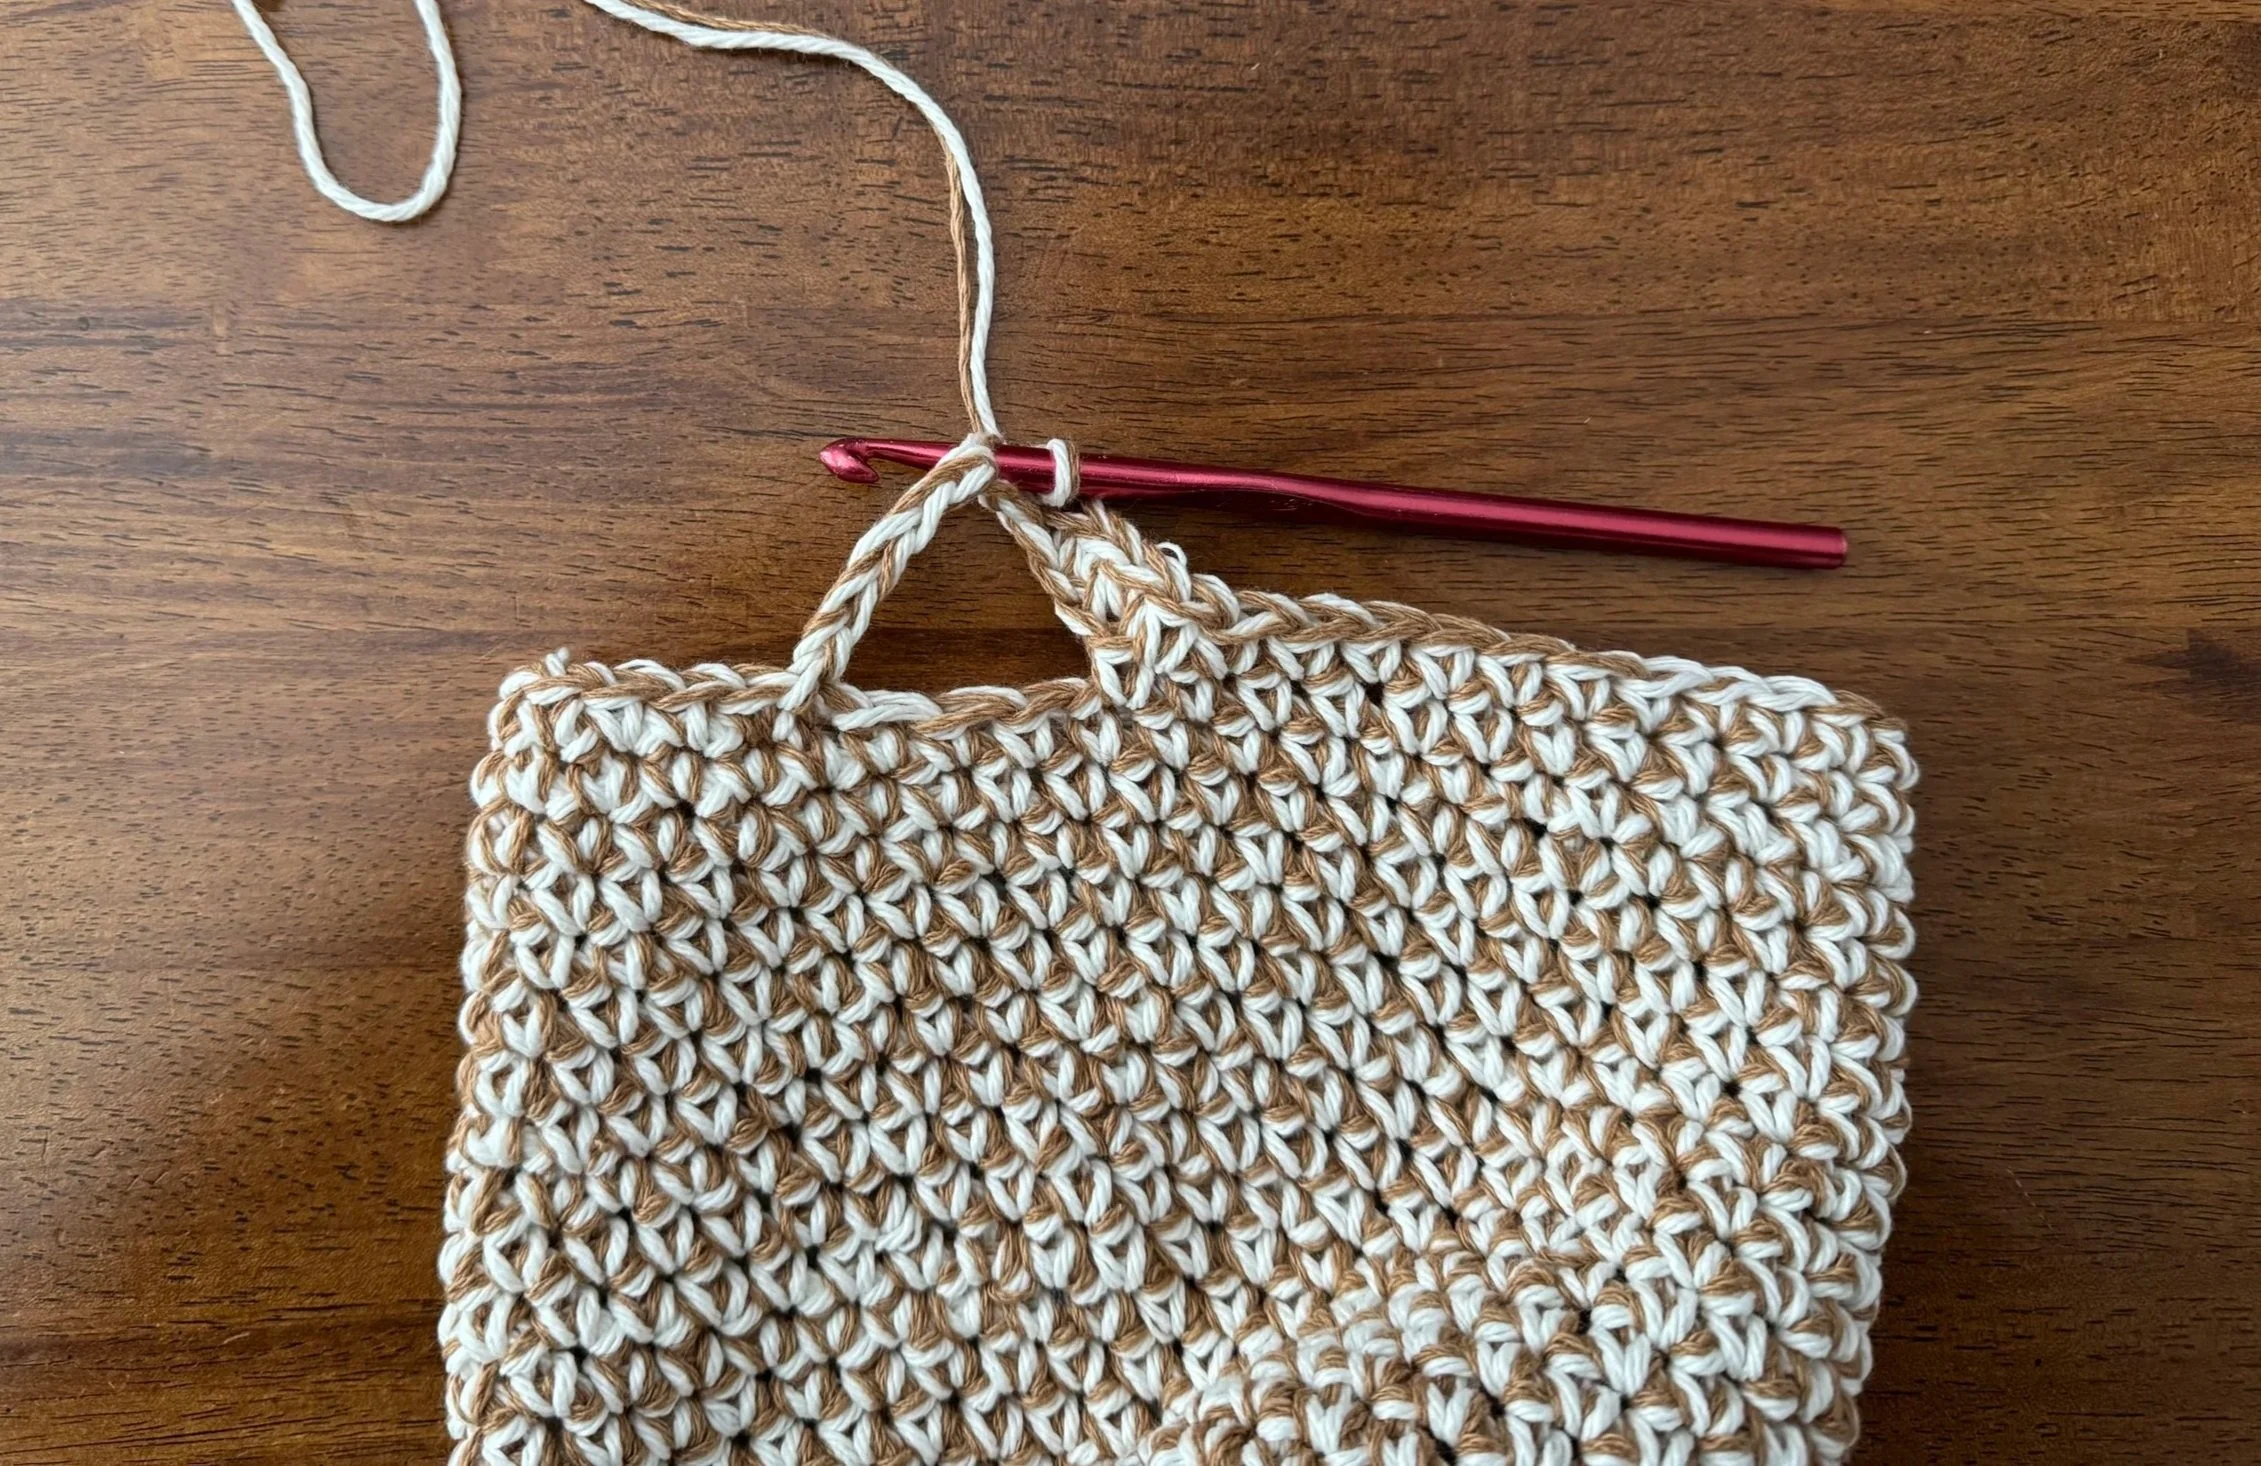
new hanging loop
I just chained 10 and then single-crocheted right next to the first chain, and then sc’d my way back around. Fastened it off, wove it in, and there it is.
-
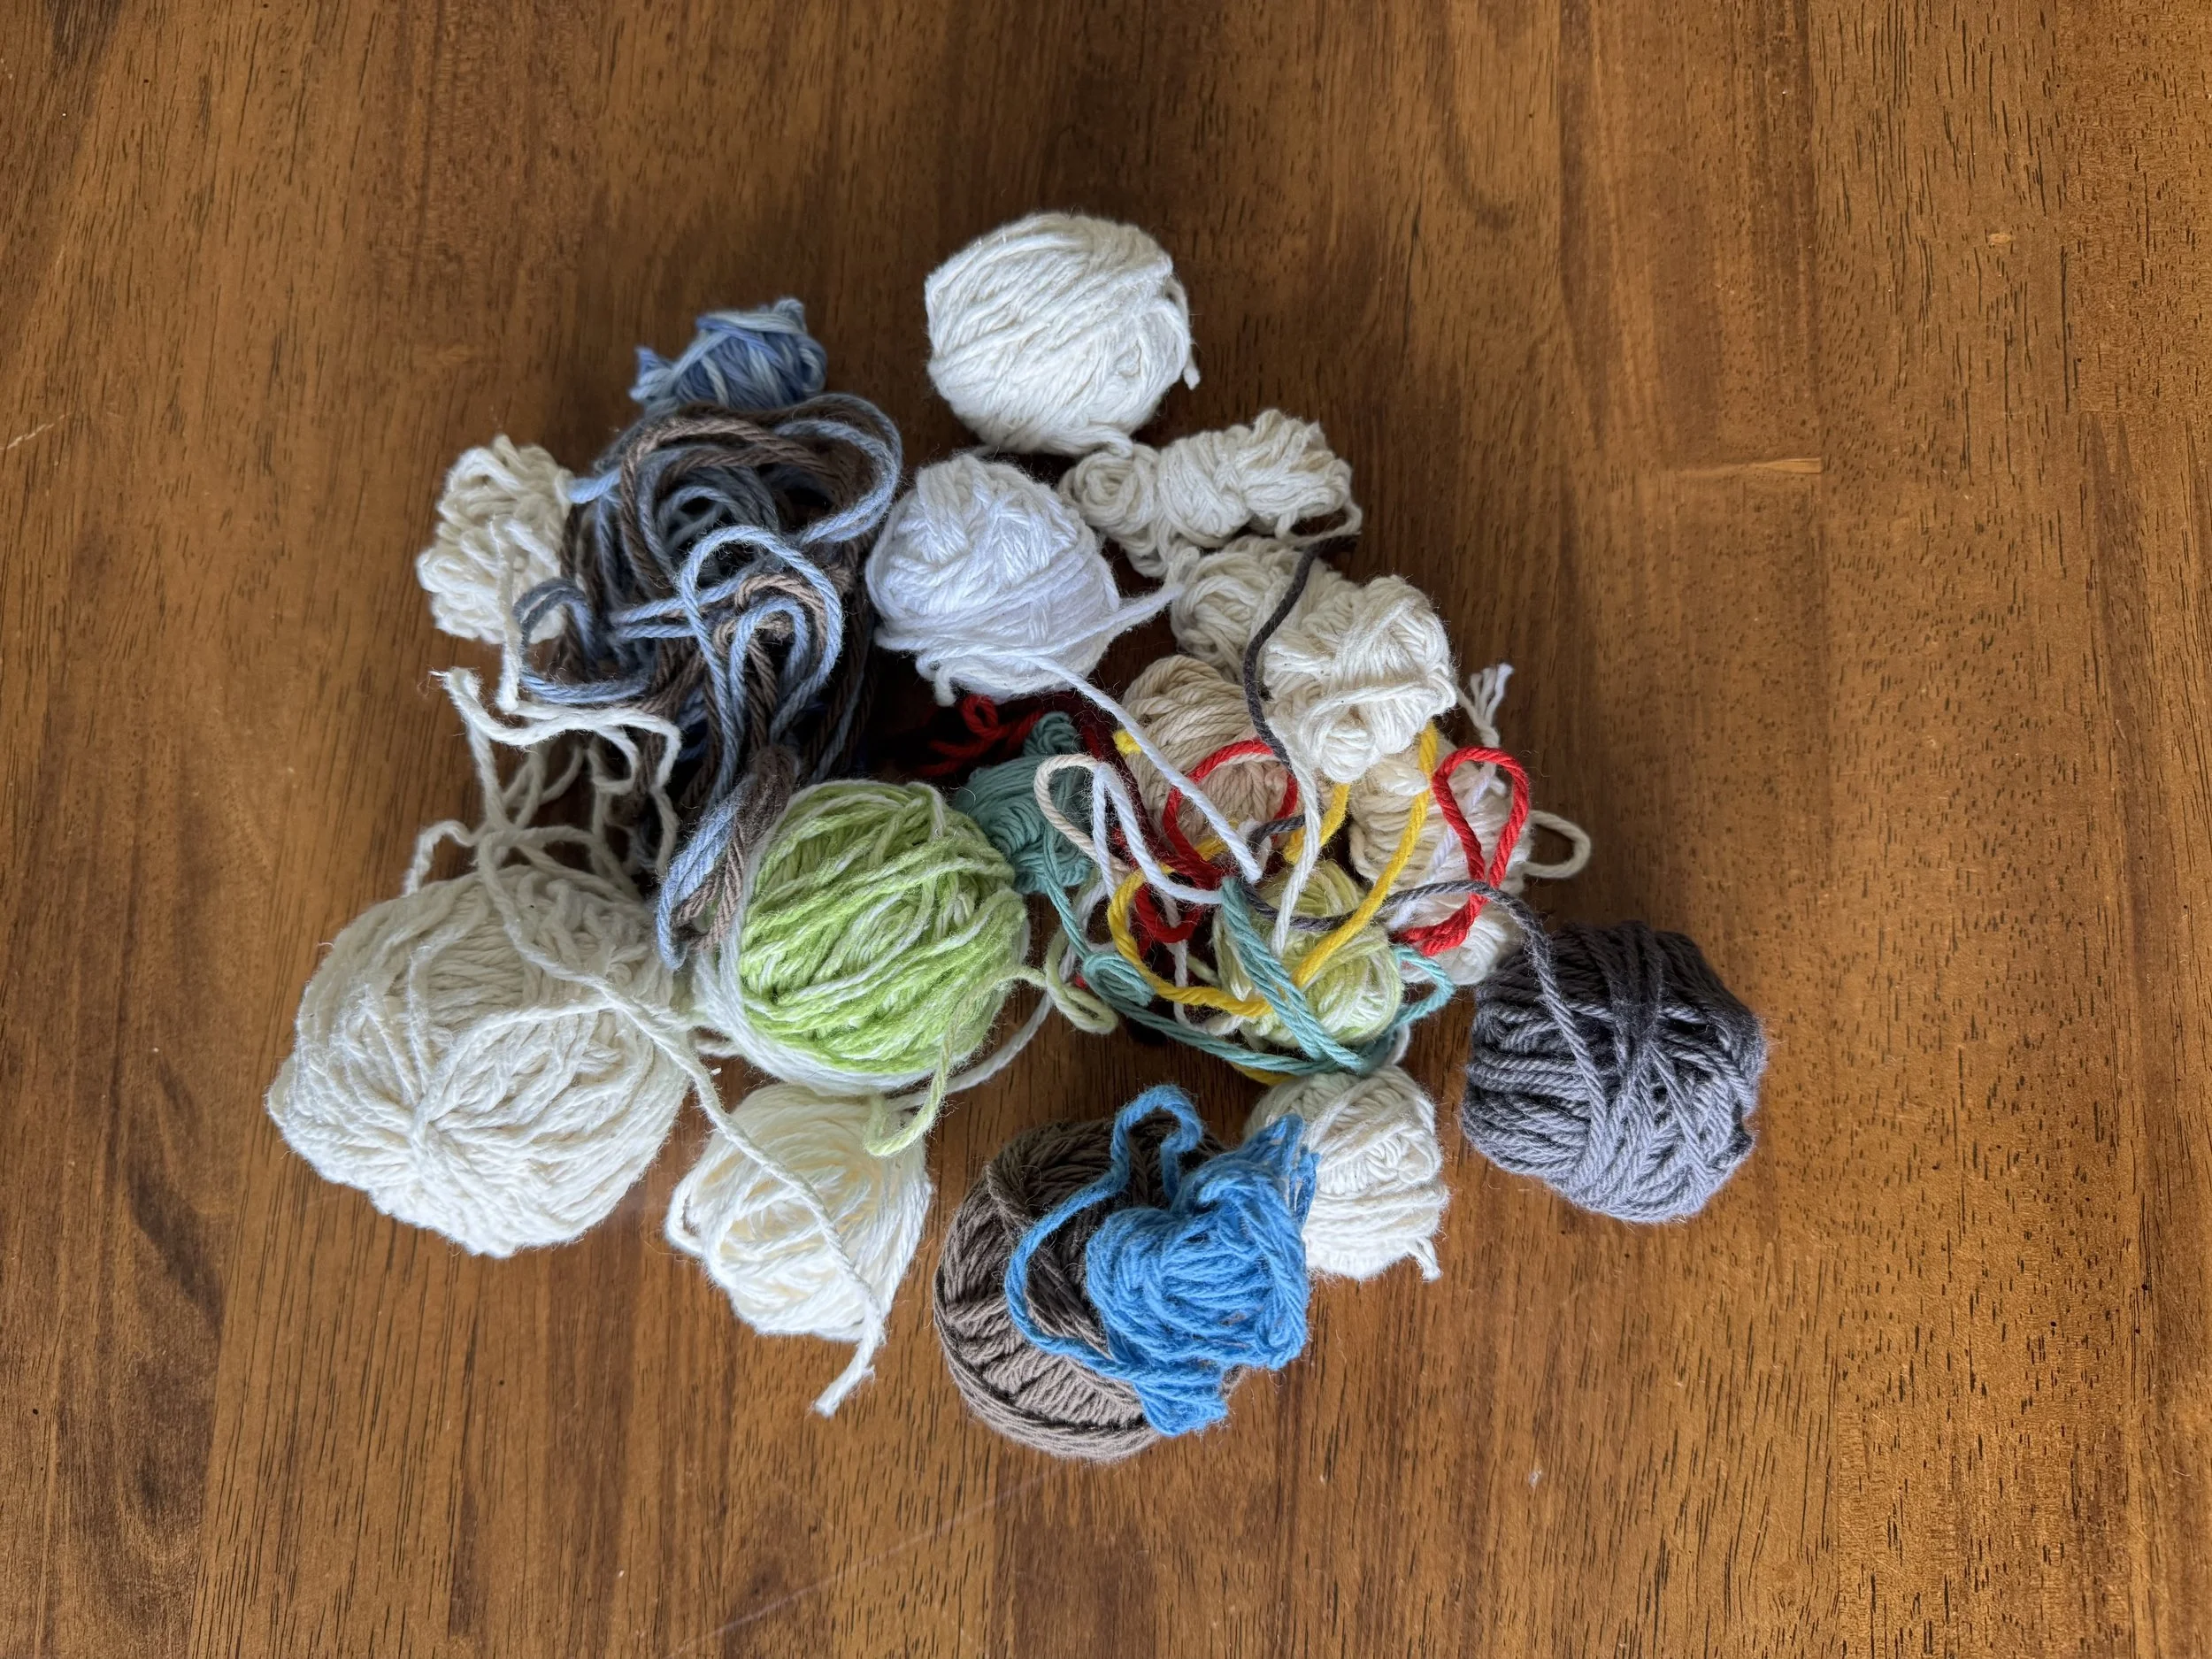
this is what I have left
I am not sure if this will be enough yarn for another basket, but we shall see.
-
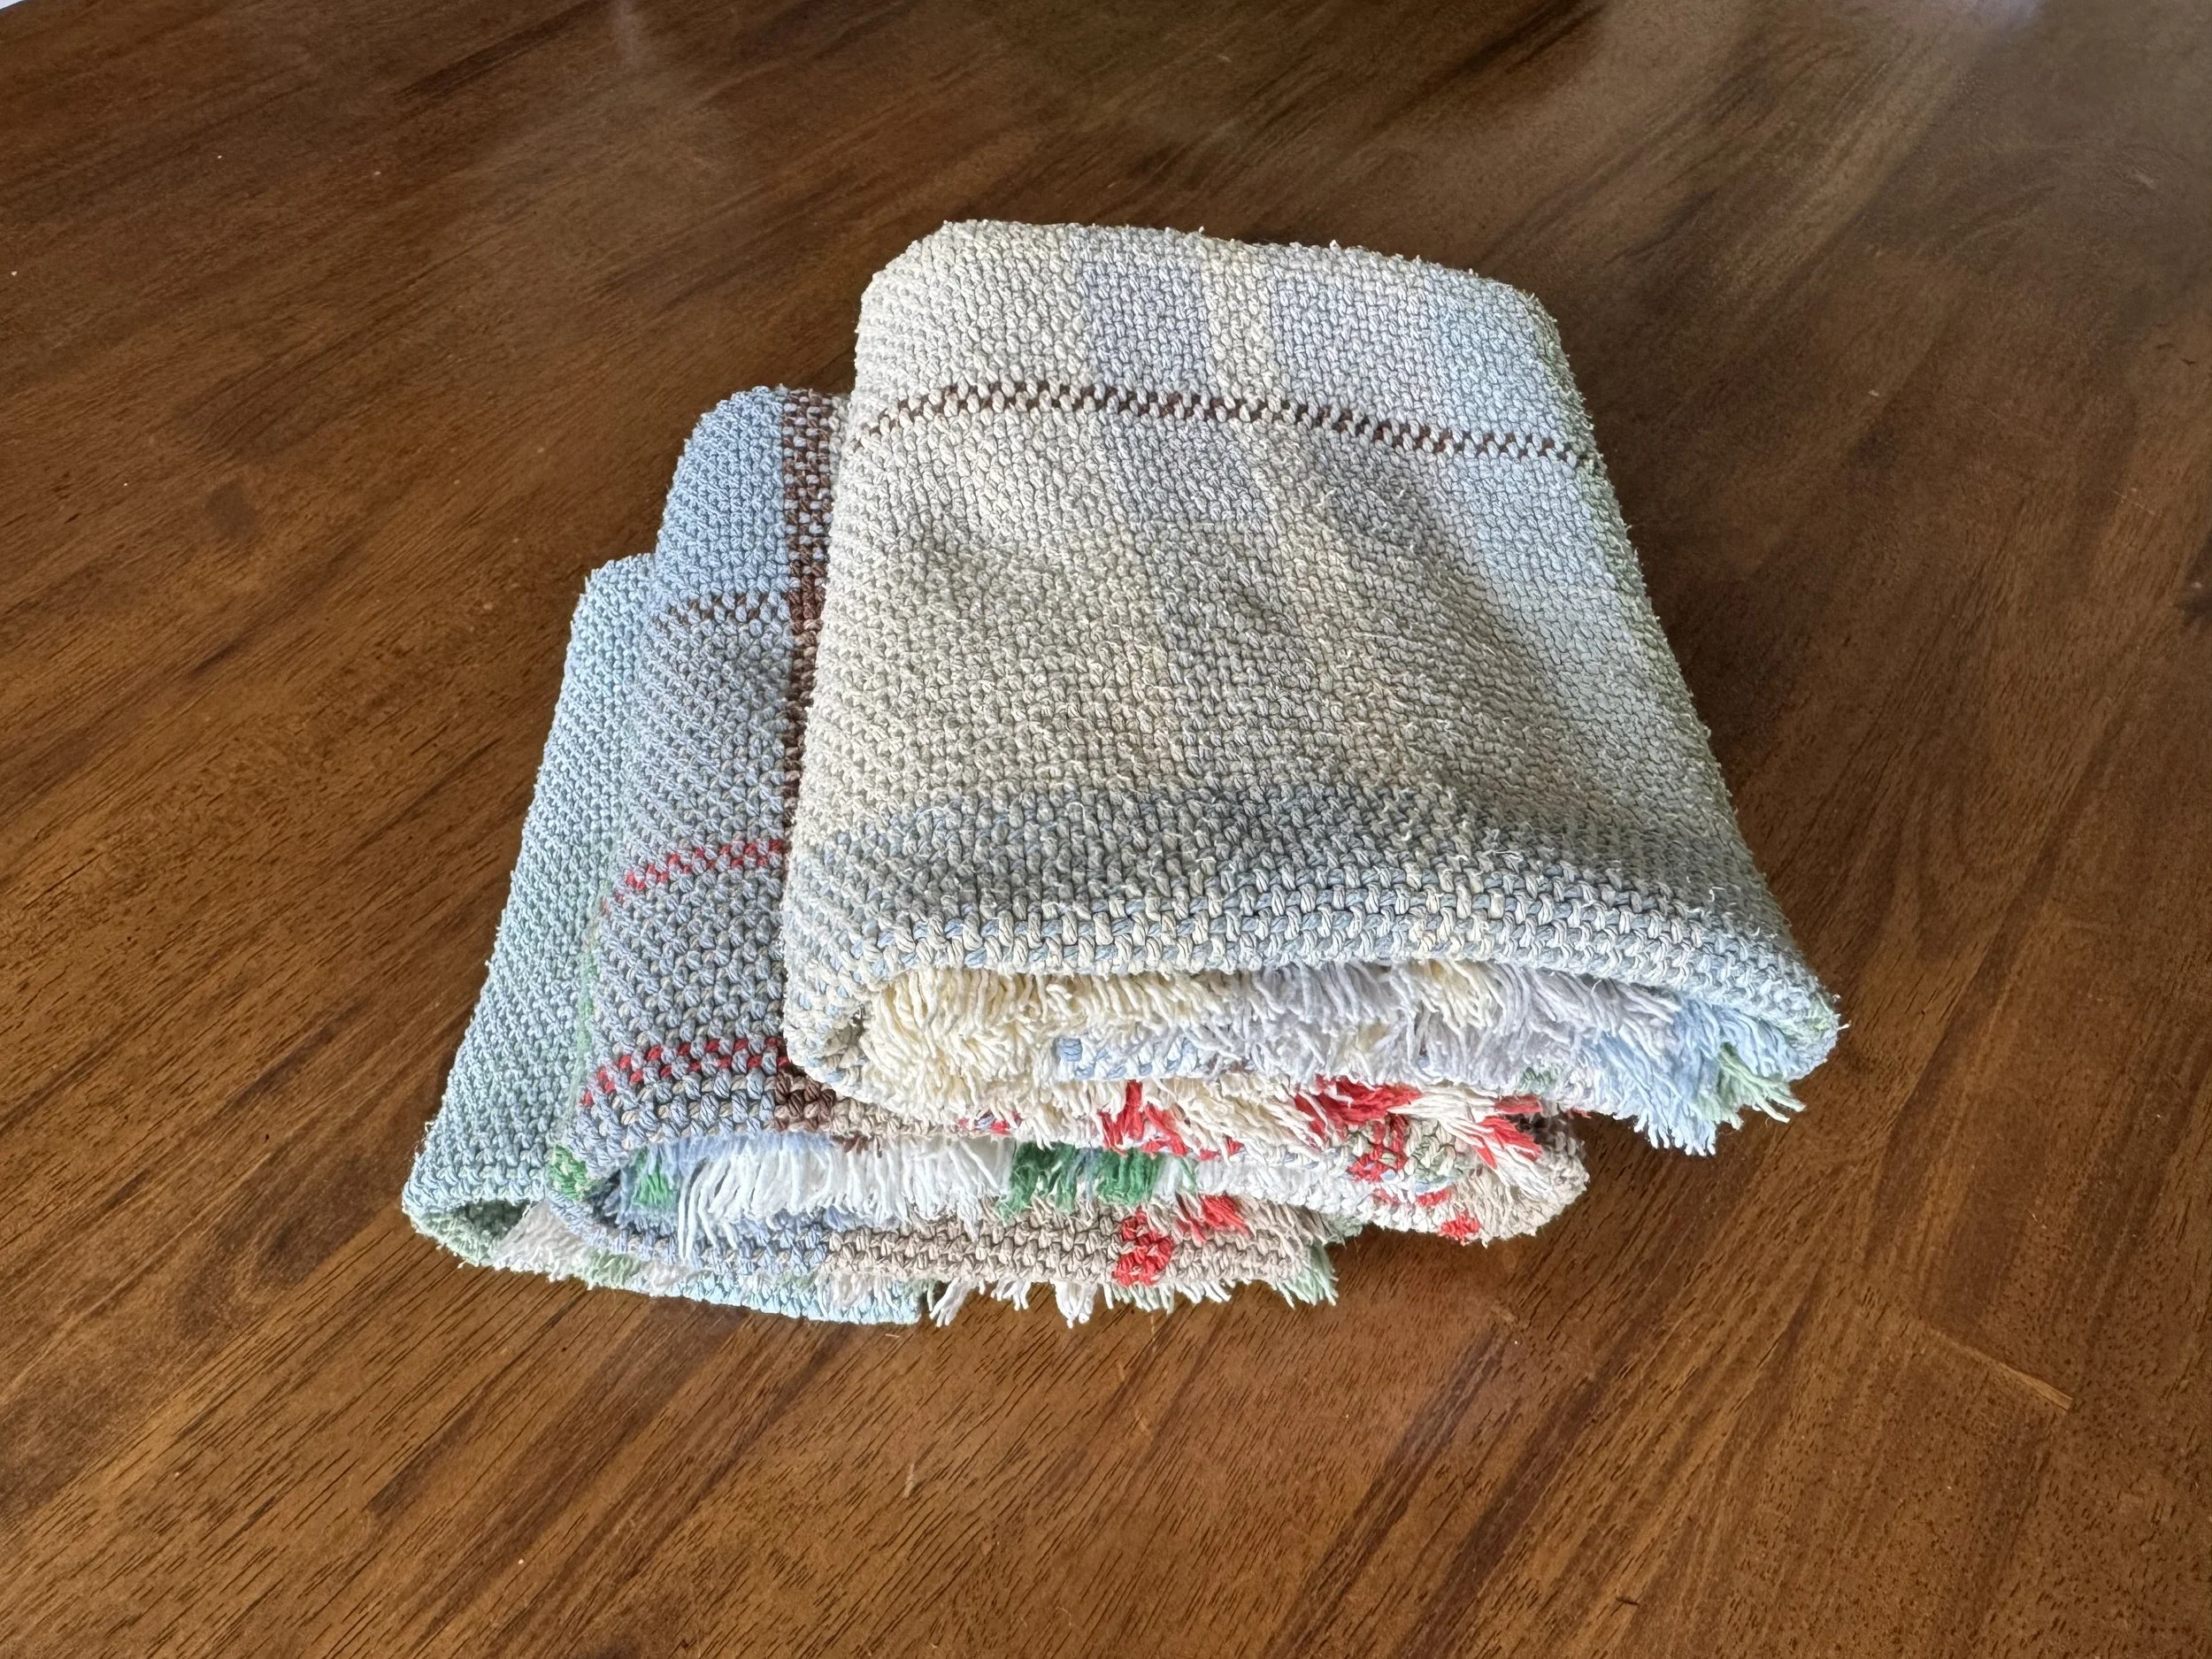
how I used most of the cotton
These are some of the towels I wove in my first efforts to get rid of my random cotton skeins. We use them to dry our hands in the kitchen and they have lasted well for several years already. They are made with the (once) inexpensive cotton you can get at craft stores.
-
the base
I love it - it reminds me of my grandma.
-
other side
-
barely big enough
I could not bring myself to use the two really dark colors, given the 50’s flow that I was getting, so I still have a teeny bit of cotton left. Who knows, maybe I will find another ball or skein rolling around somewhere and will be able to use these guys up, too.
-

yes!
-
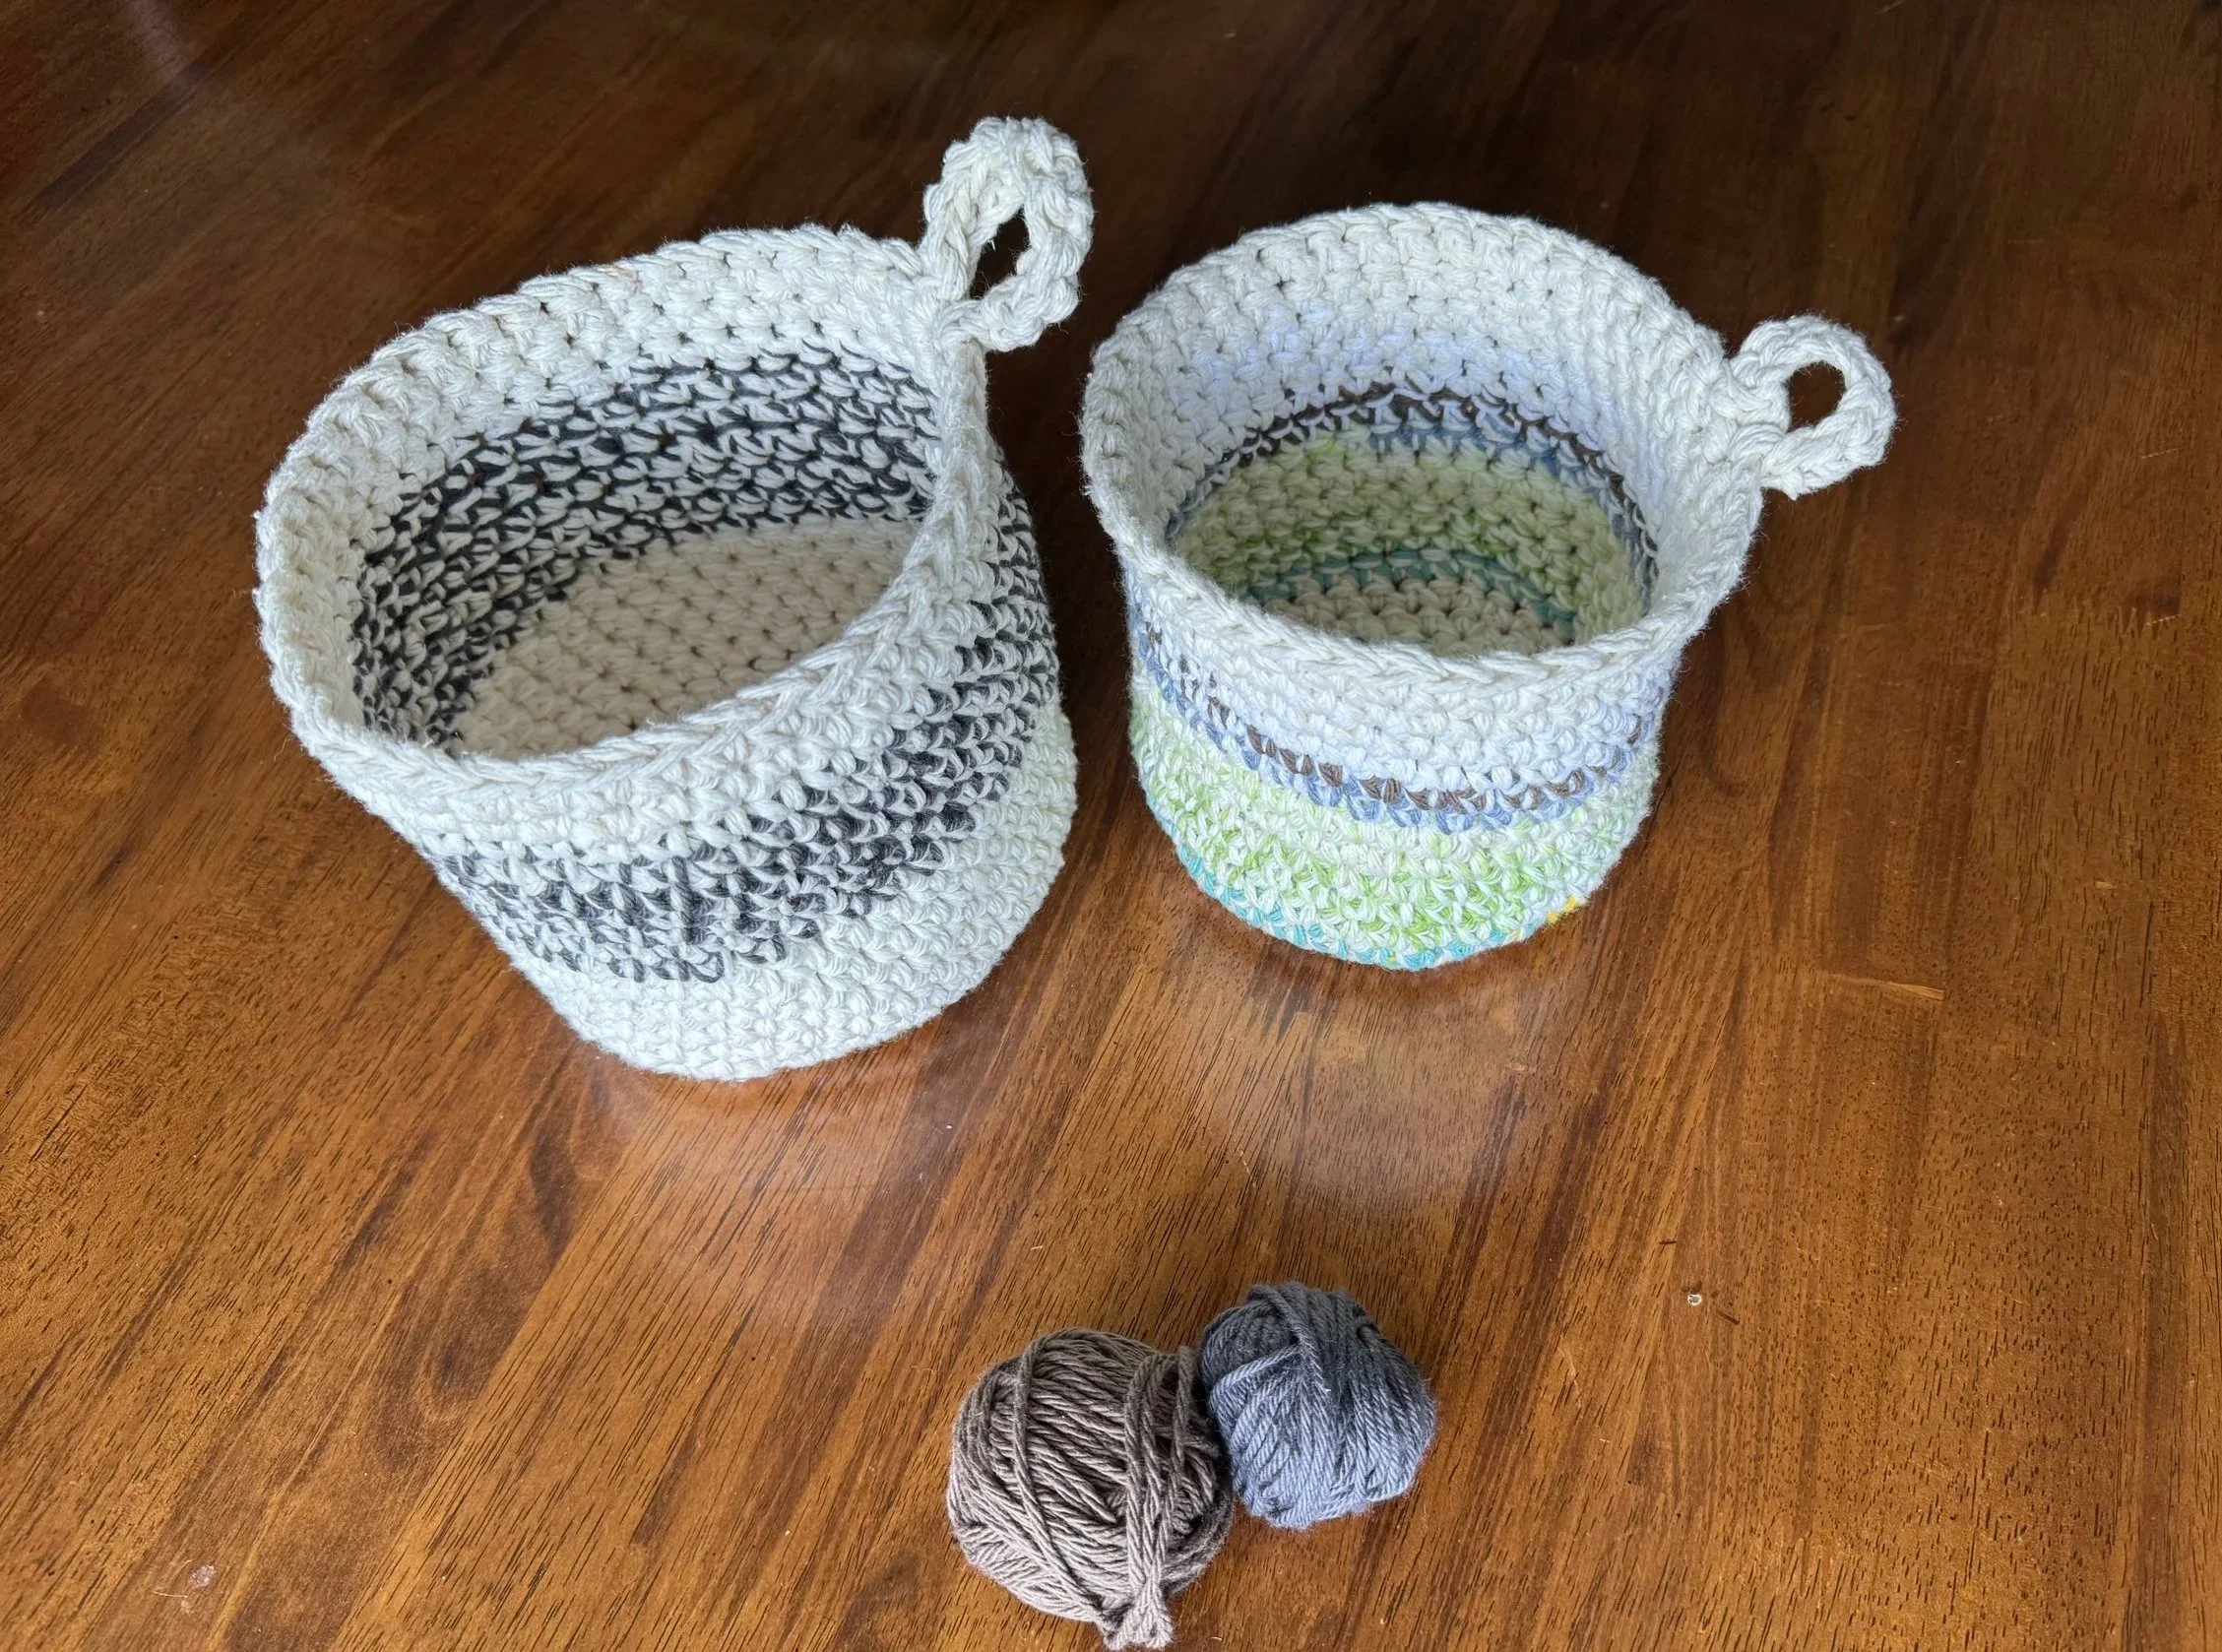
two sizes
But the roll fits in both of them just fine. It is nice to know that we have options.