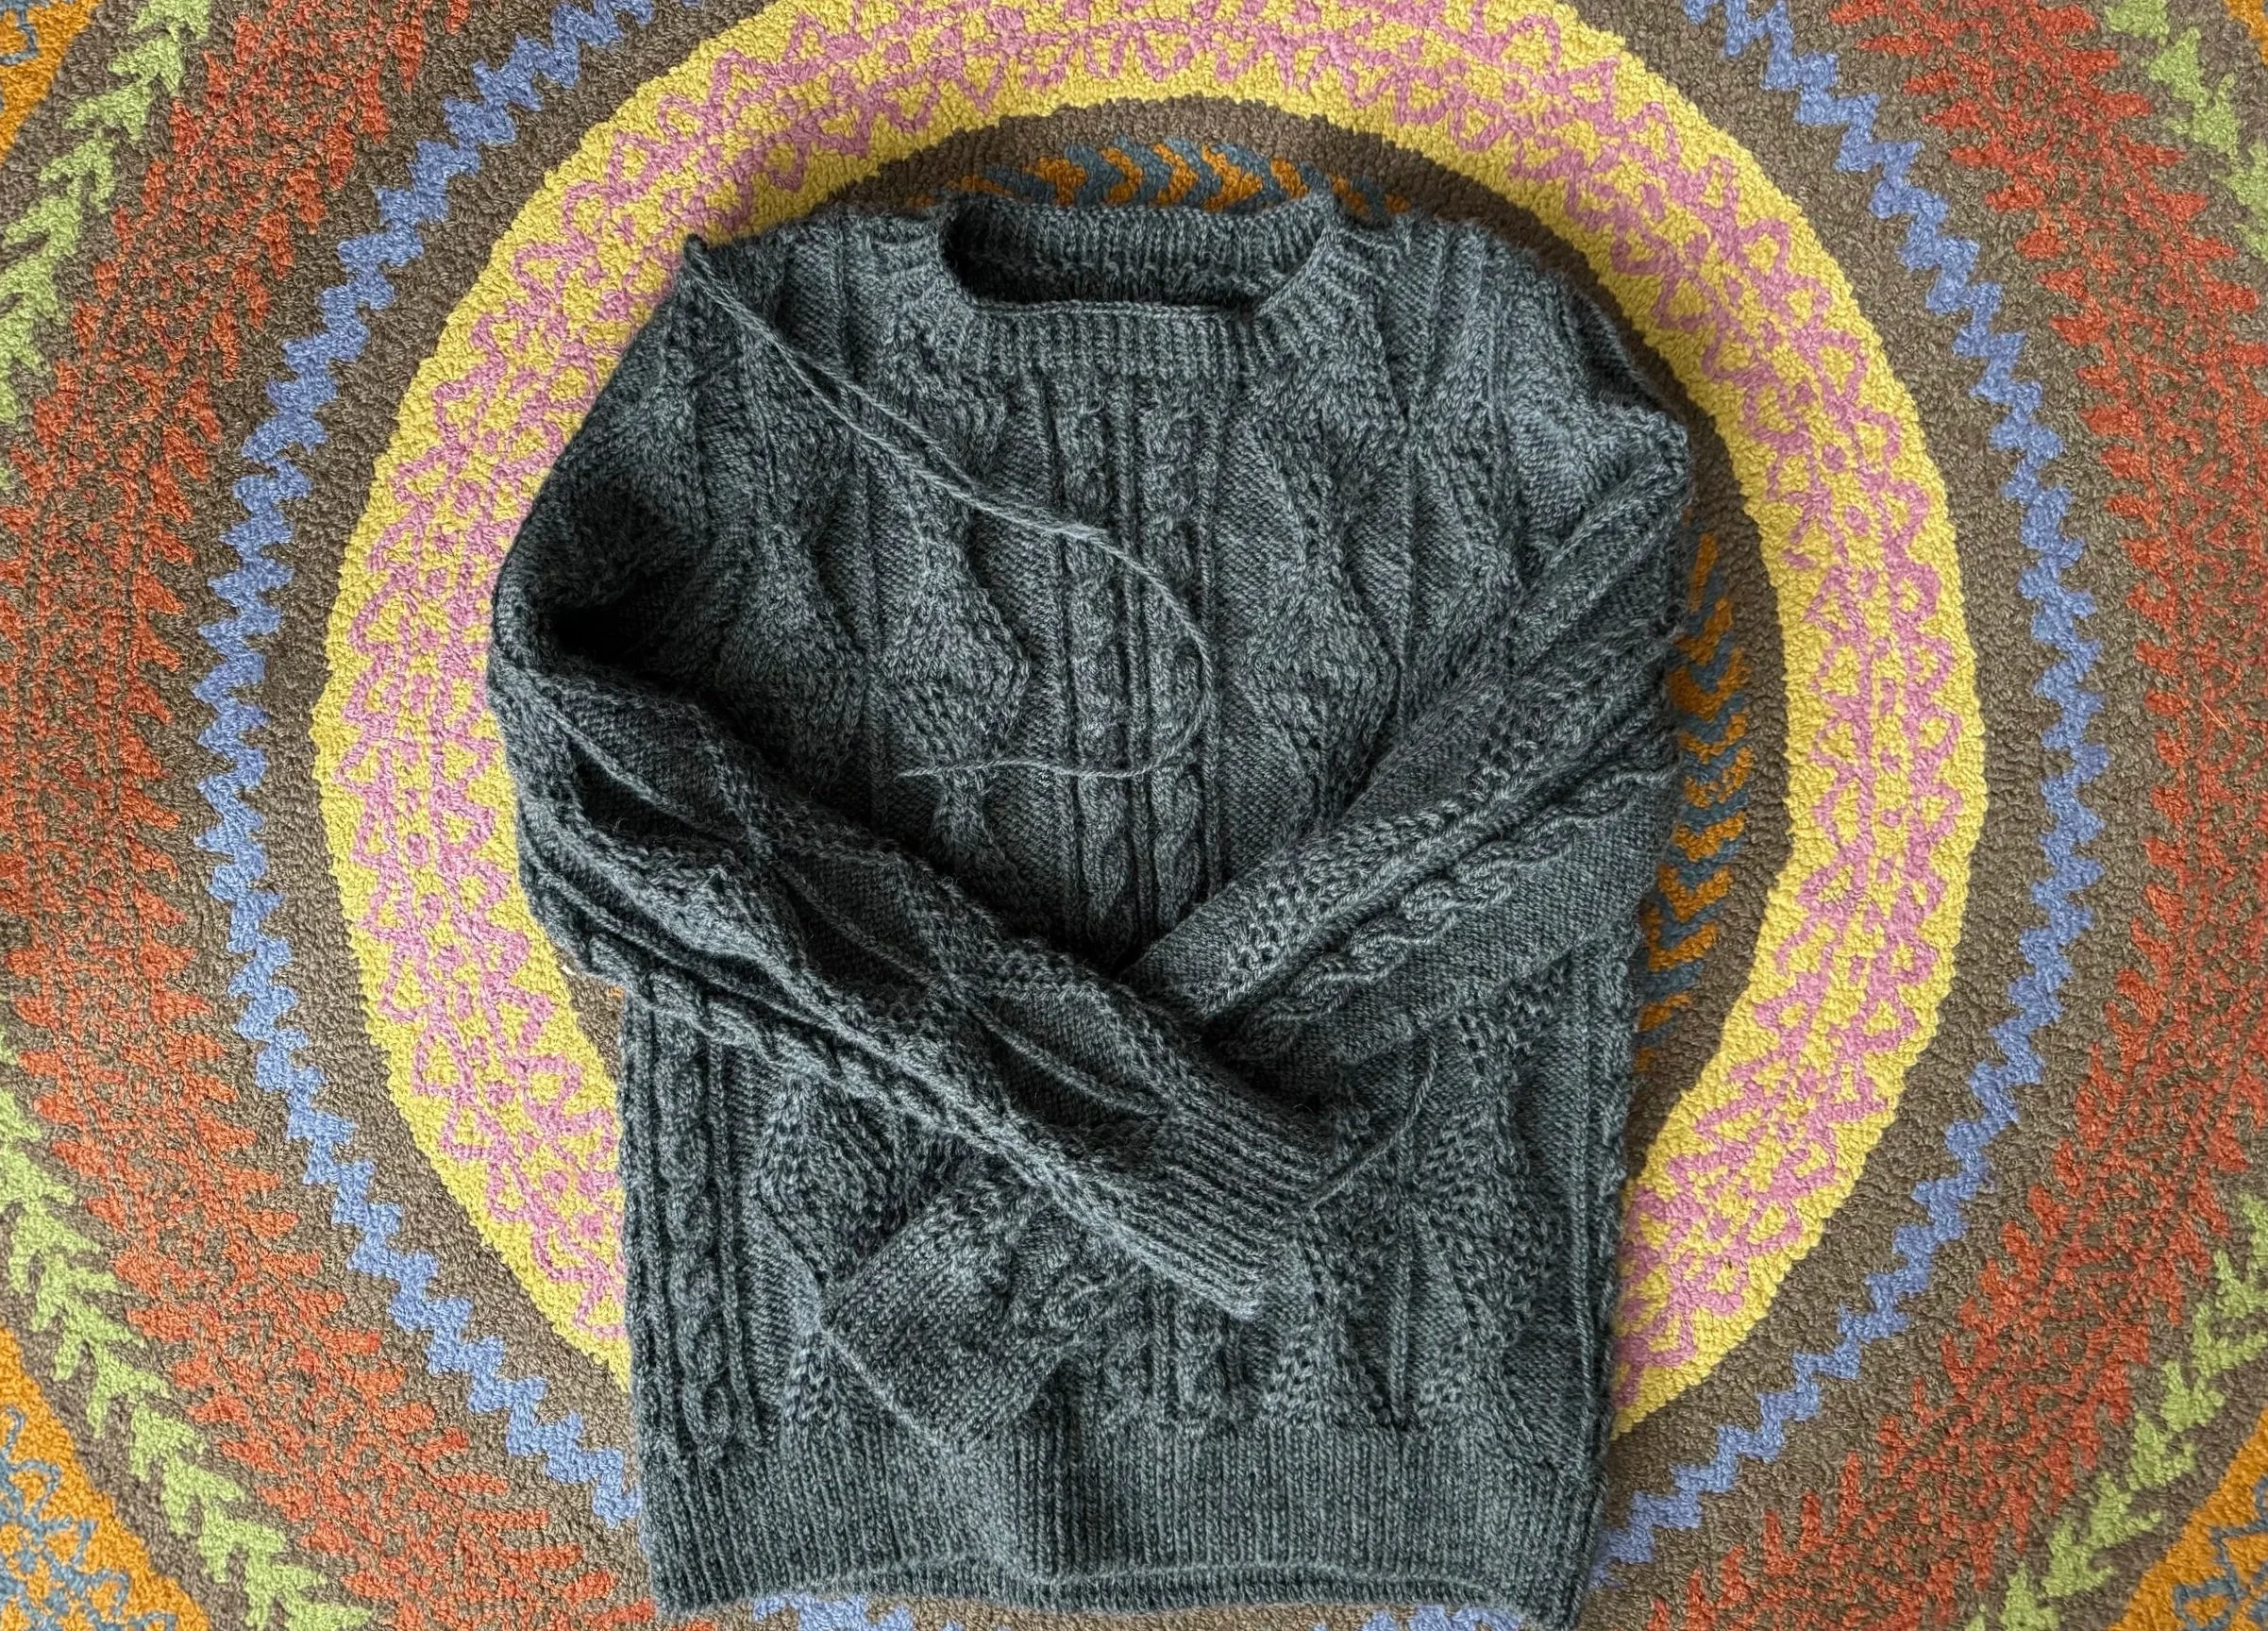
an aran sweater
-
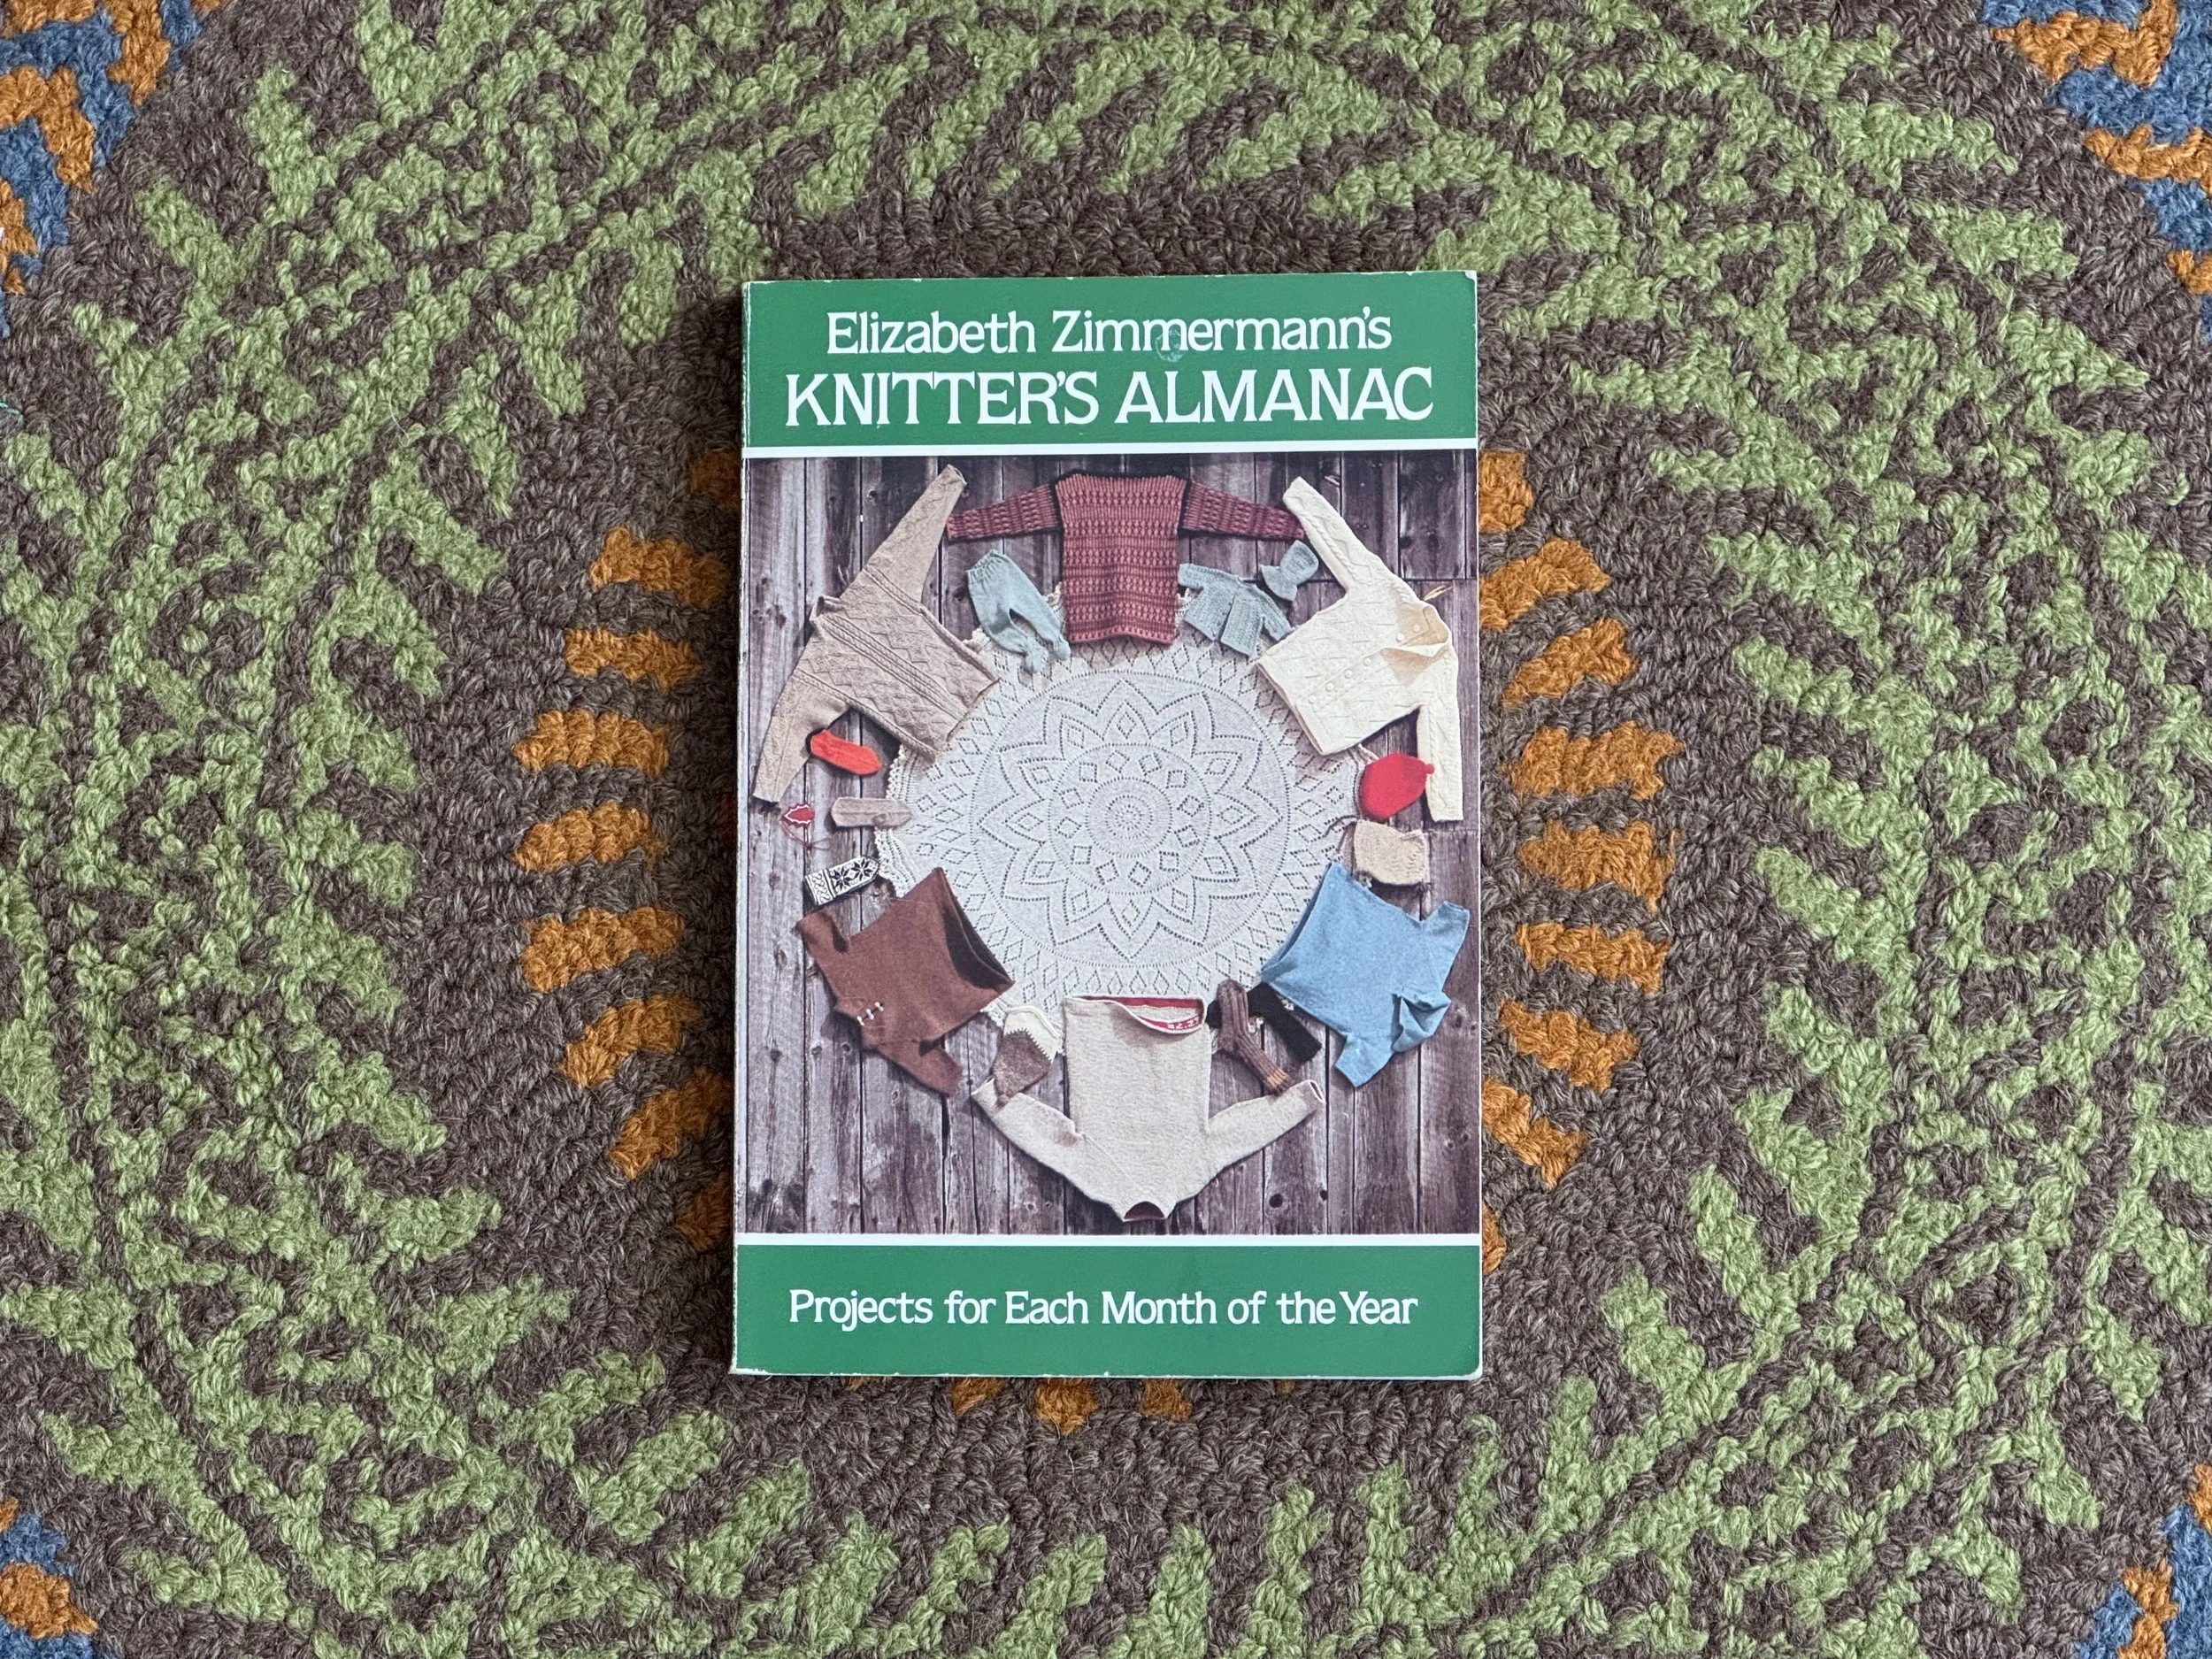
do you know this book?
It was written by the supreme Elizabeth Zimmermann and everyone deserves to enjoy it. I am in my very small way emulating the great EZ by making a January Aran sweater, and I am making use of her stitch pattern and a lot of her excellent advice.
-
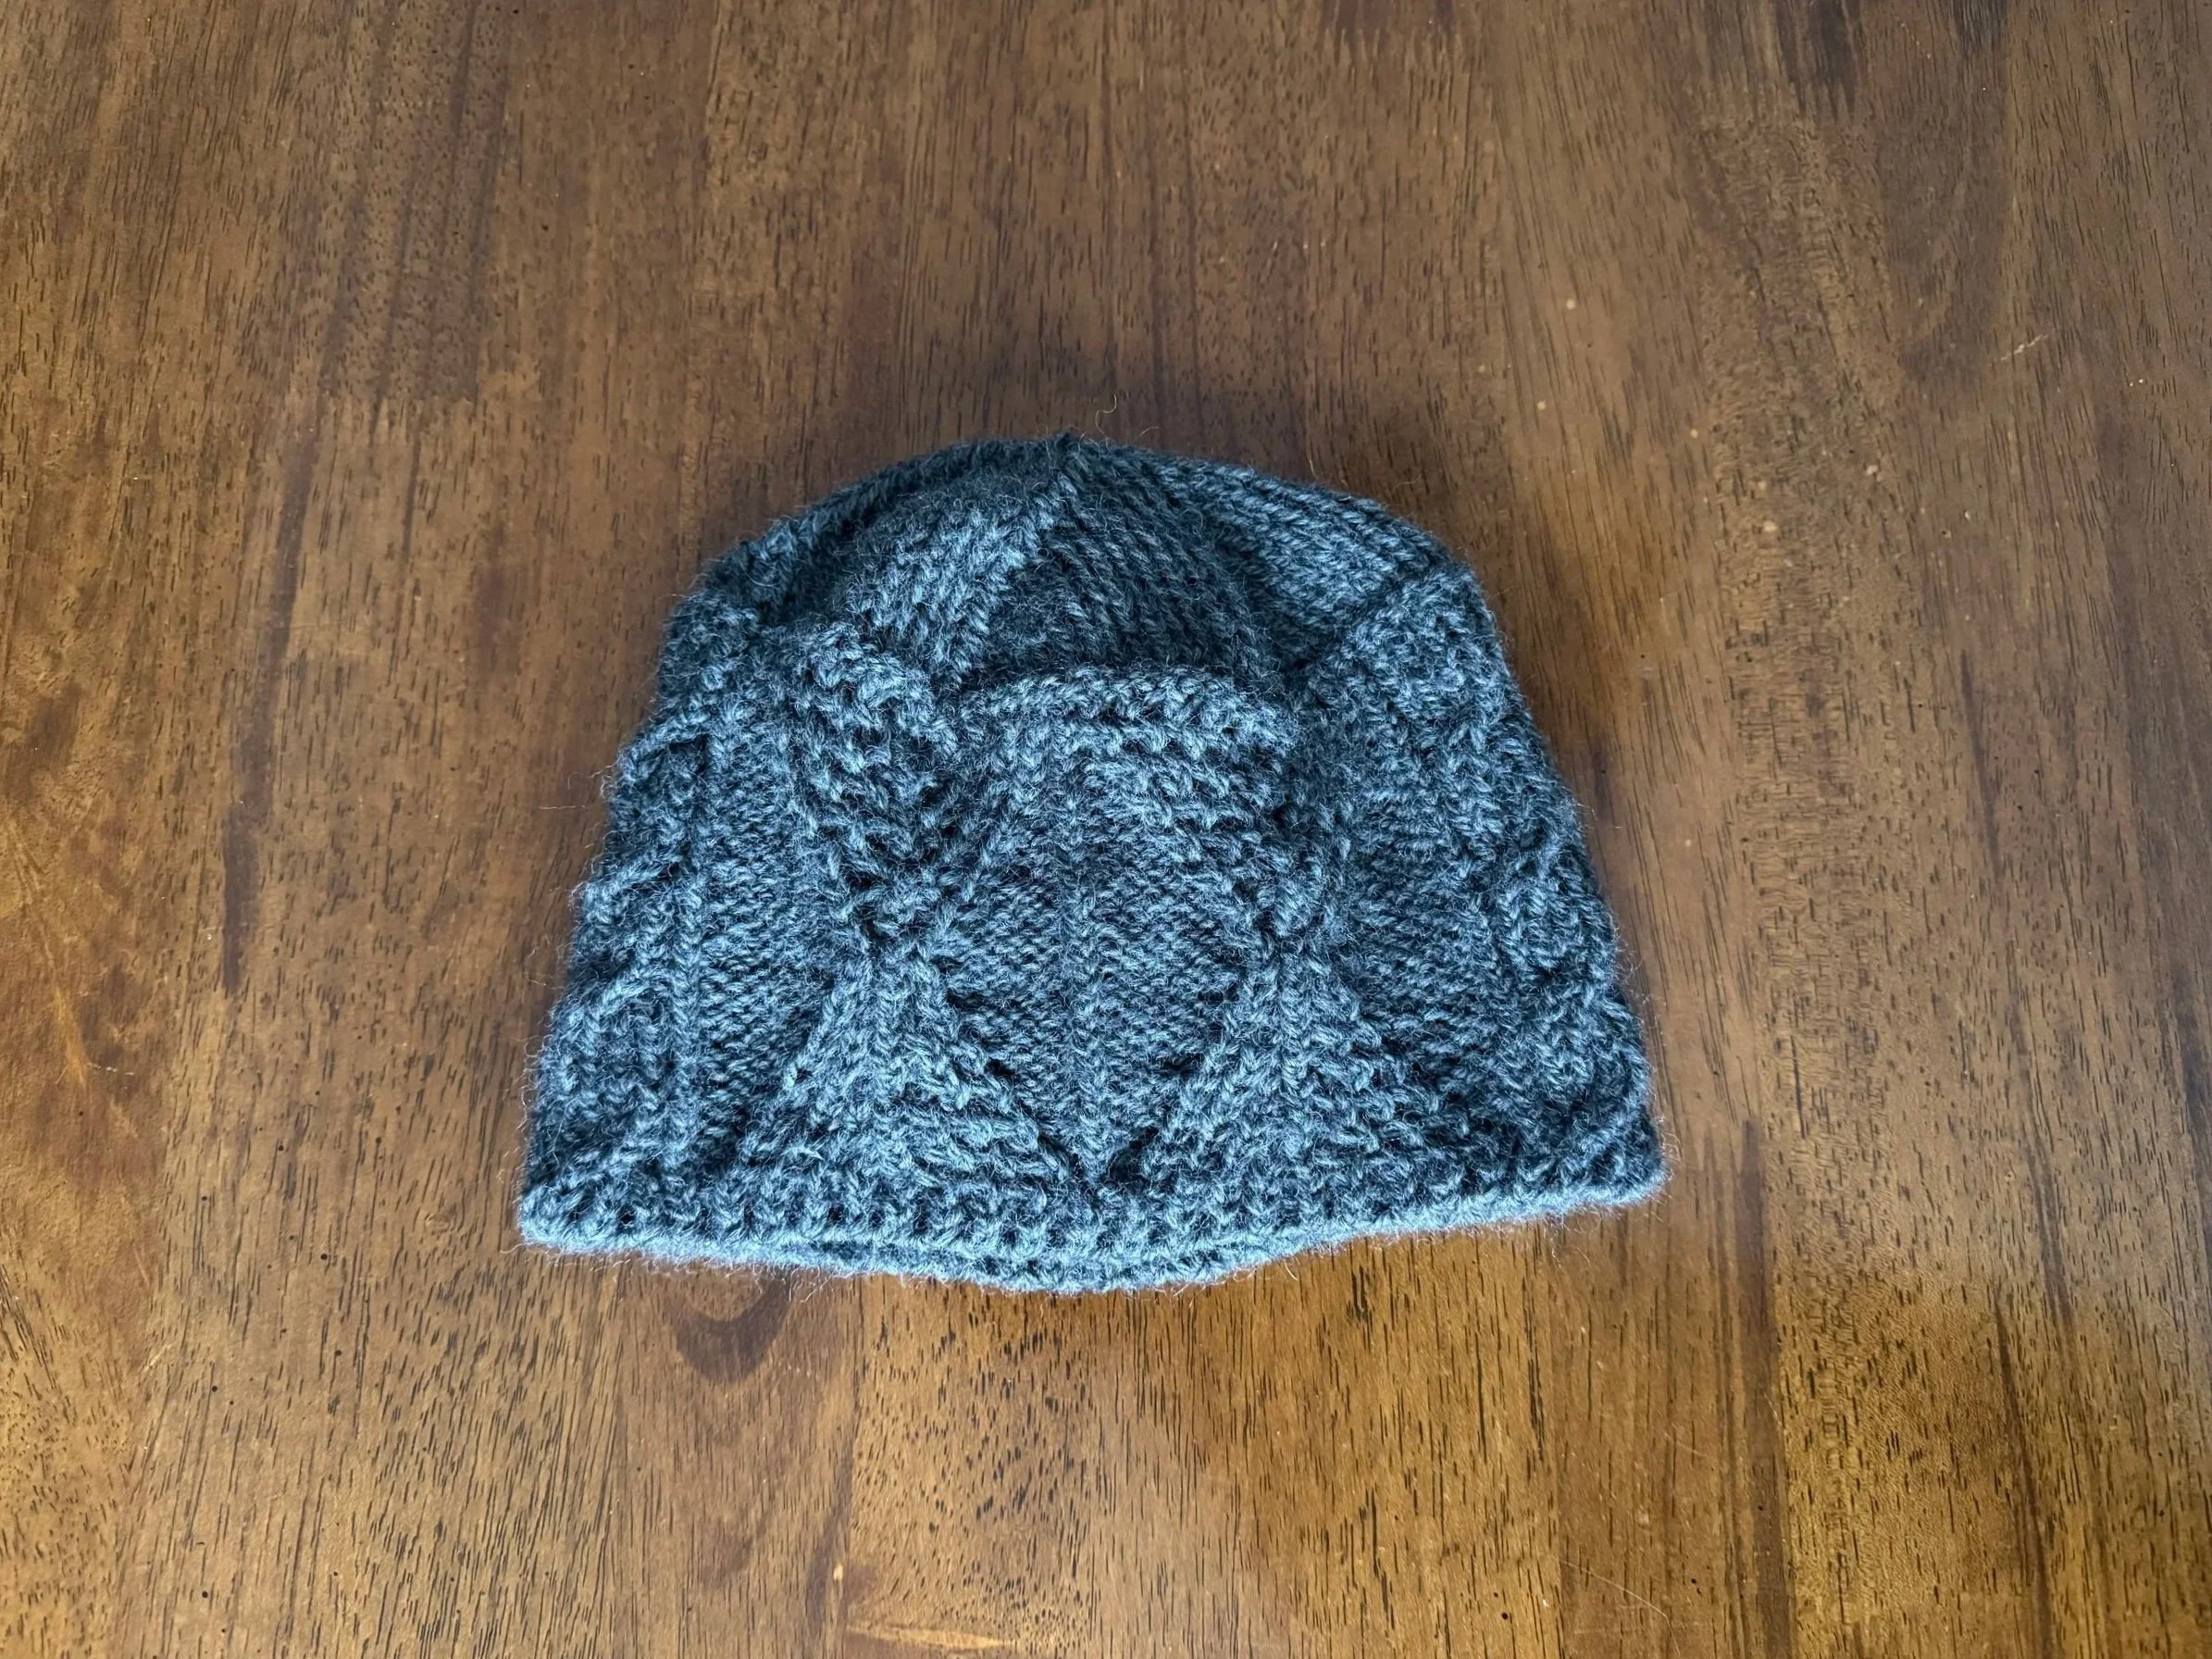
gauge-swatch hat
I have a large pile of Paton’s dark gray Classic worsted yarn and its time has come. I made this swatch hat with 108 stitches. It more or less fits as a hat, but if I were to simply double the stitches to 216, it would make an extremely fitted pullover, not the look I want.
-
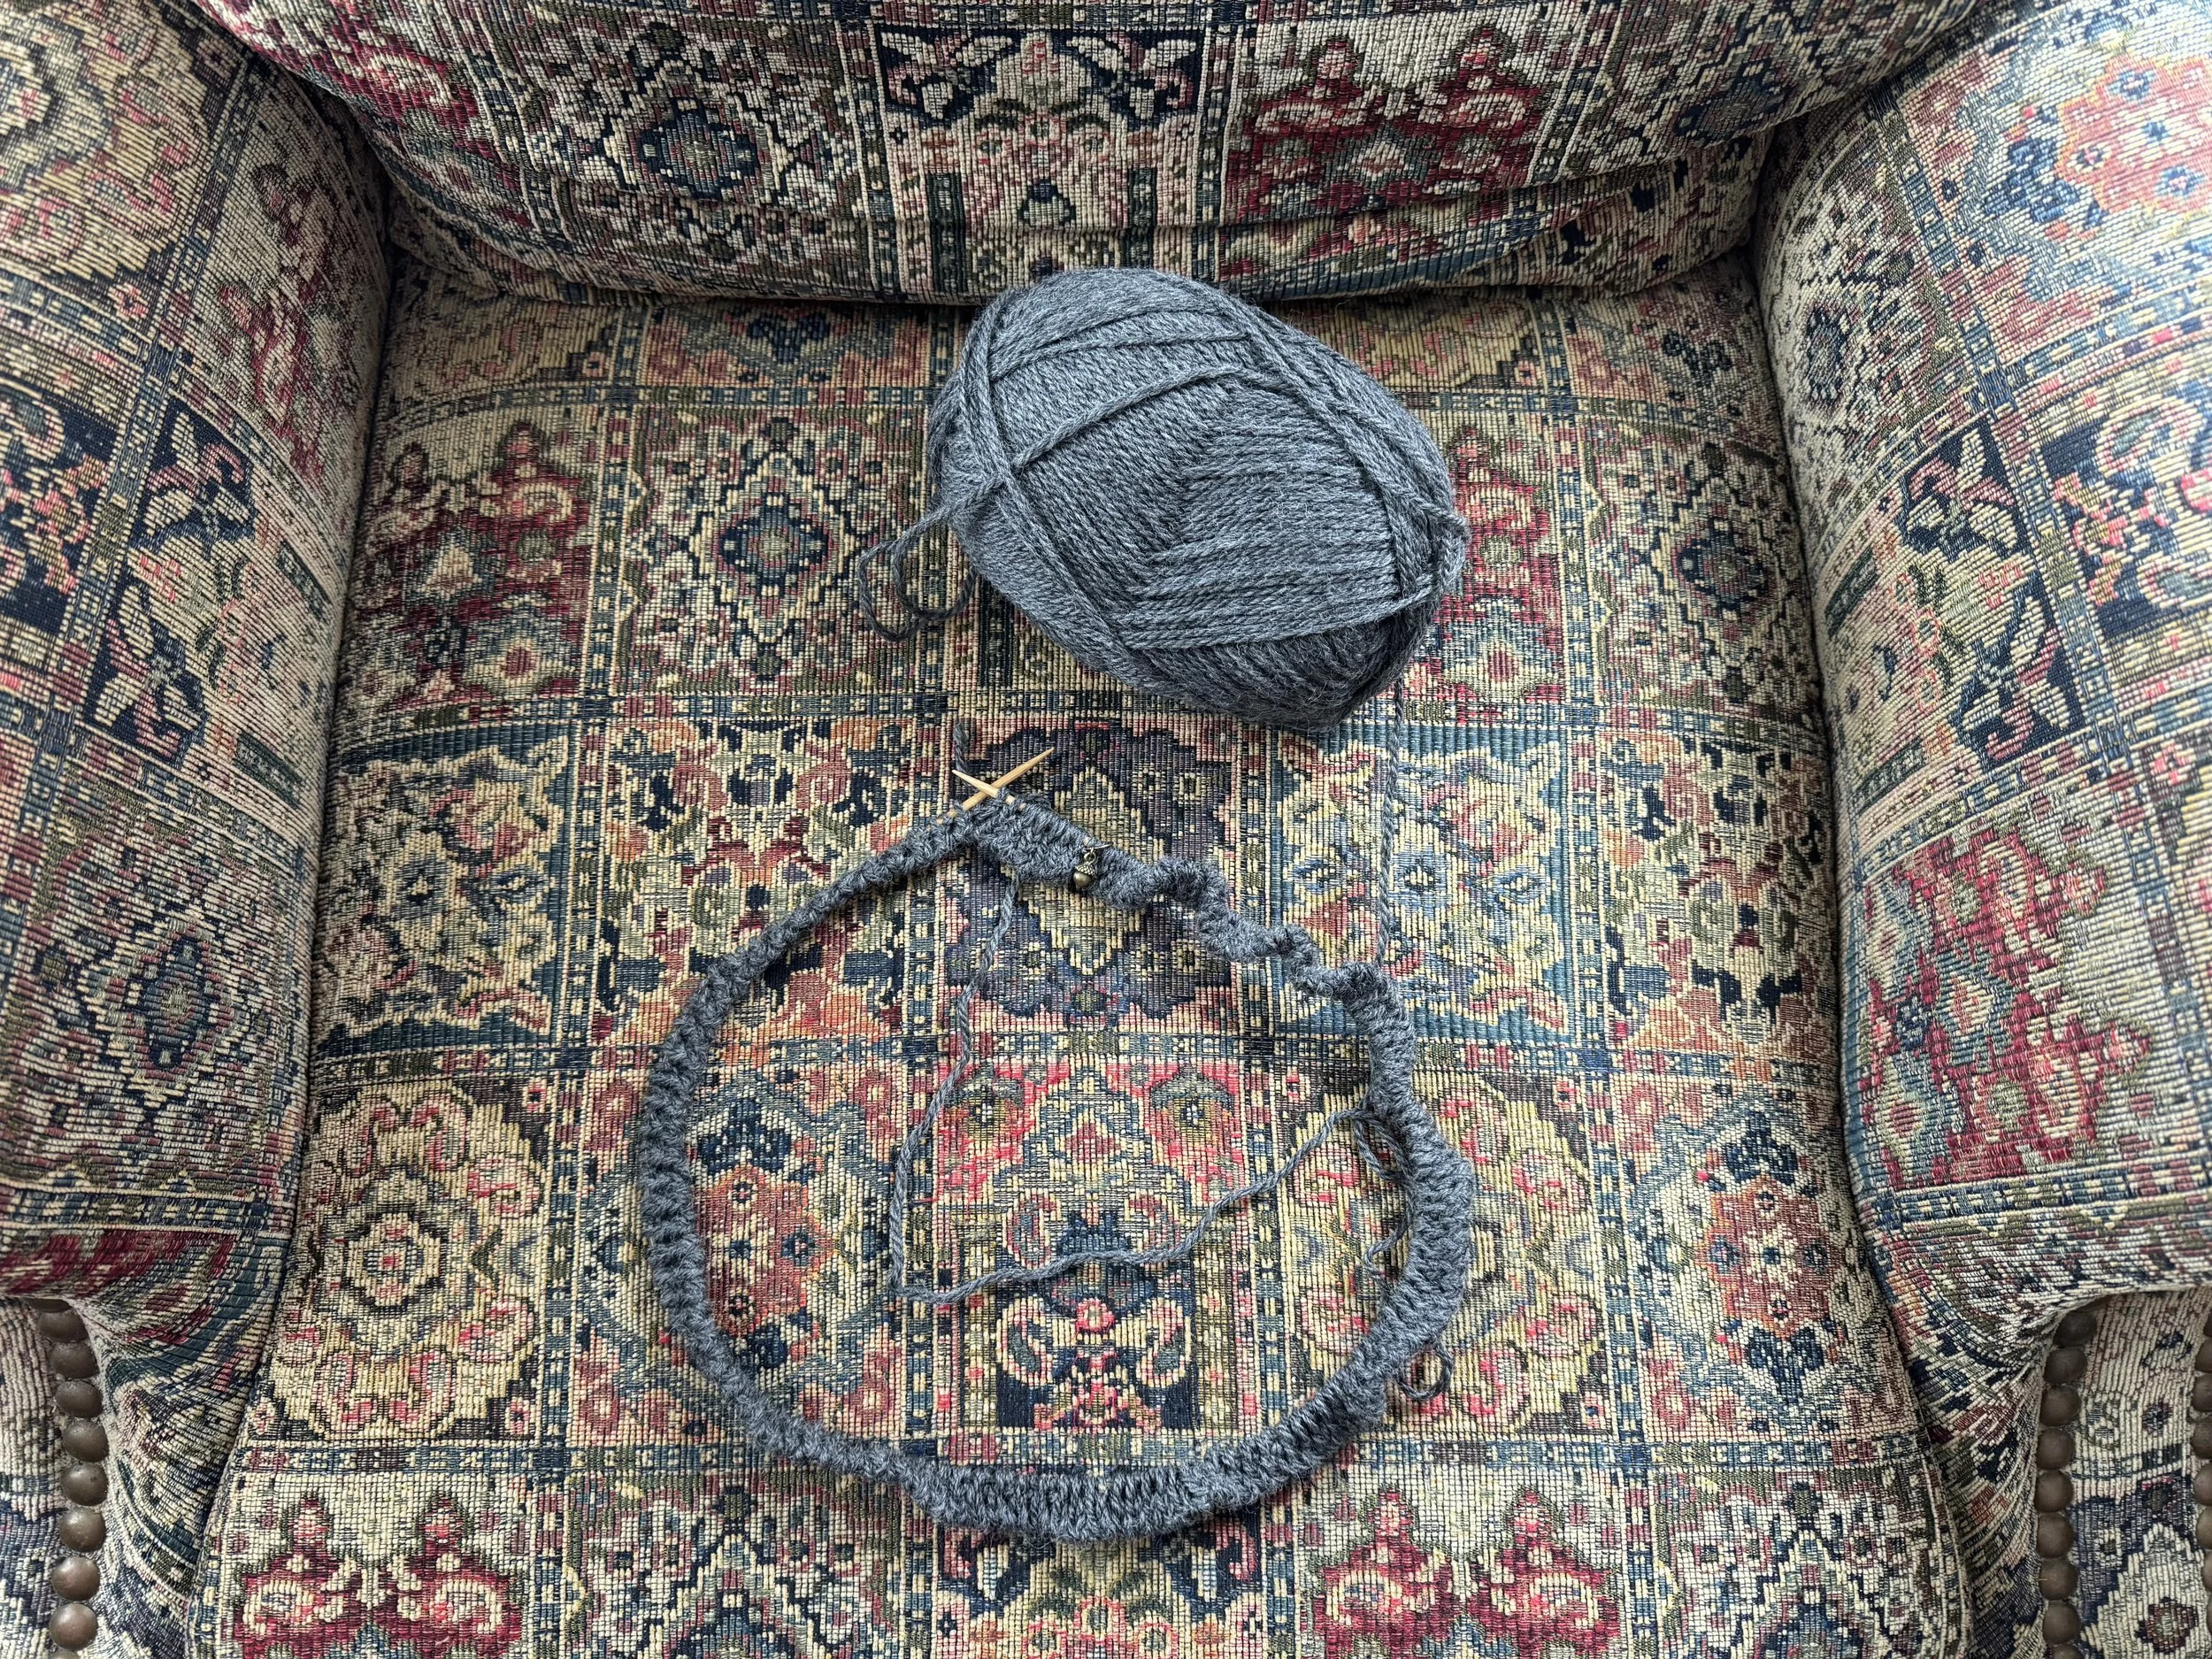
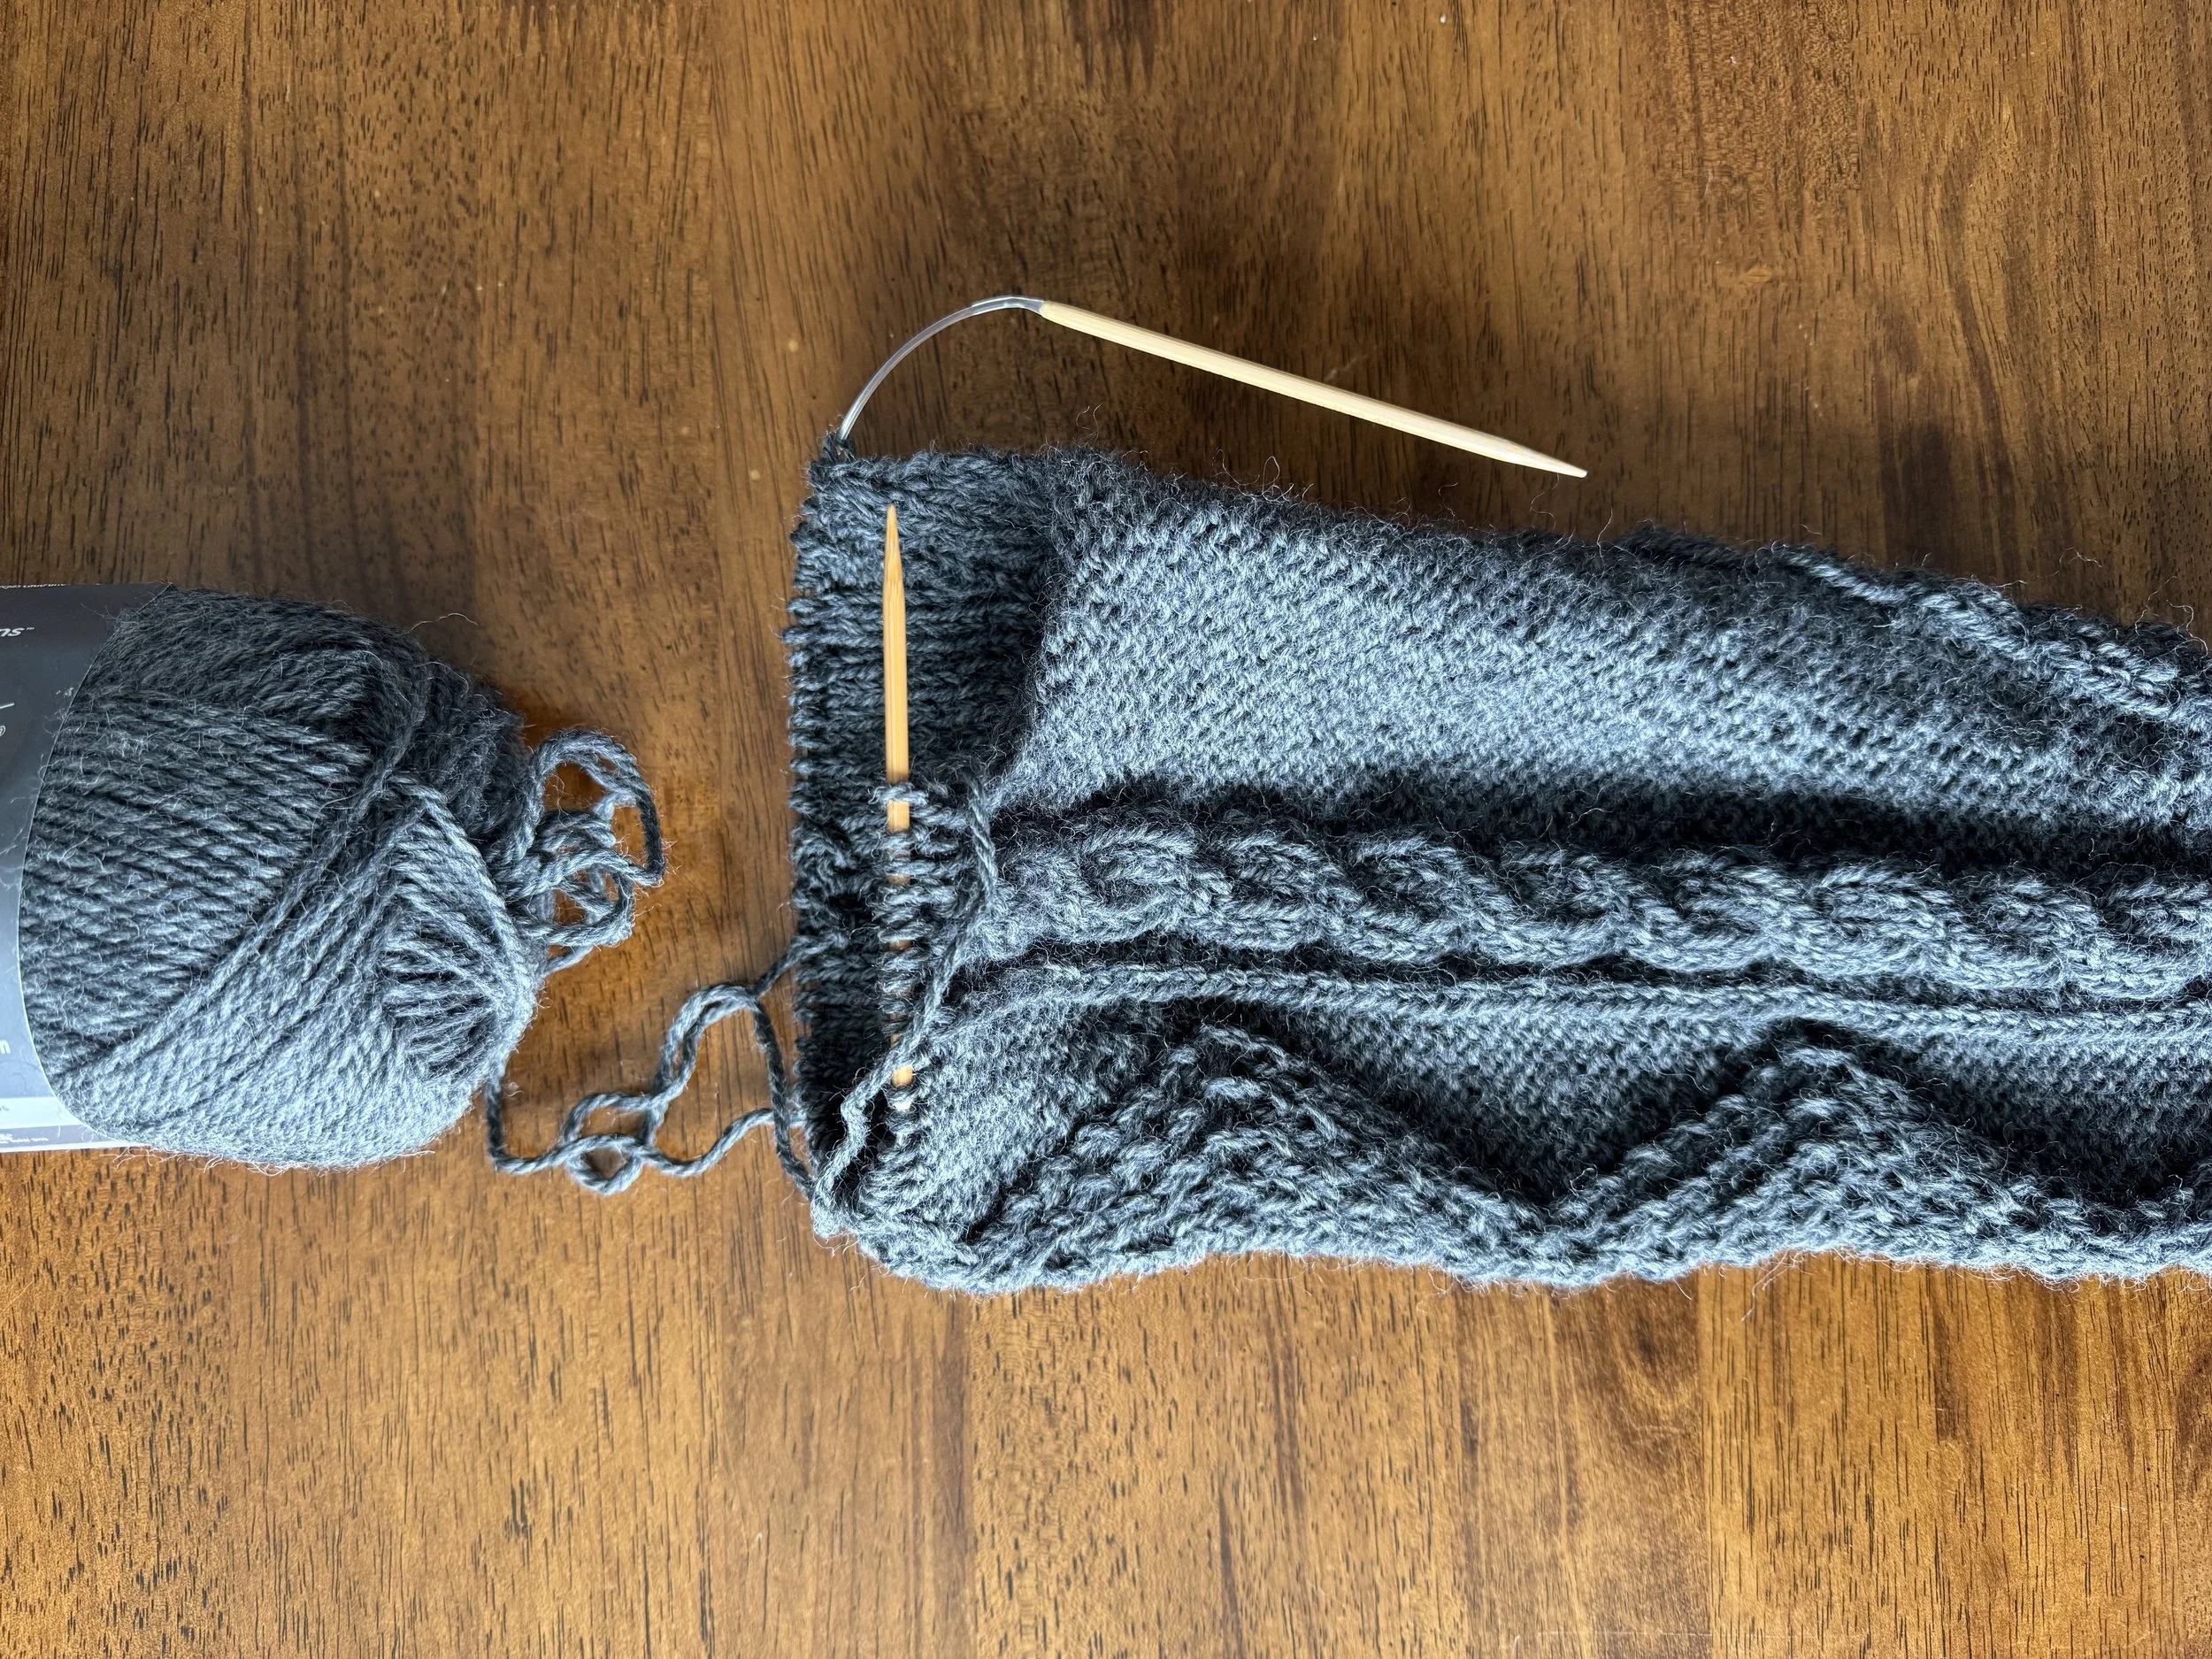
this is where I knit, mostly
My gauge-swatch hat taught me that since I want my sweater to be on the roomy side, I needed to add a bunch more purl stitches, as EZ suggests. My total stitch count is now 240. I used an alternate-cable cast on. It makes such a nice edge.
-
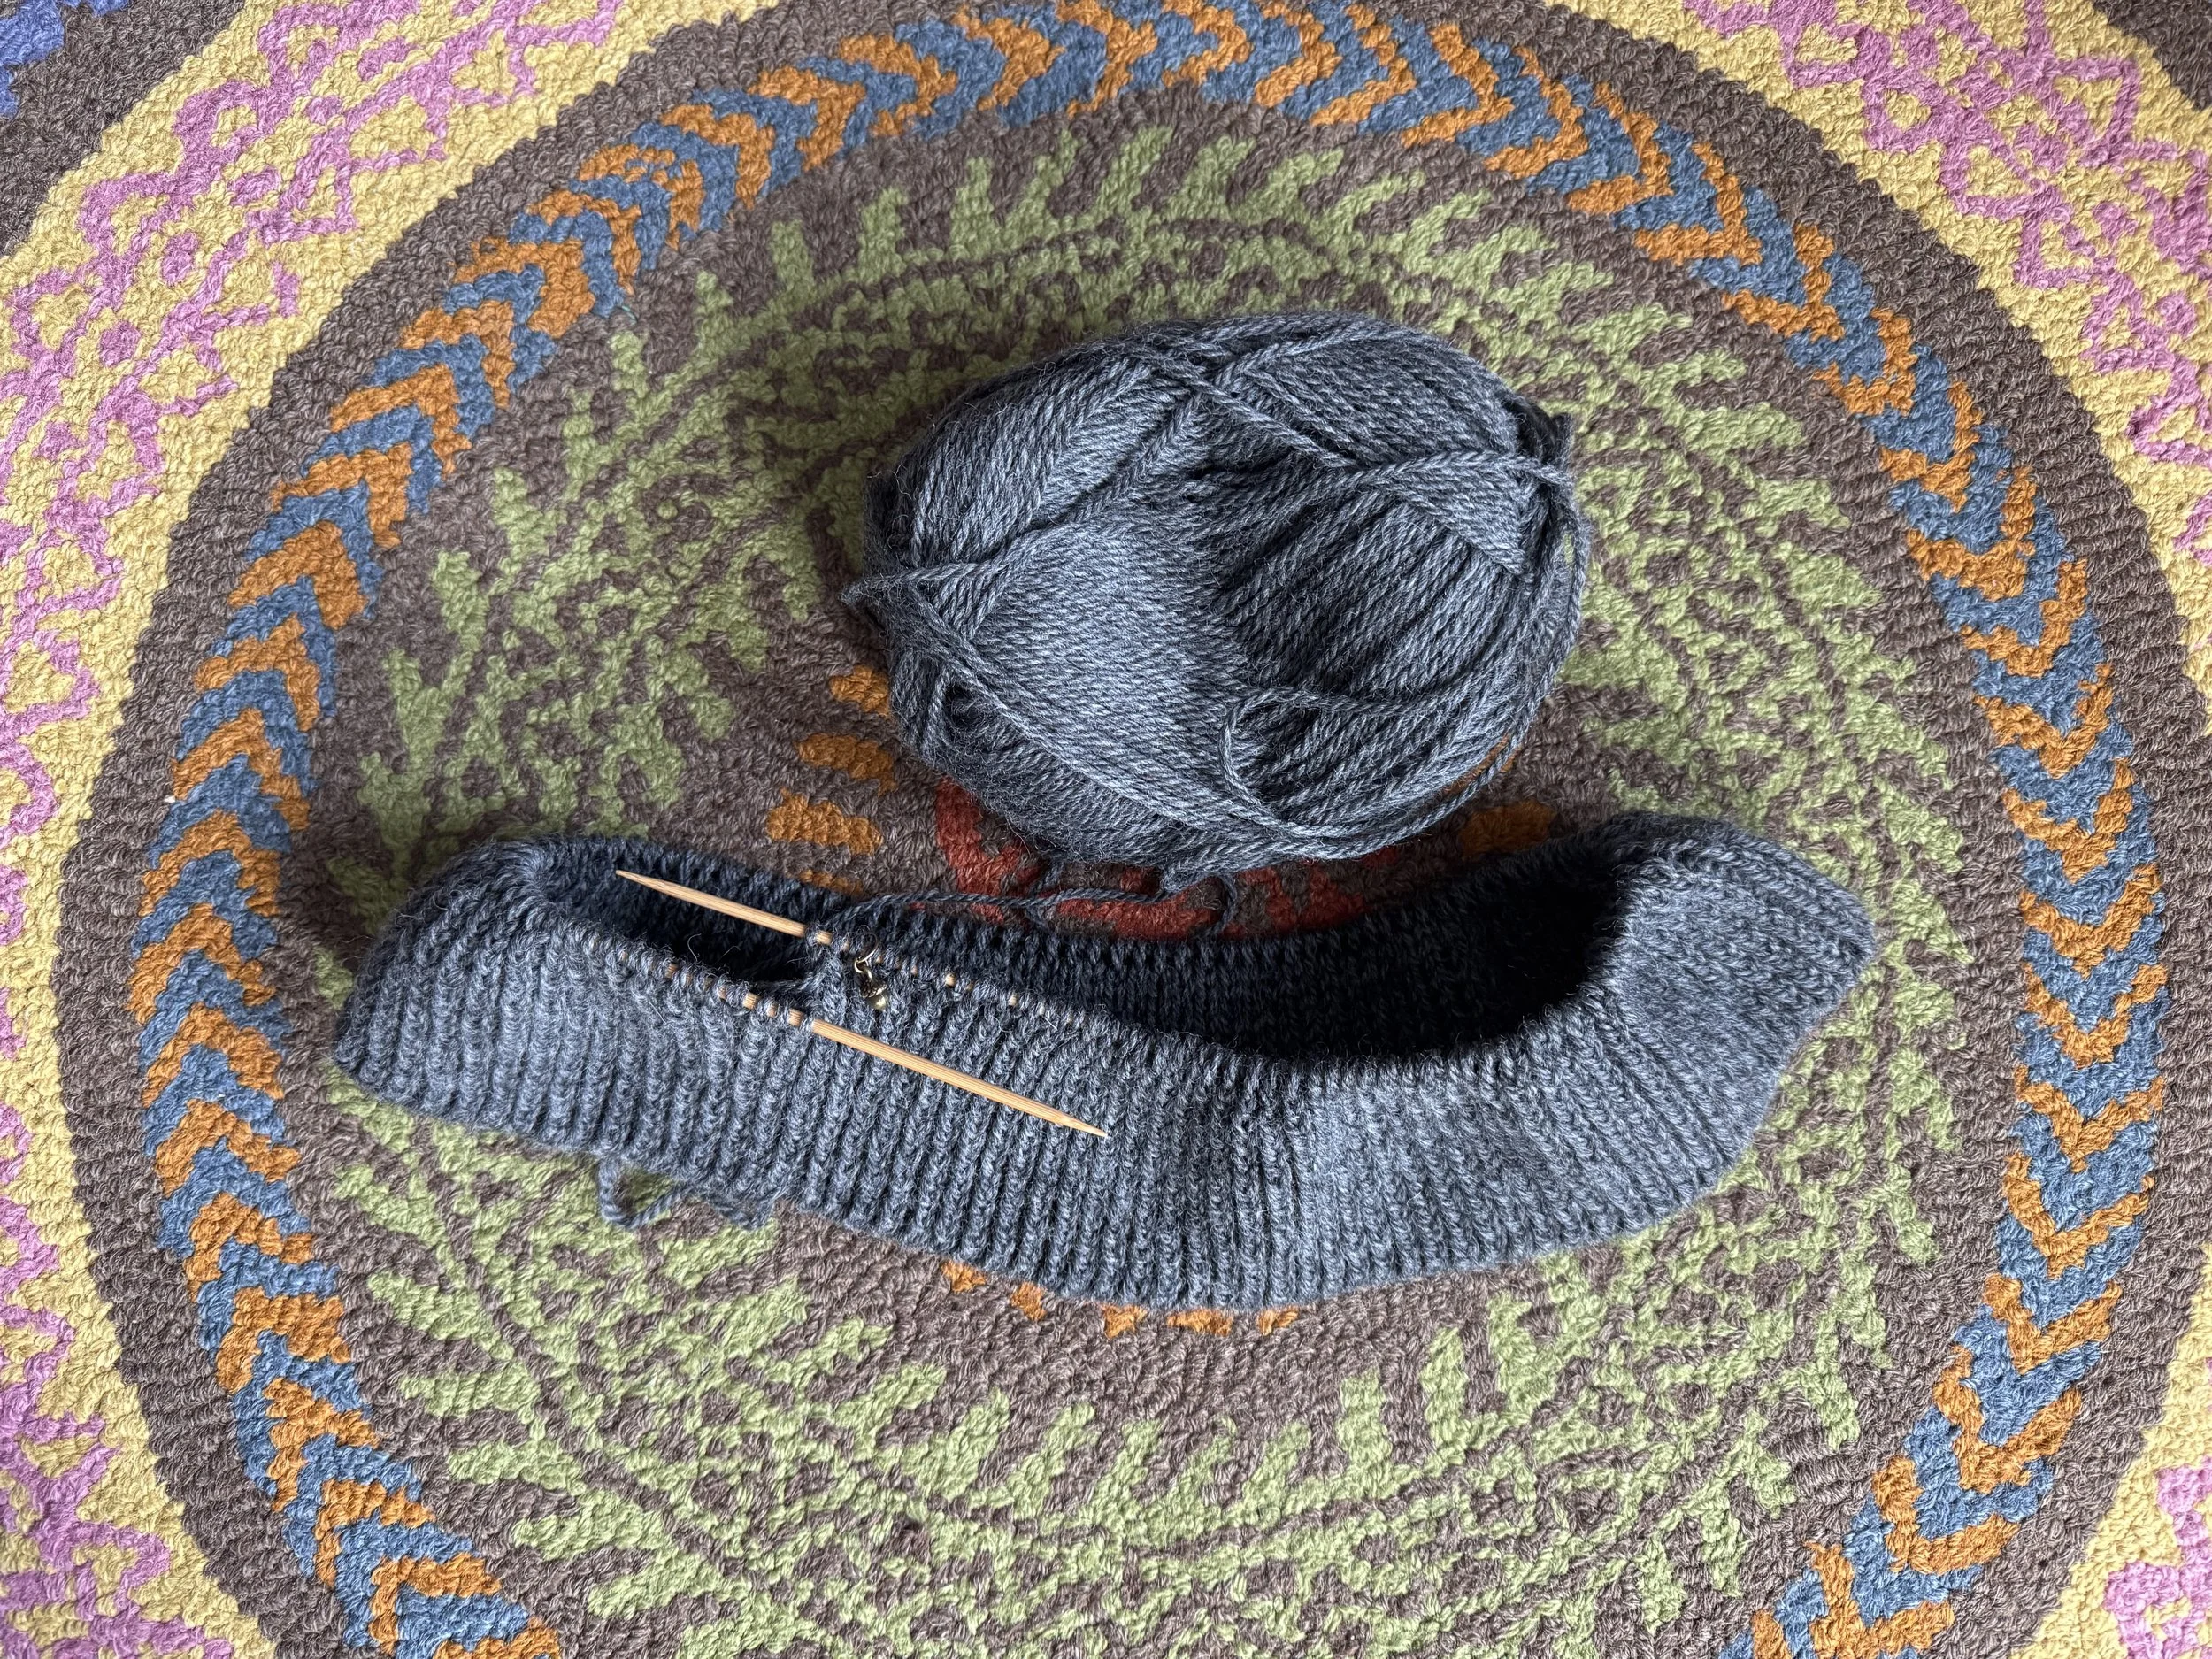
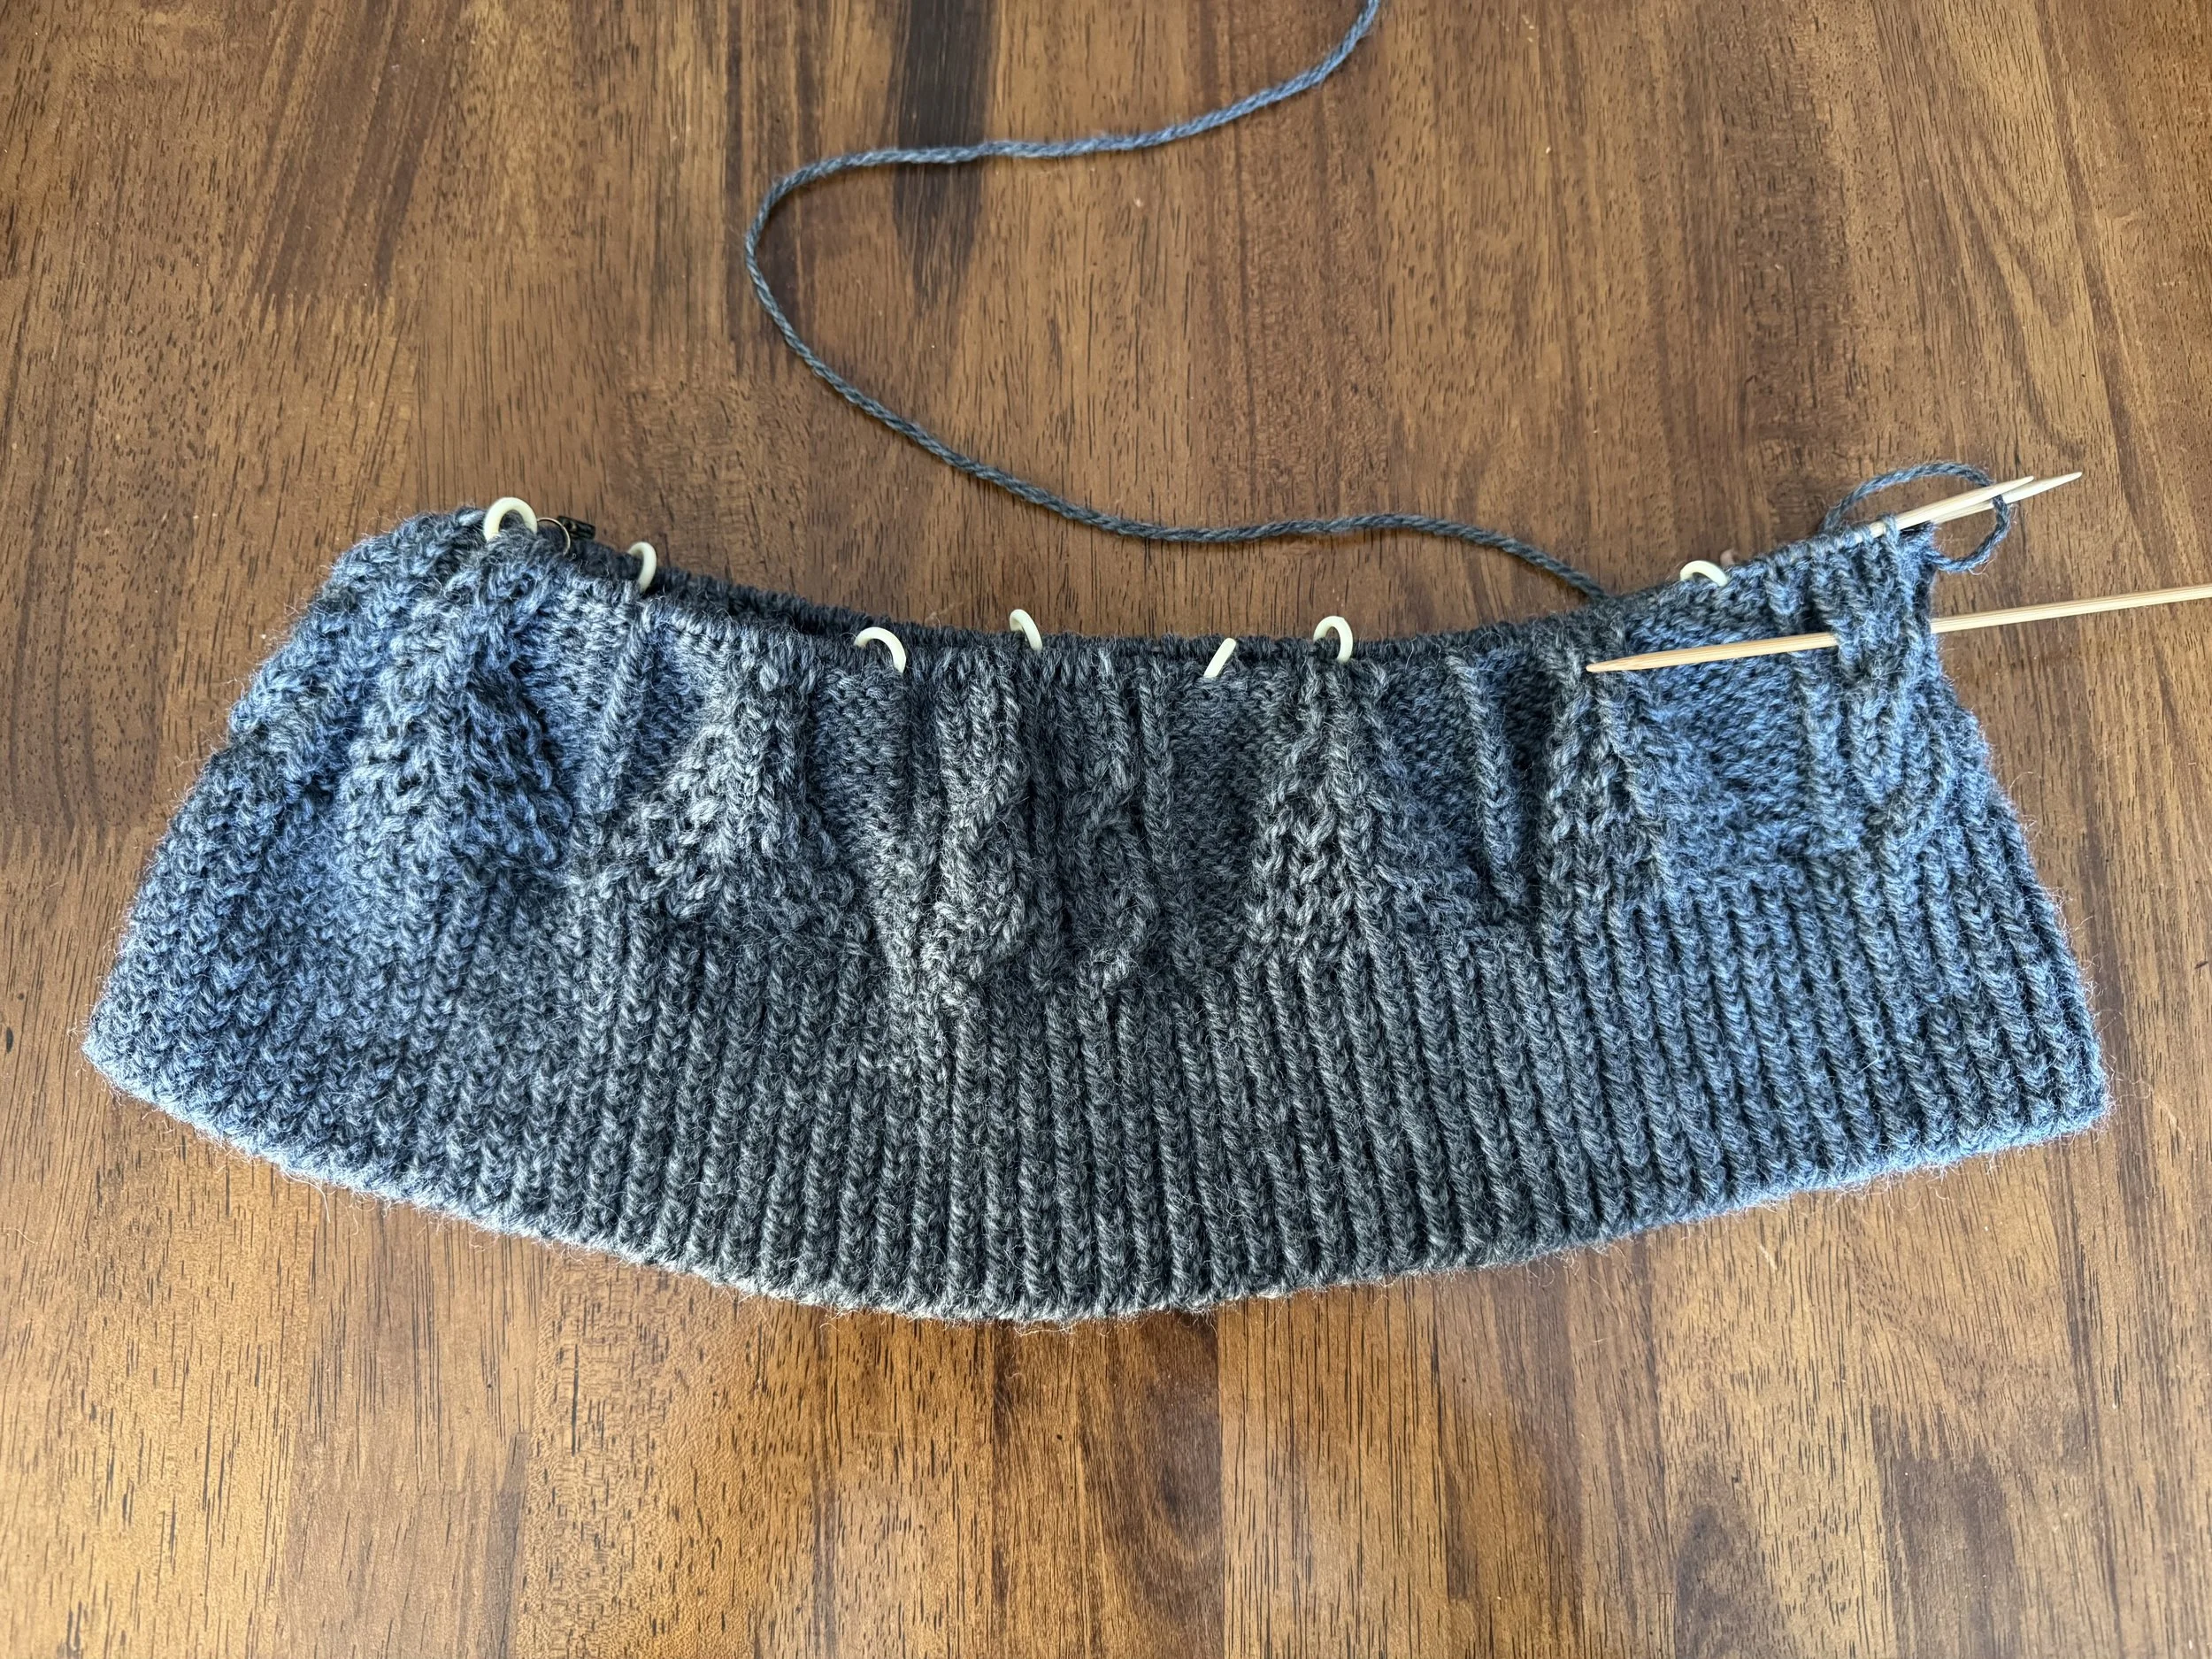
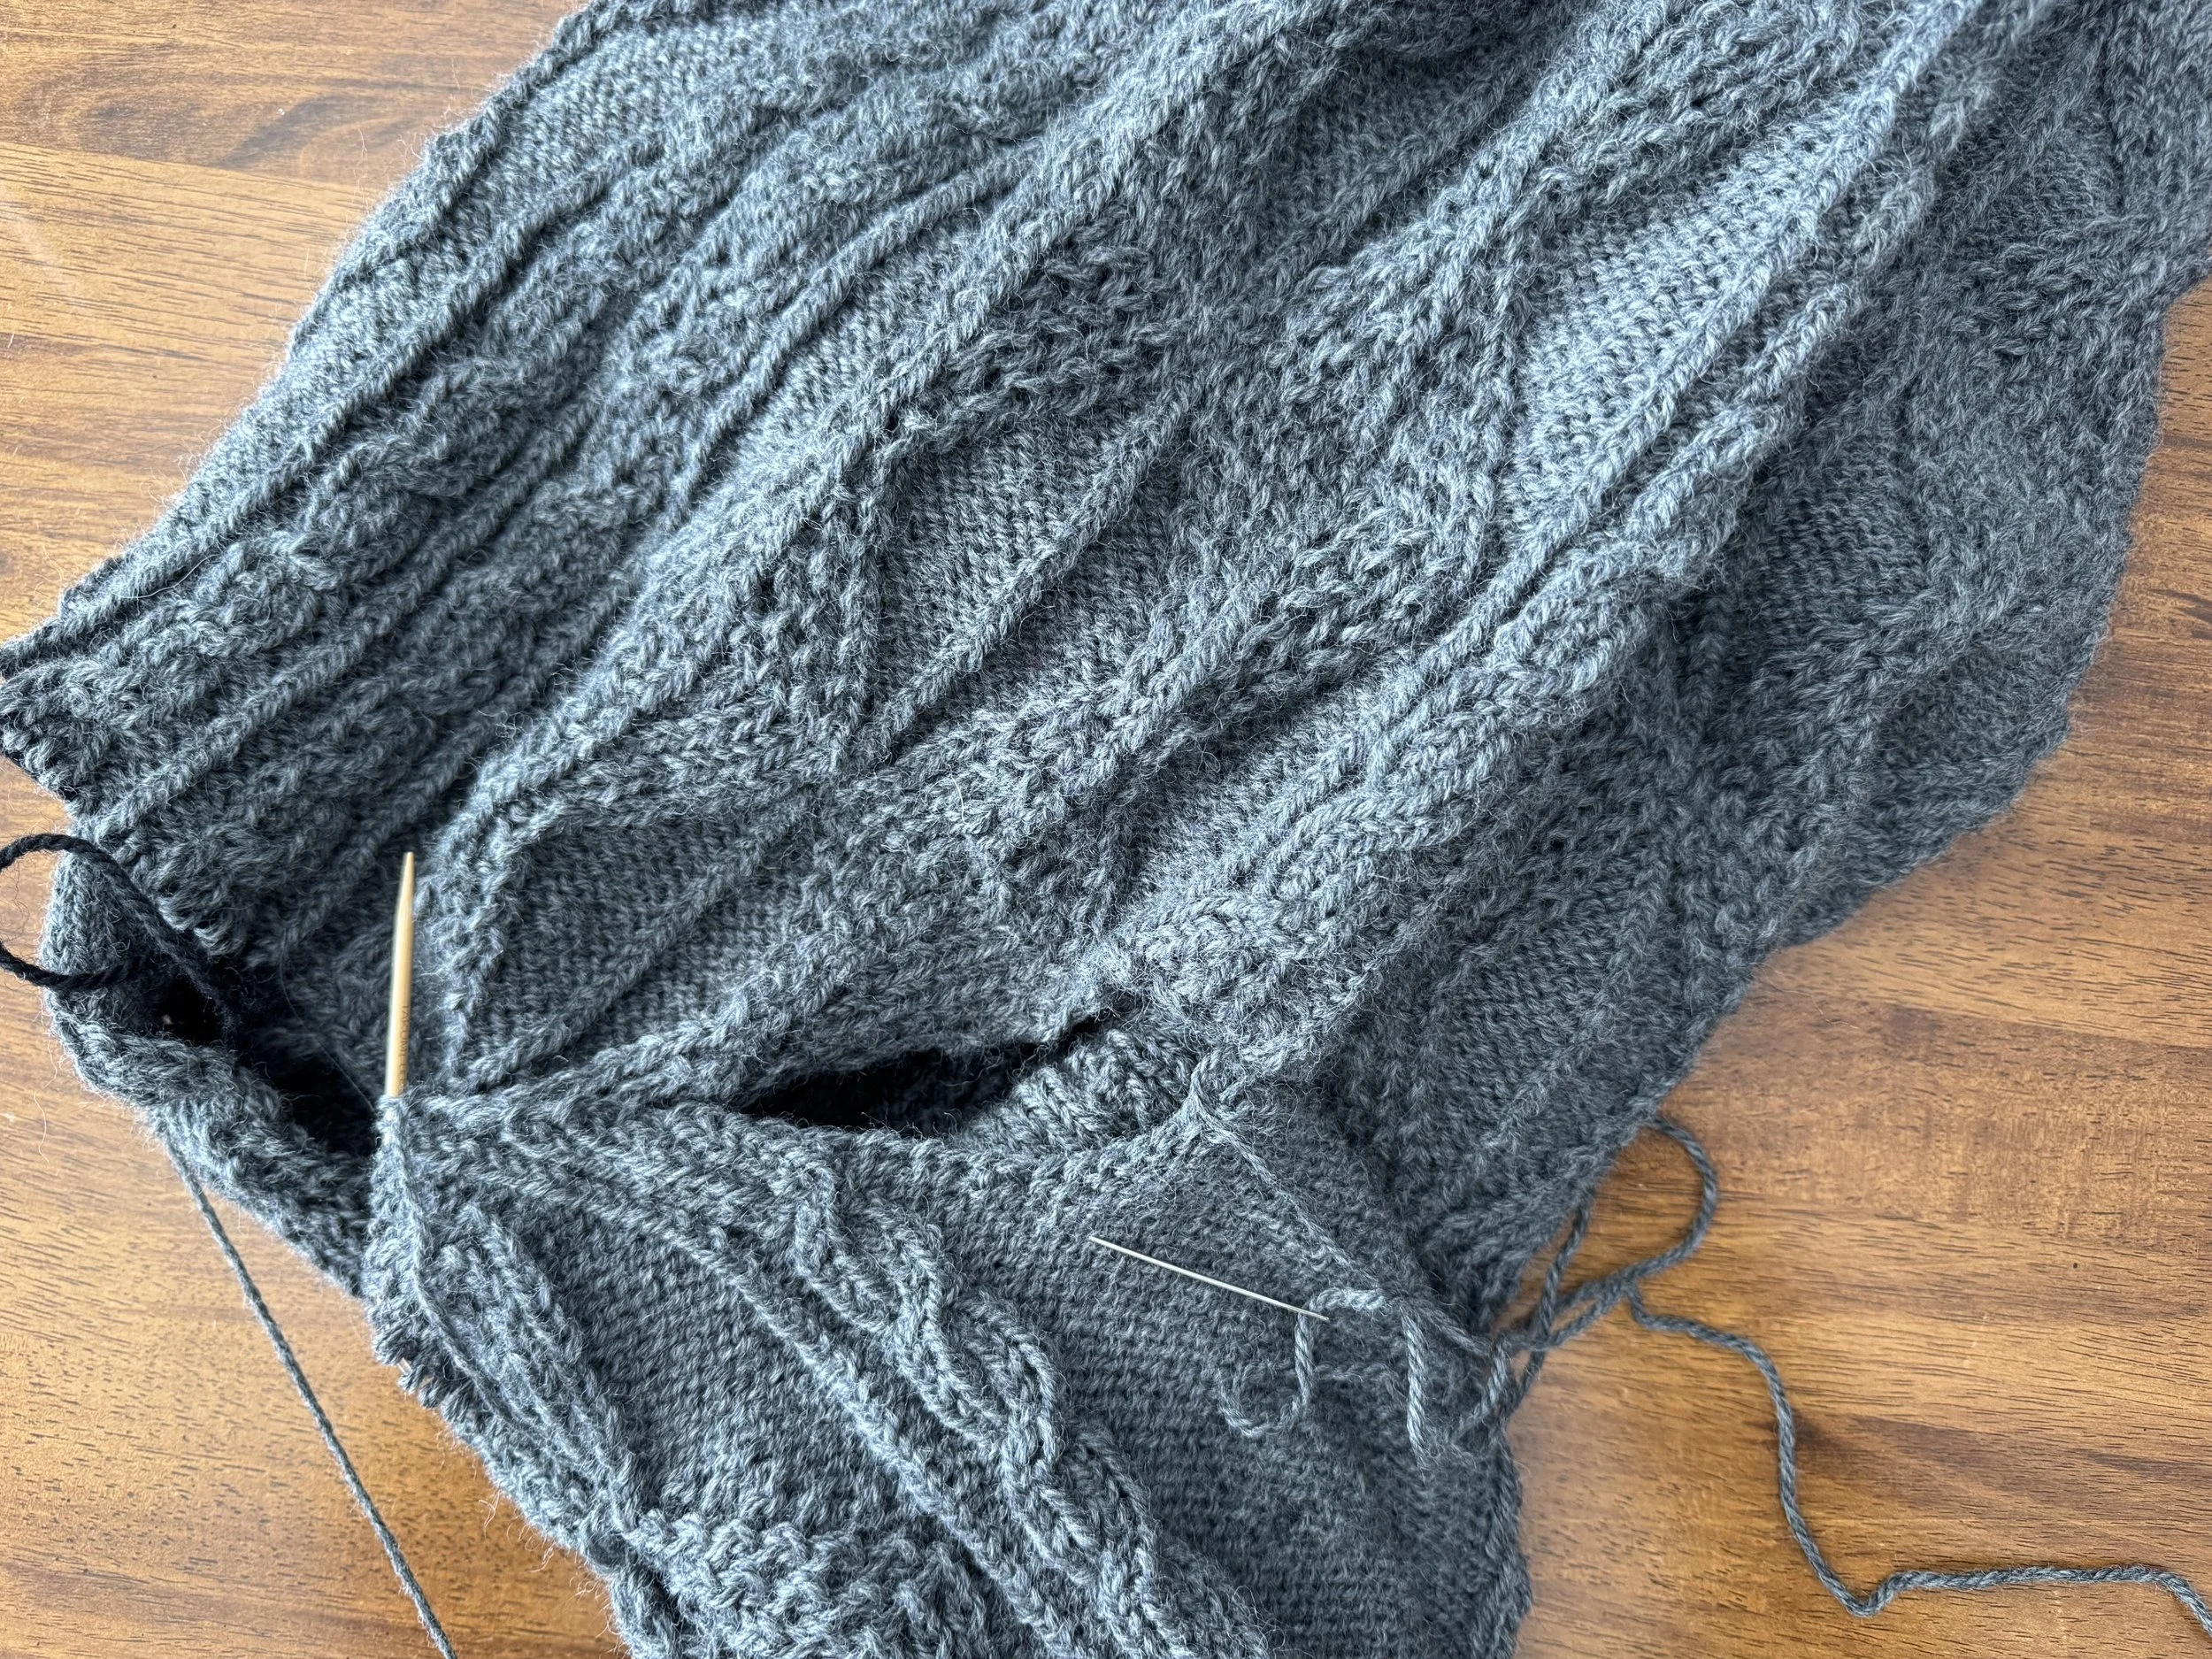
ribbing done
After about 2.75” of k1.p1, I feel done with the ribbing. I used a twisted knit stitch and a regular purl stitch. And somewhere along the way, I marked the halfway point (after 120 stitches), to make life easier when I begin the patterning.
-
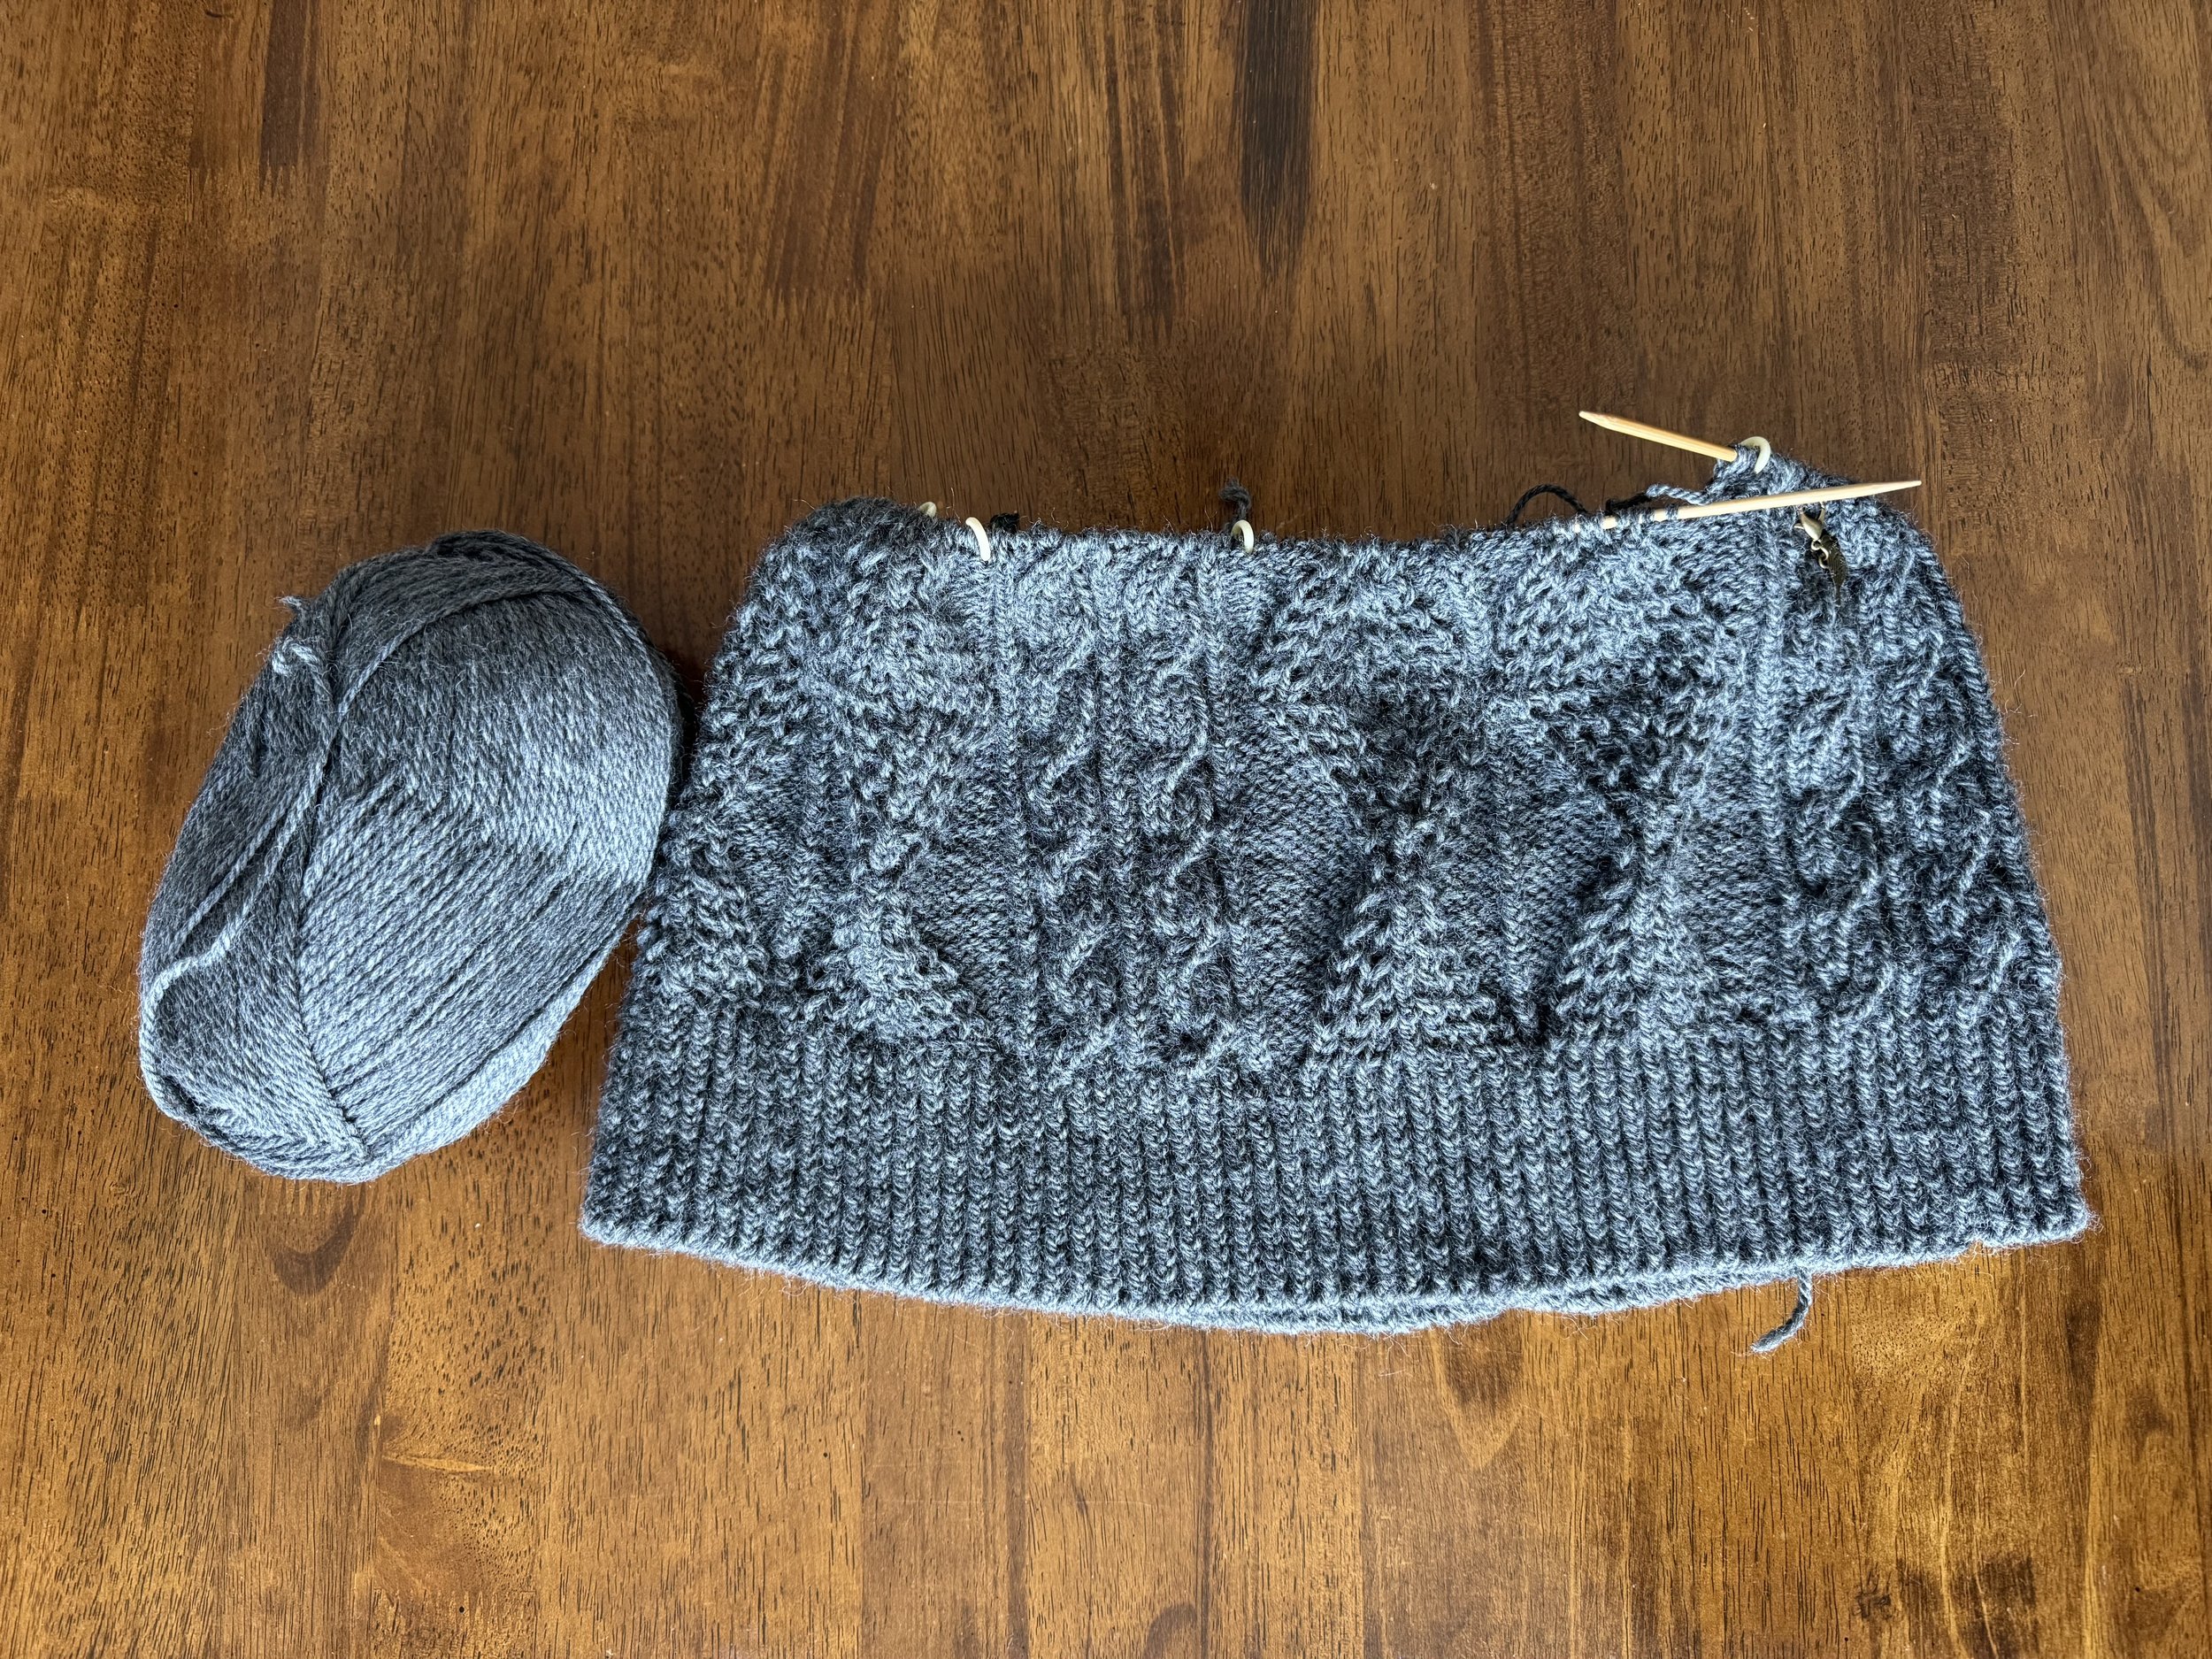
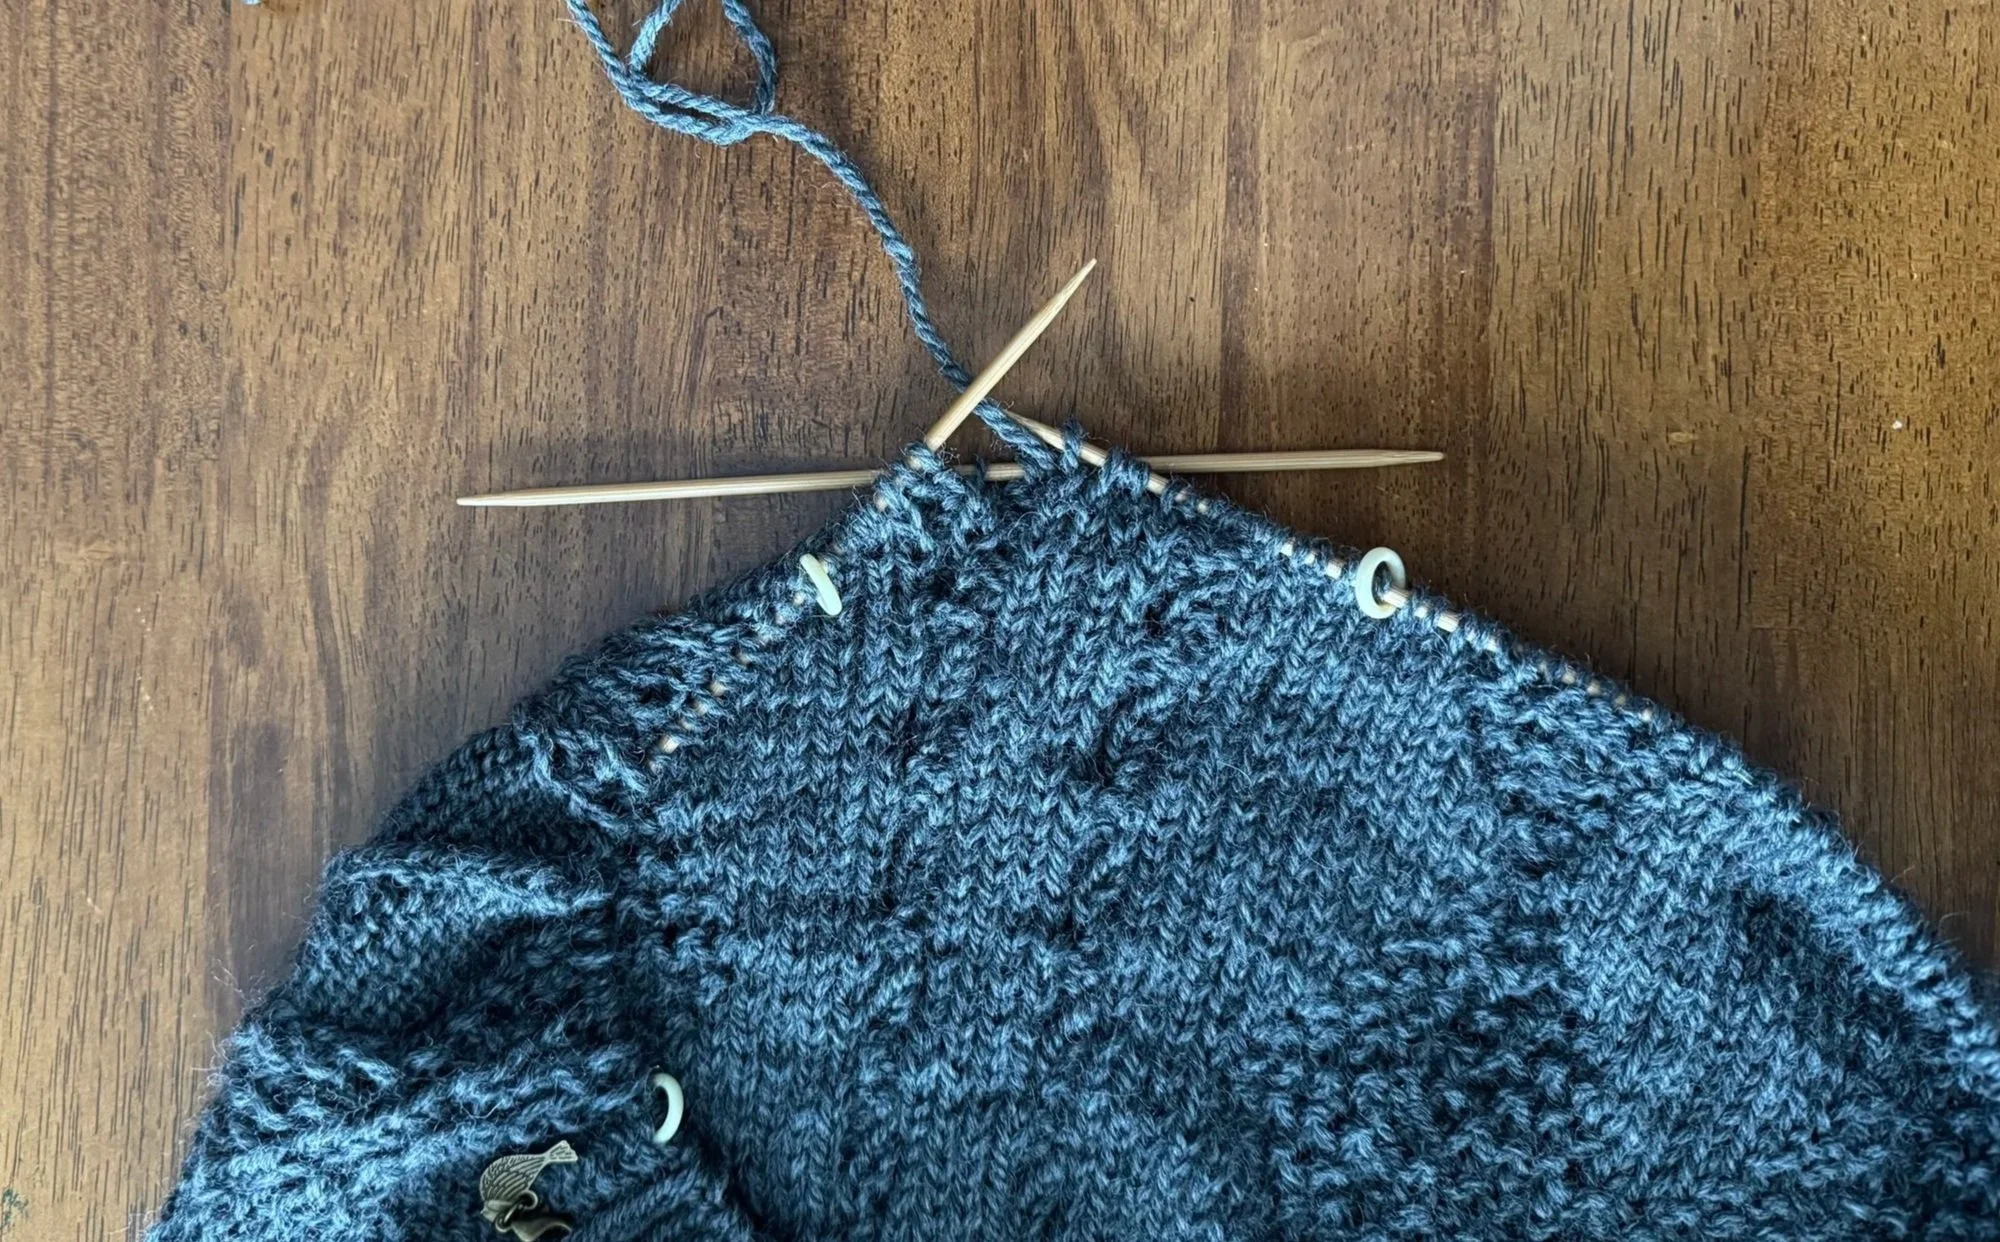
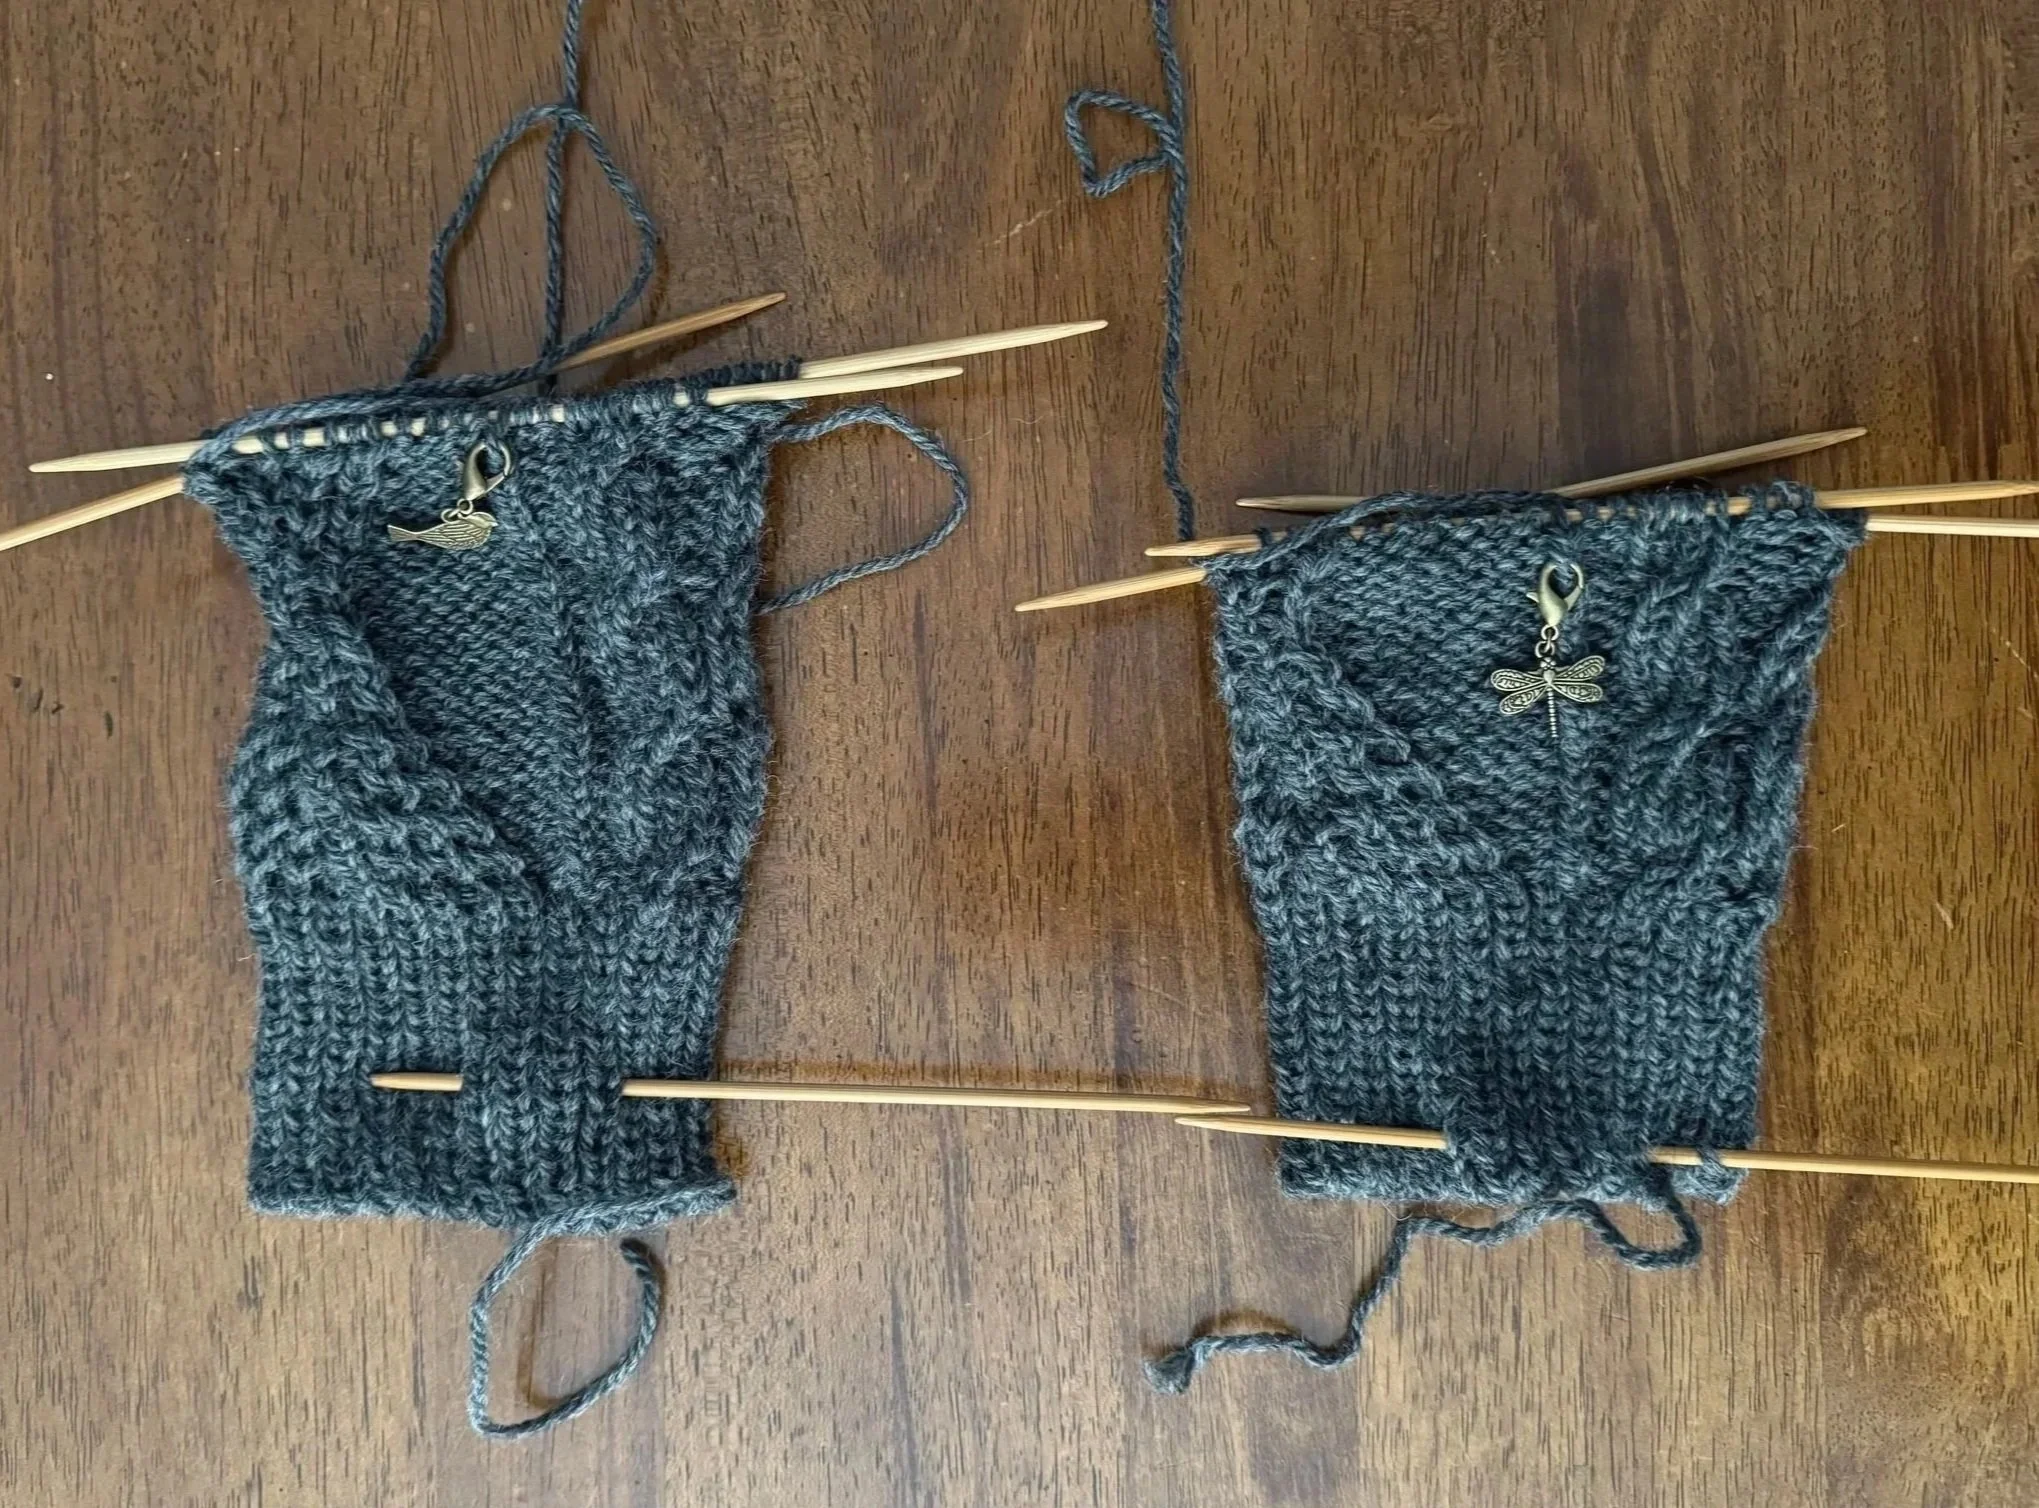
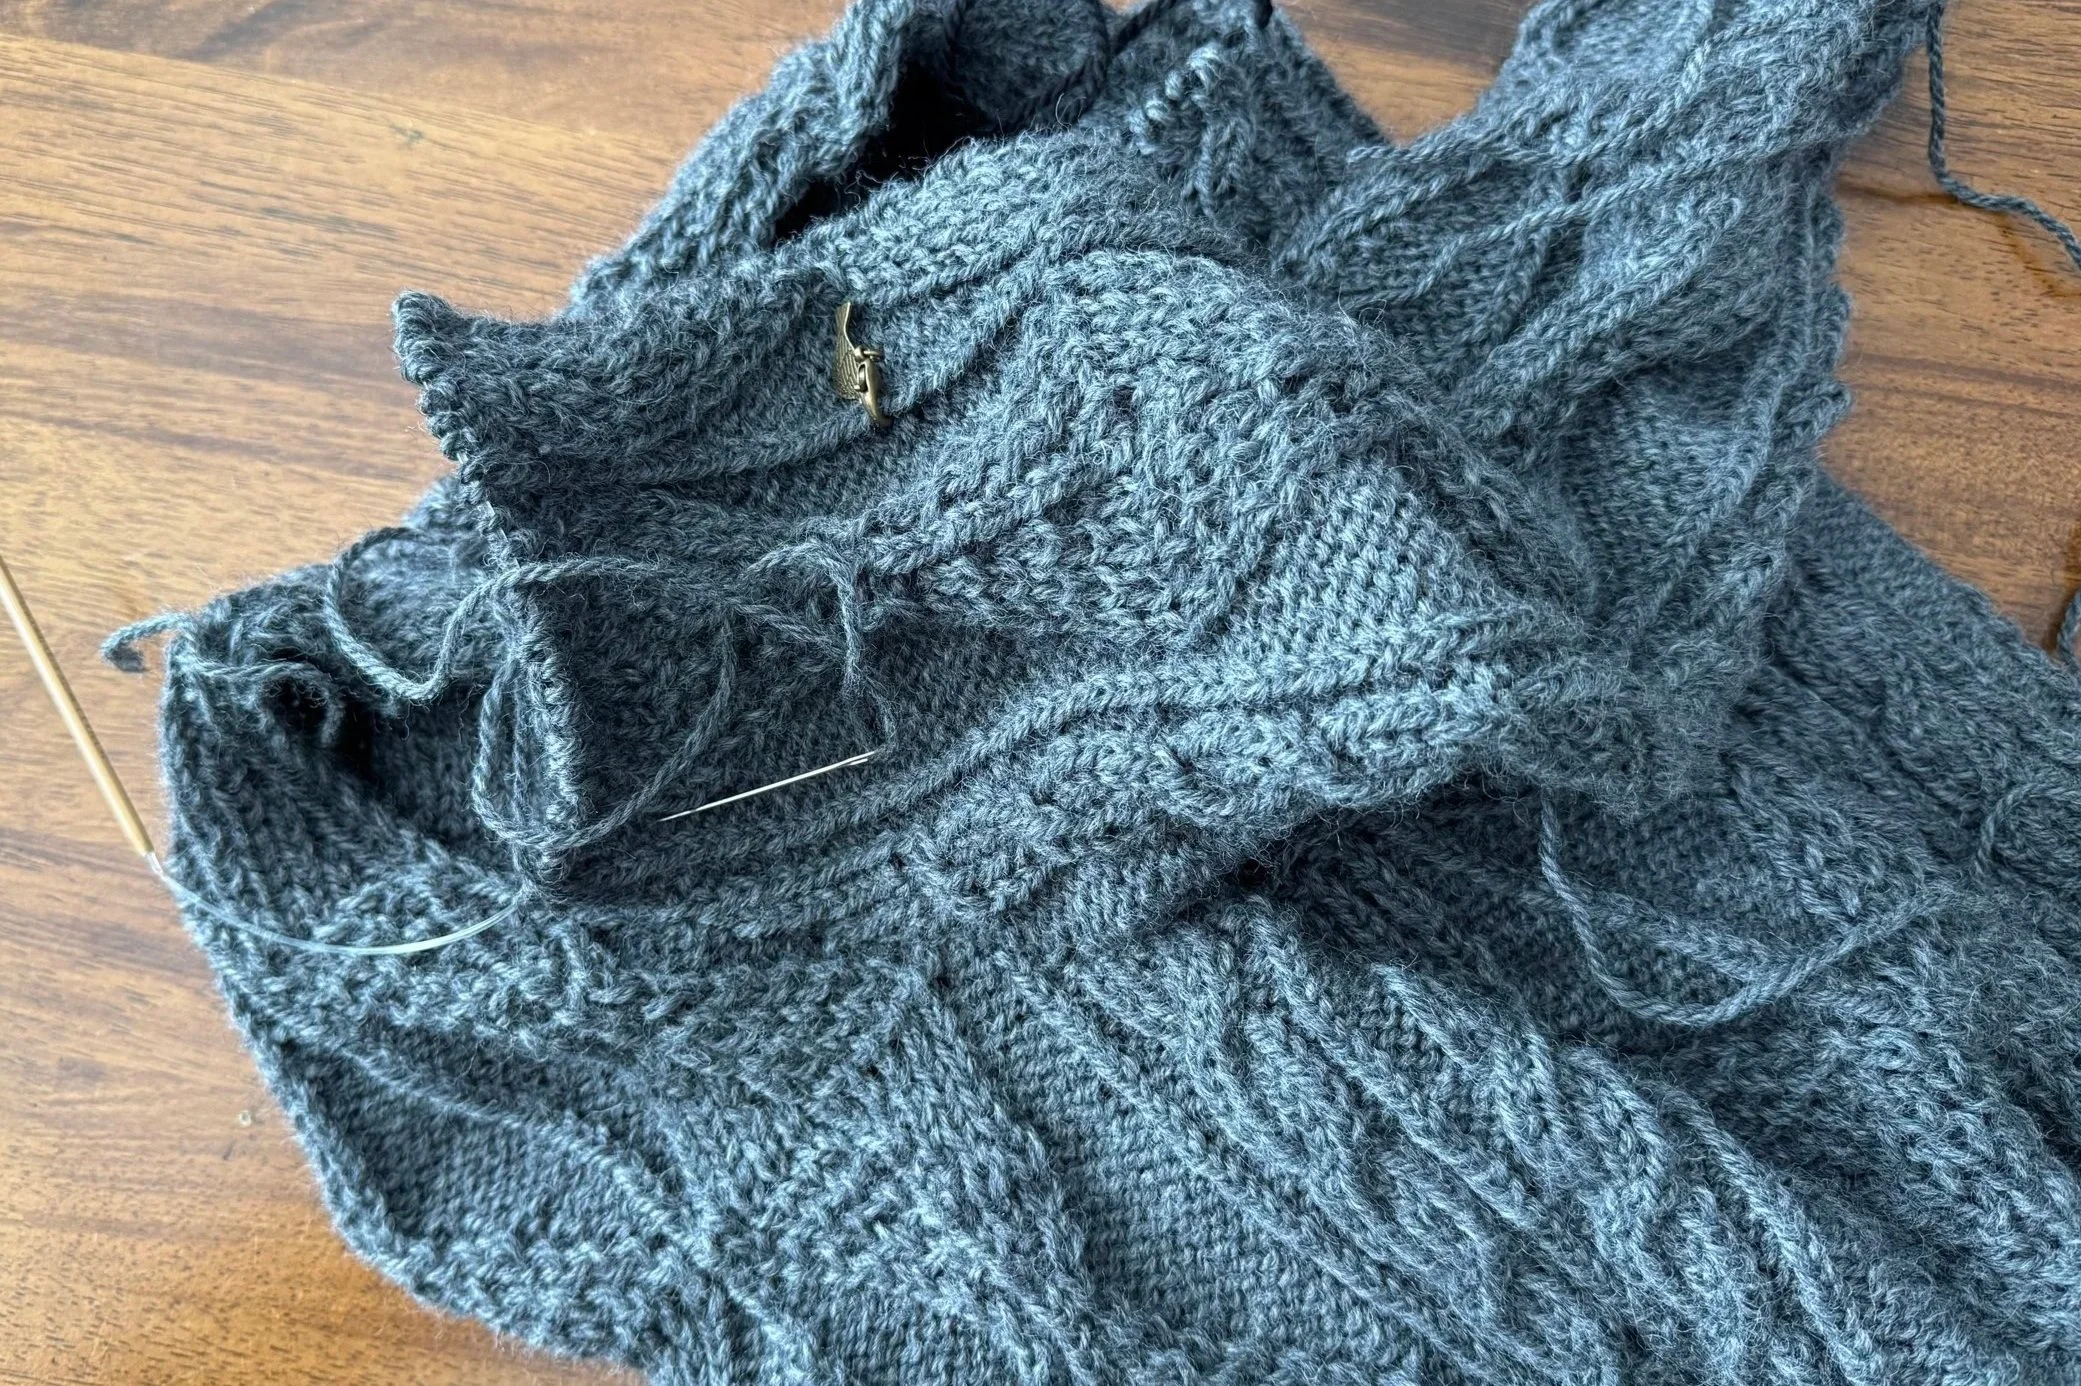
first 14 rounds are done
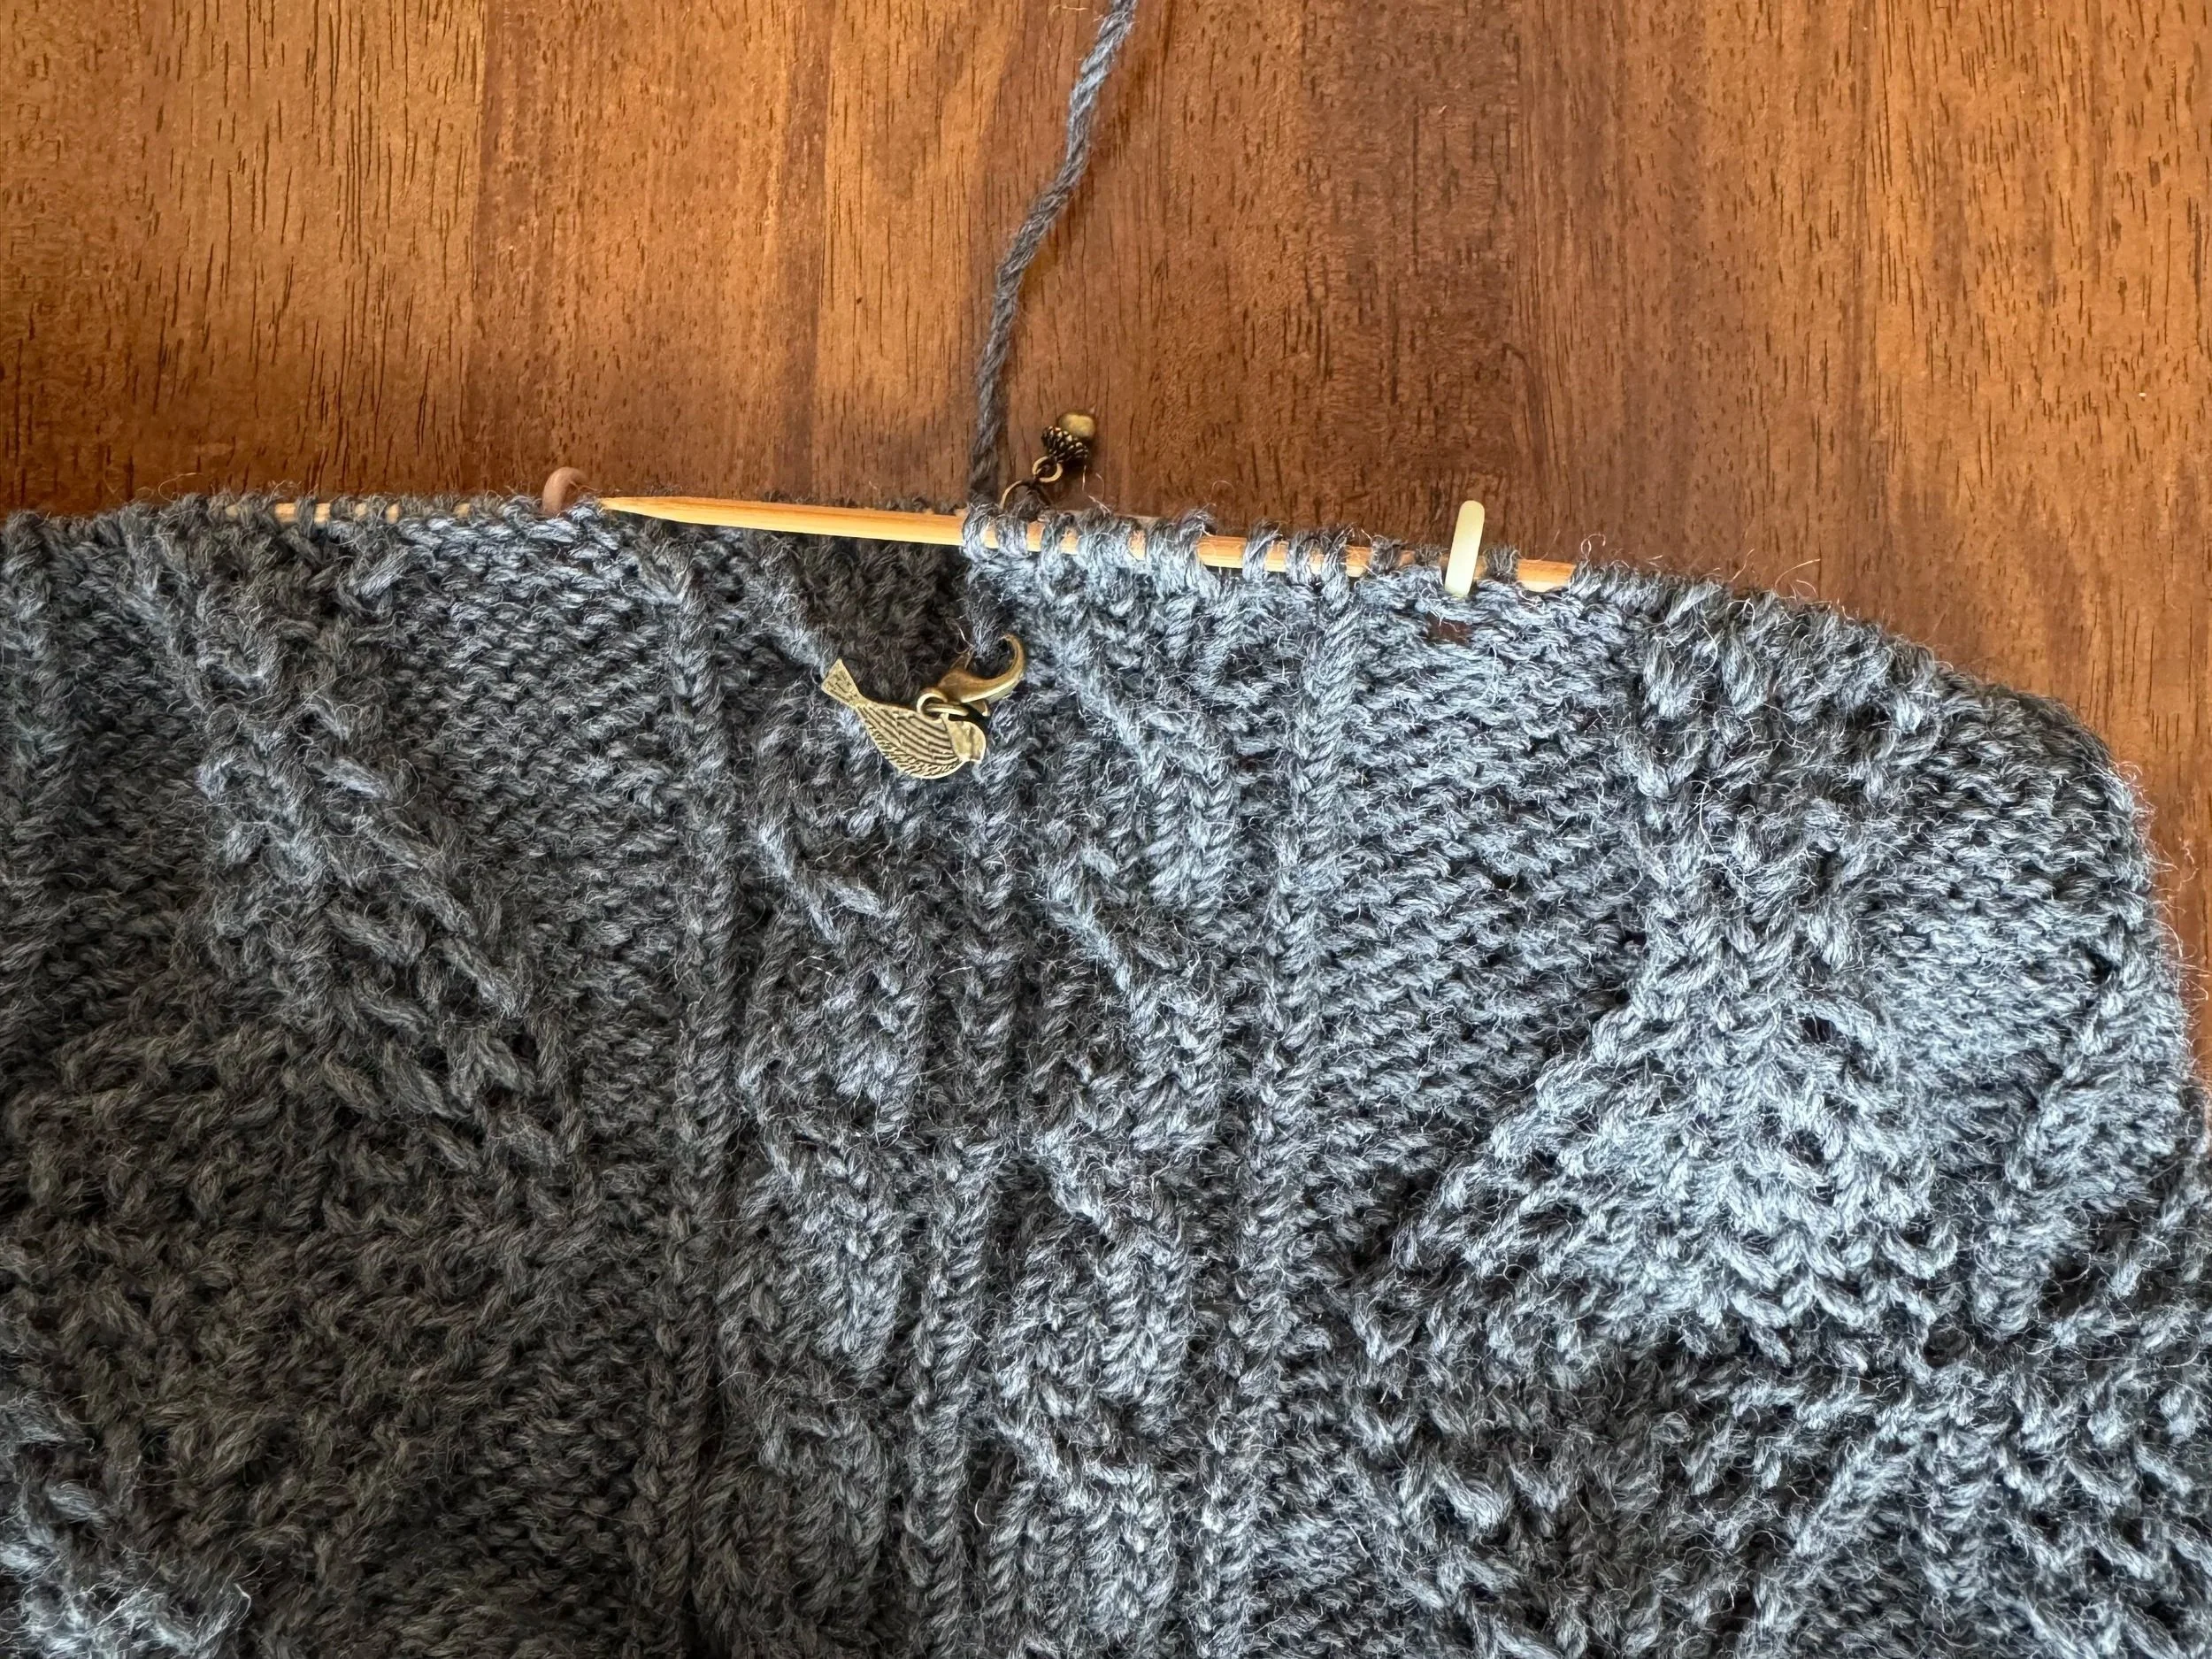
In addition to putting markers at the beginning and halfway points of my round, I also put markers at strategic points in the patterning; basically, I put the white markers immediately before and after the “fishnet” pattern. I am dutifully twisting my cable every 7th round and my, it does look nice.
This is going to be a long project, so I think I will upload as I go, rather than waiting until the whole thing is done.
-
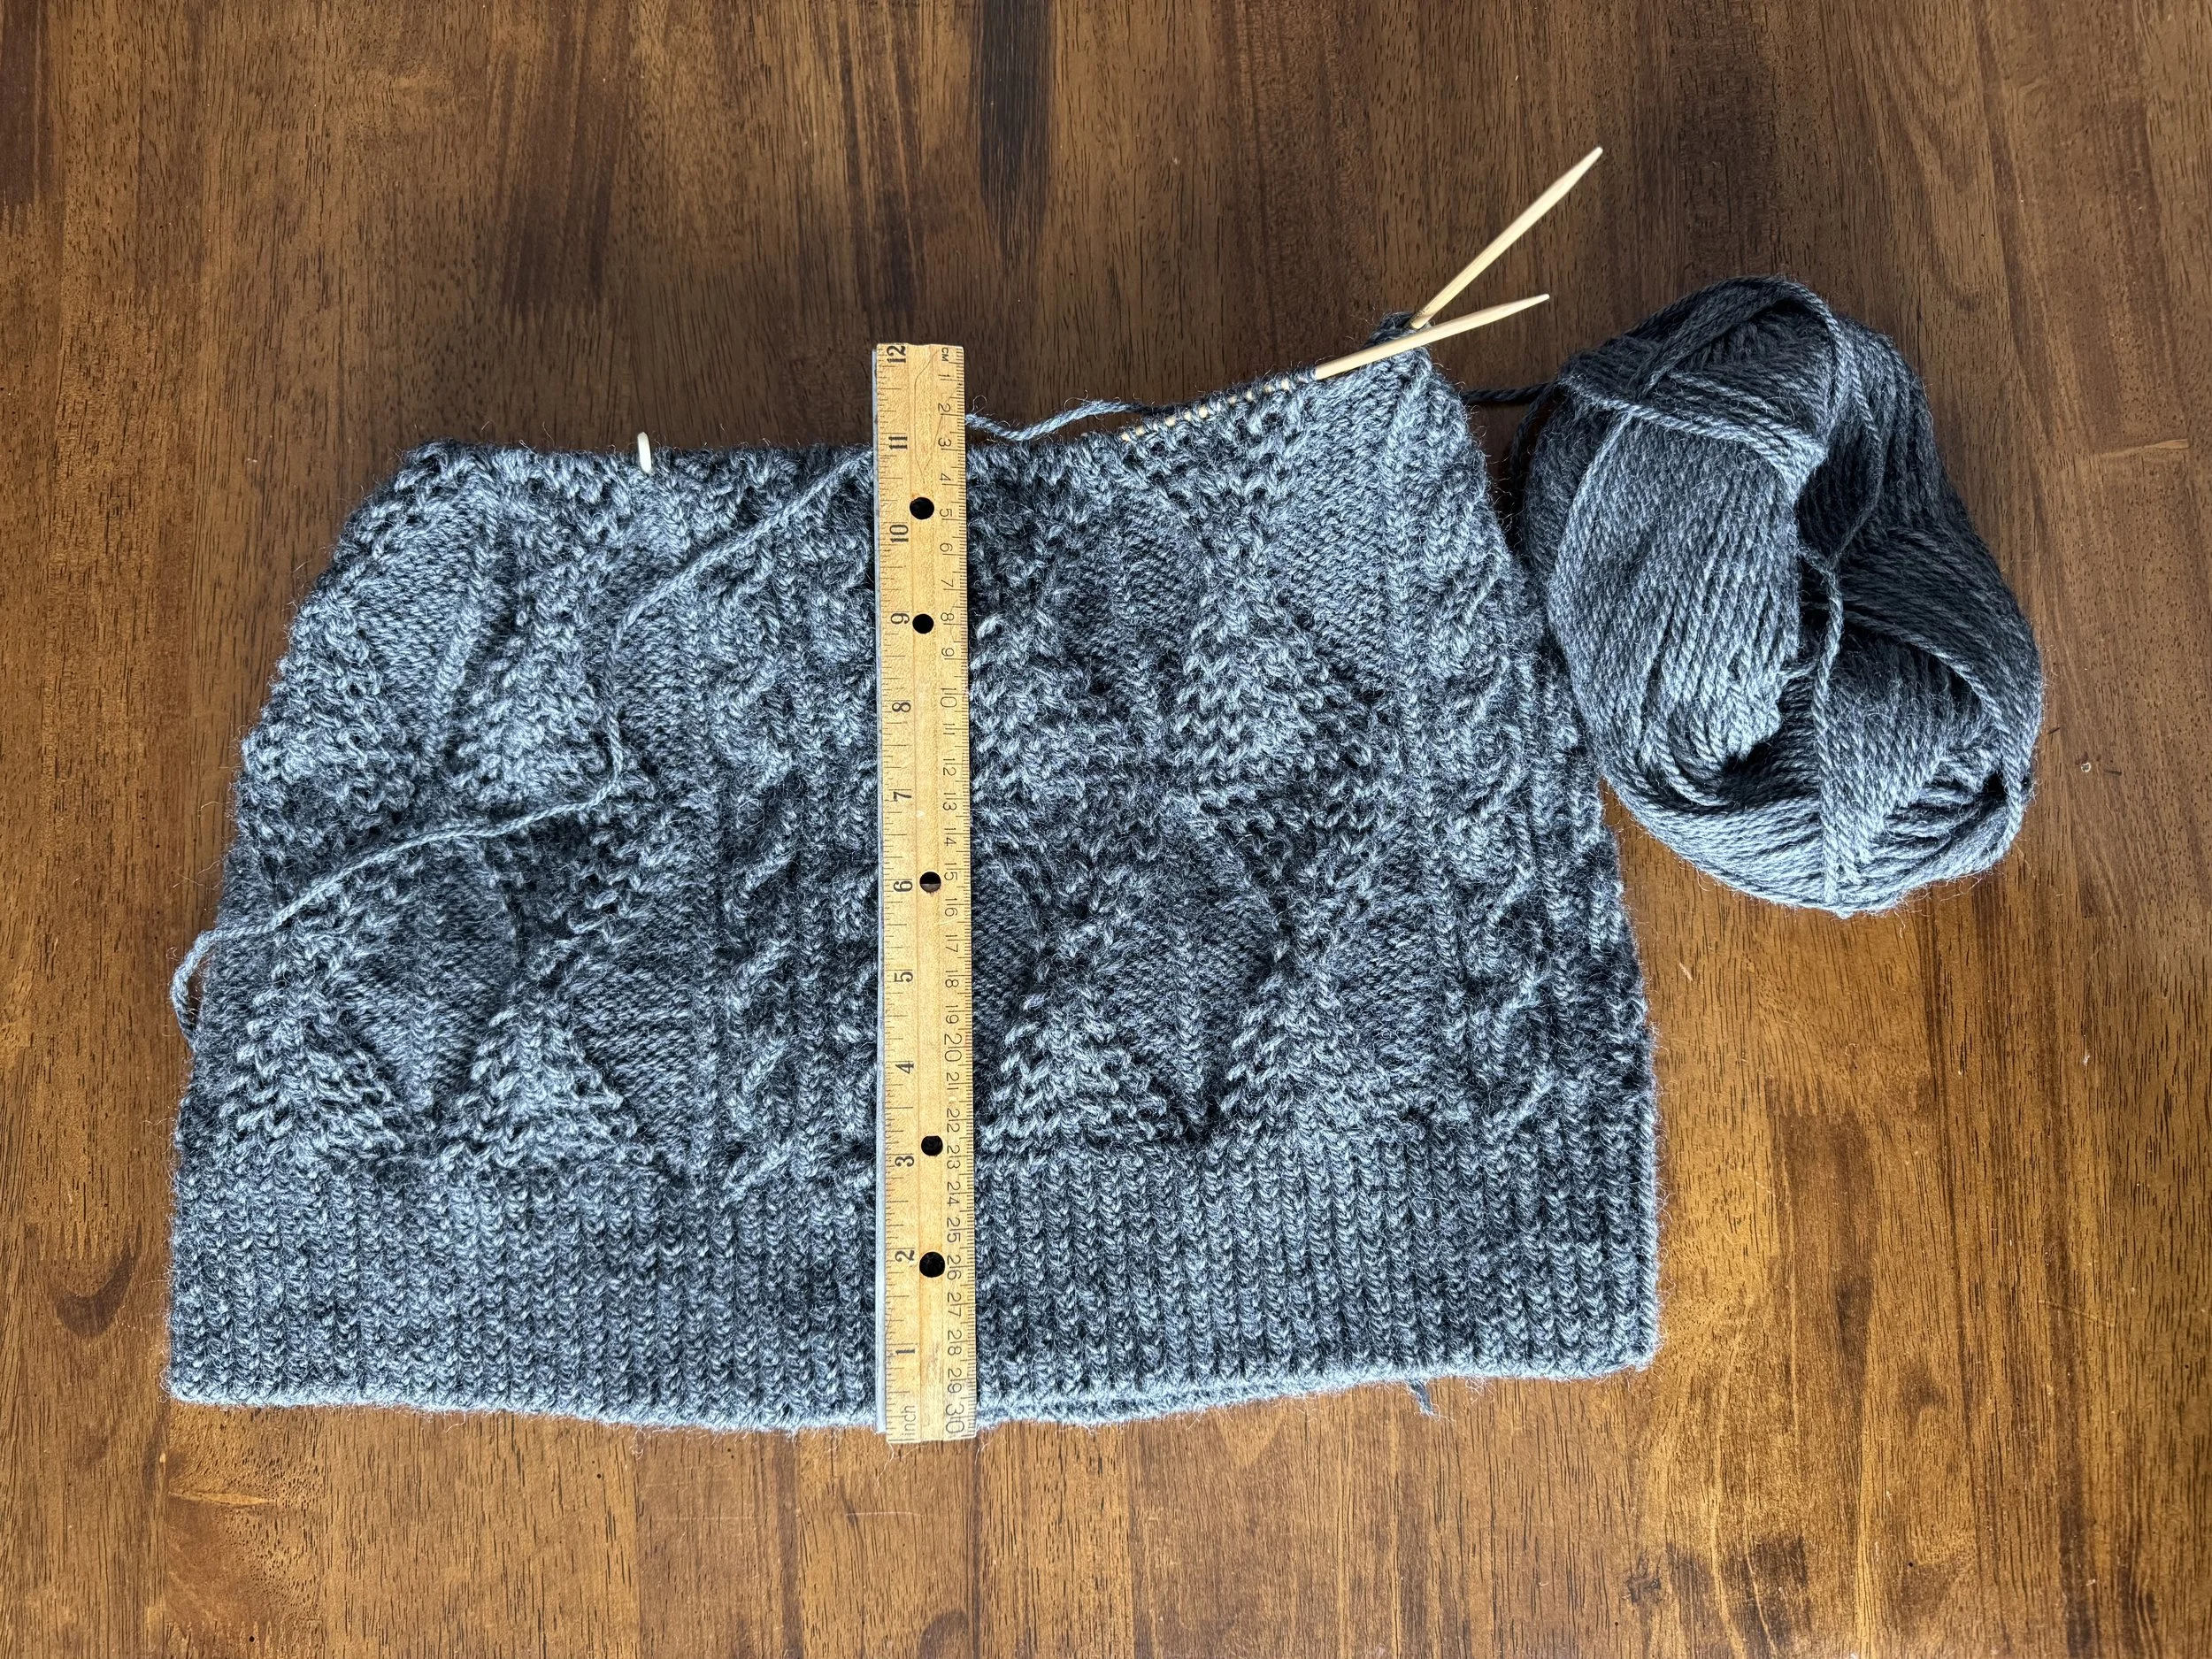
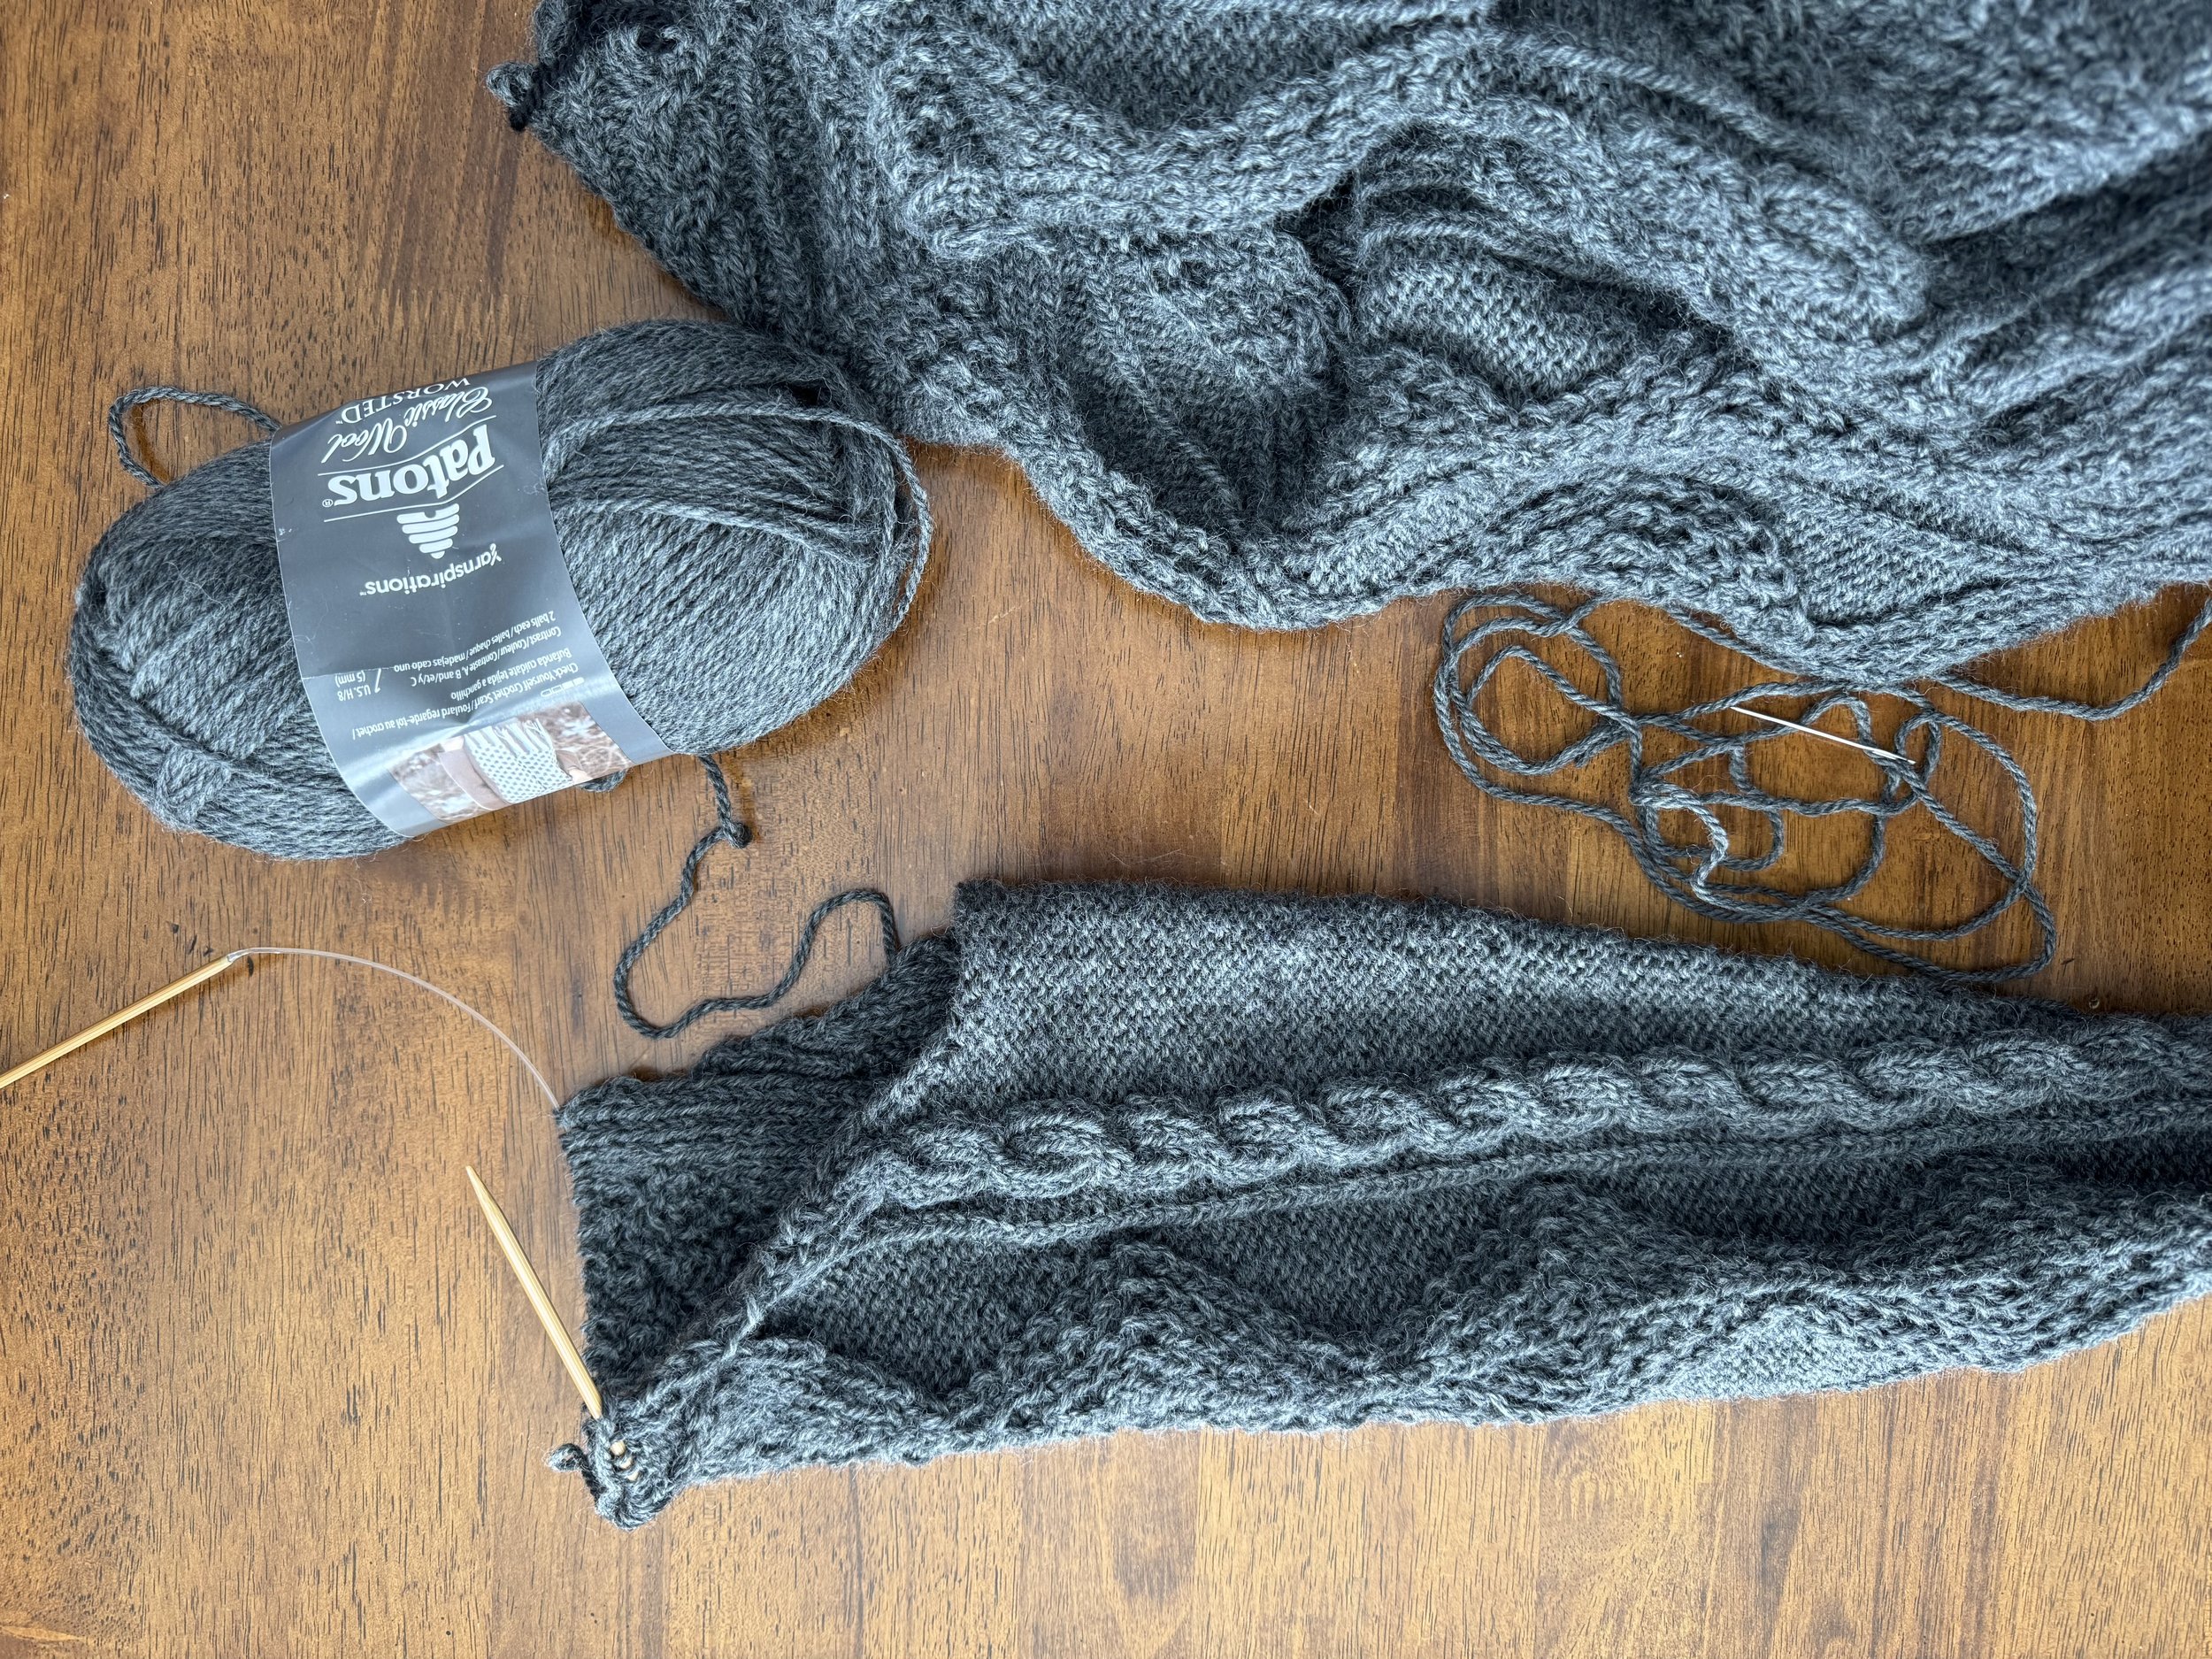
just started my third ball of yarn
Good thing I have a lot of it. I am already thinking about the sleeves and the shaping for the armholes. I am not planning to make this a drop-shoulder sweater but rather a fitted-sleeved work of art, and thus have plans to make separate sleeves and sew them in. I am not sure how this fits with the EZ approach, but it is my current plan.
-
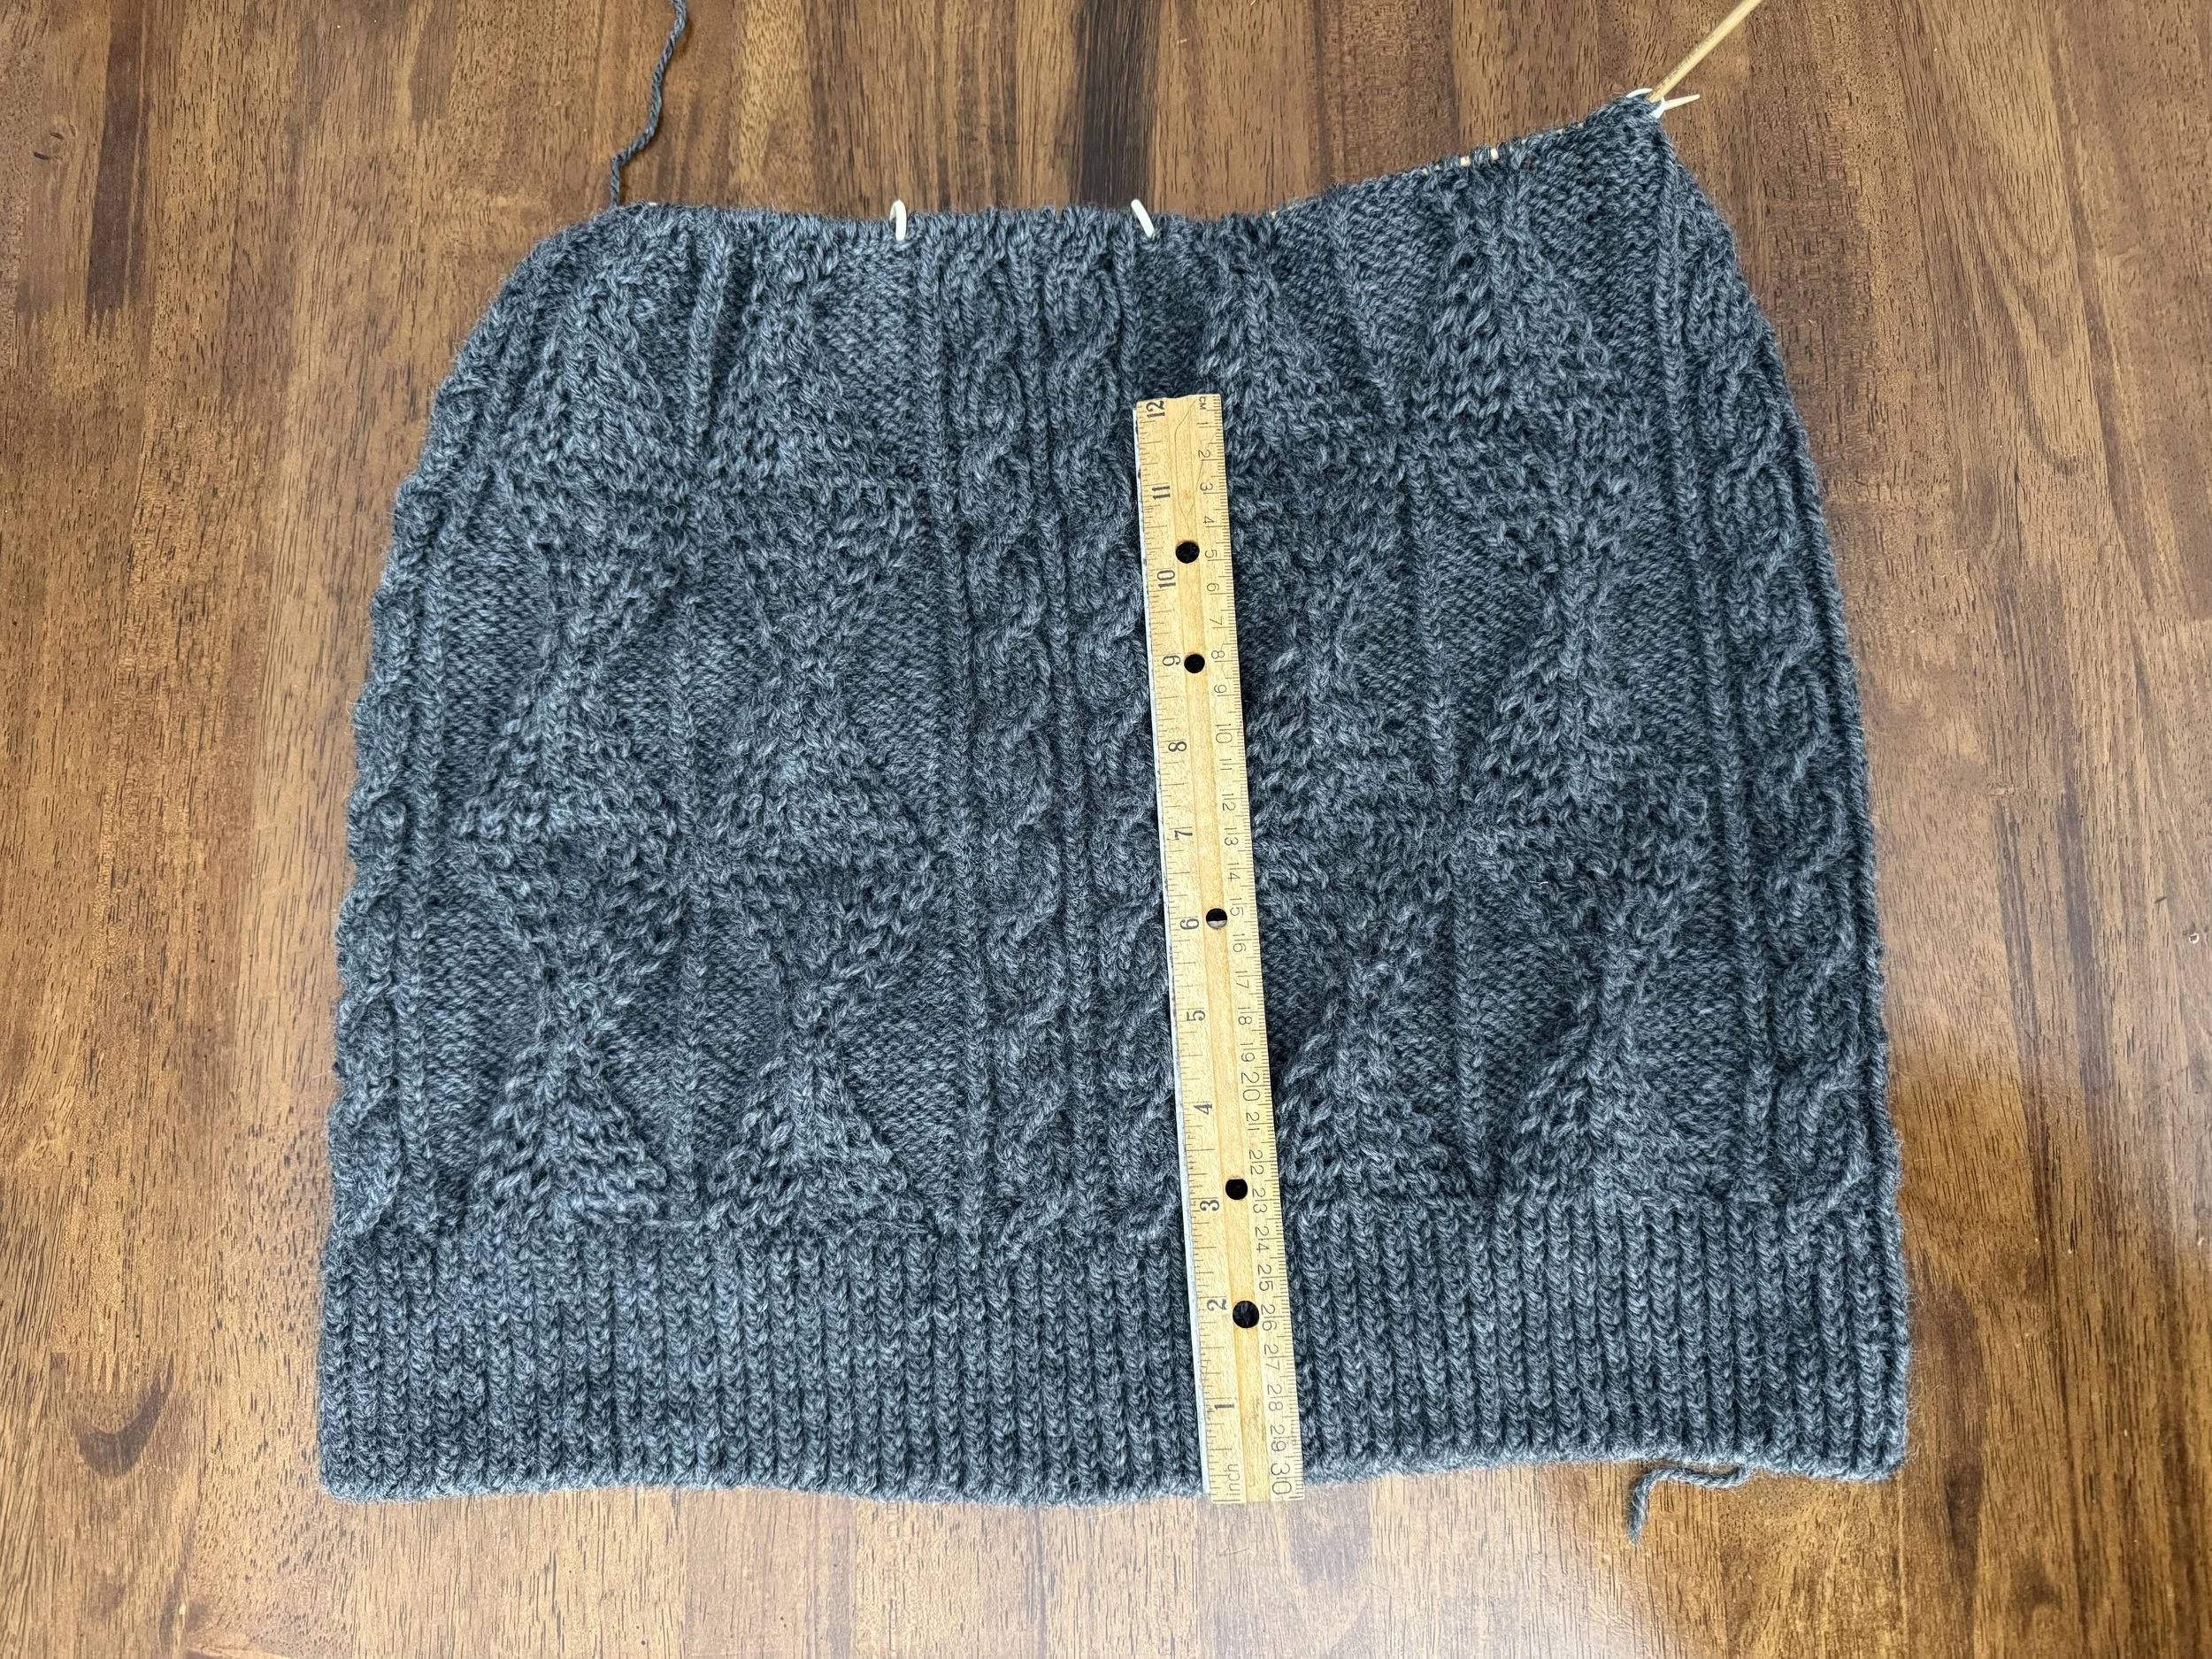
time to get organized
This should be at least 14” long before I start the underarm shaping. I am sort of dreading it, because I will have to work the front and back parts flat, but I am telling myself that I will decrease so many stitches that there won’t be a ton to do. I am not sure I believe myself. EZ’s simpler sleeve idea is beginning to burn a bit brighter. But I am not a big person and a drop-sleeve Aran would swallow me whole. Could I make a raglan, perhaps? The trouble with raglan Arans is that sometimes the shoulders seem to predominate and the neck seems a bit squinched. I have a few more inches to keep thinking.
-
i am out of time
I am also ready to face the set-in sleeve planning. I think.
-
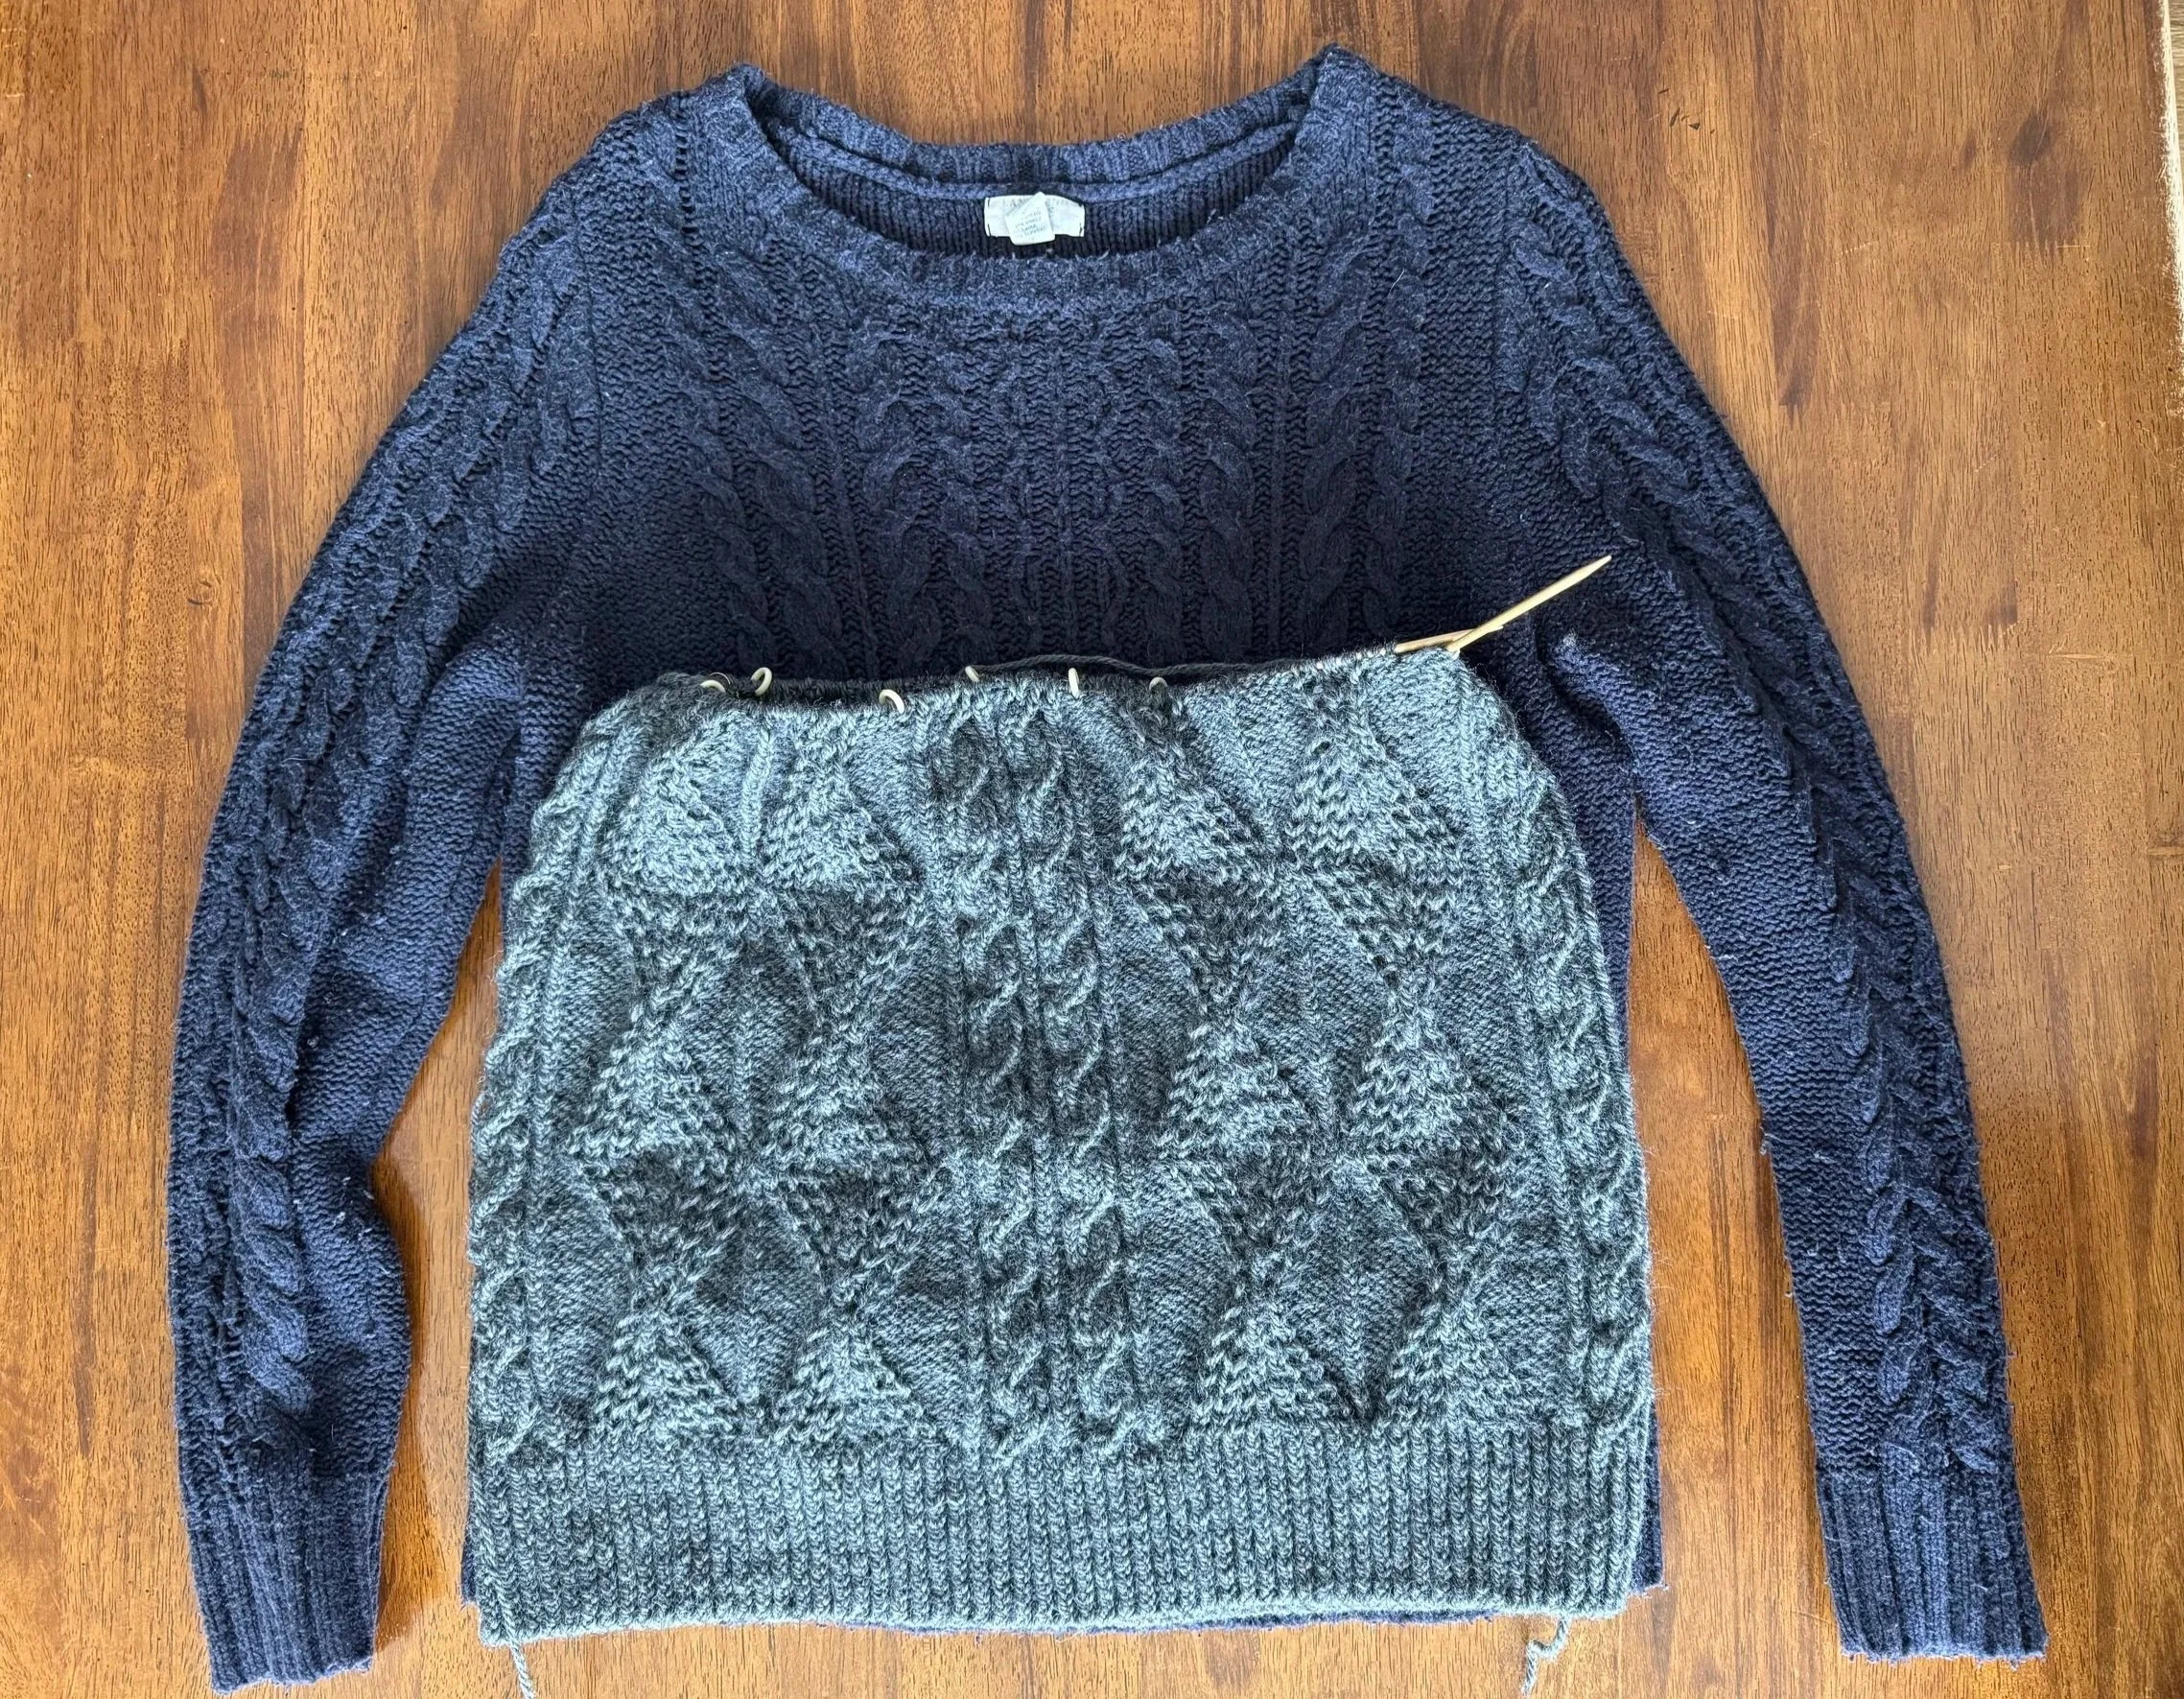
they always say to find a sweater you like
This very old friend fits more or less the way I want my very new friend to fit, though the neck opening is a bit wider than I want. It is quite stretched from years of wear, so I will have to account for that in my planning,
-
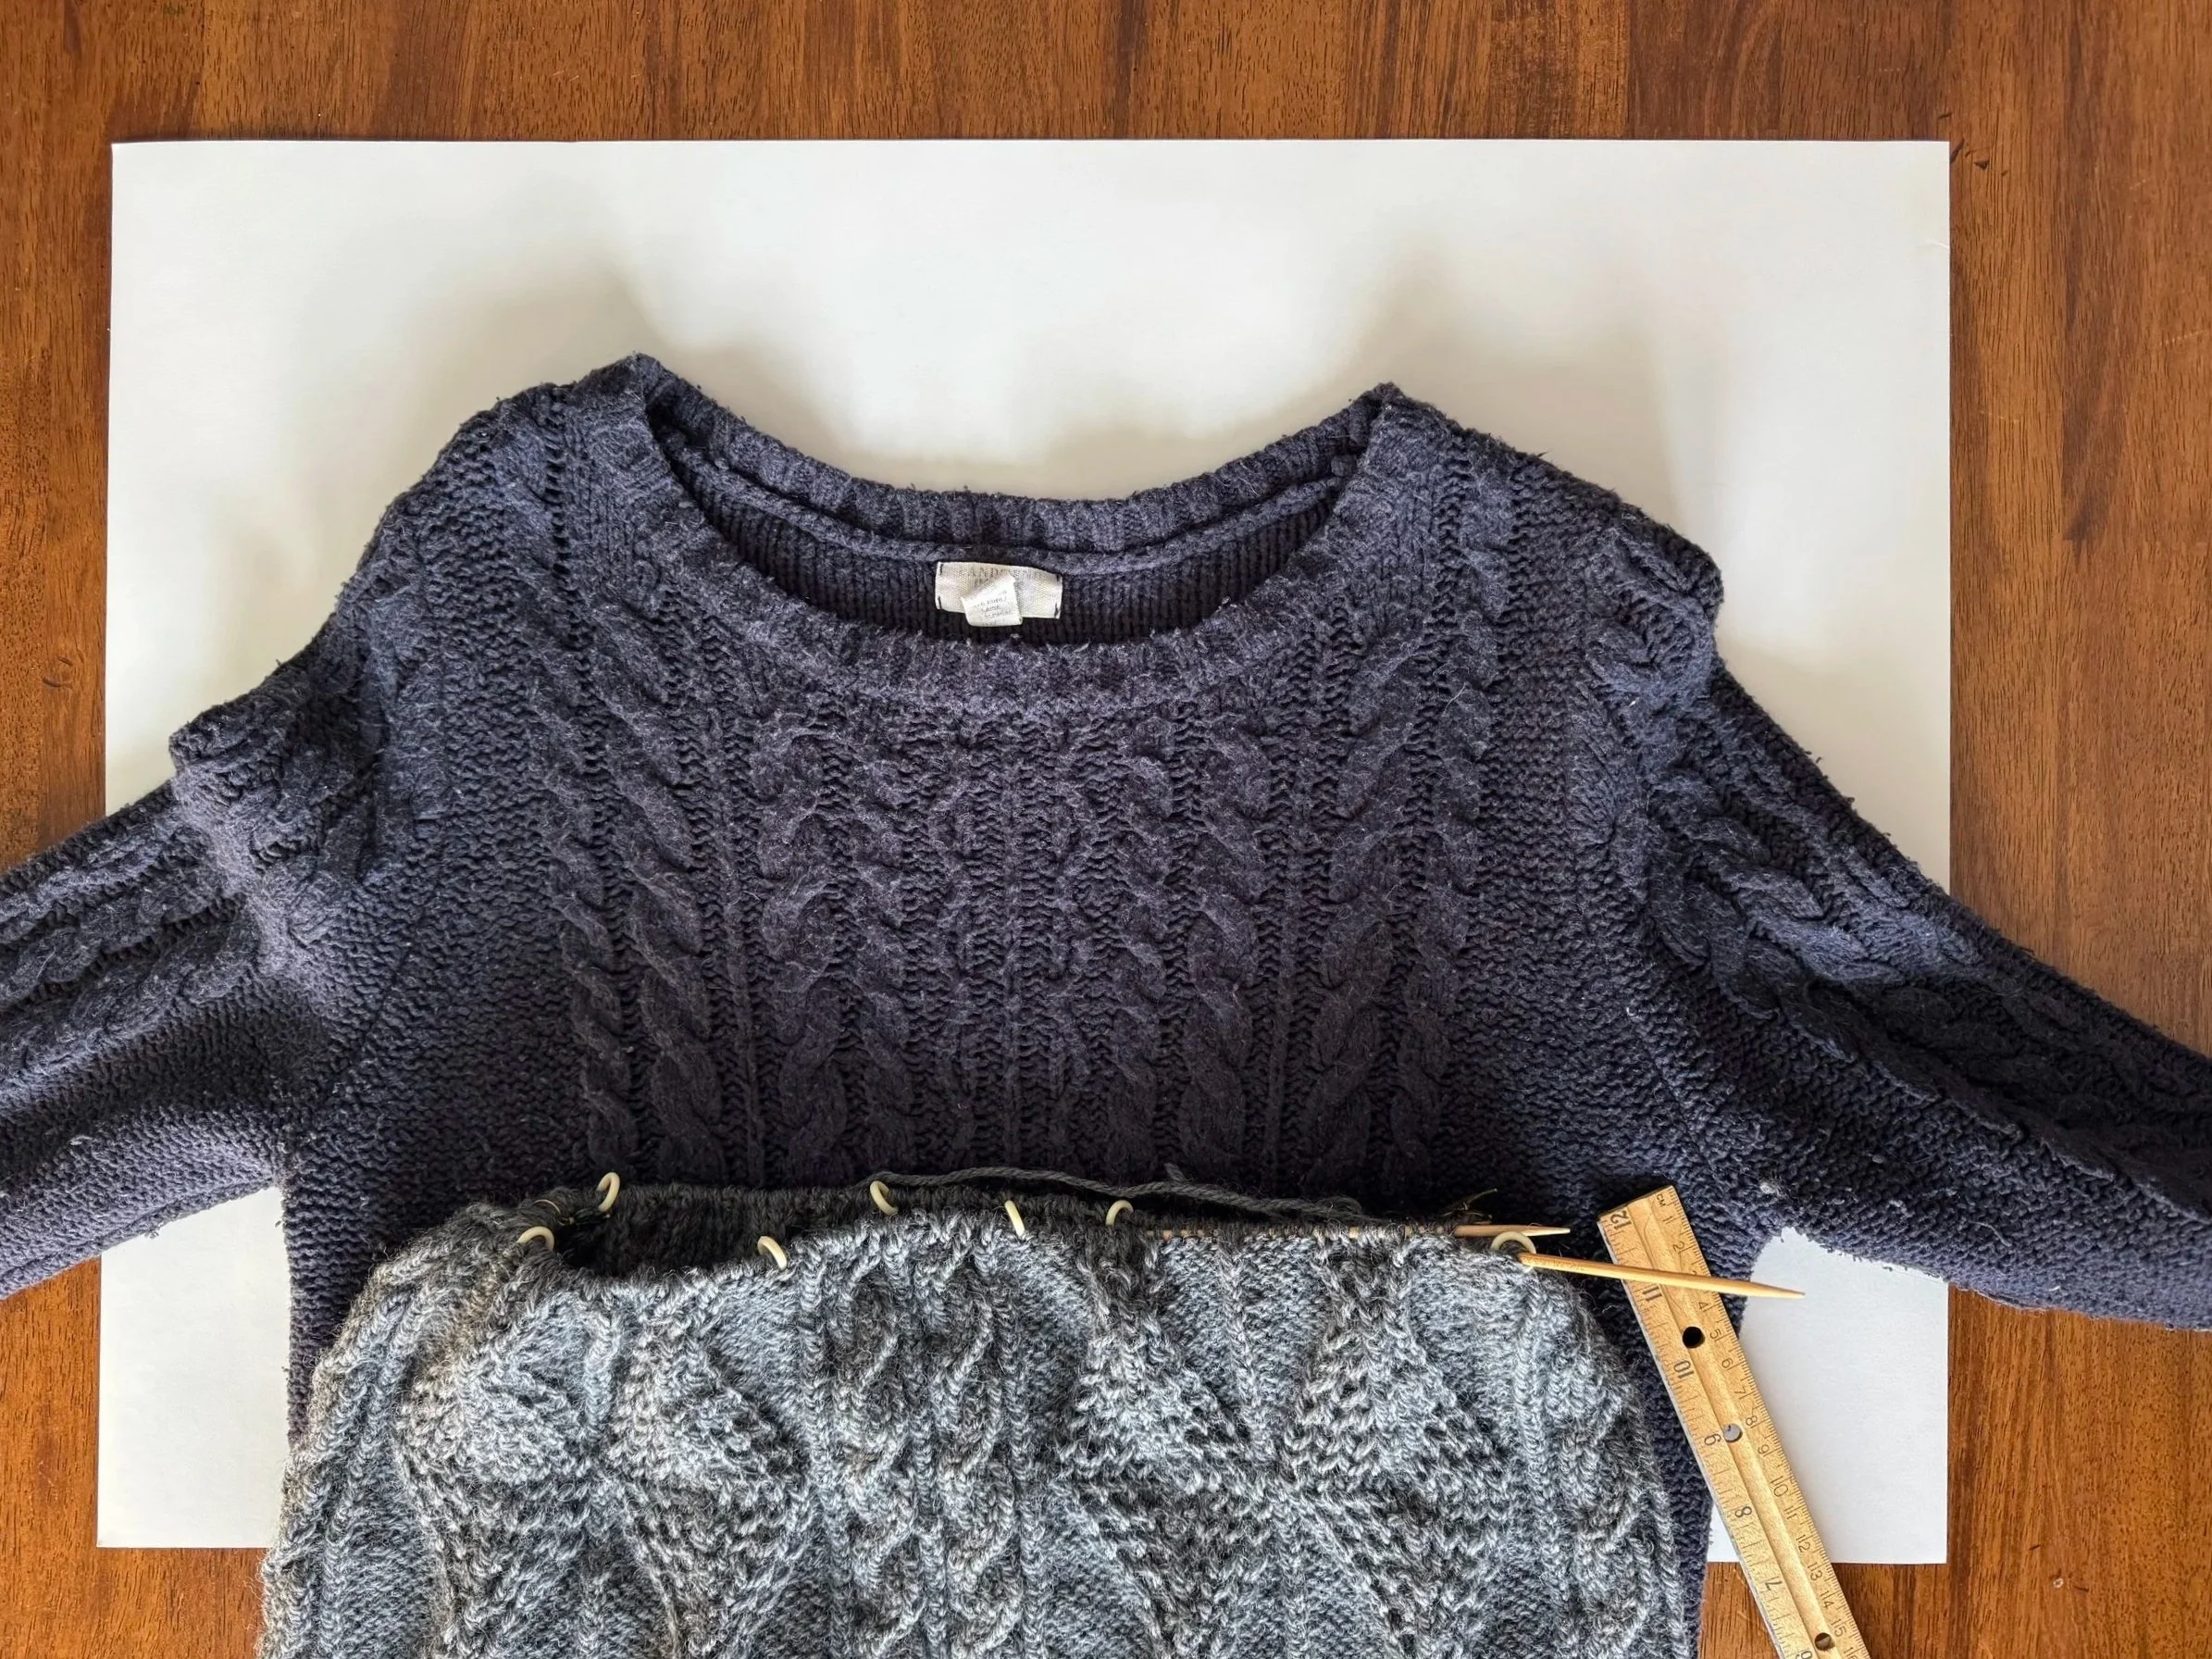
I doubt if they mean for you to do this
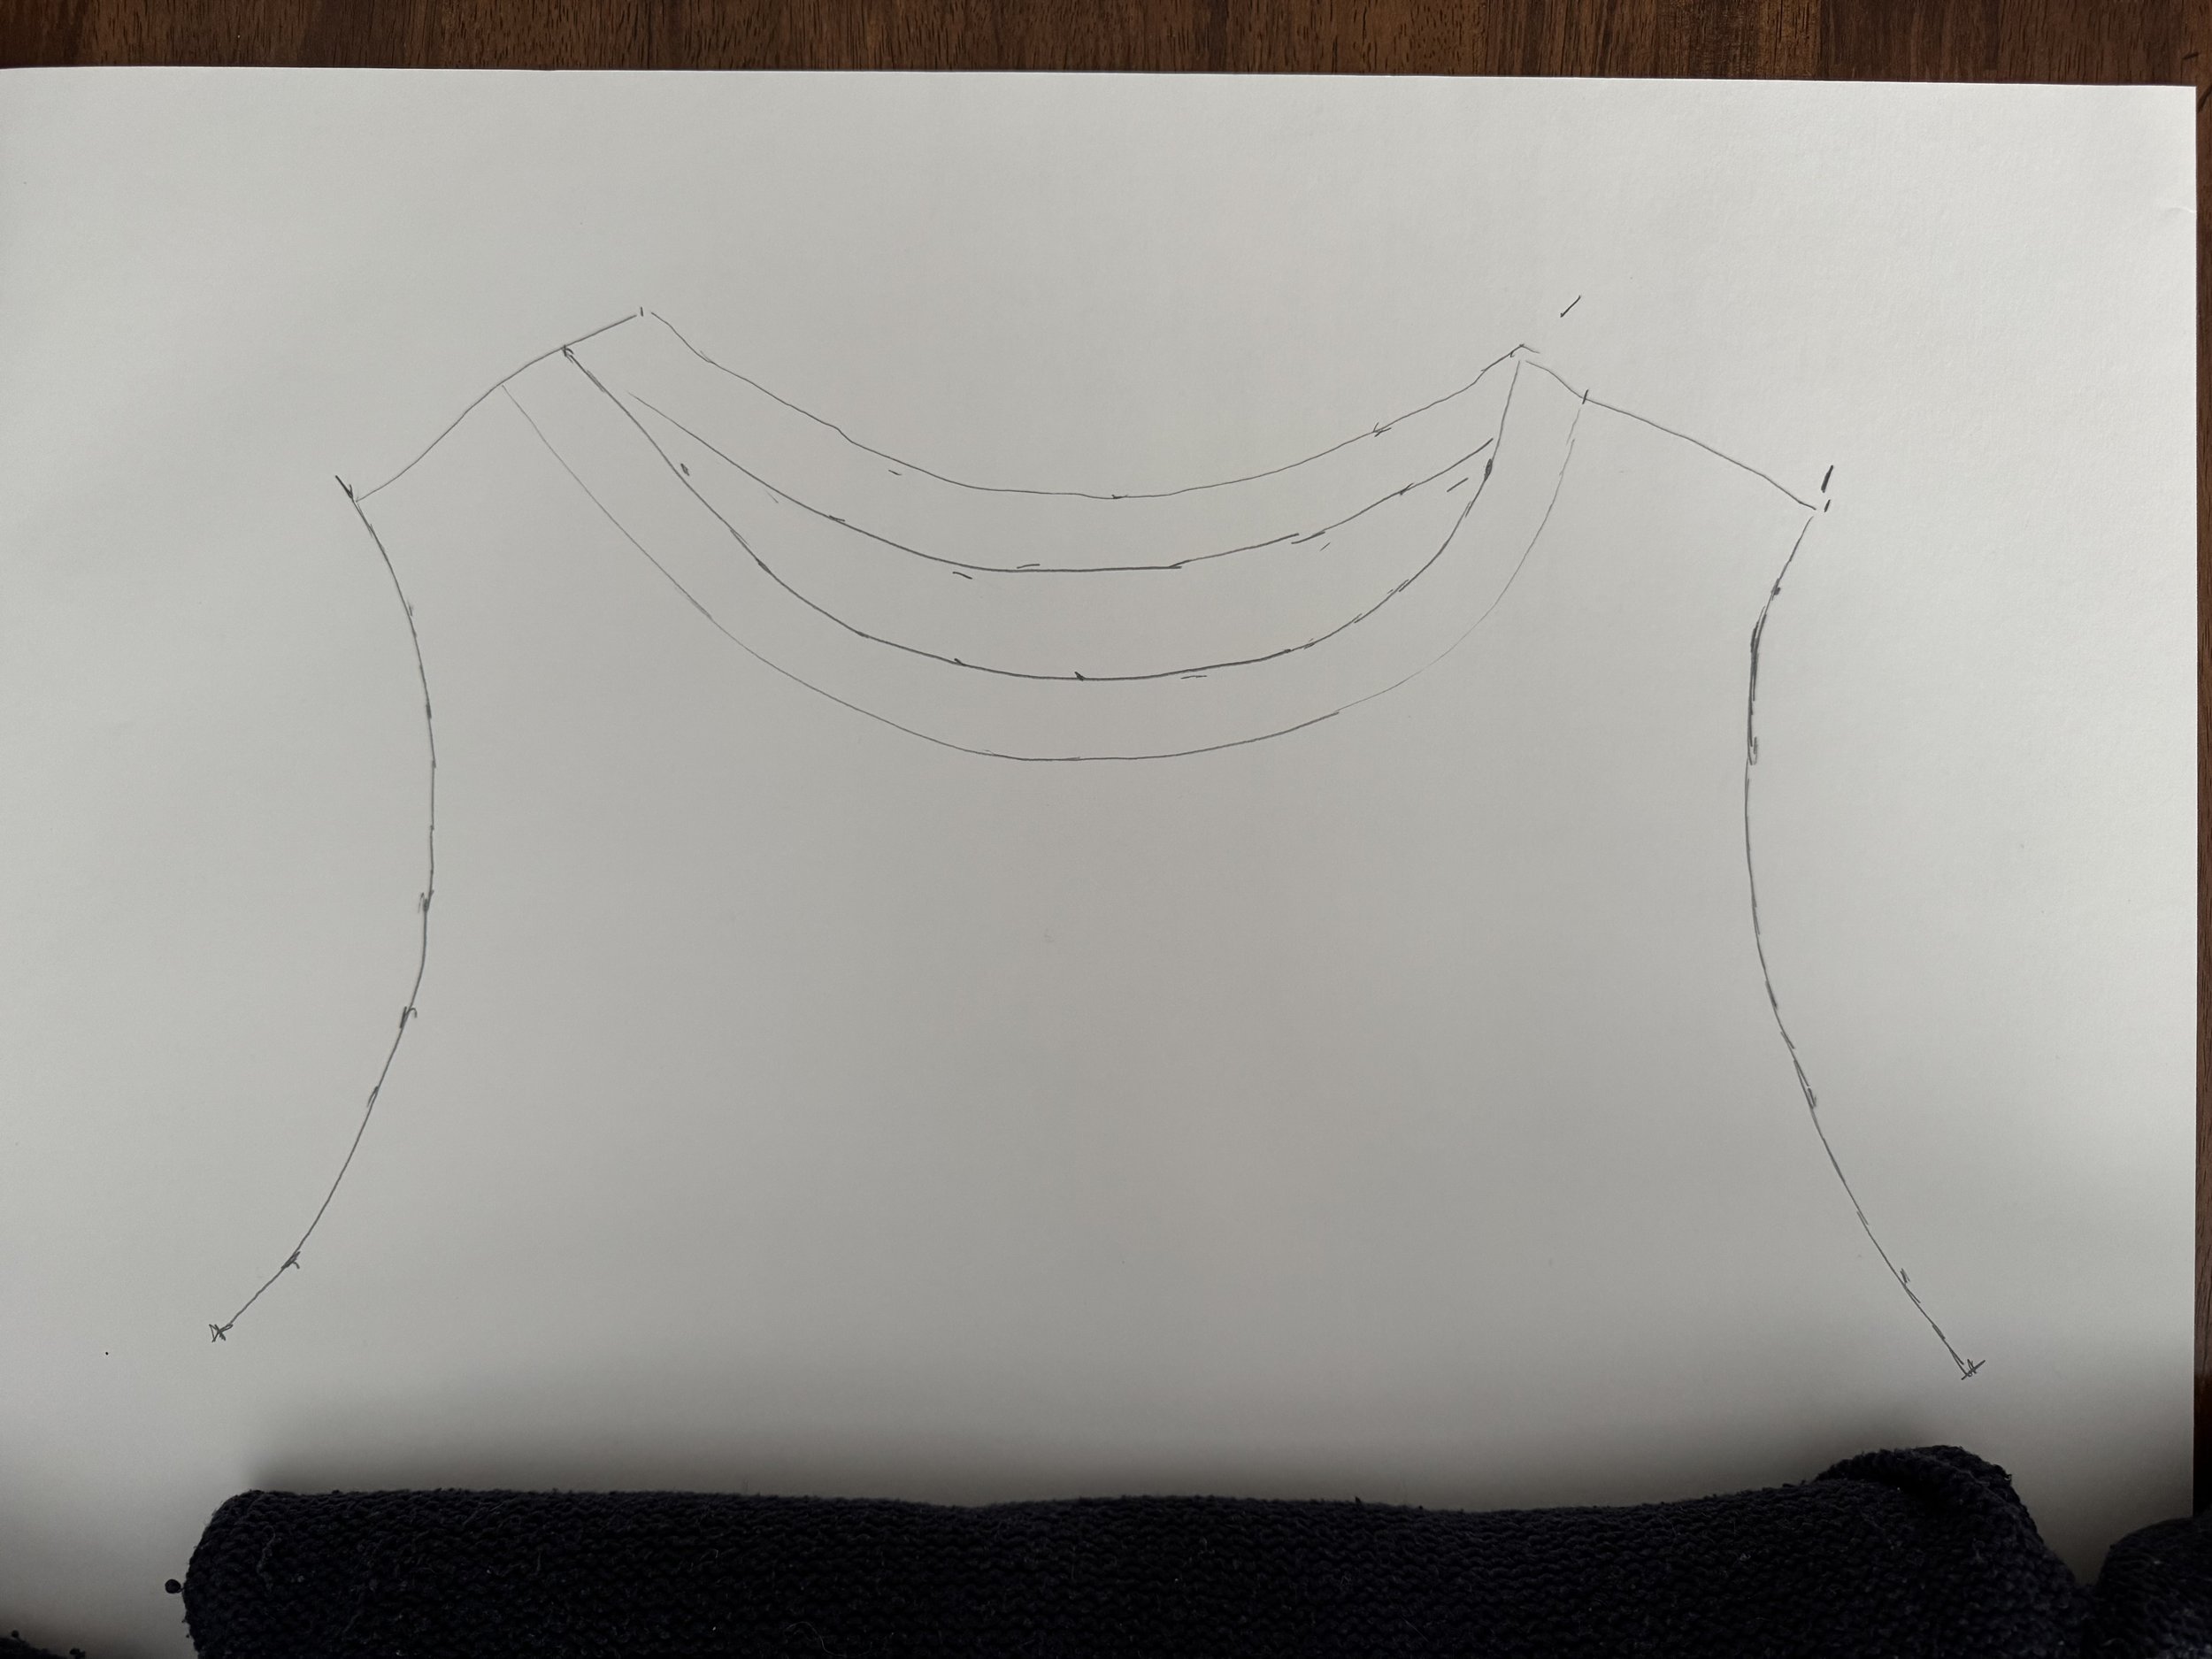
I plan to trace this old sweater onto paper and then to figure out how to replicate its dimensions.
-
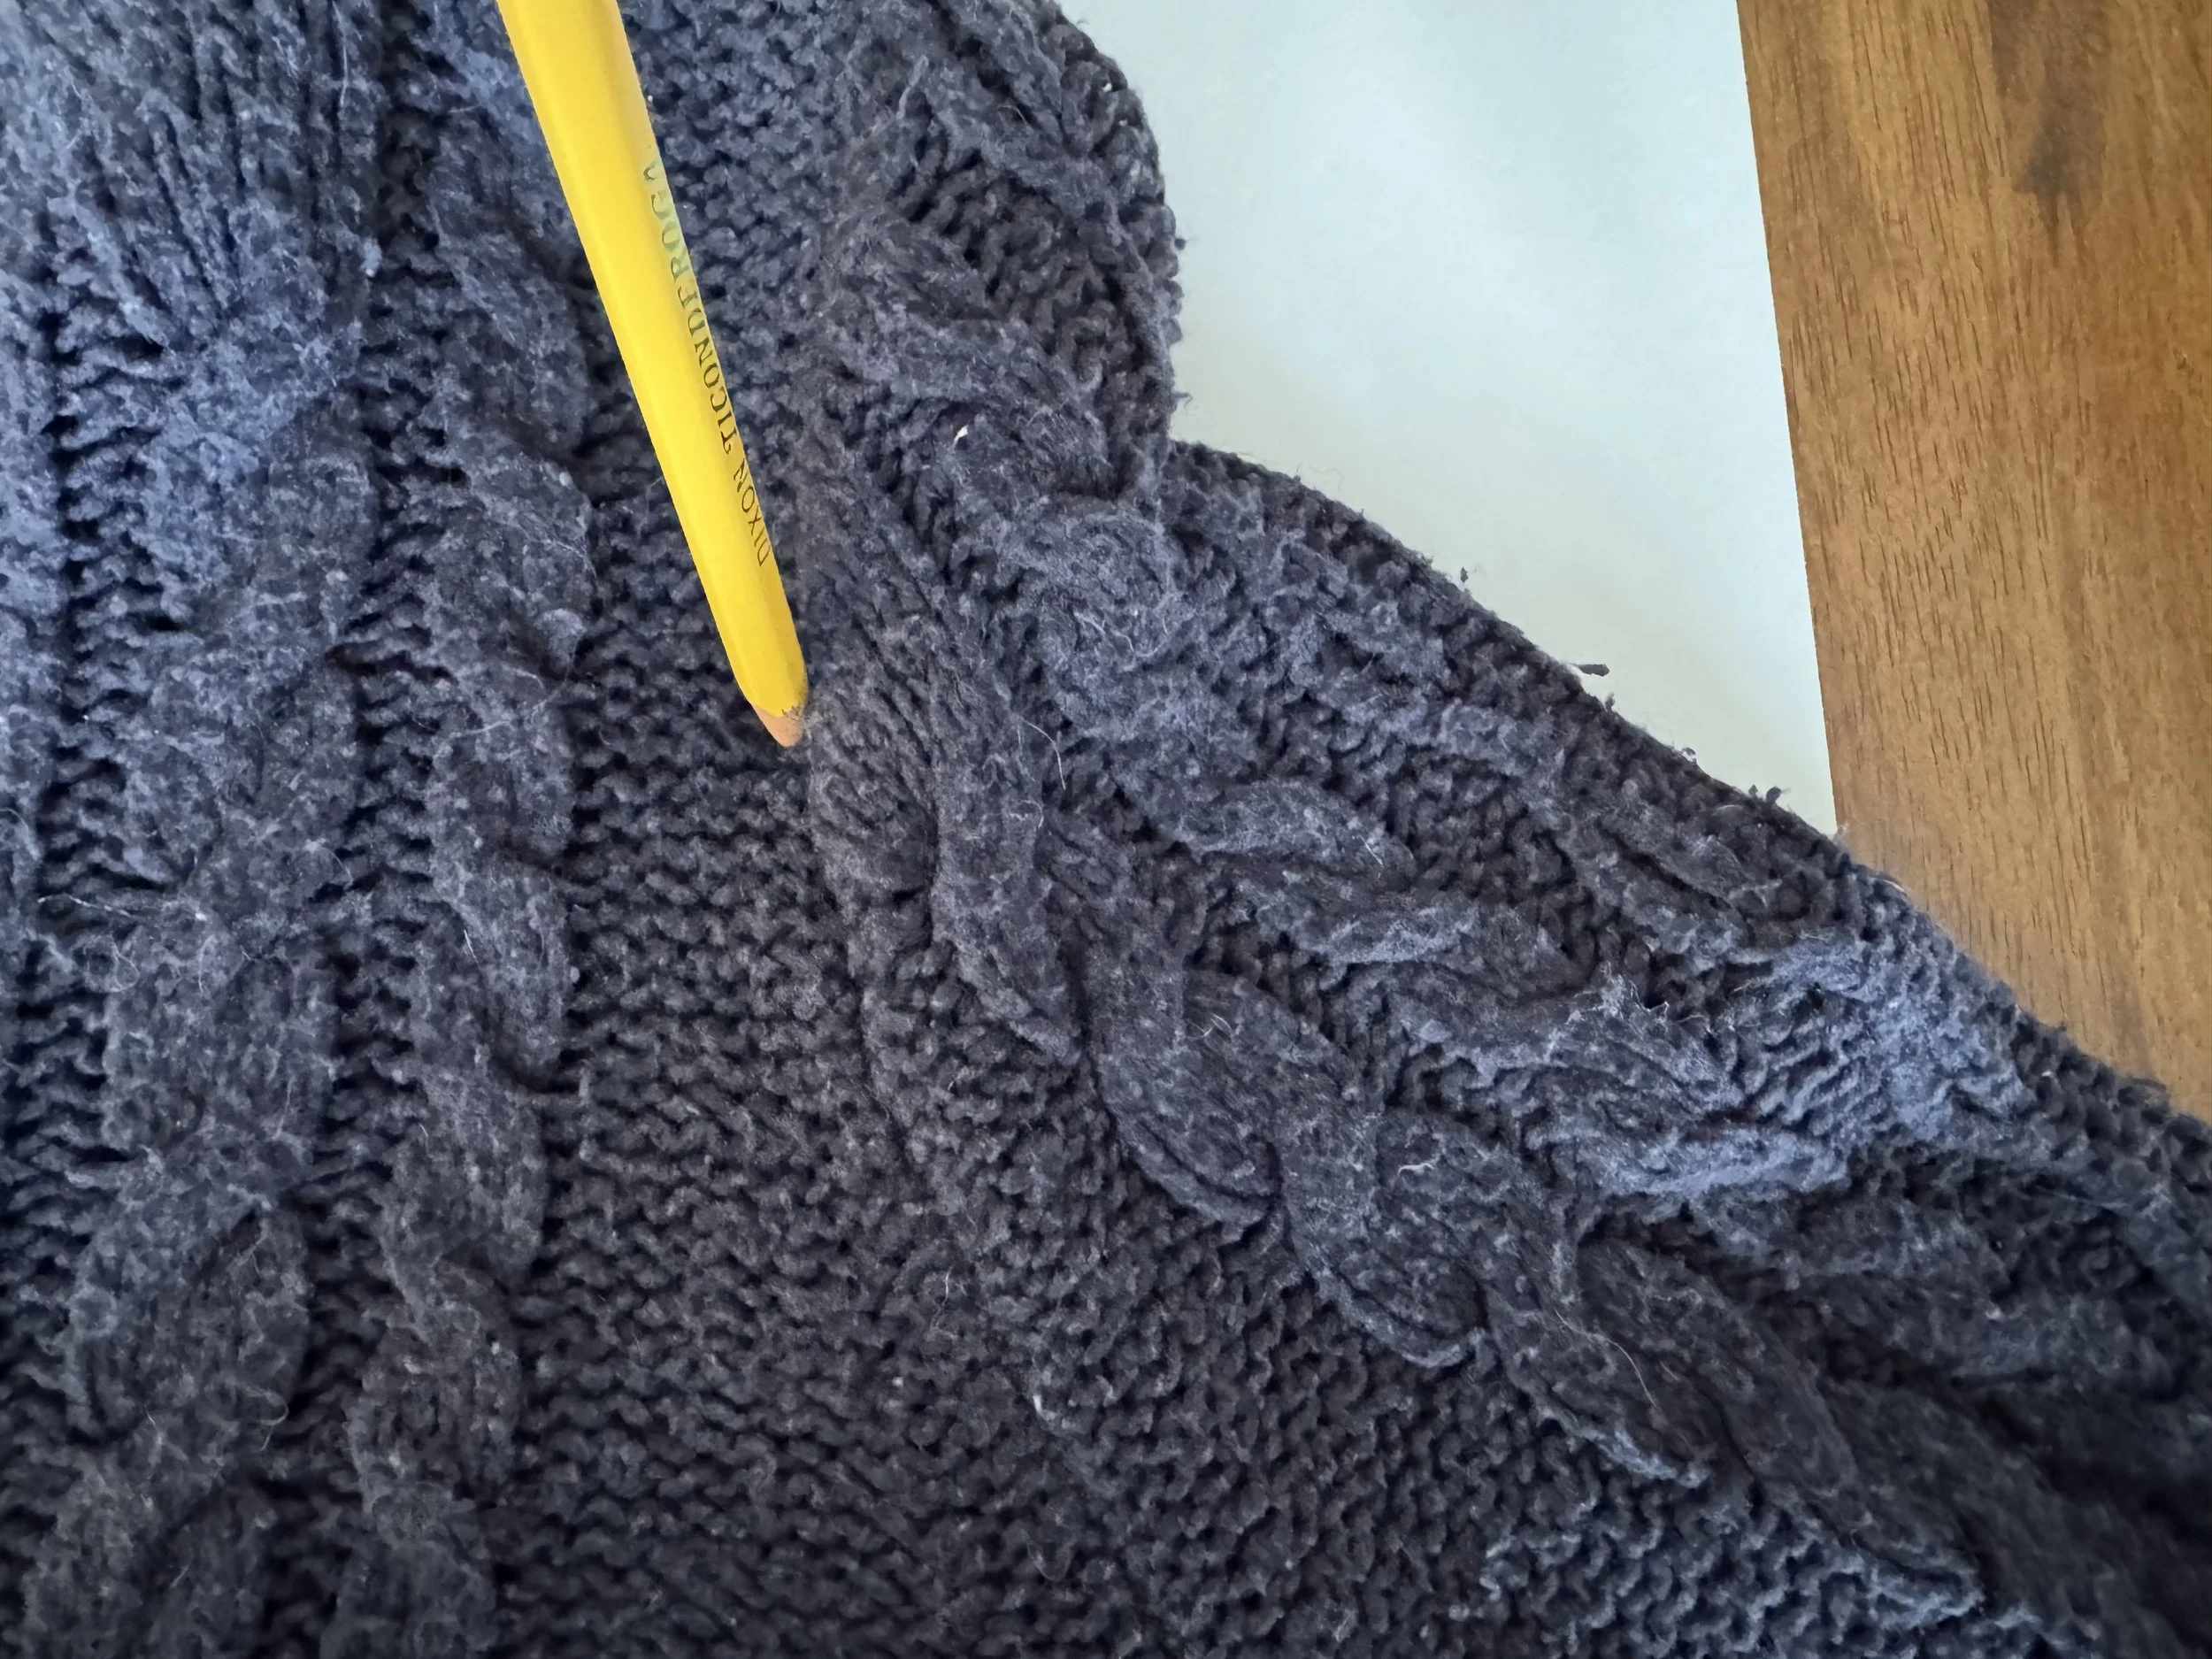
how rude
I am sticking my pencil through both layers of the sweater every inch or so and making a dot on the paper underneath. The top parts I am simply tracing.
-
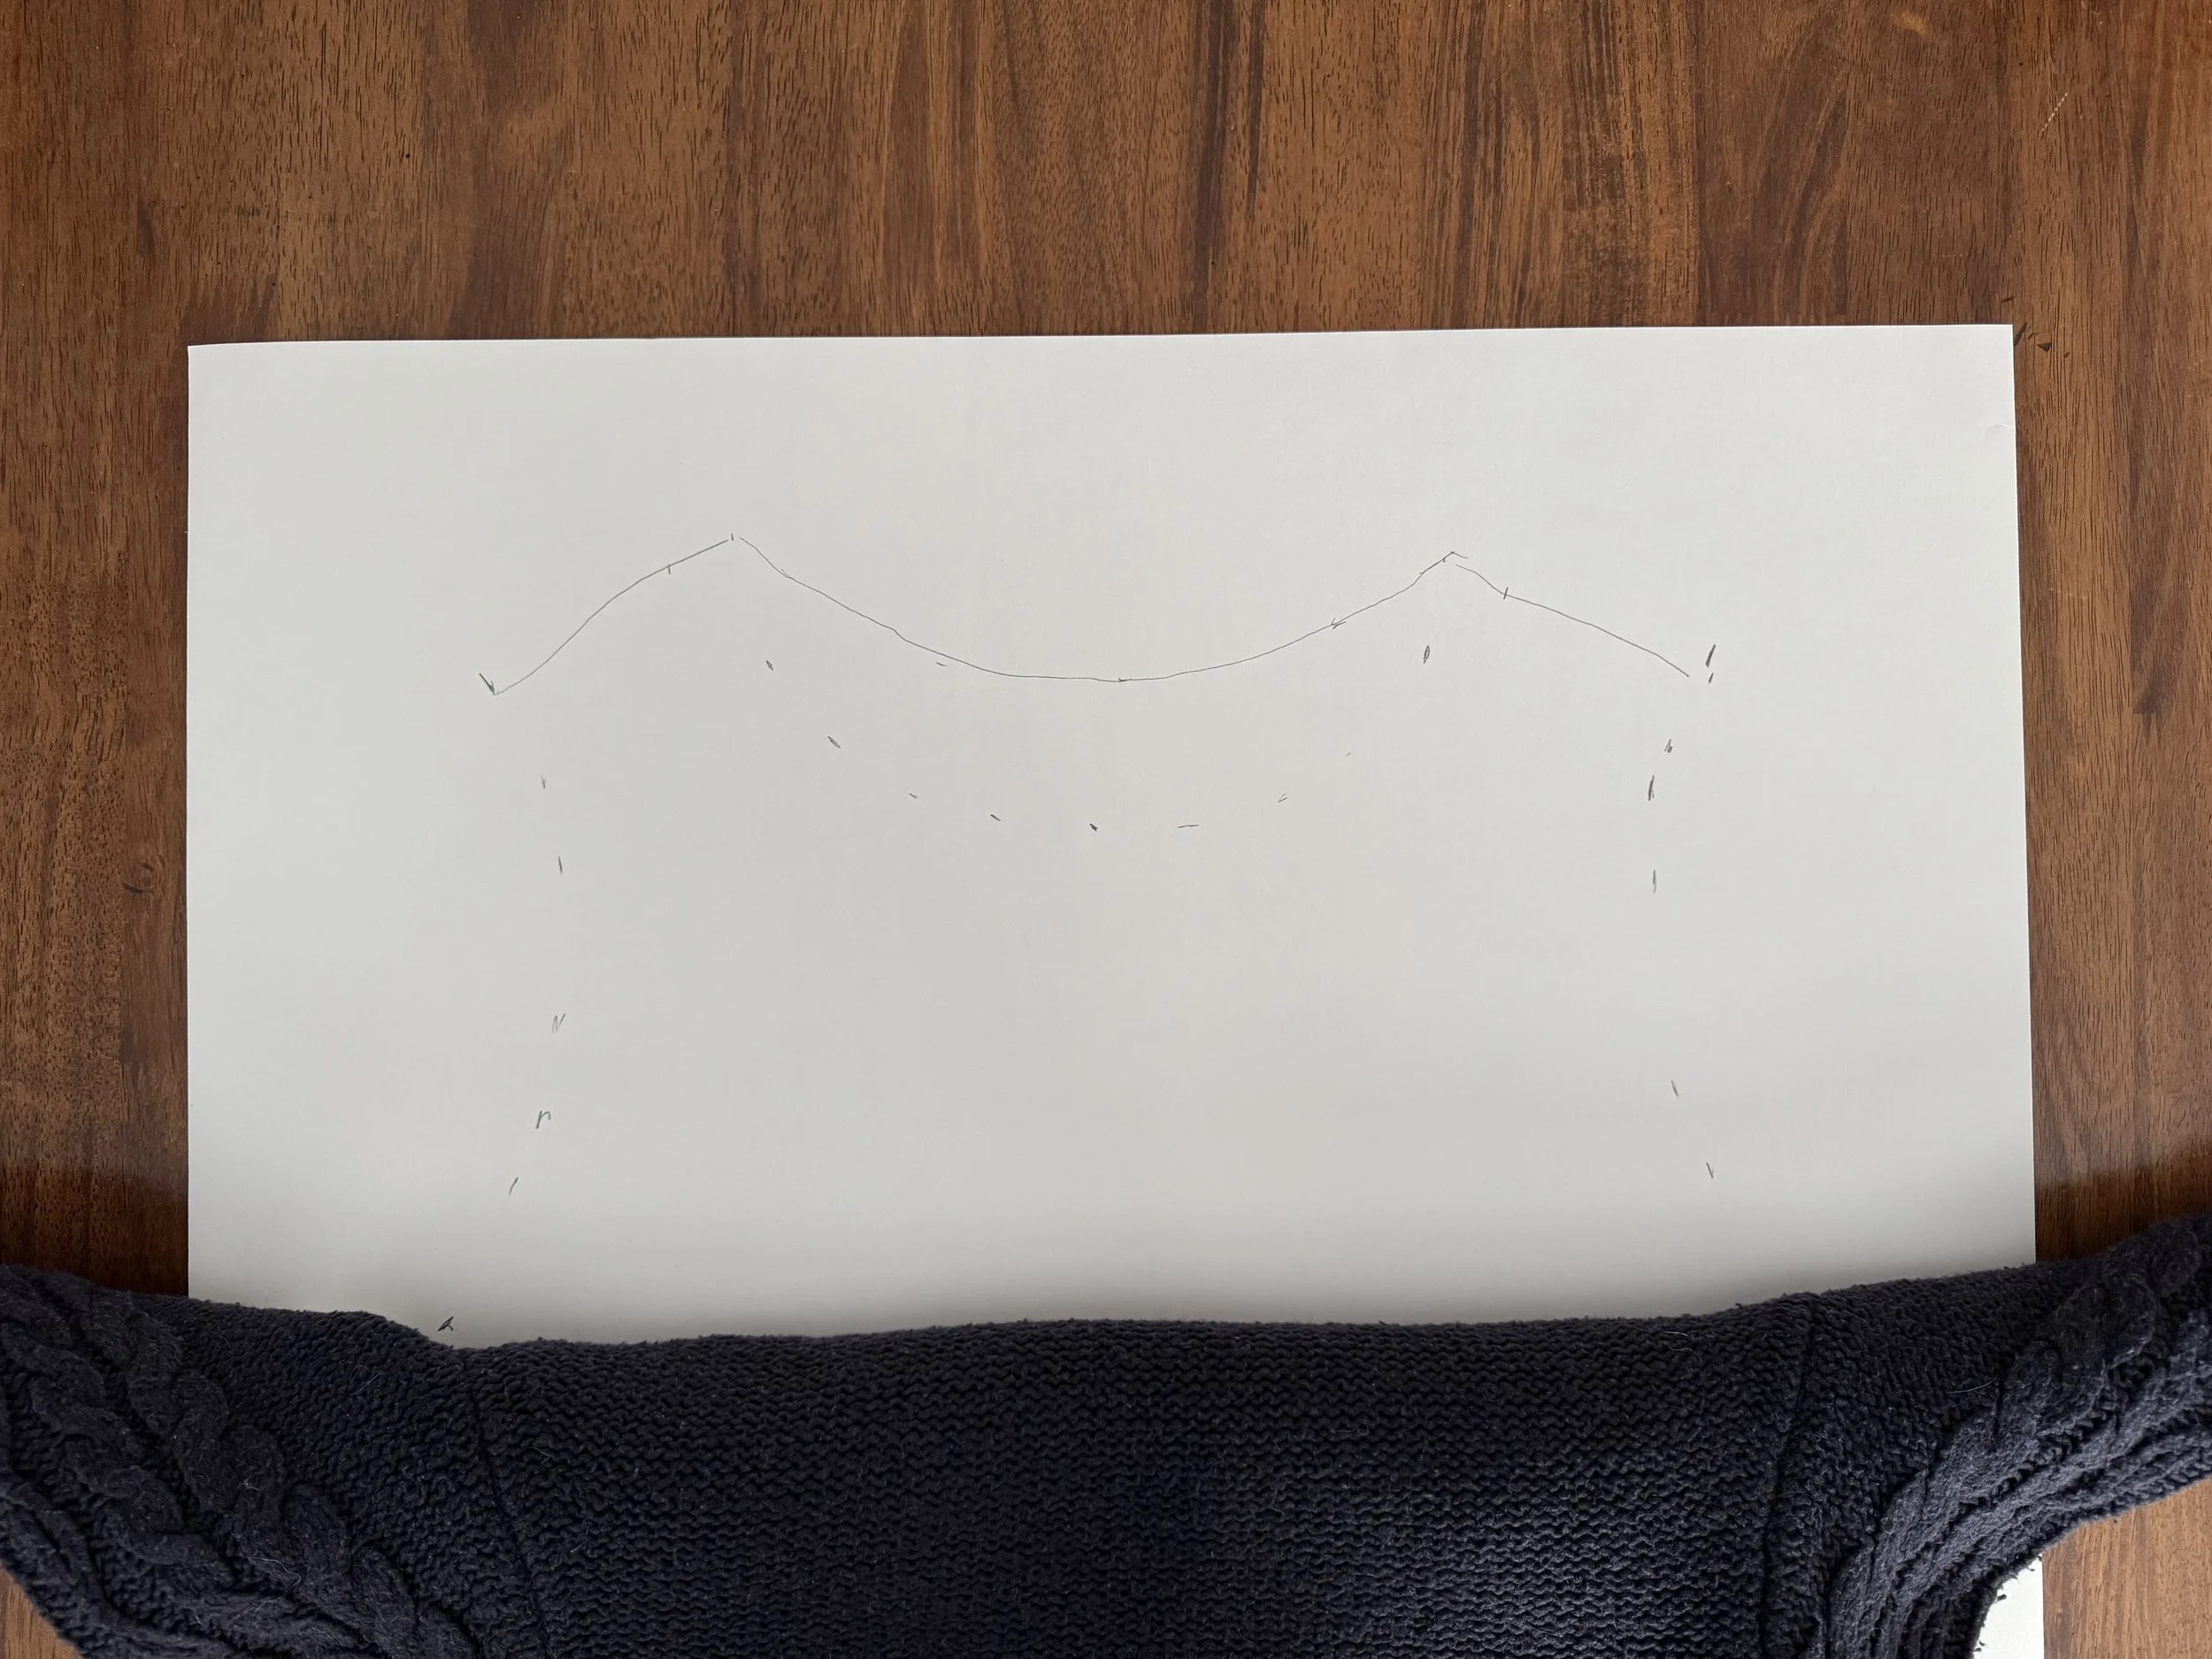
dot-to-dot time
It was crude but effective.
-
yes!
I sort of just eyeballed the neck ribbing, but this doesn’t look too bad. And the shoulders are flaring out at the top, thanks to the sweater being old and stretched. I will have to do something about that. It does not make sense to start increasing in the shoulder area, unless I want a flared shoulder which I do not.
Lesson: Trust your drawings but not too much.
-
this looks good
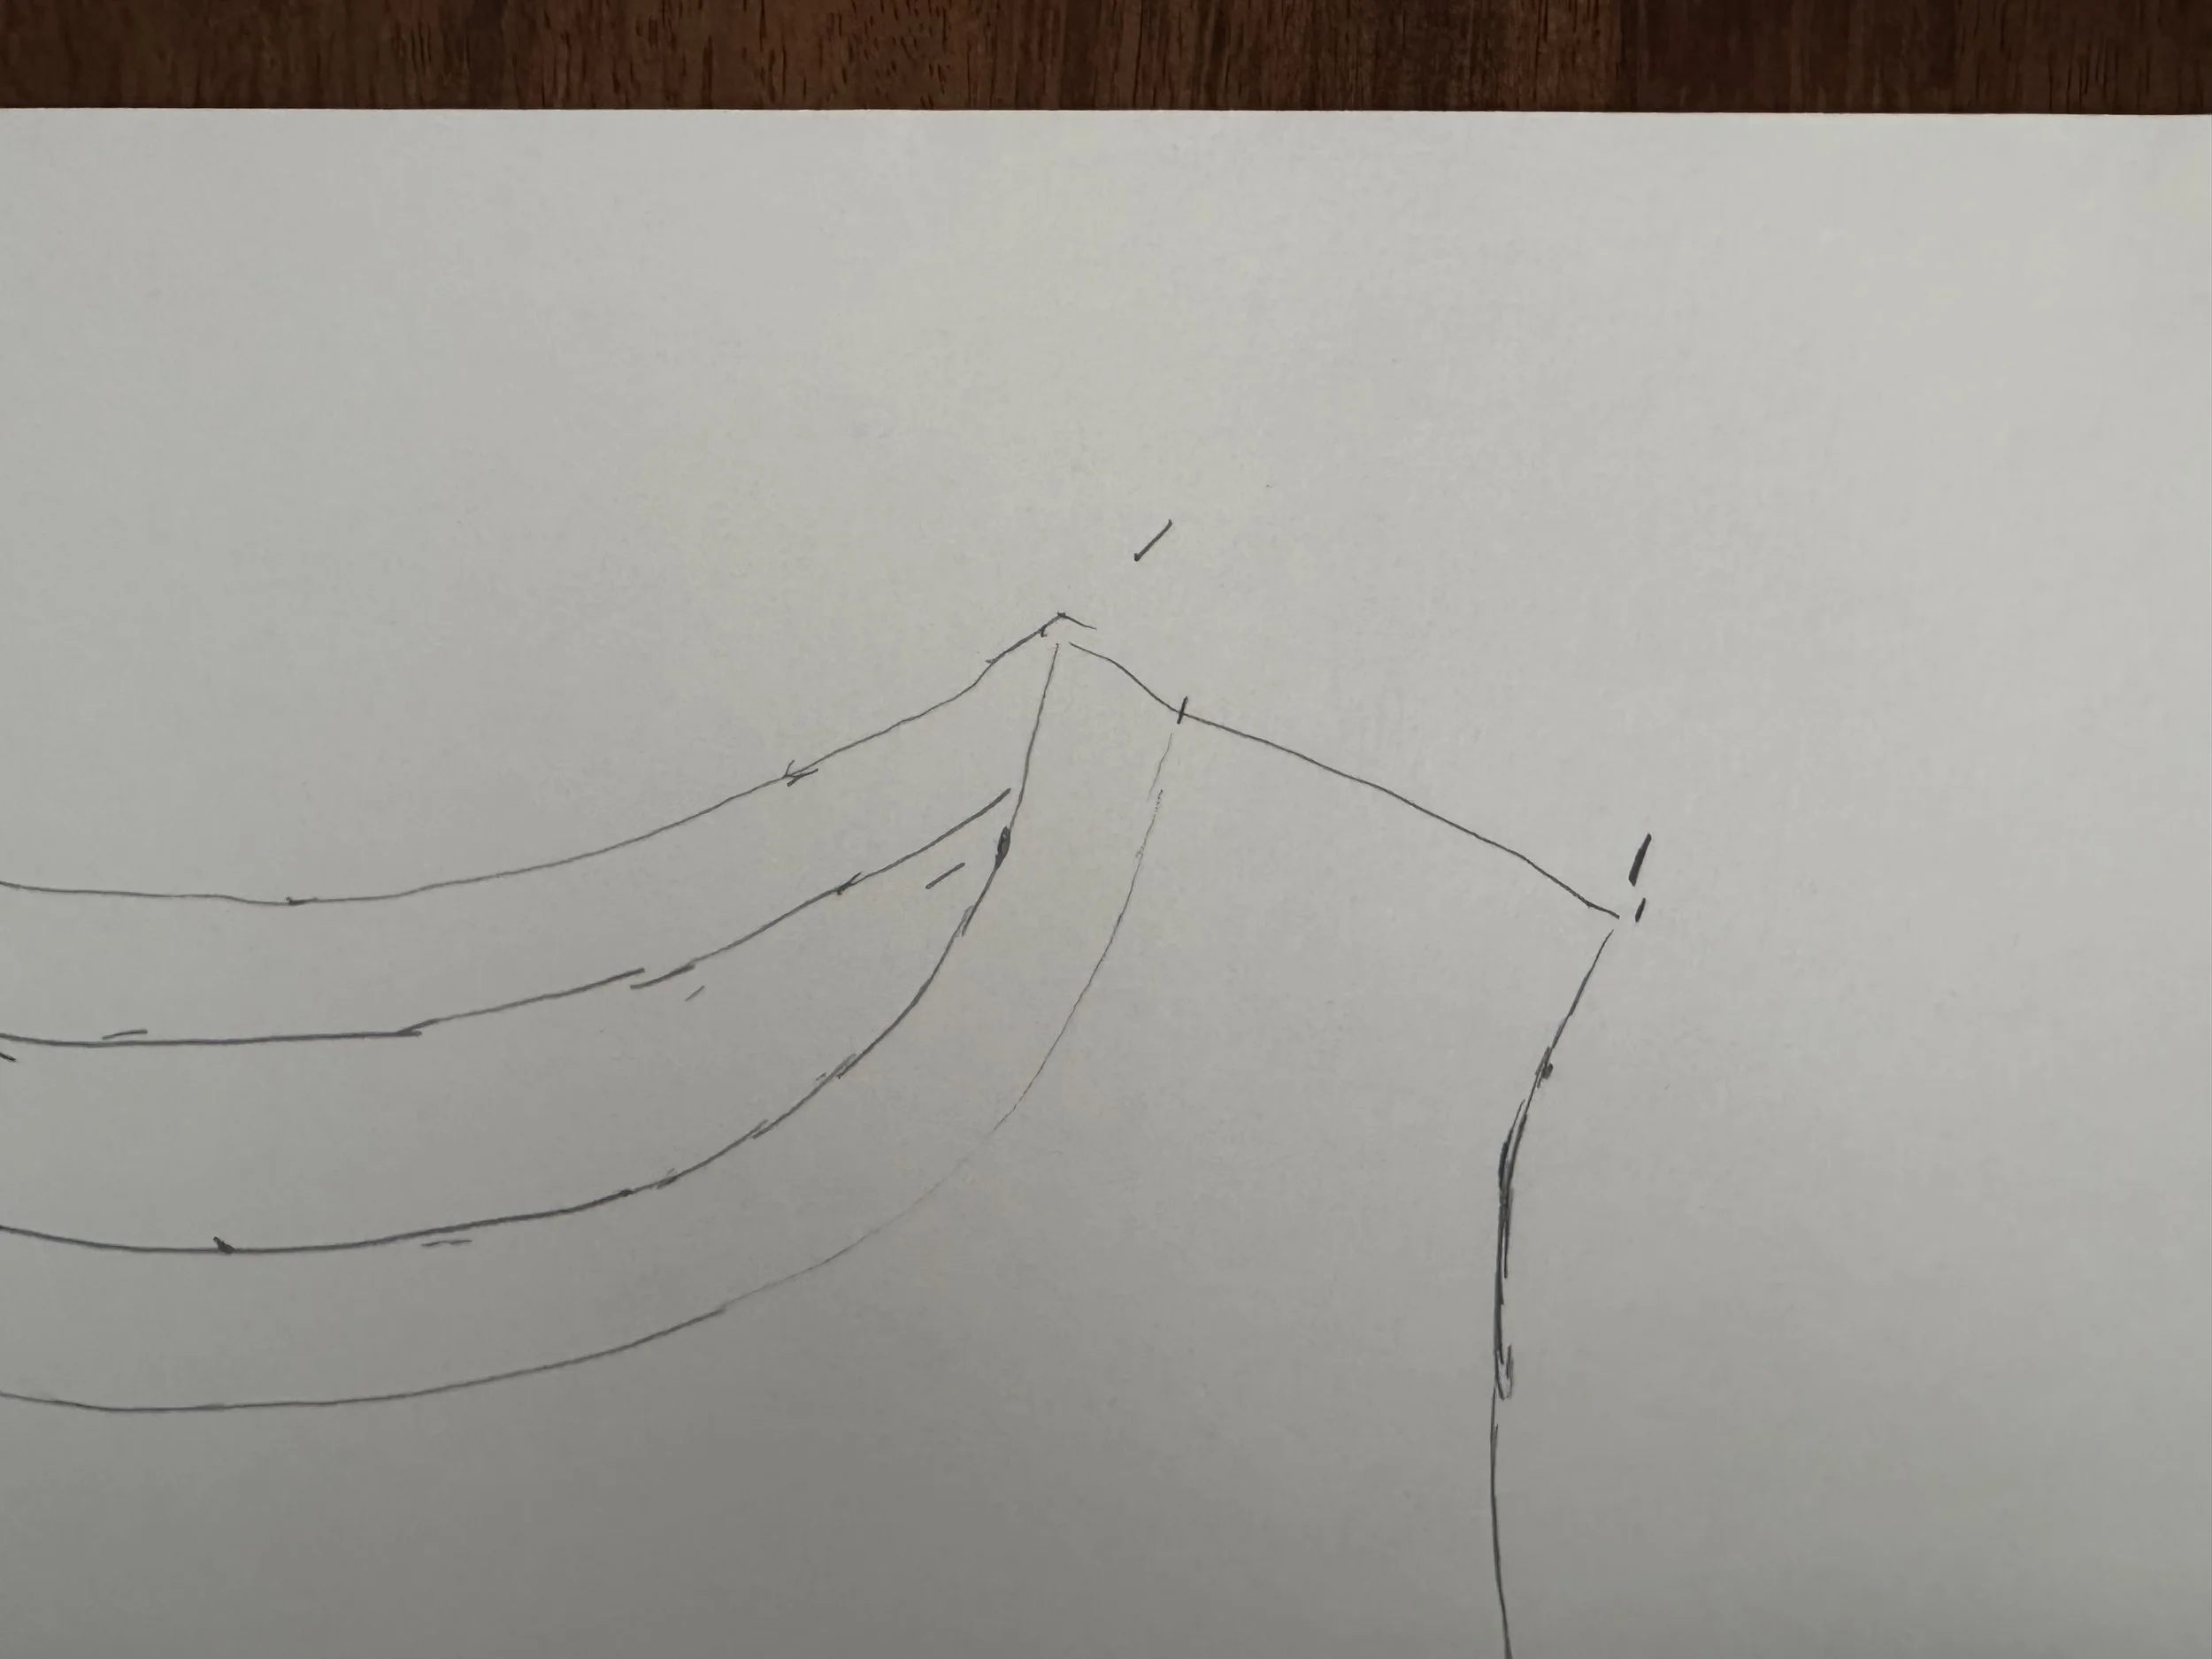
I like the way this shoulder came out.
-
this does not look good
Not sure what I did here, but I have one good shoulder and what more can one want?
-
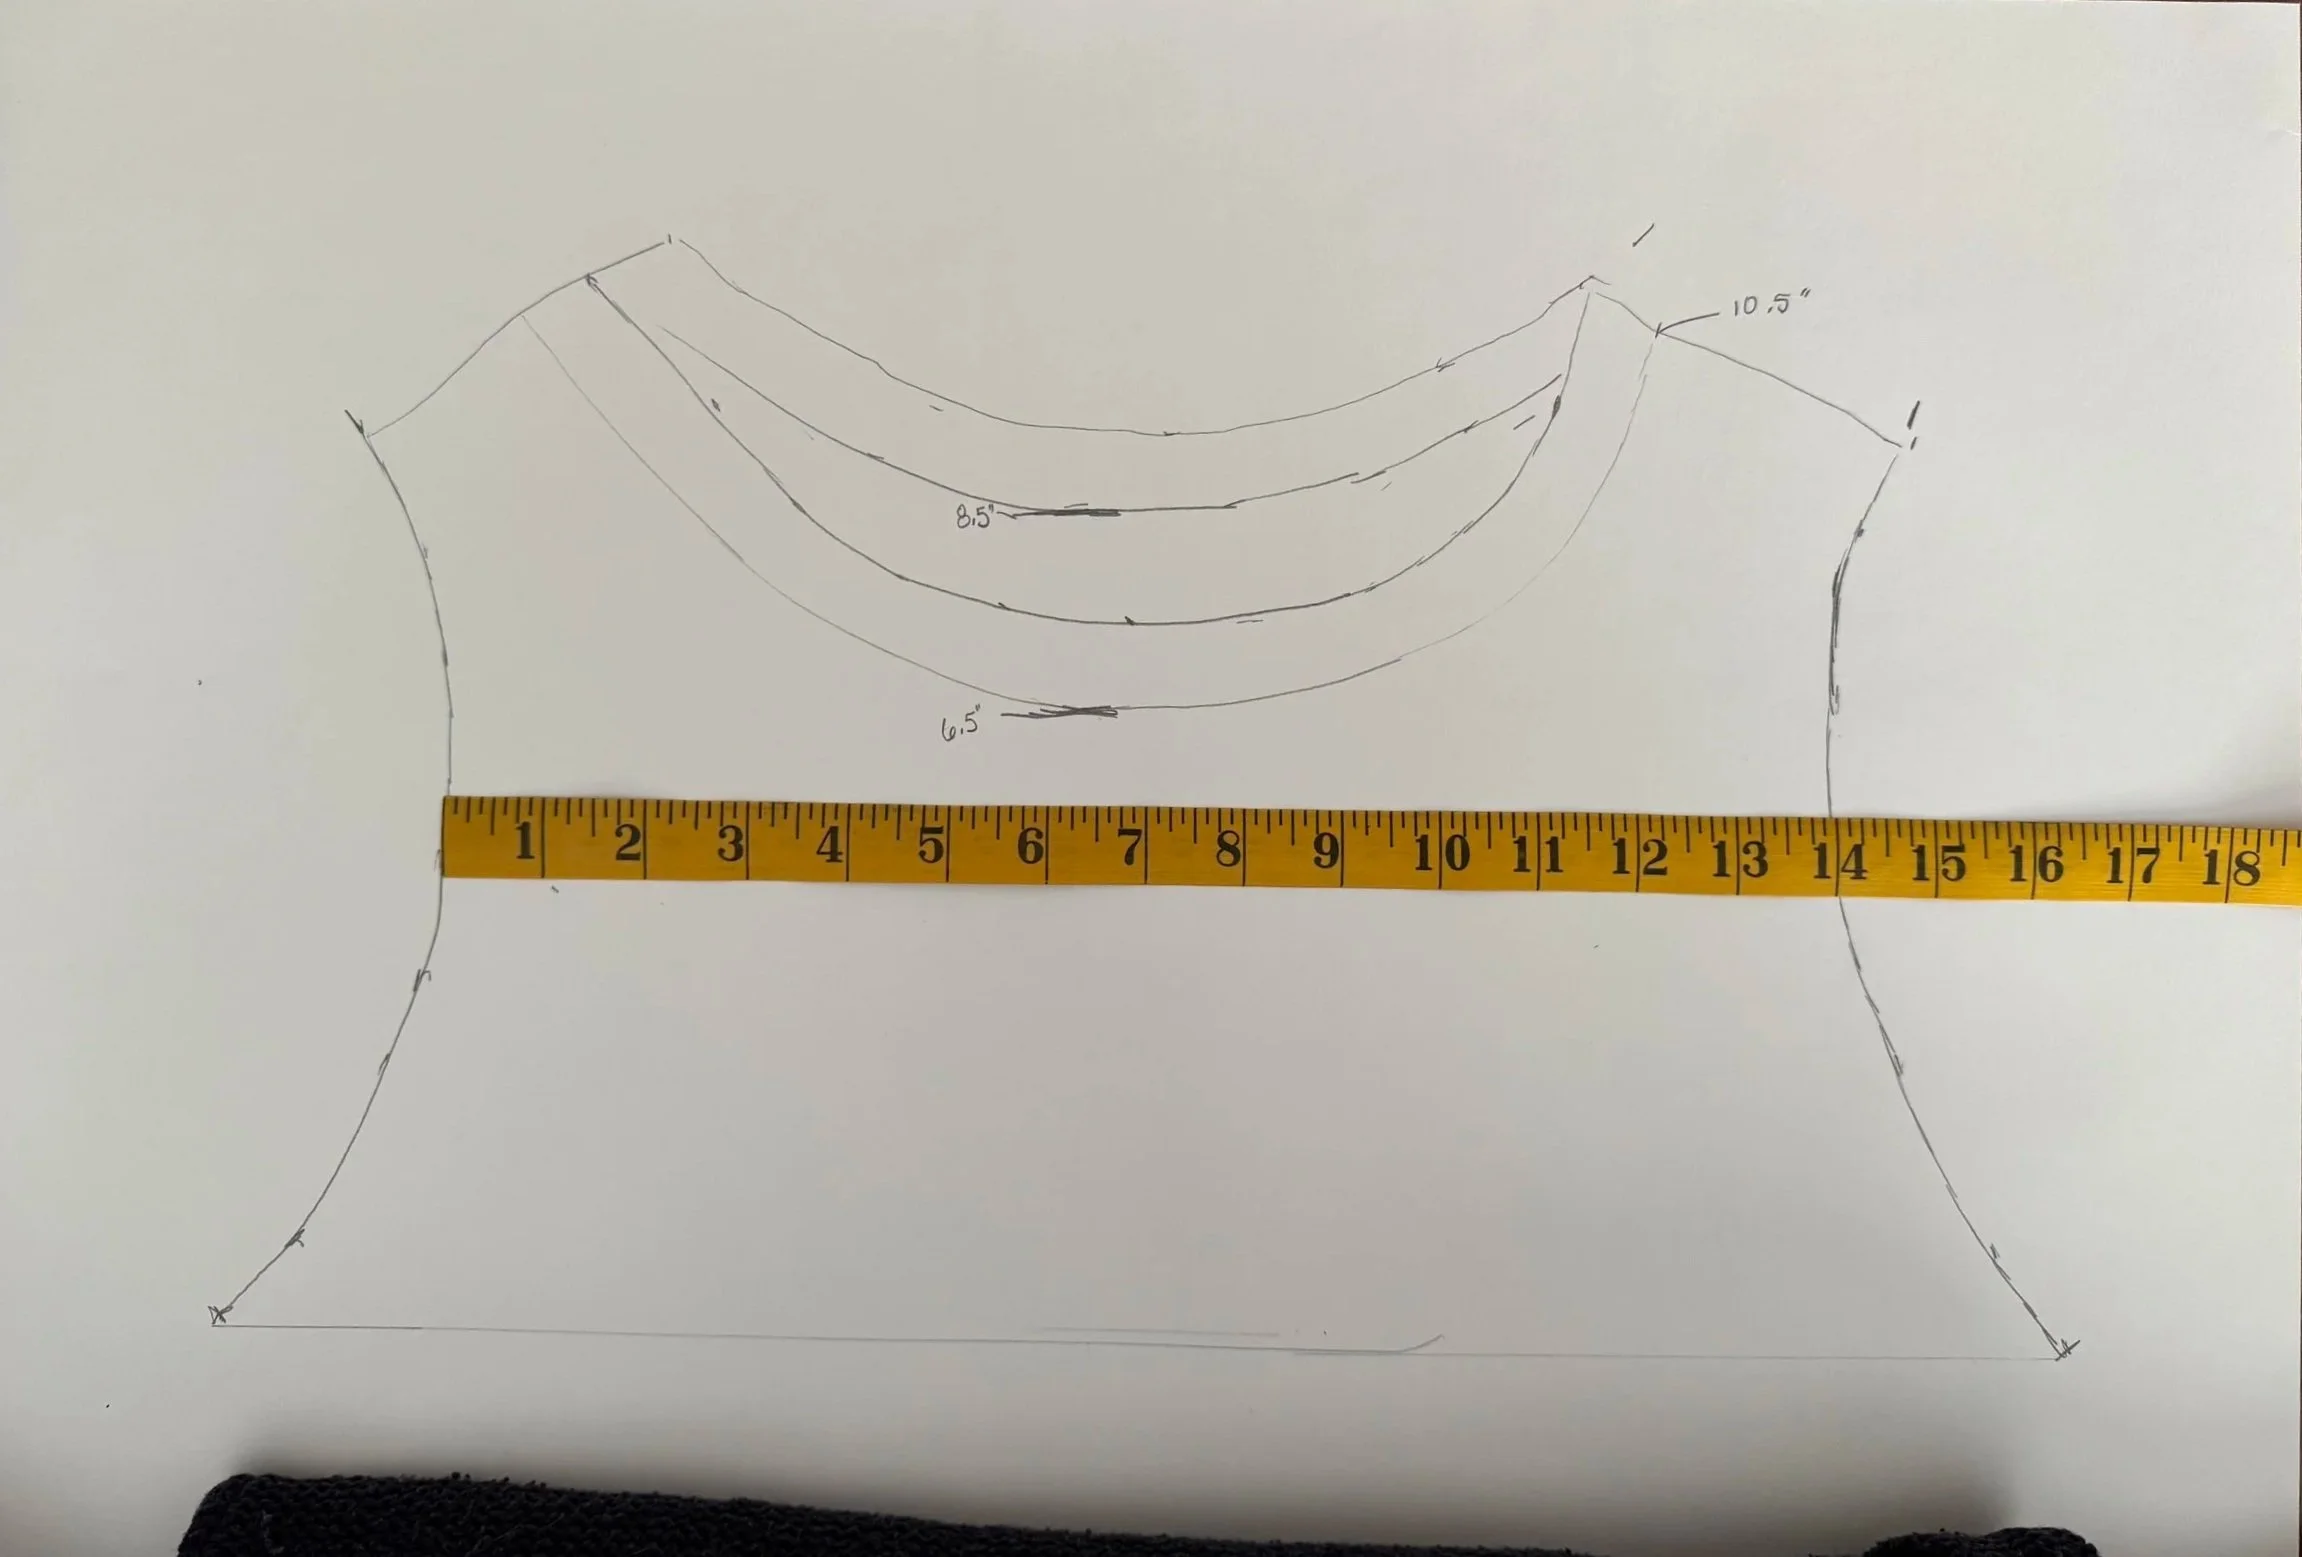
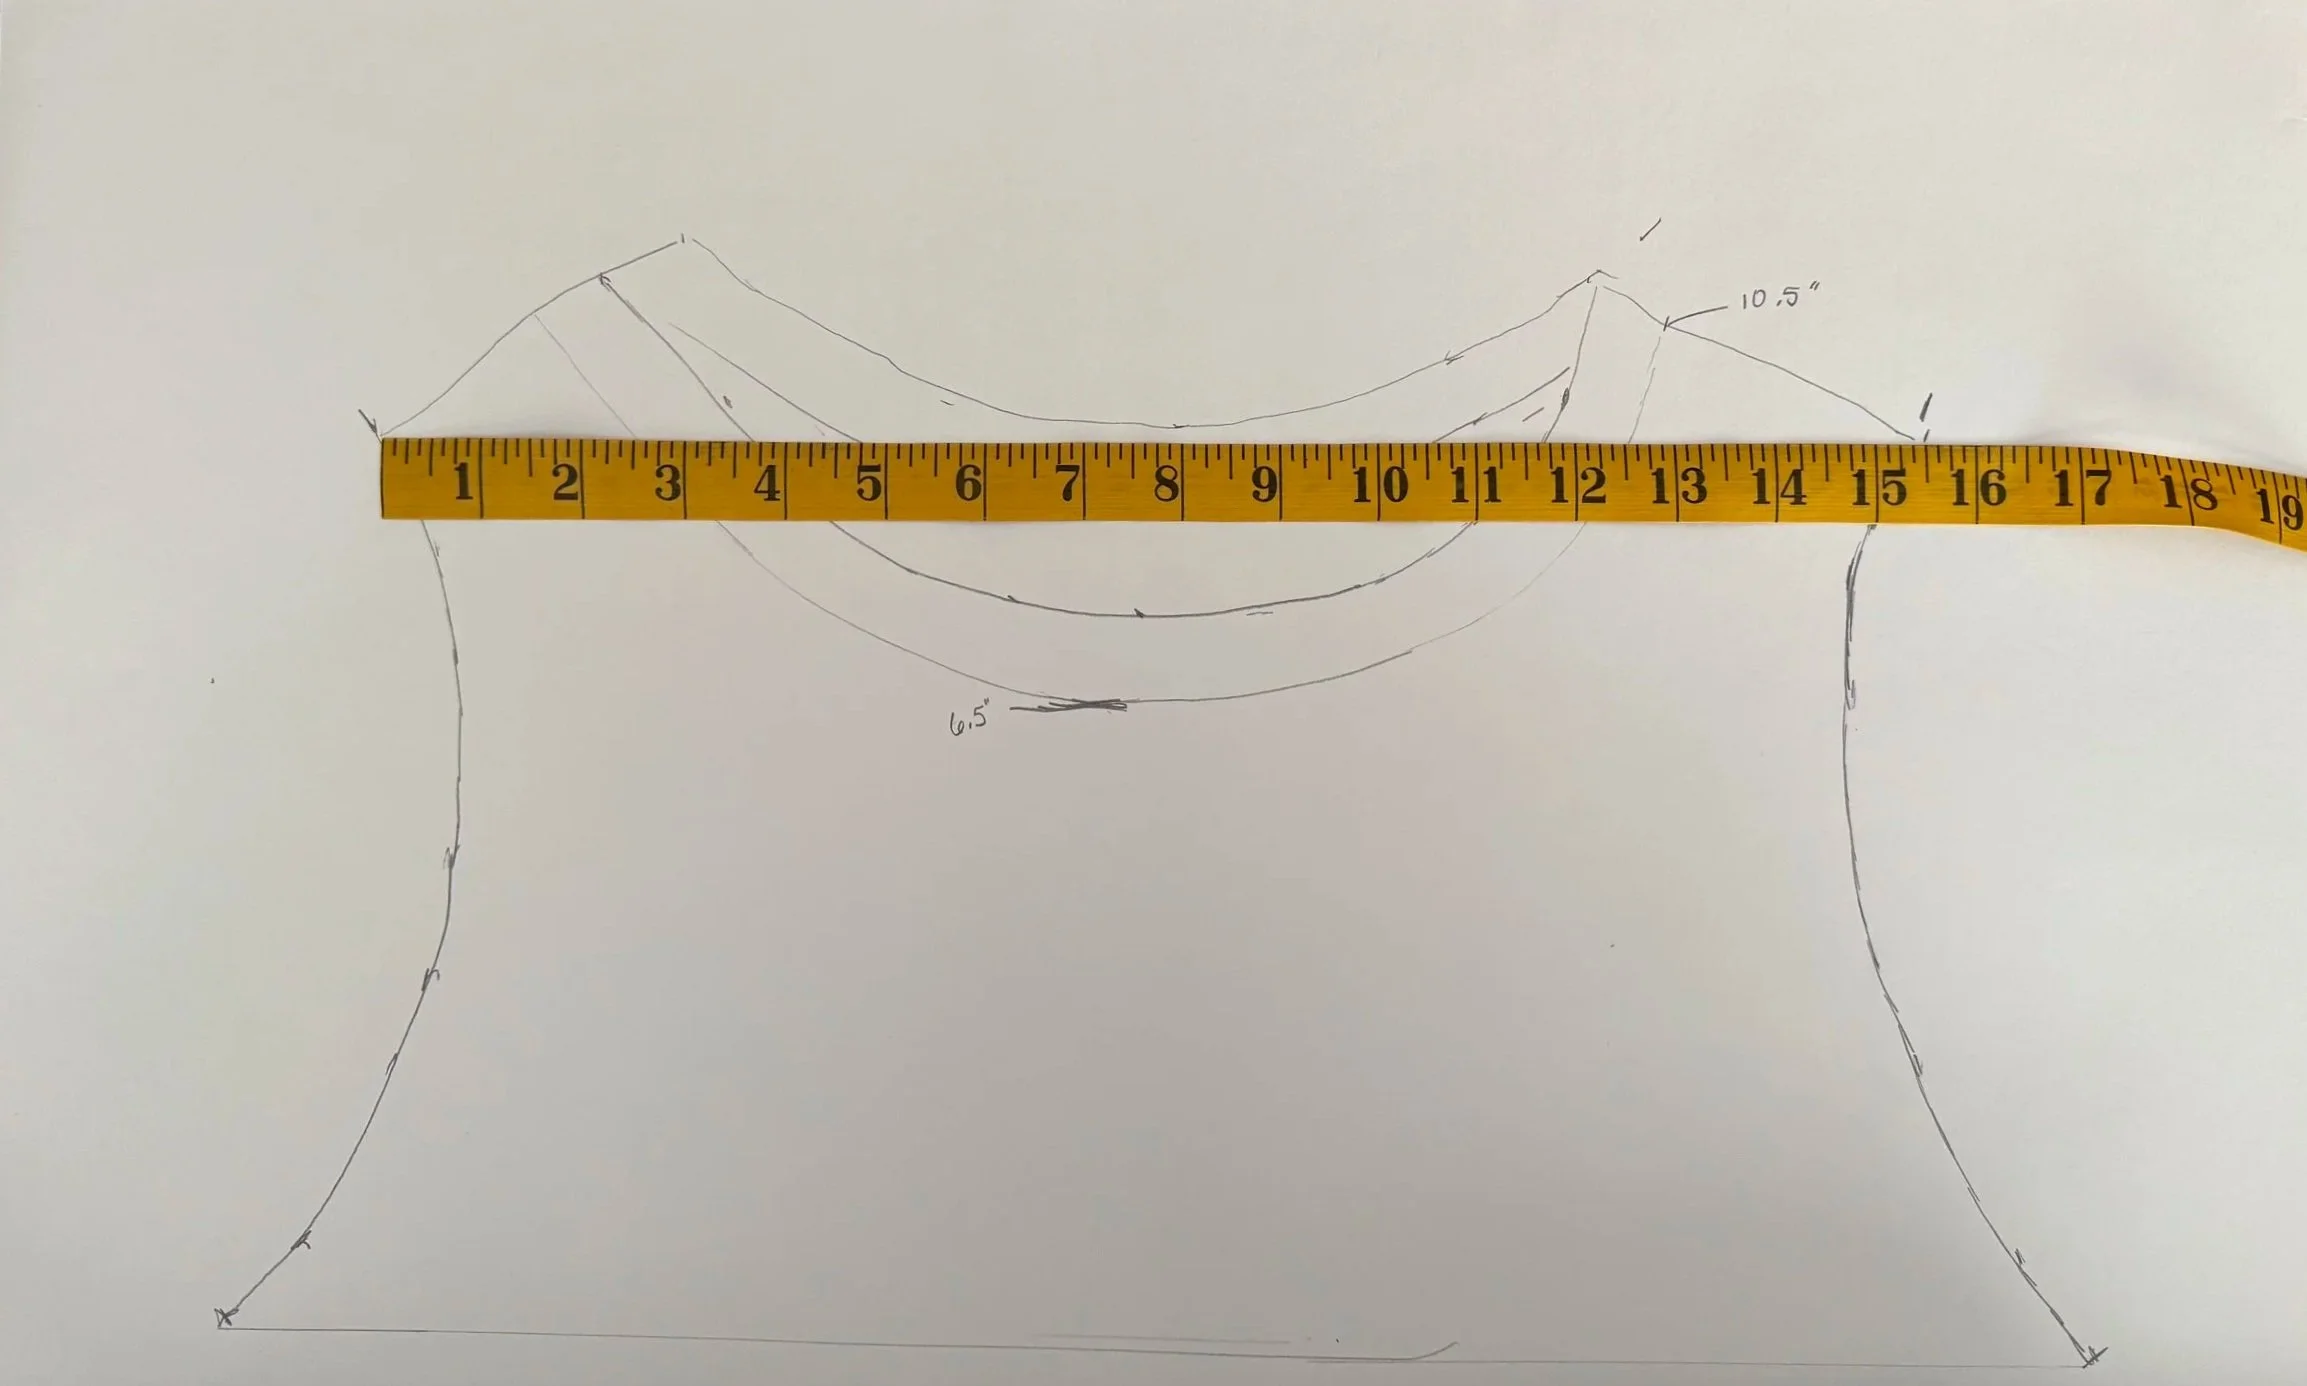
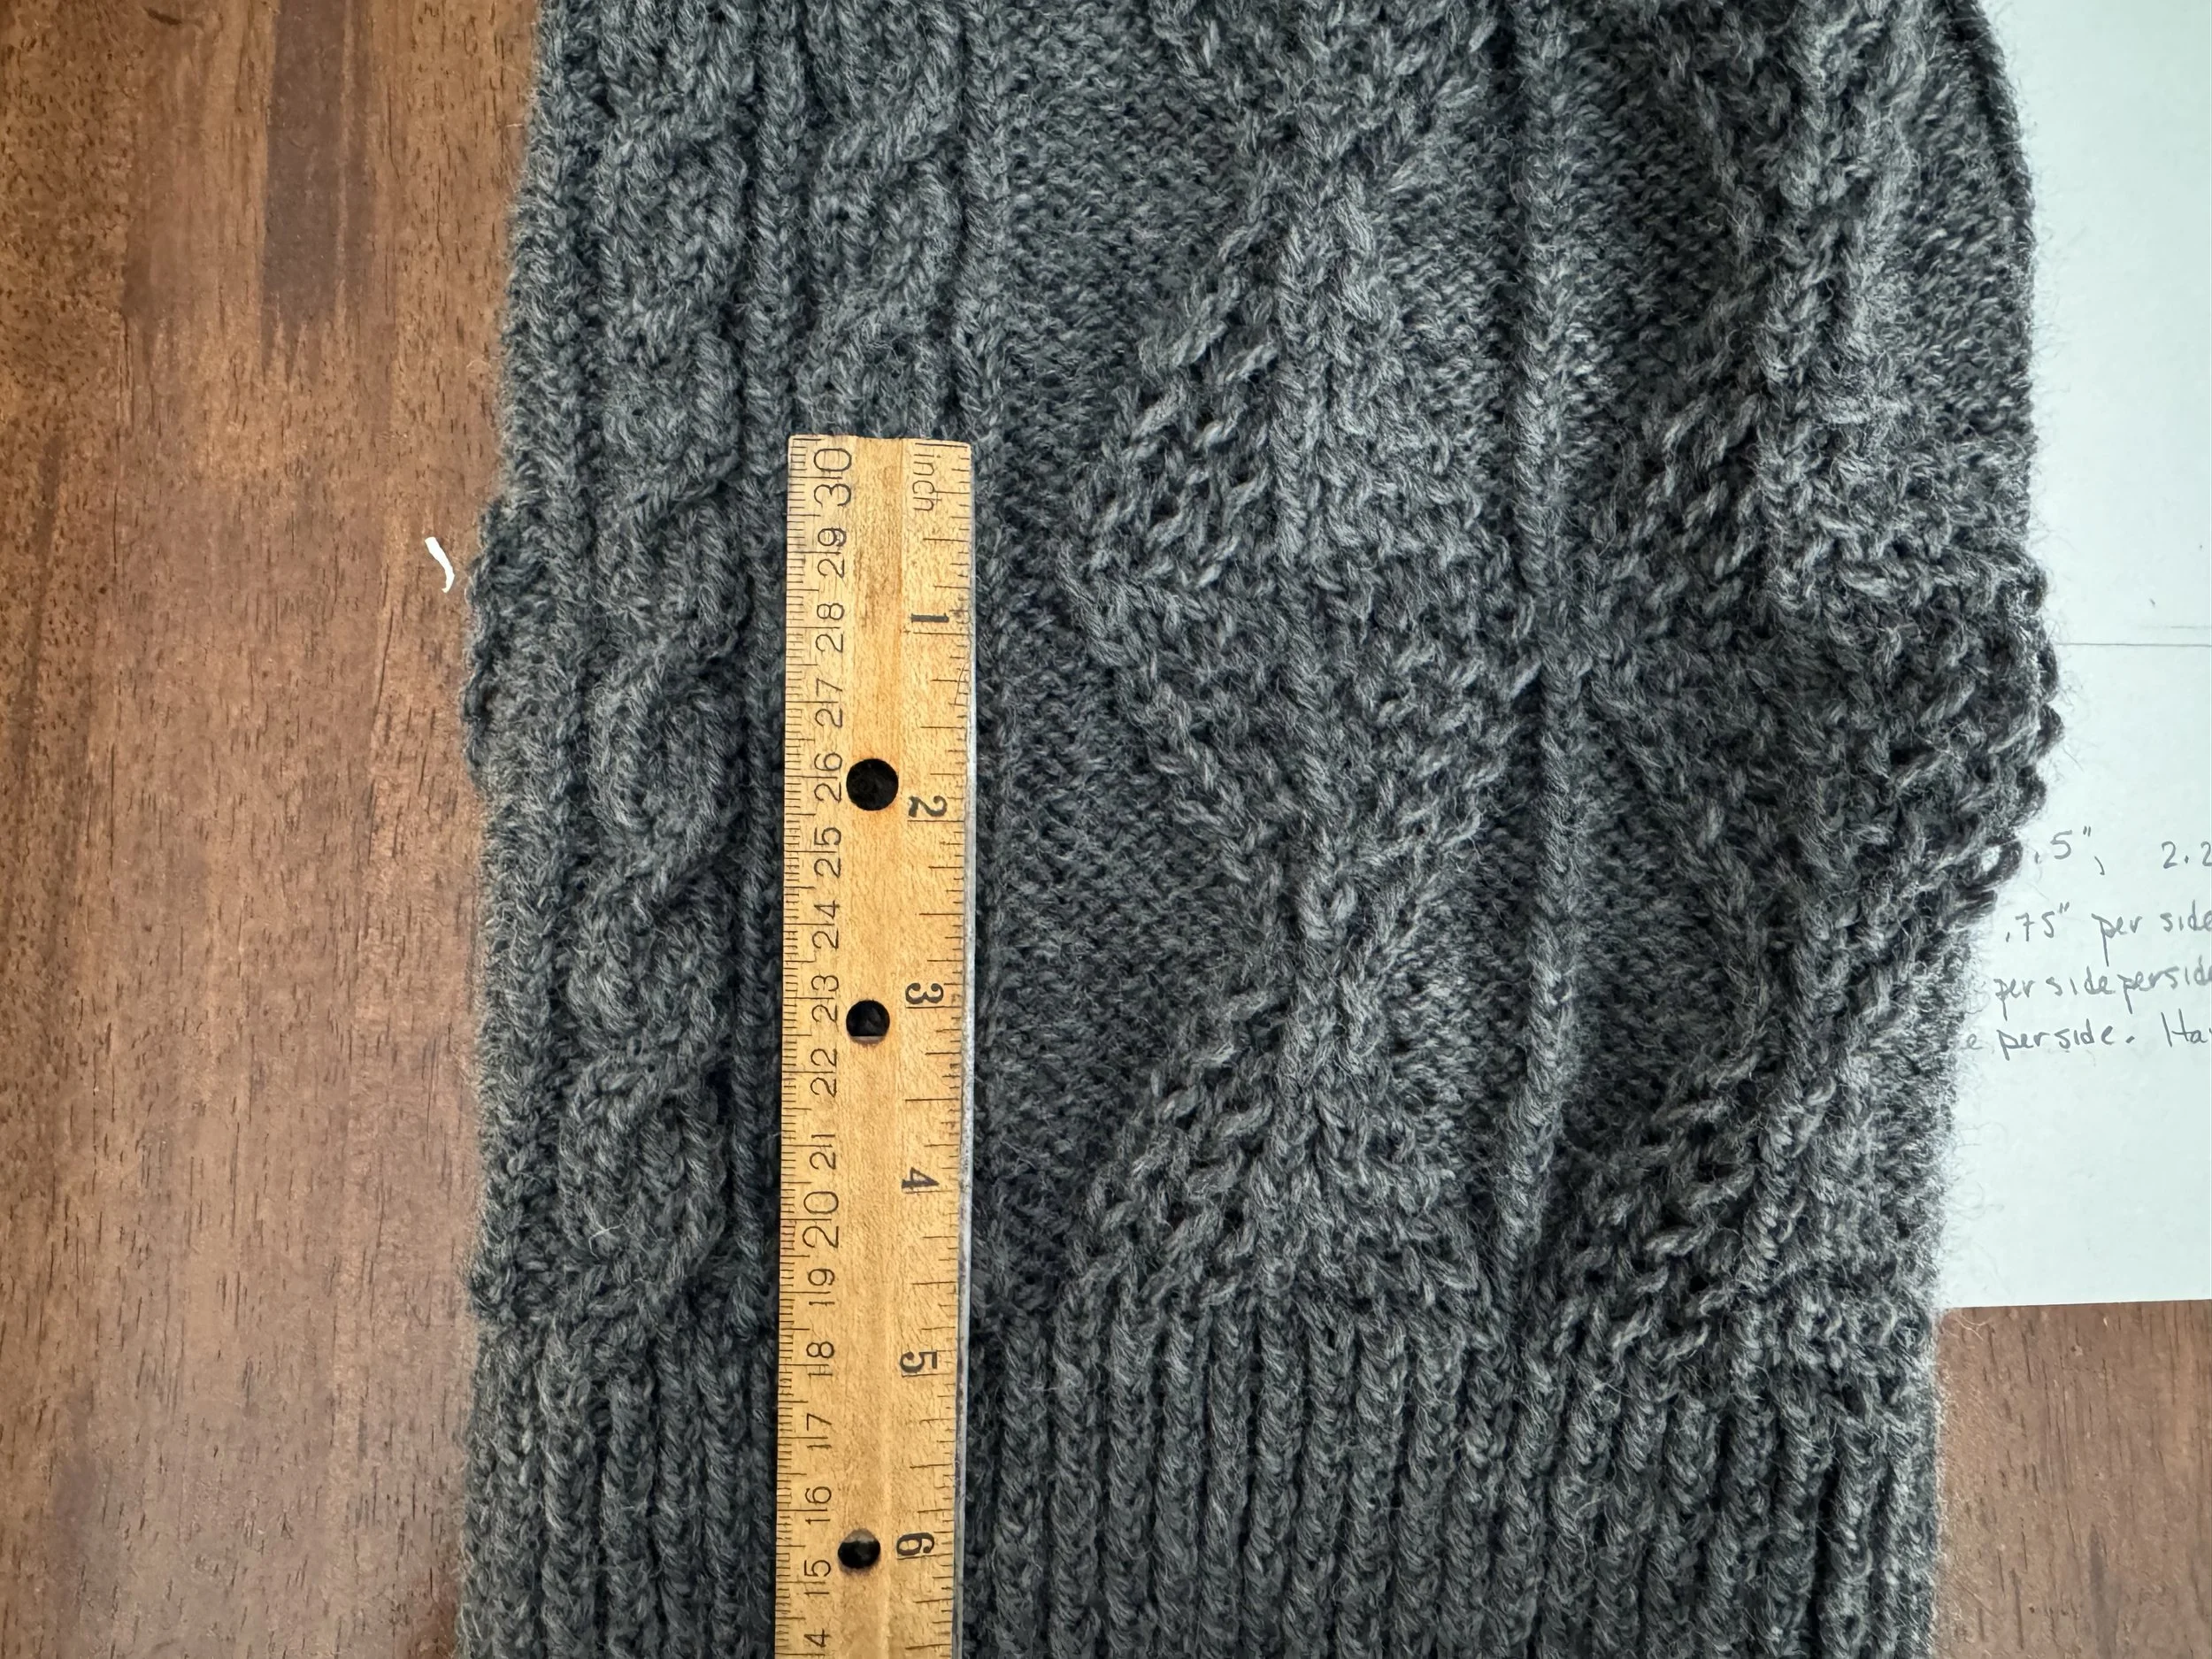
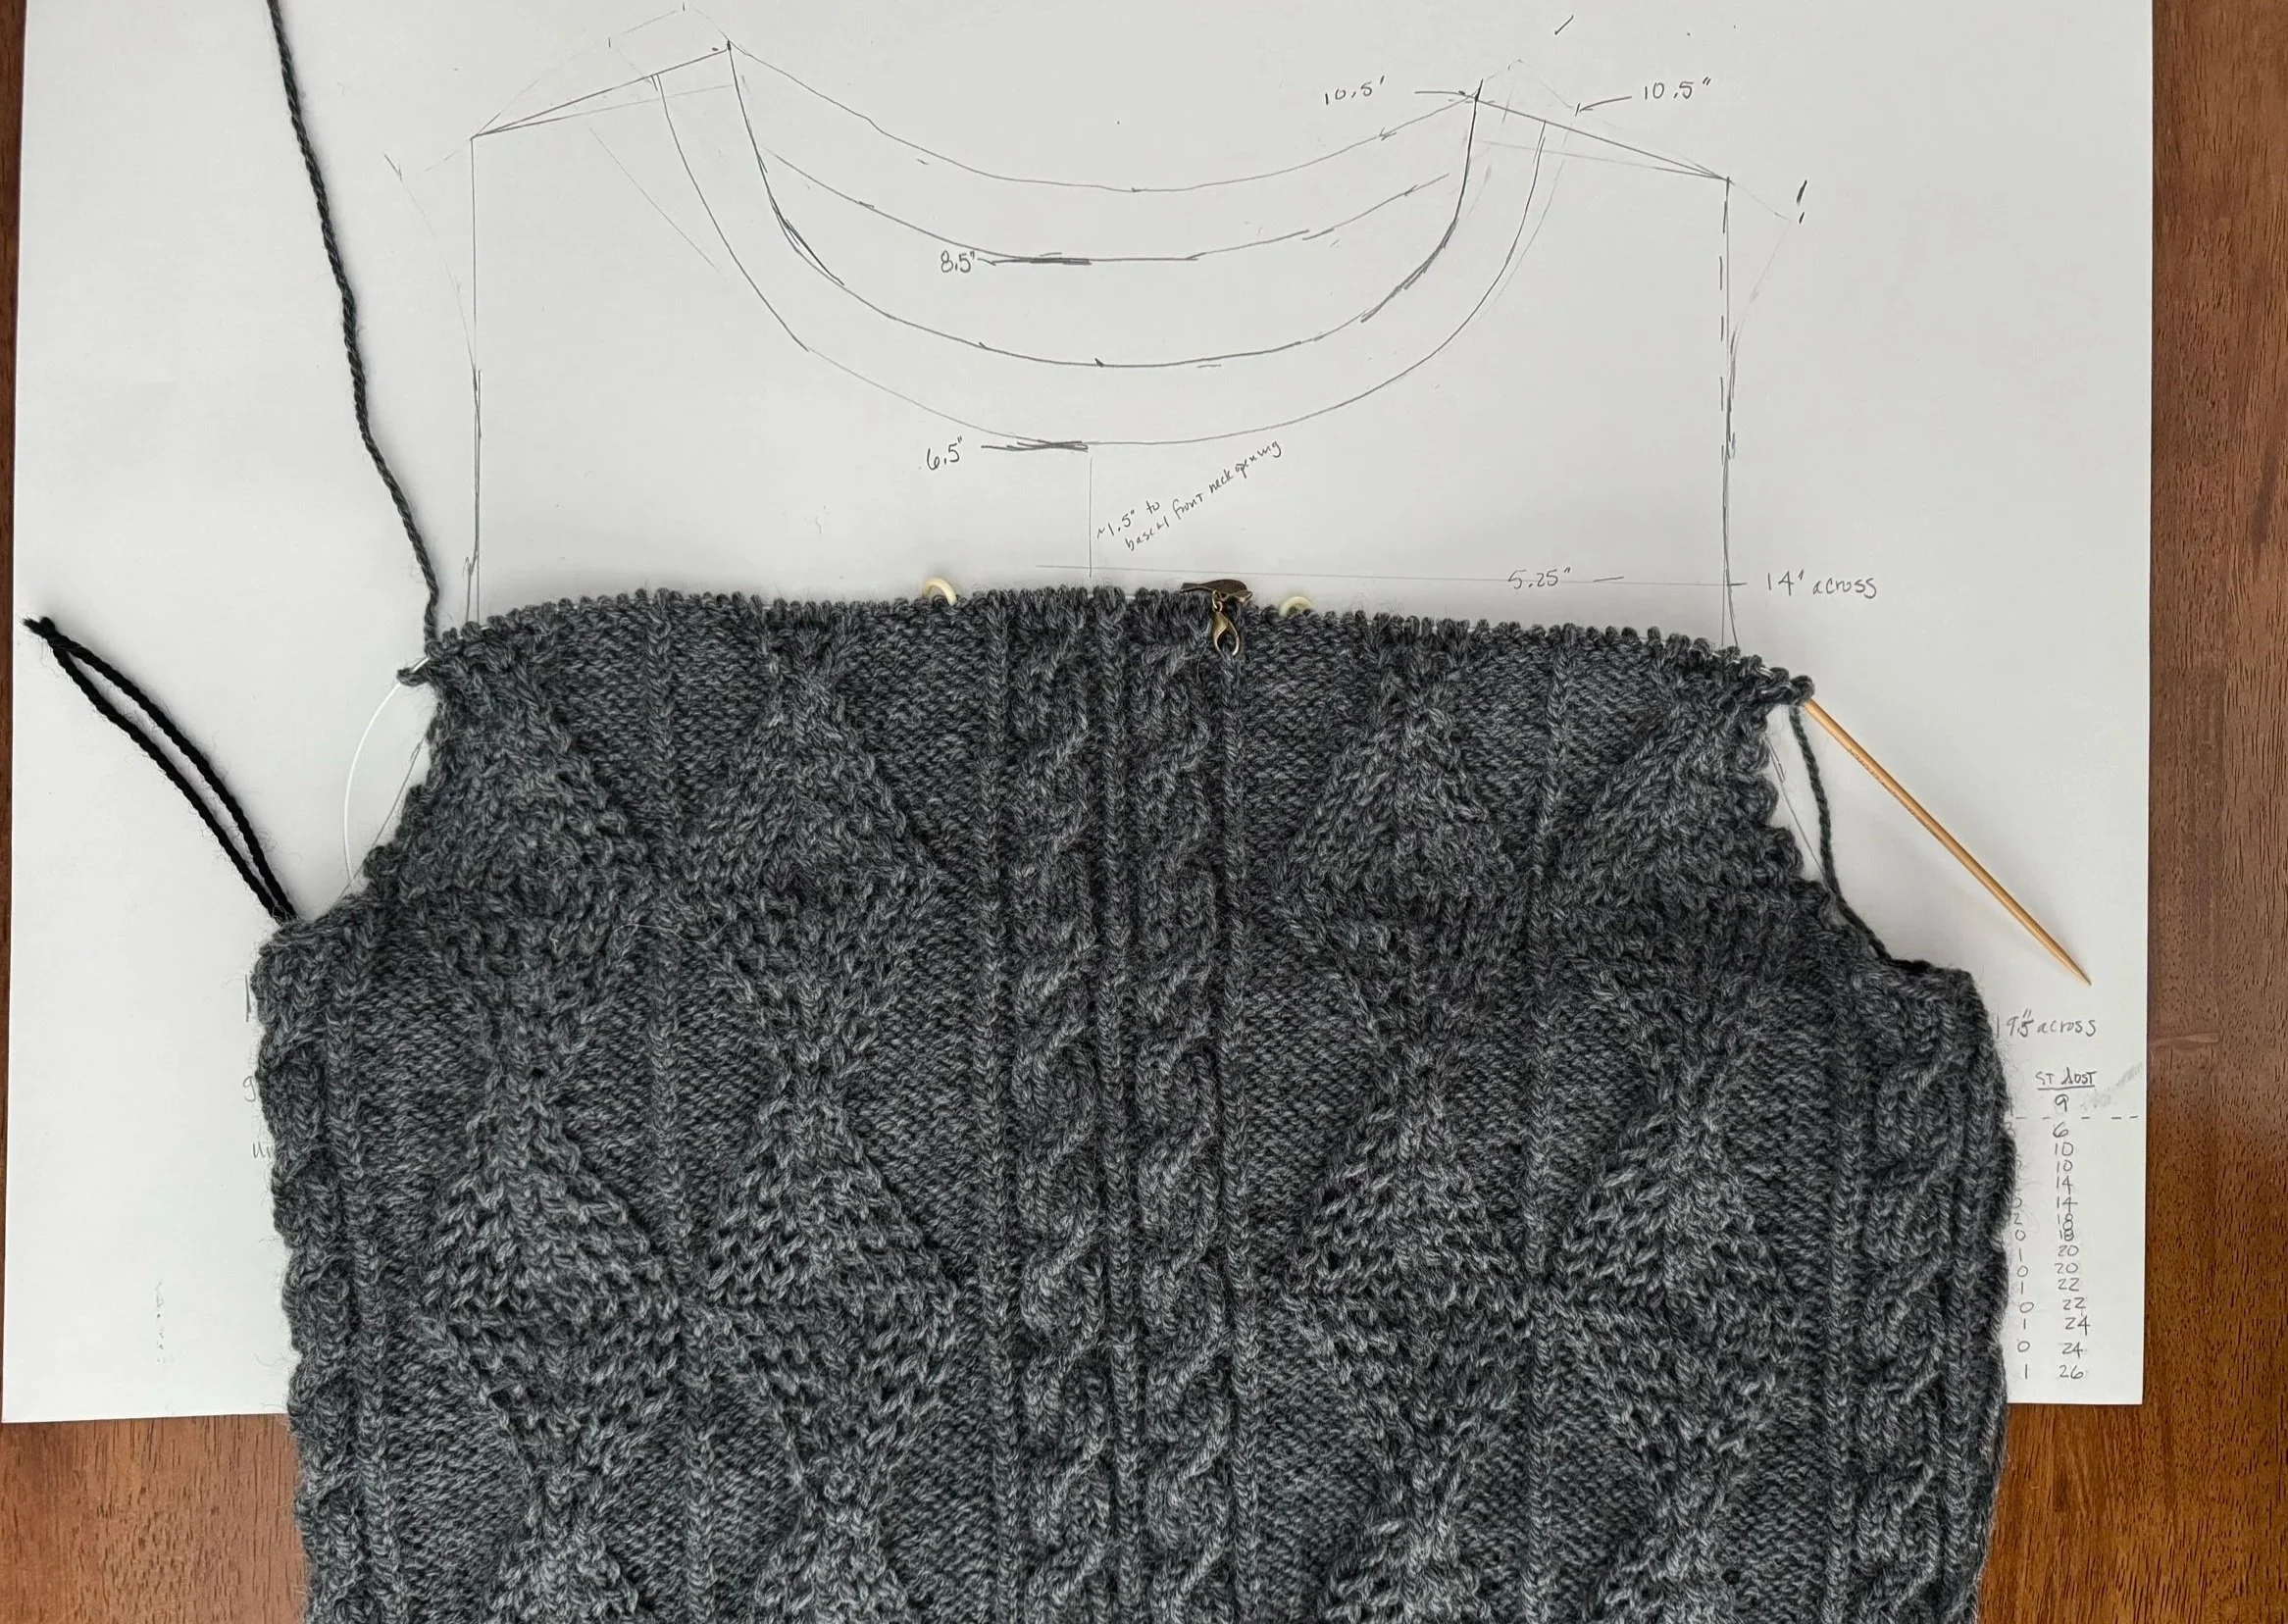
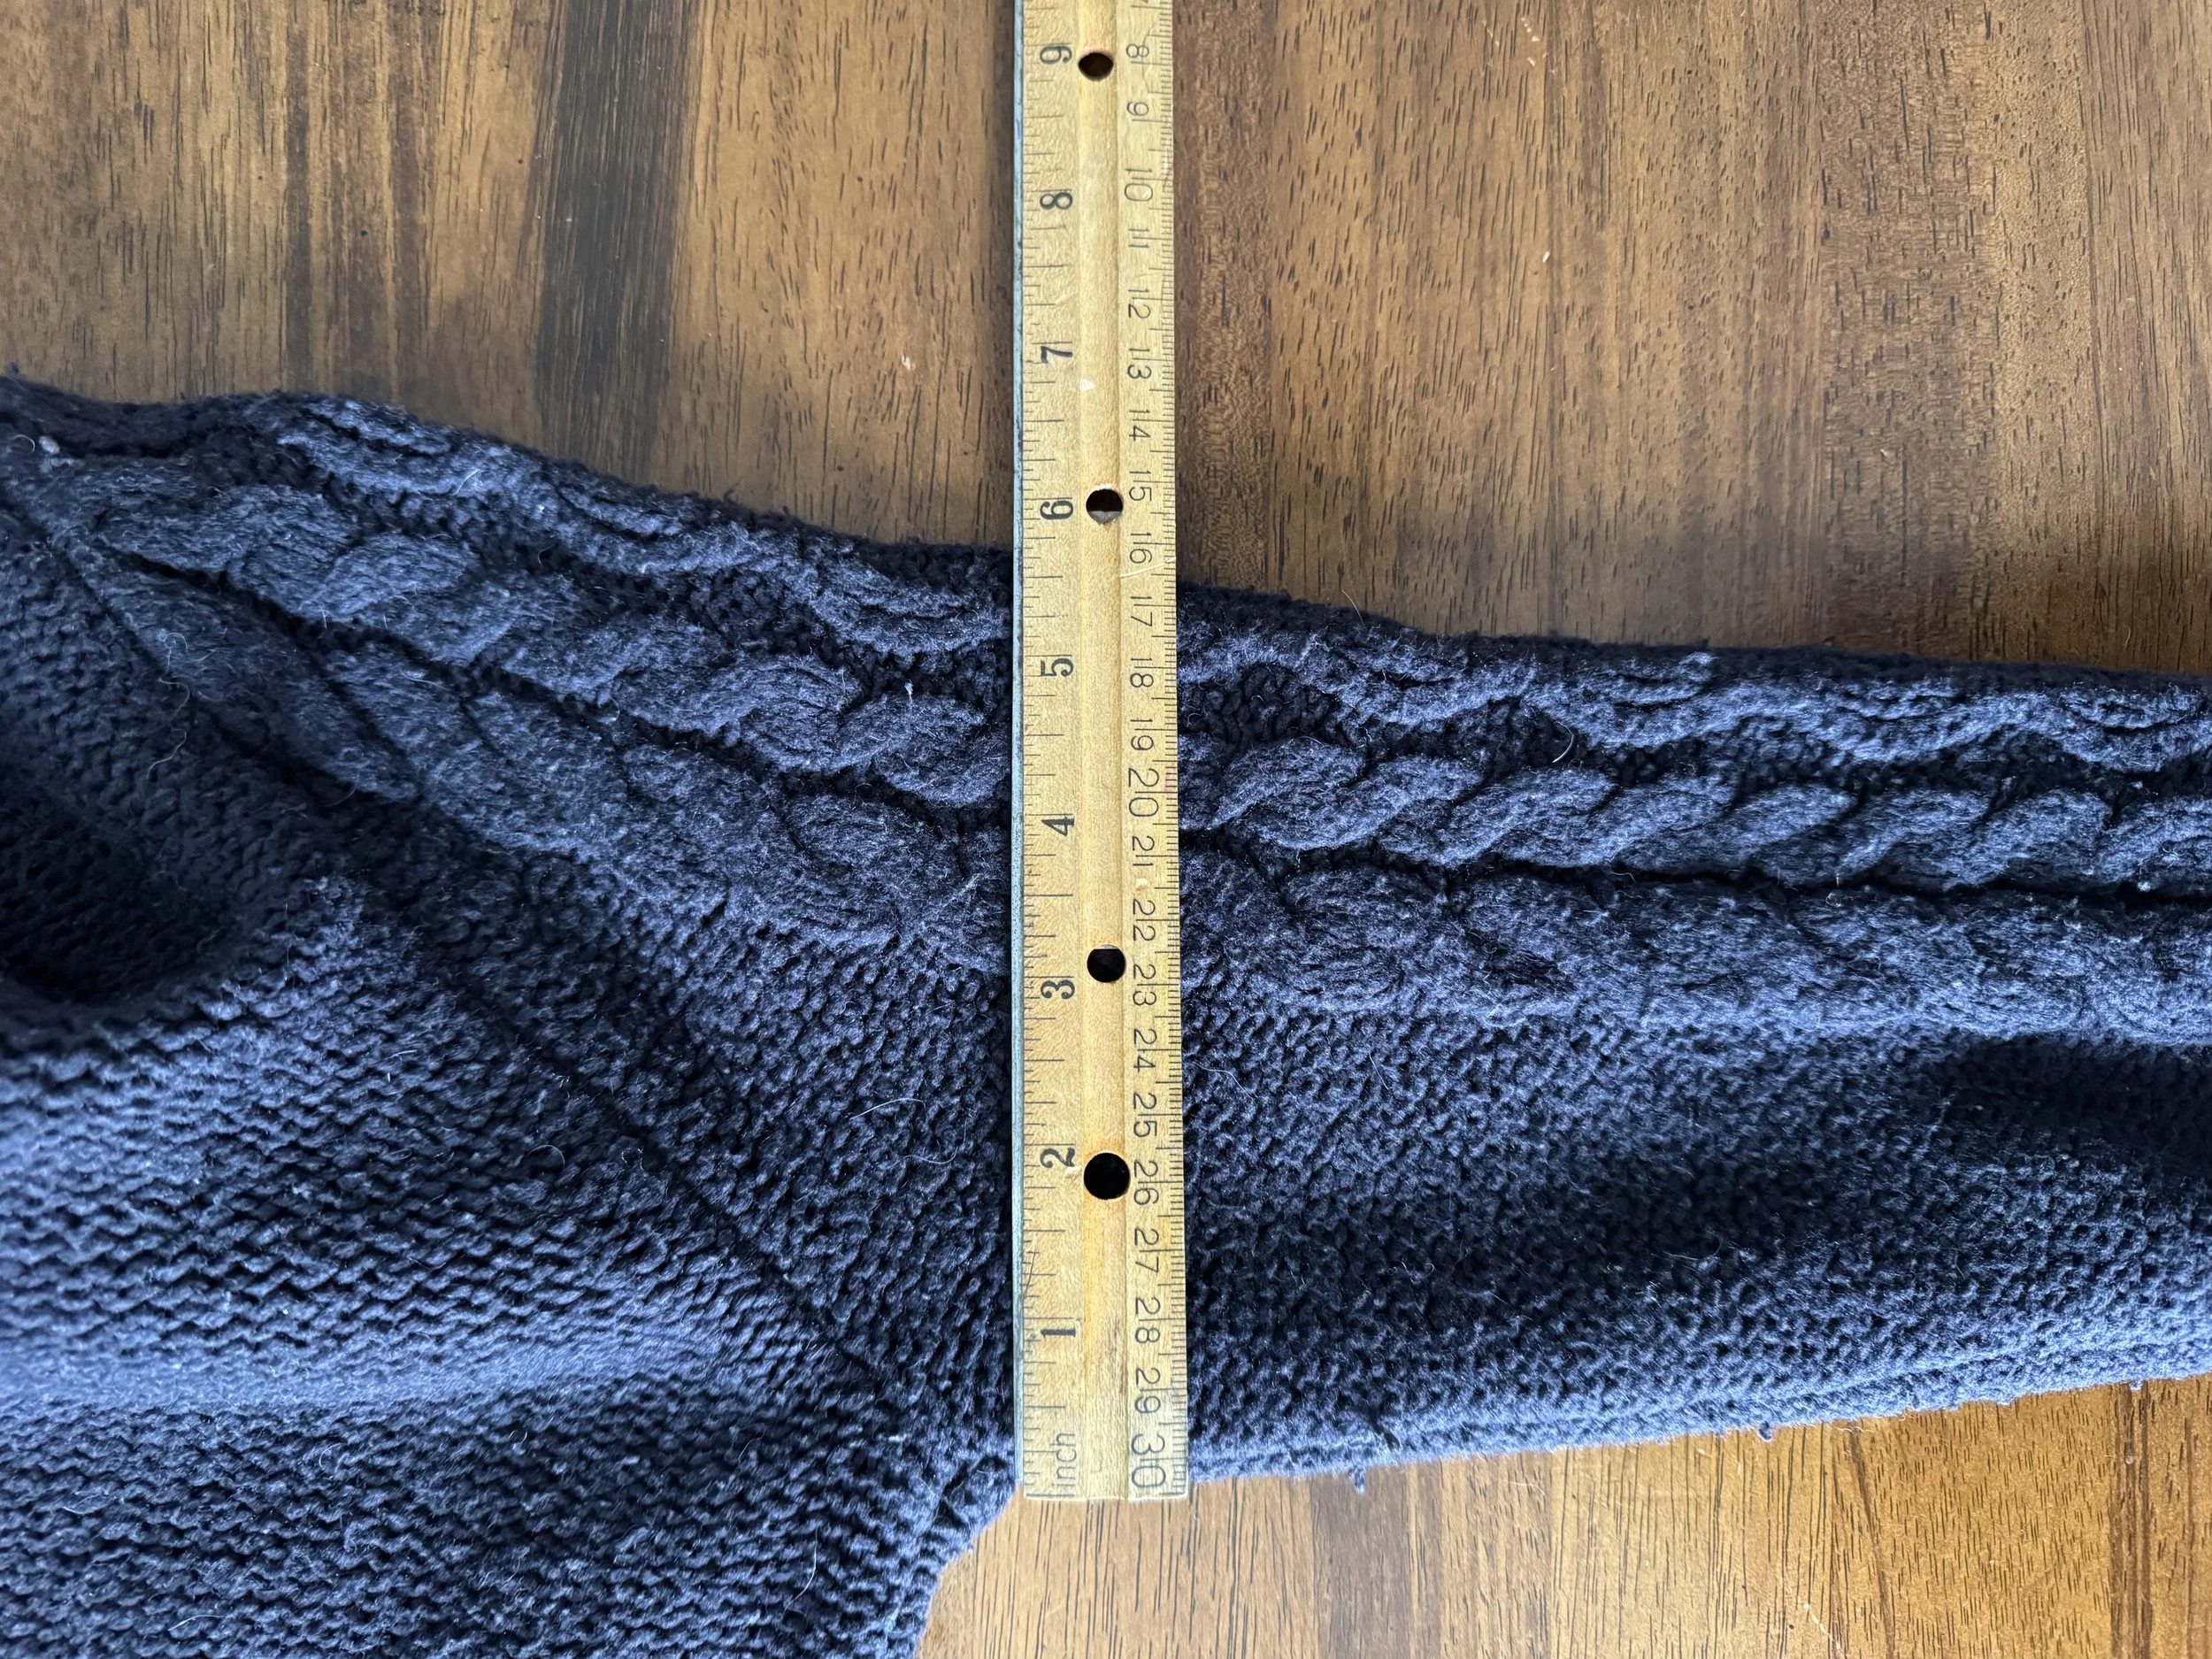
now for some cipering
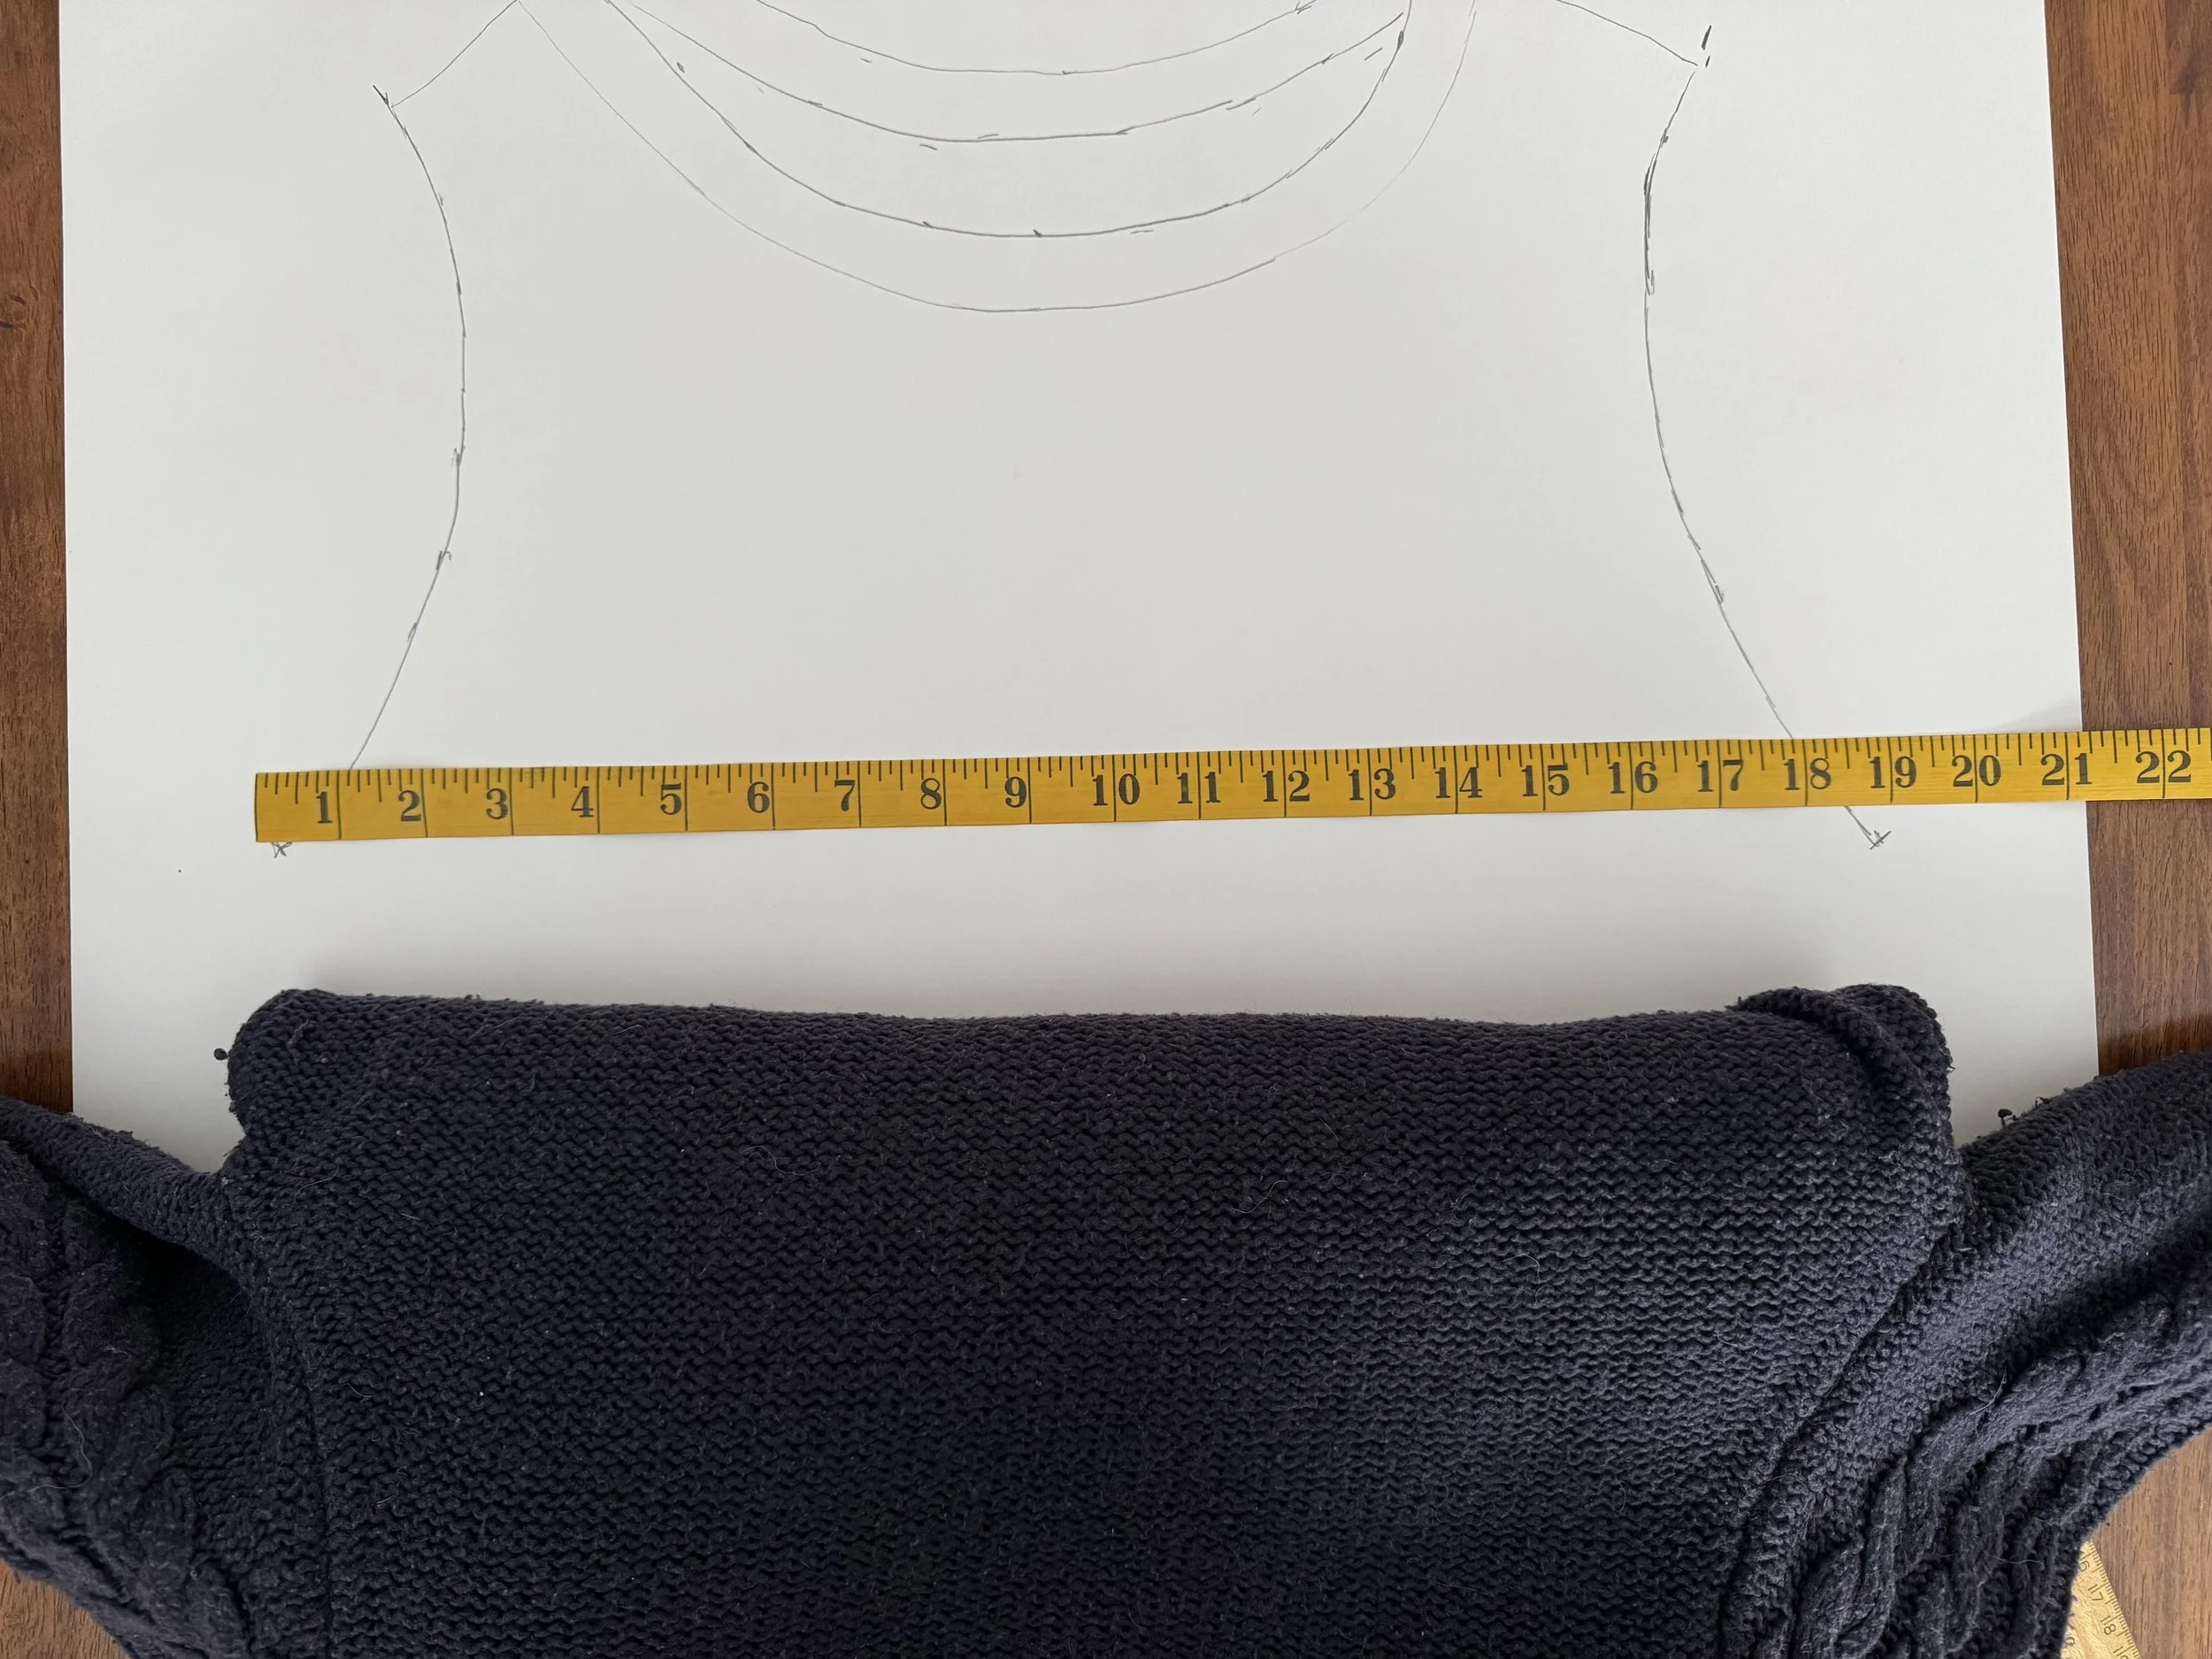
This incredibly accurate measuring job is telling me that I have about 19” in width. I am going to bump it up to 19.5” just to be safe. Bigger is better than littler here.
-
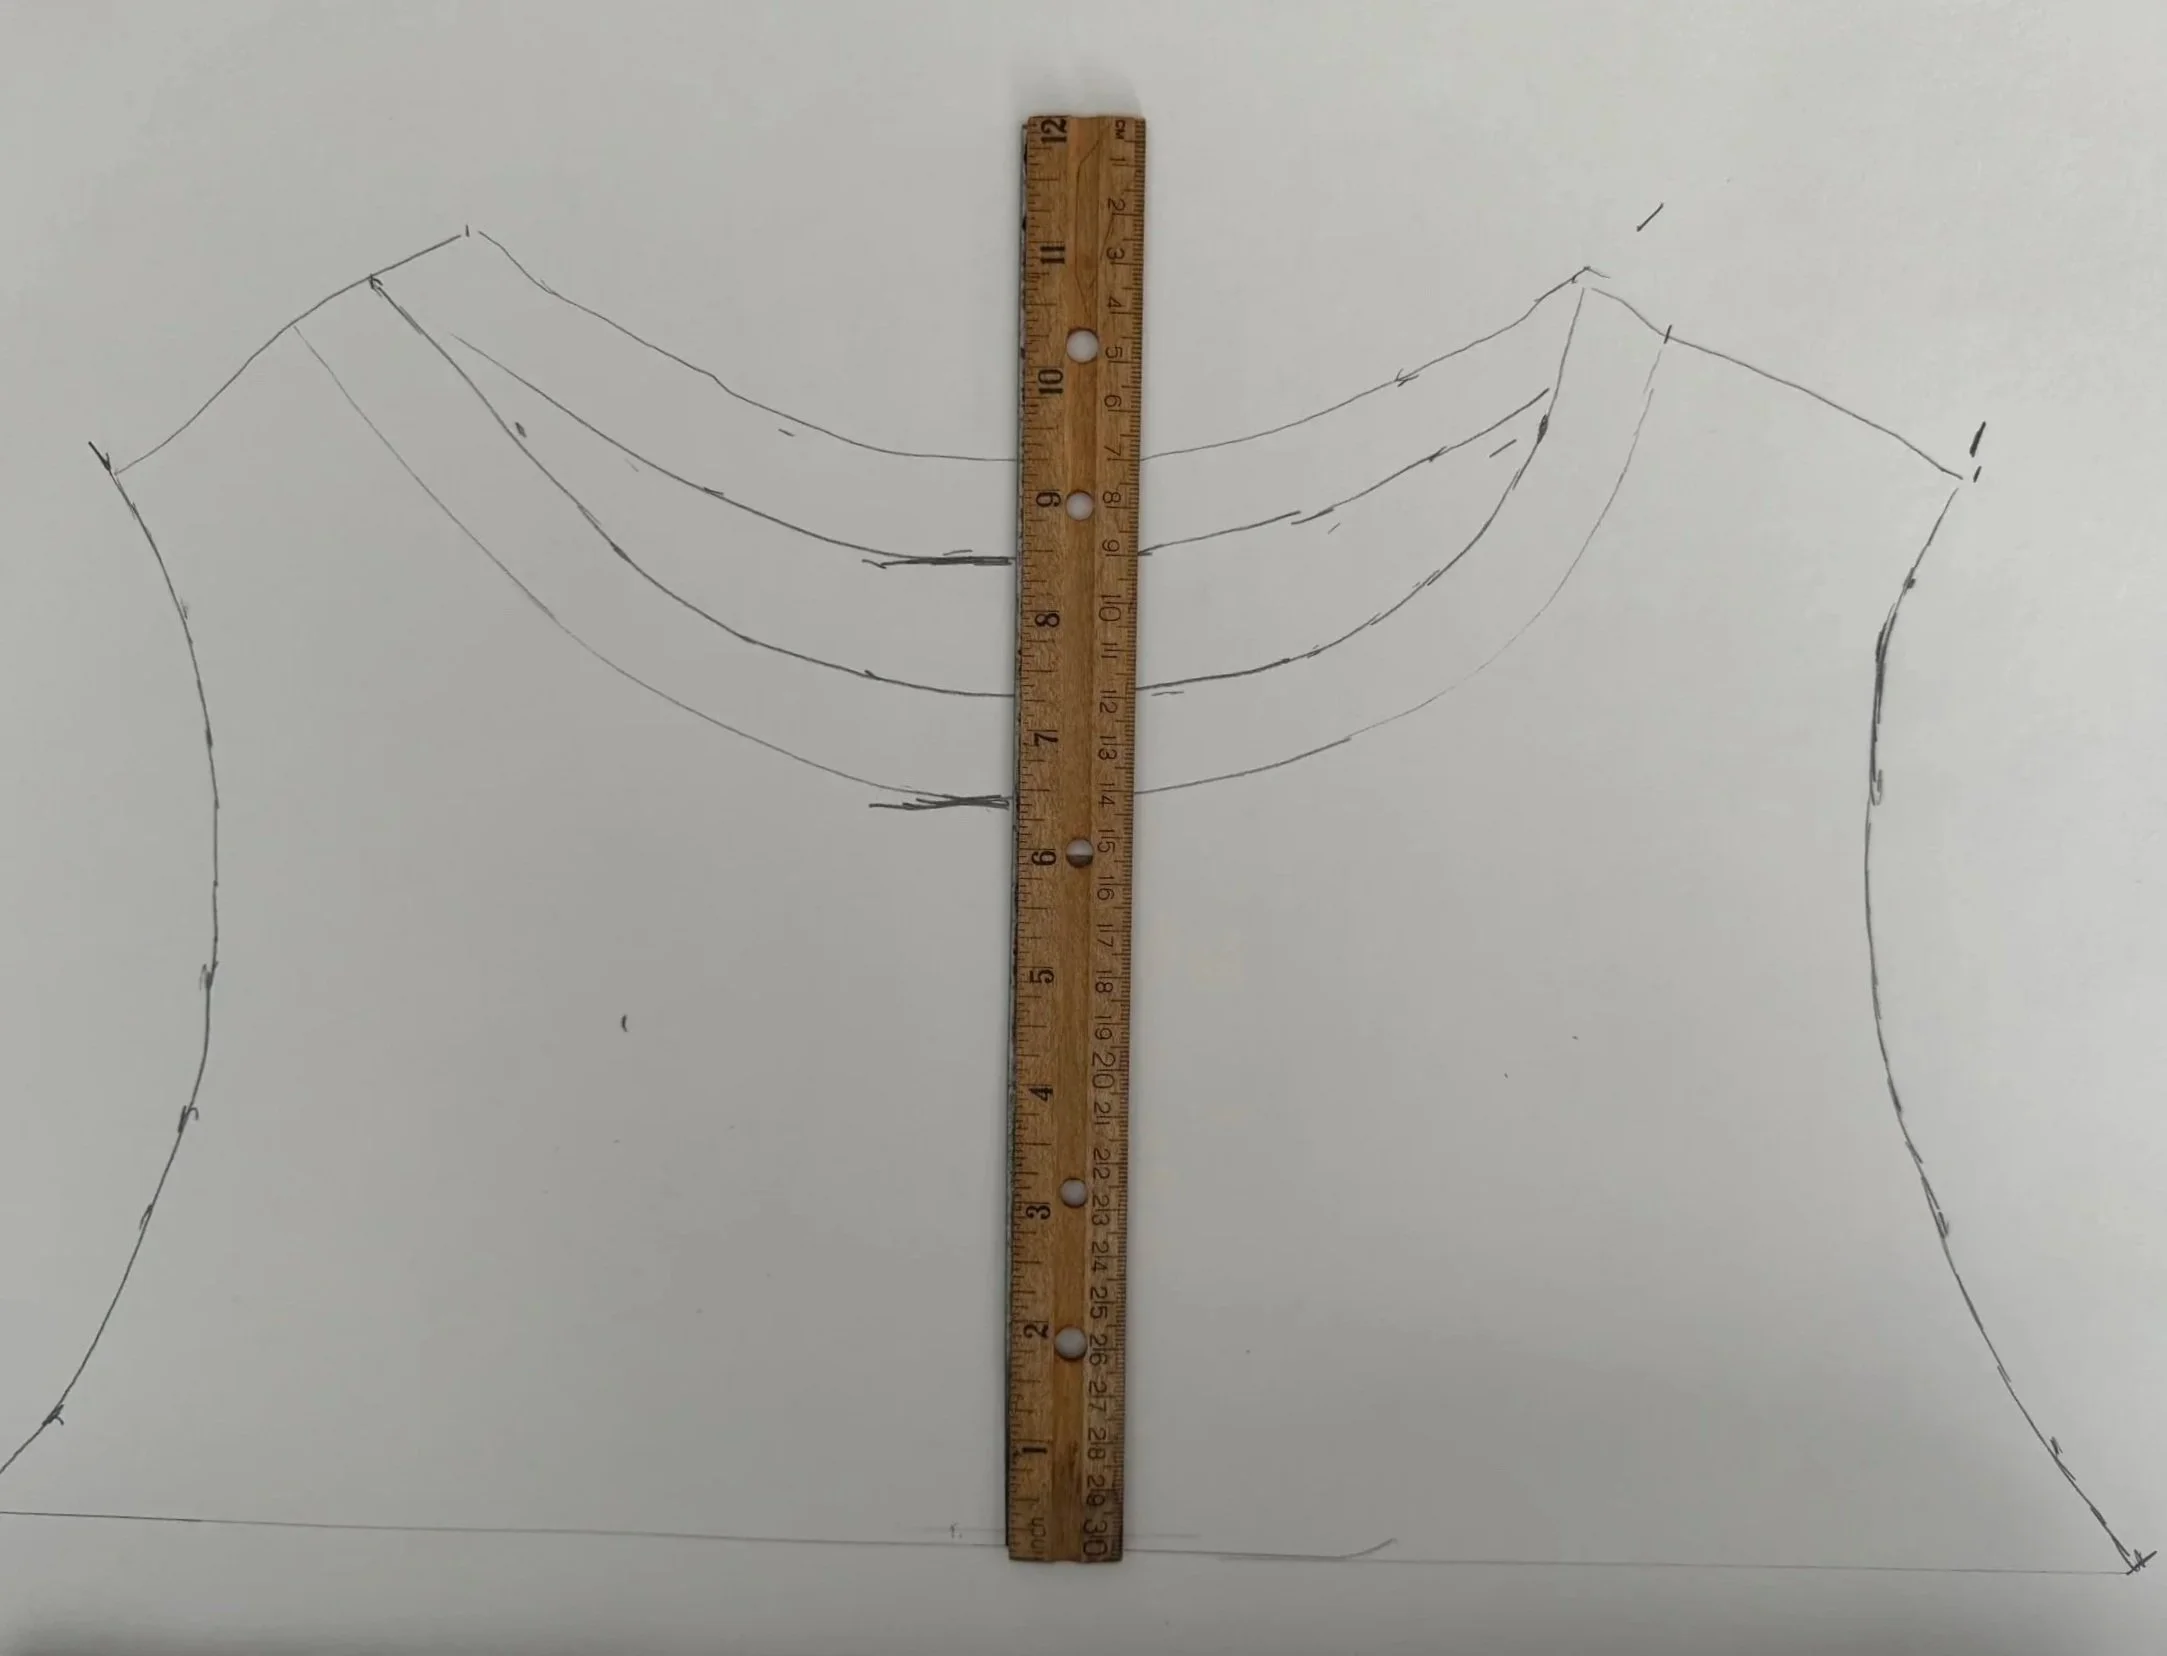
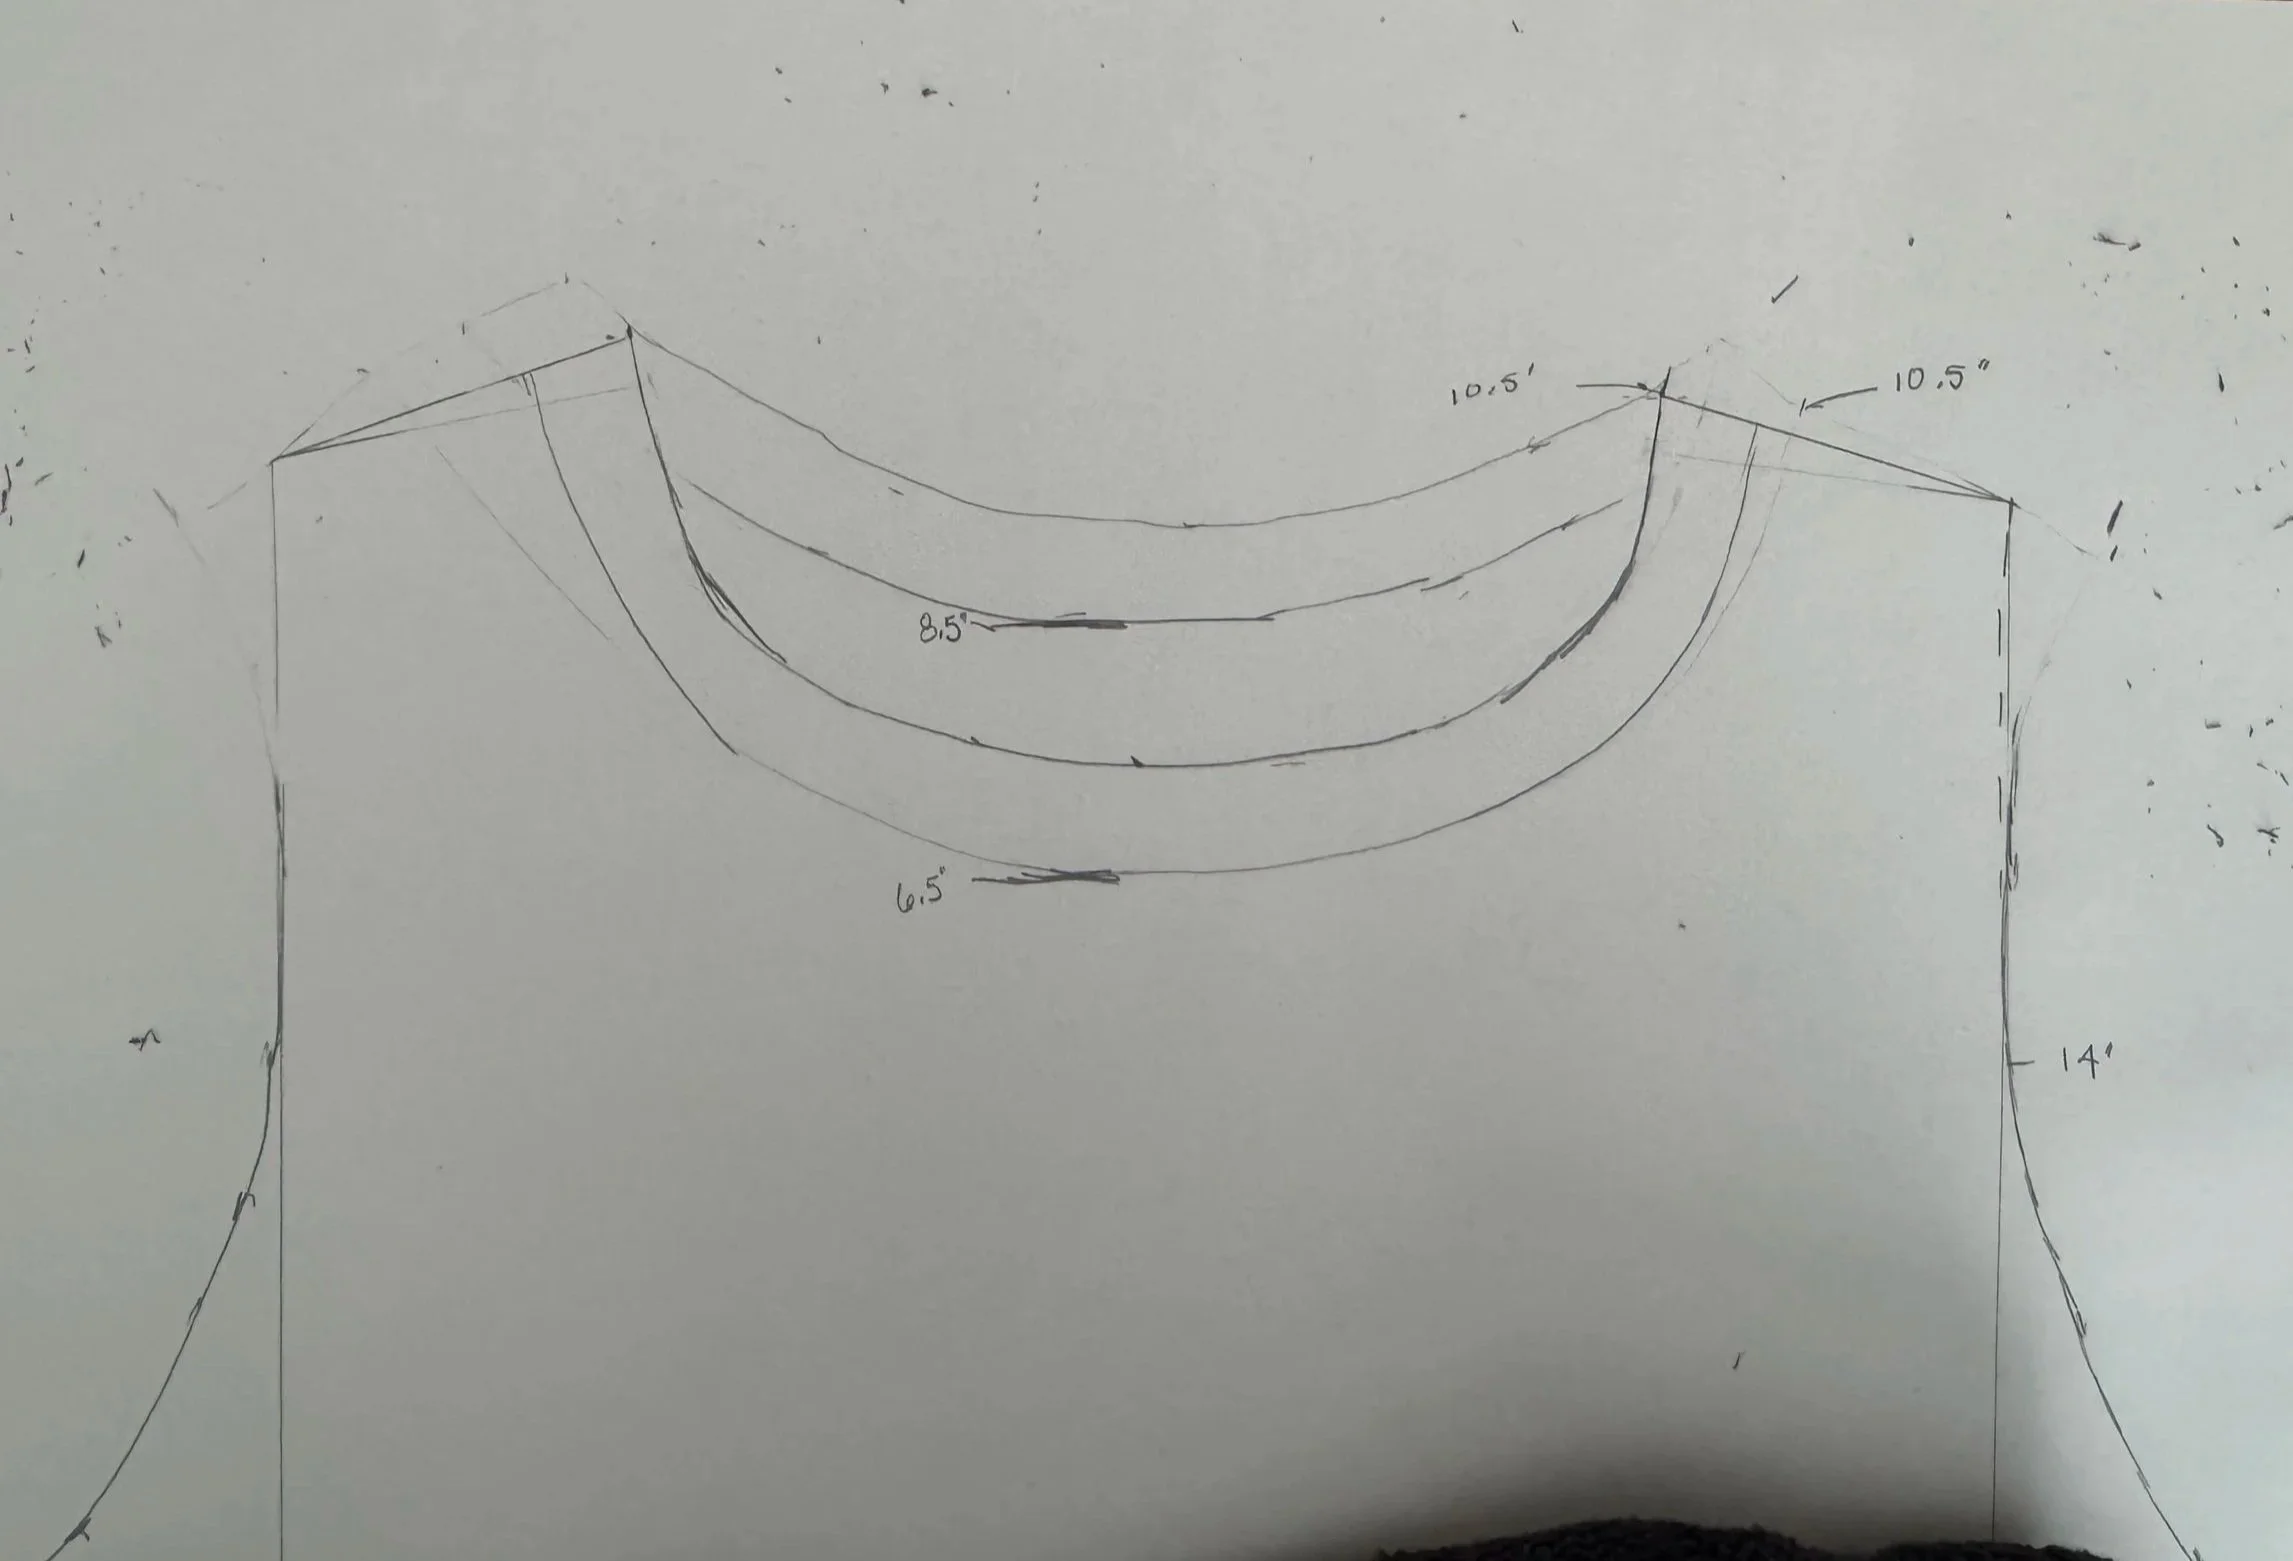
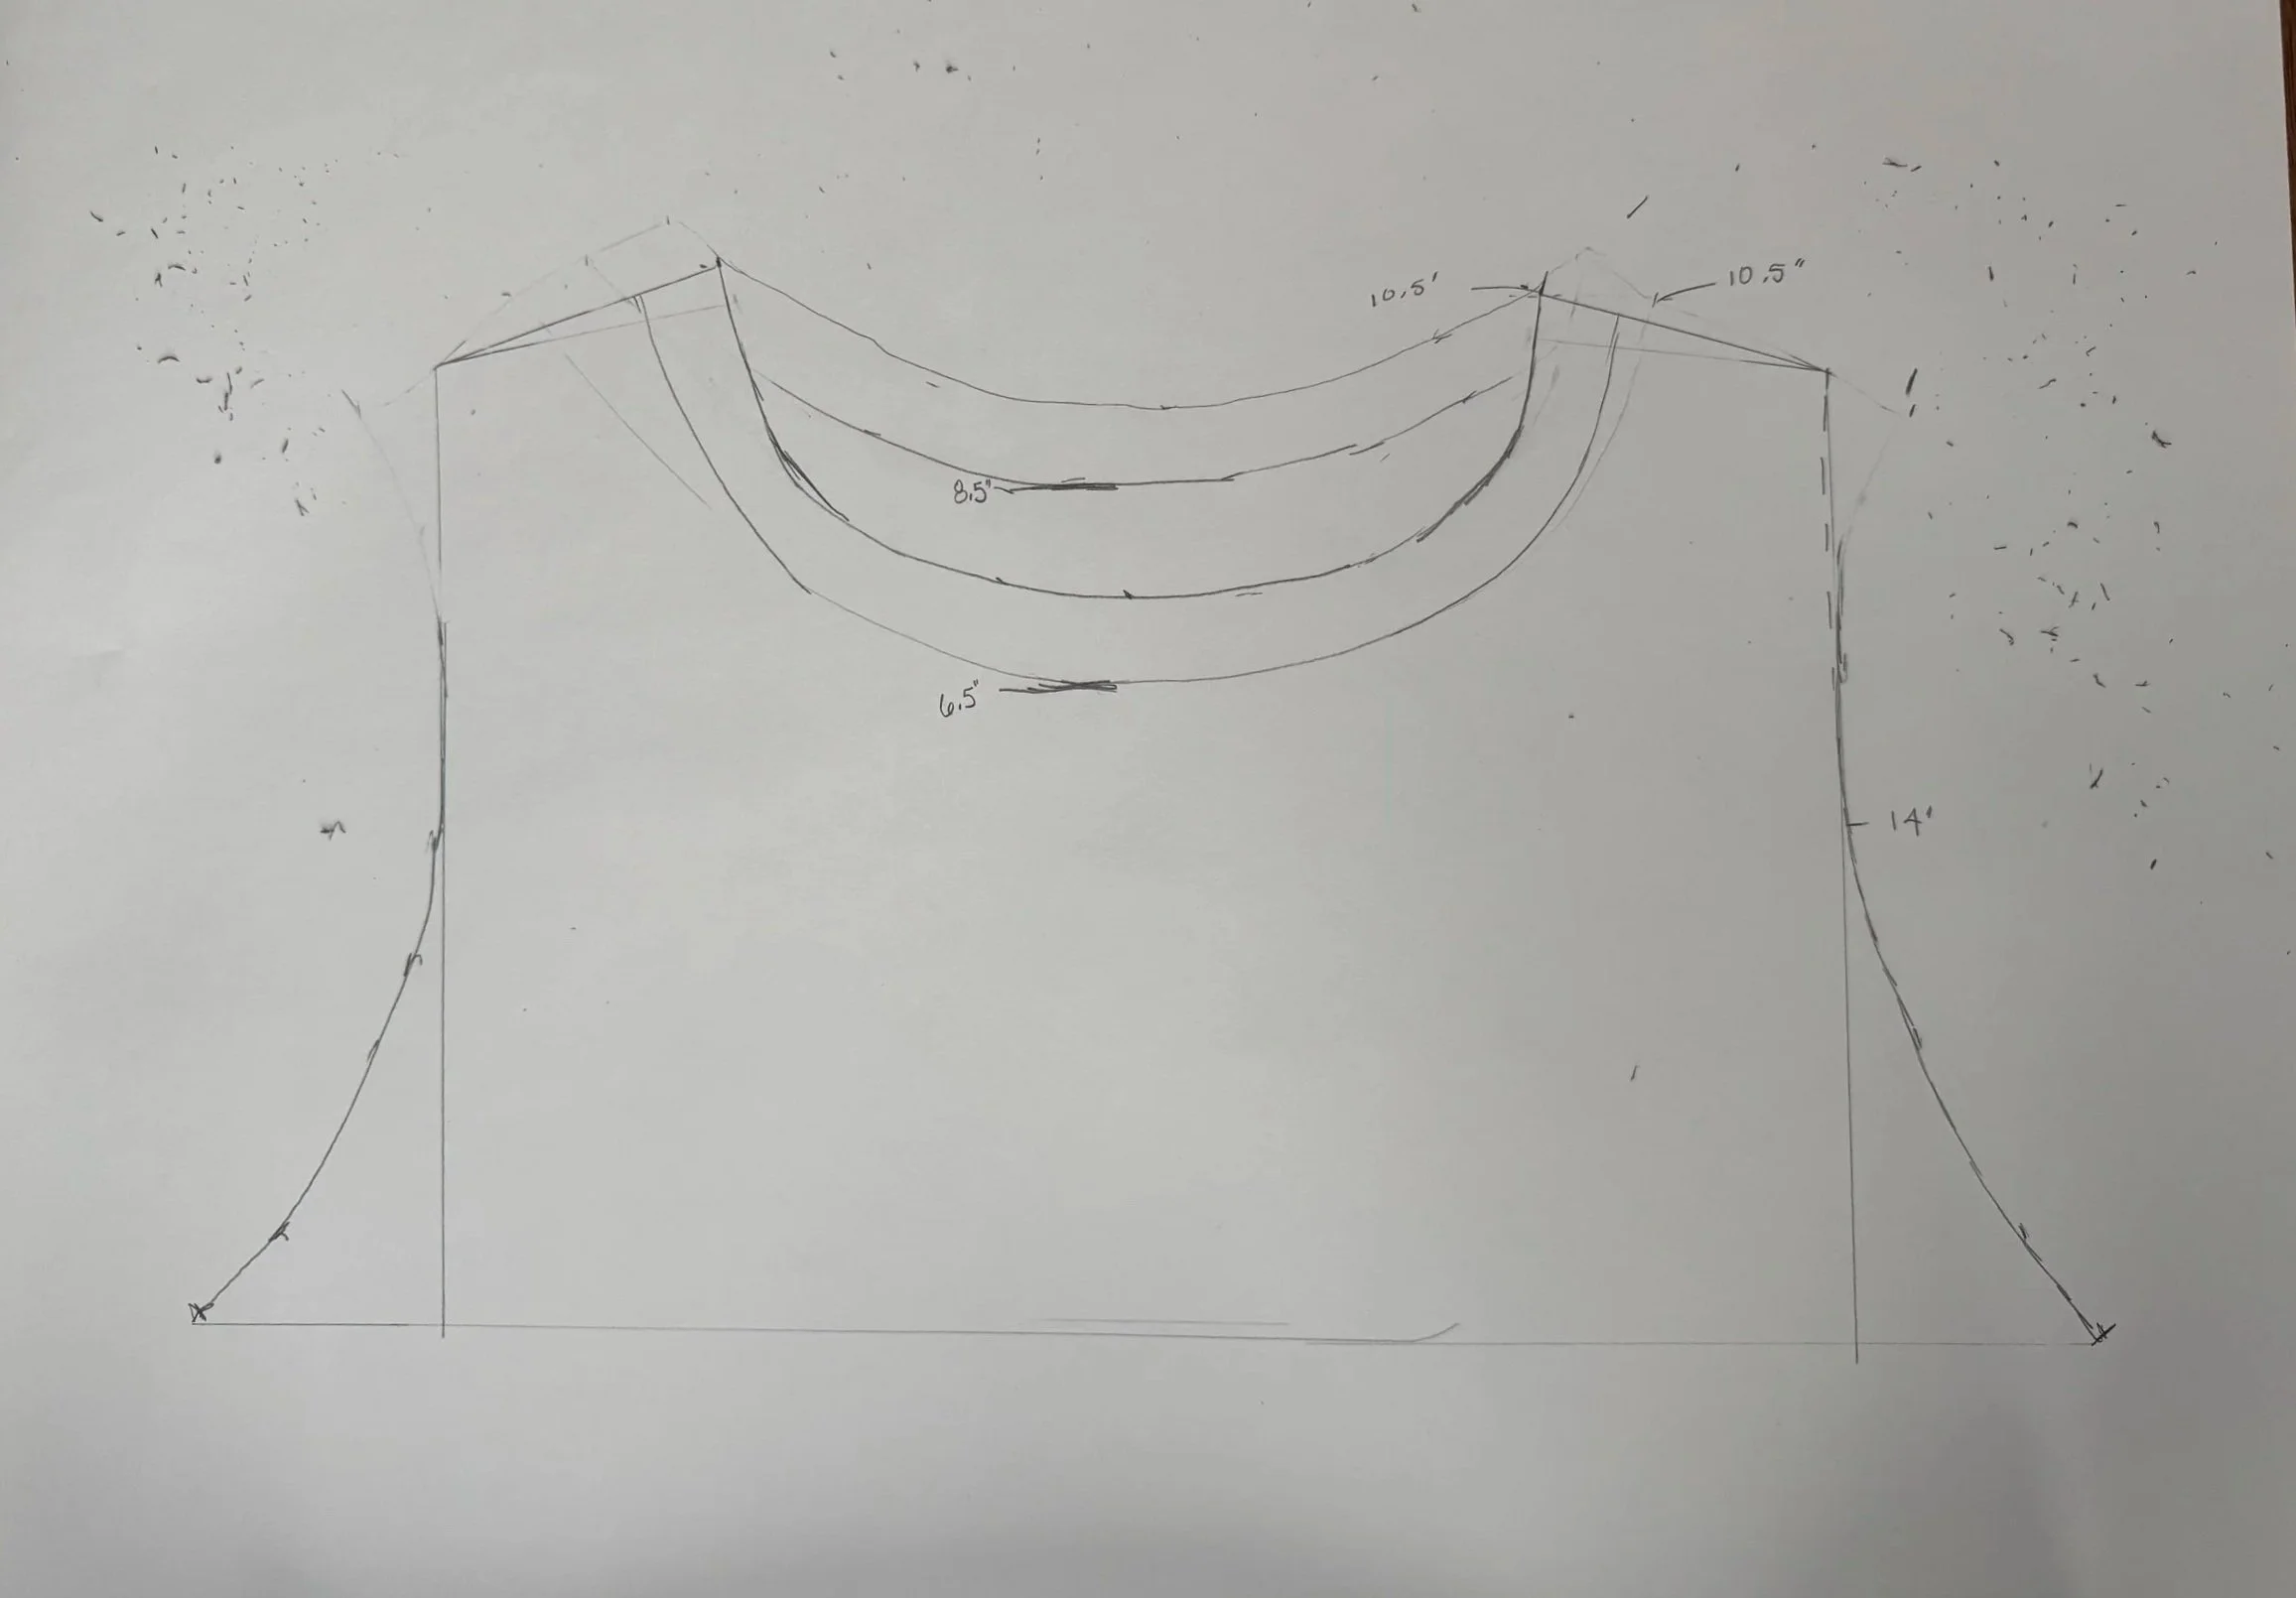
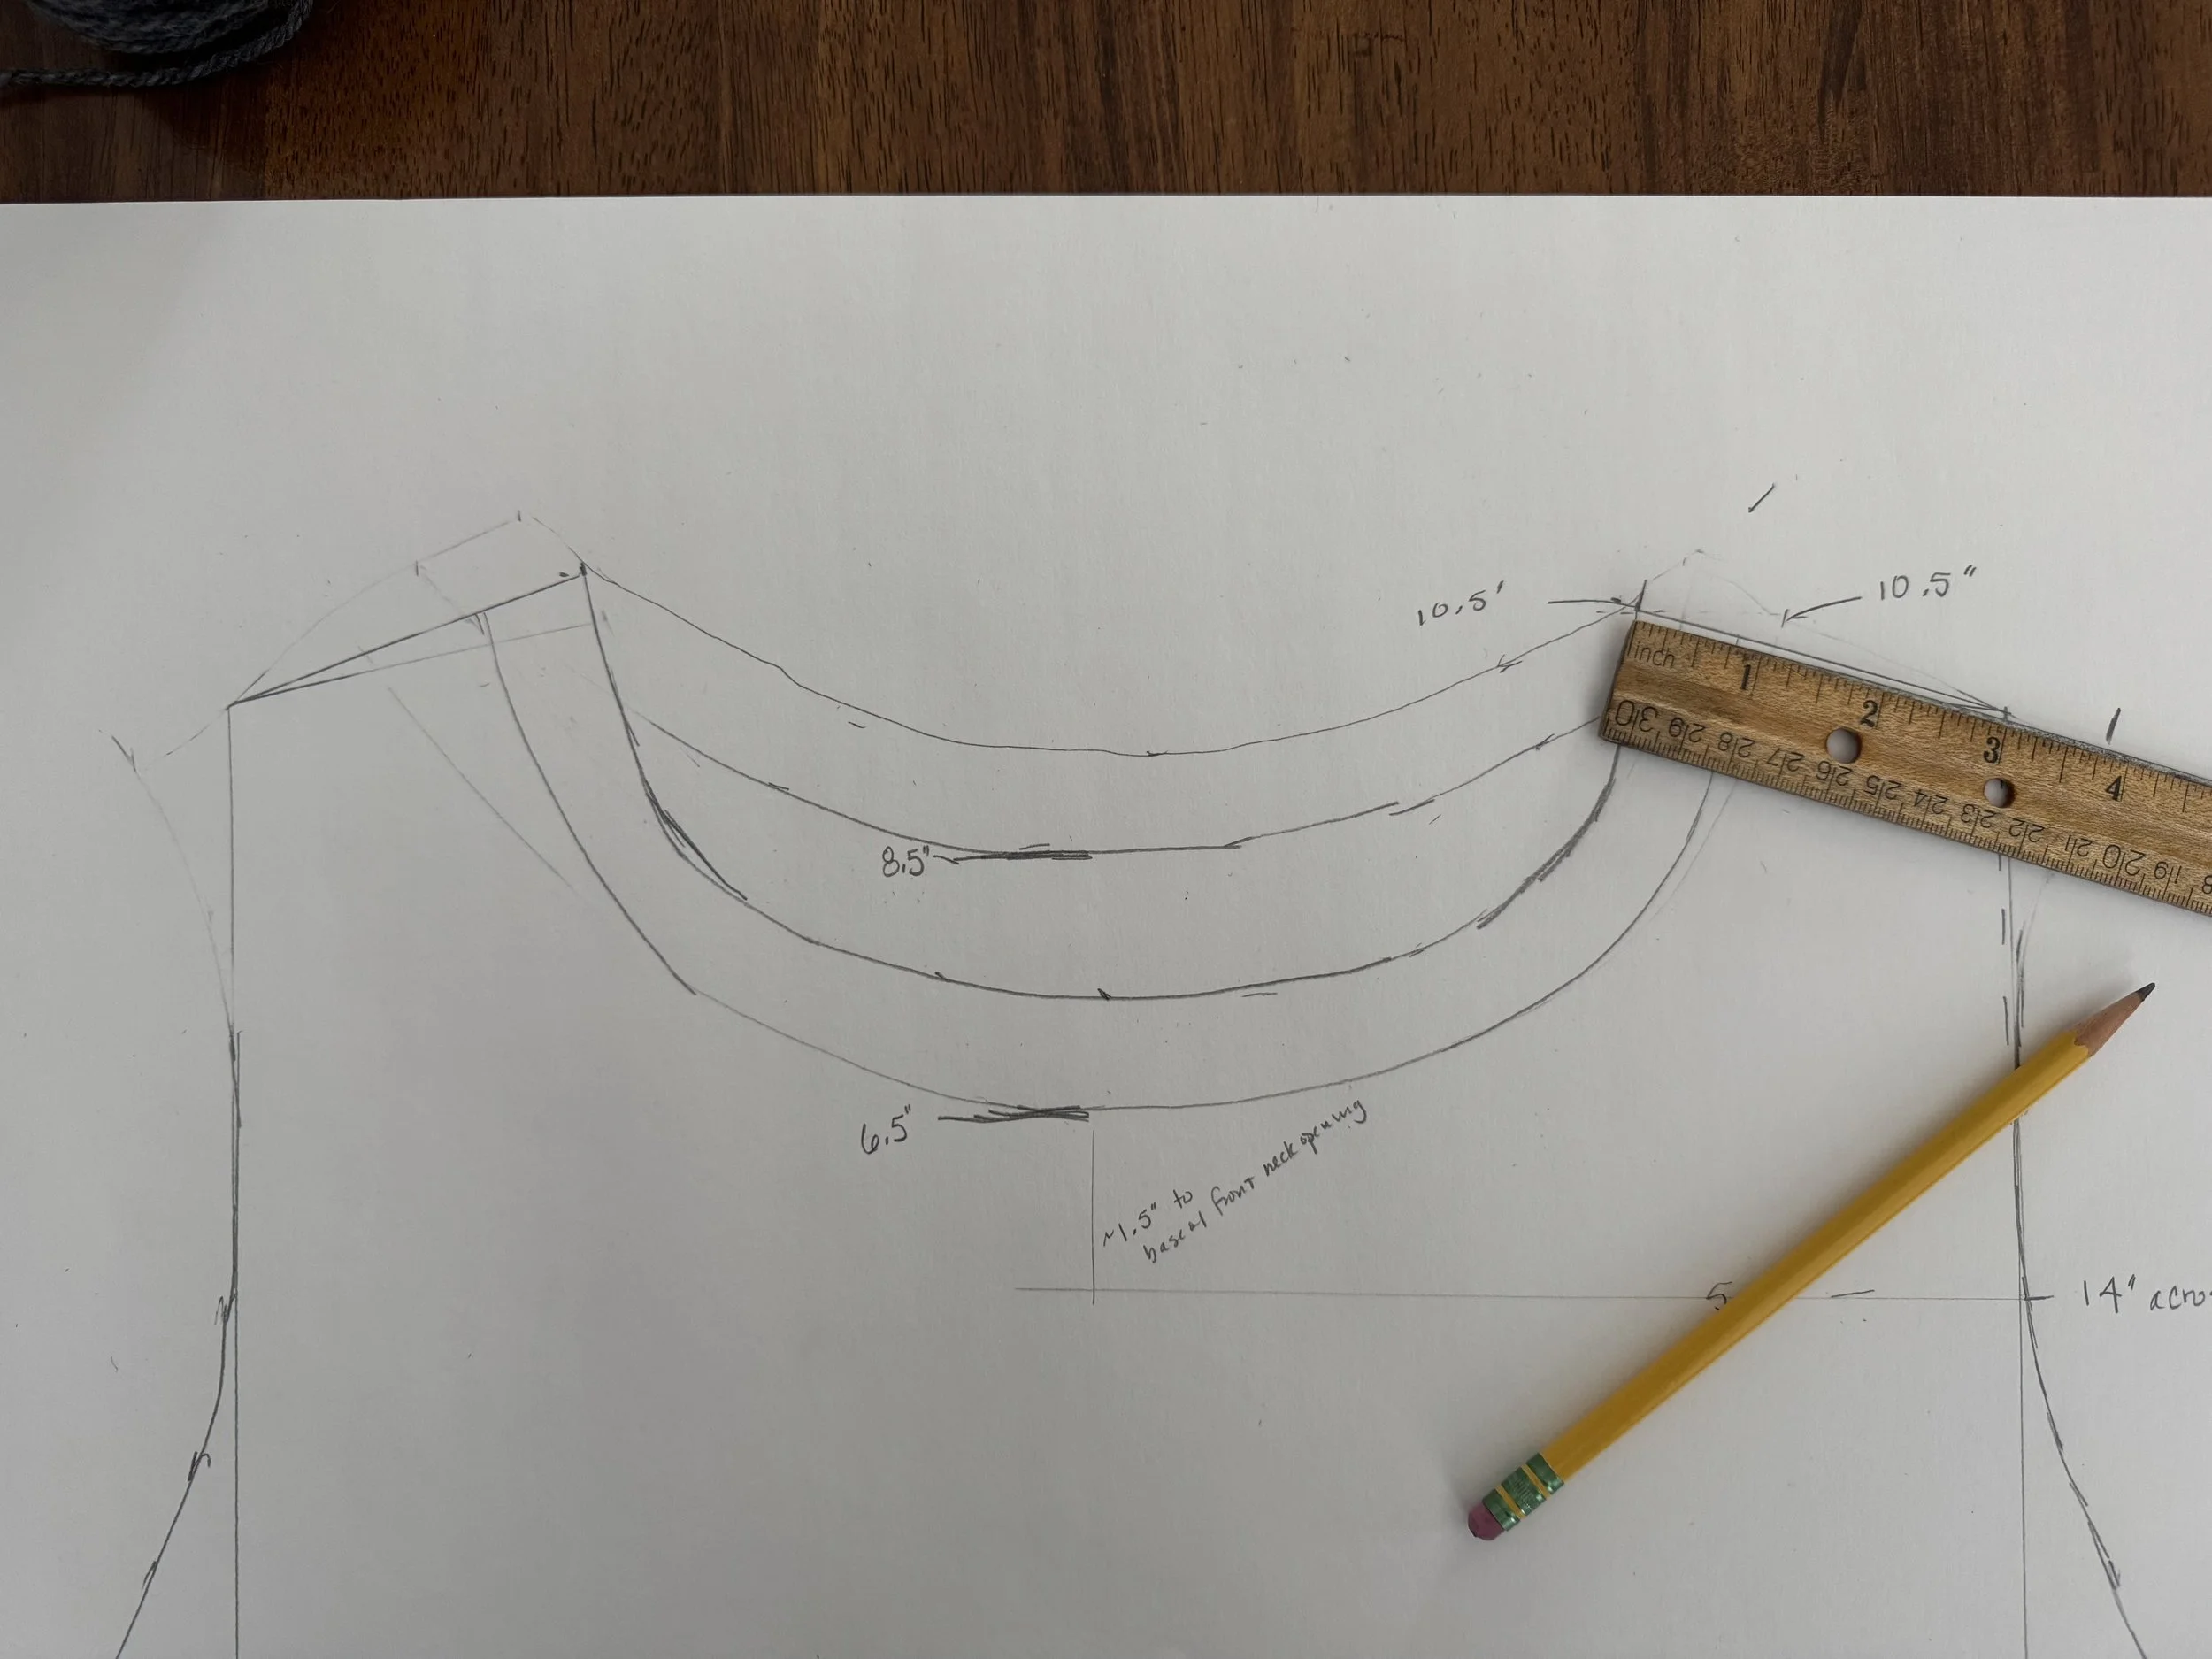
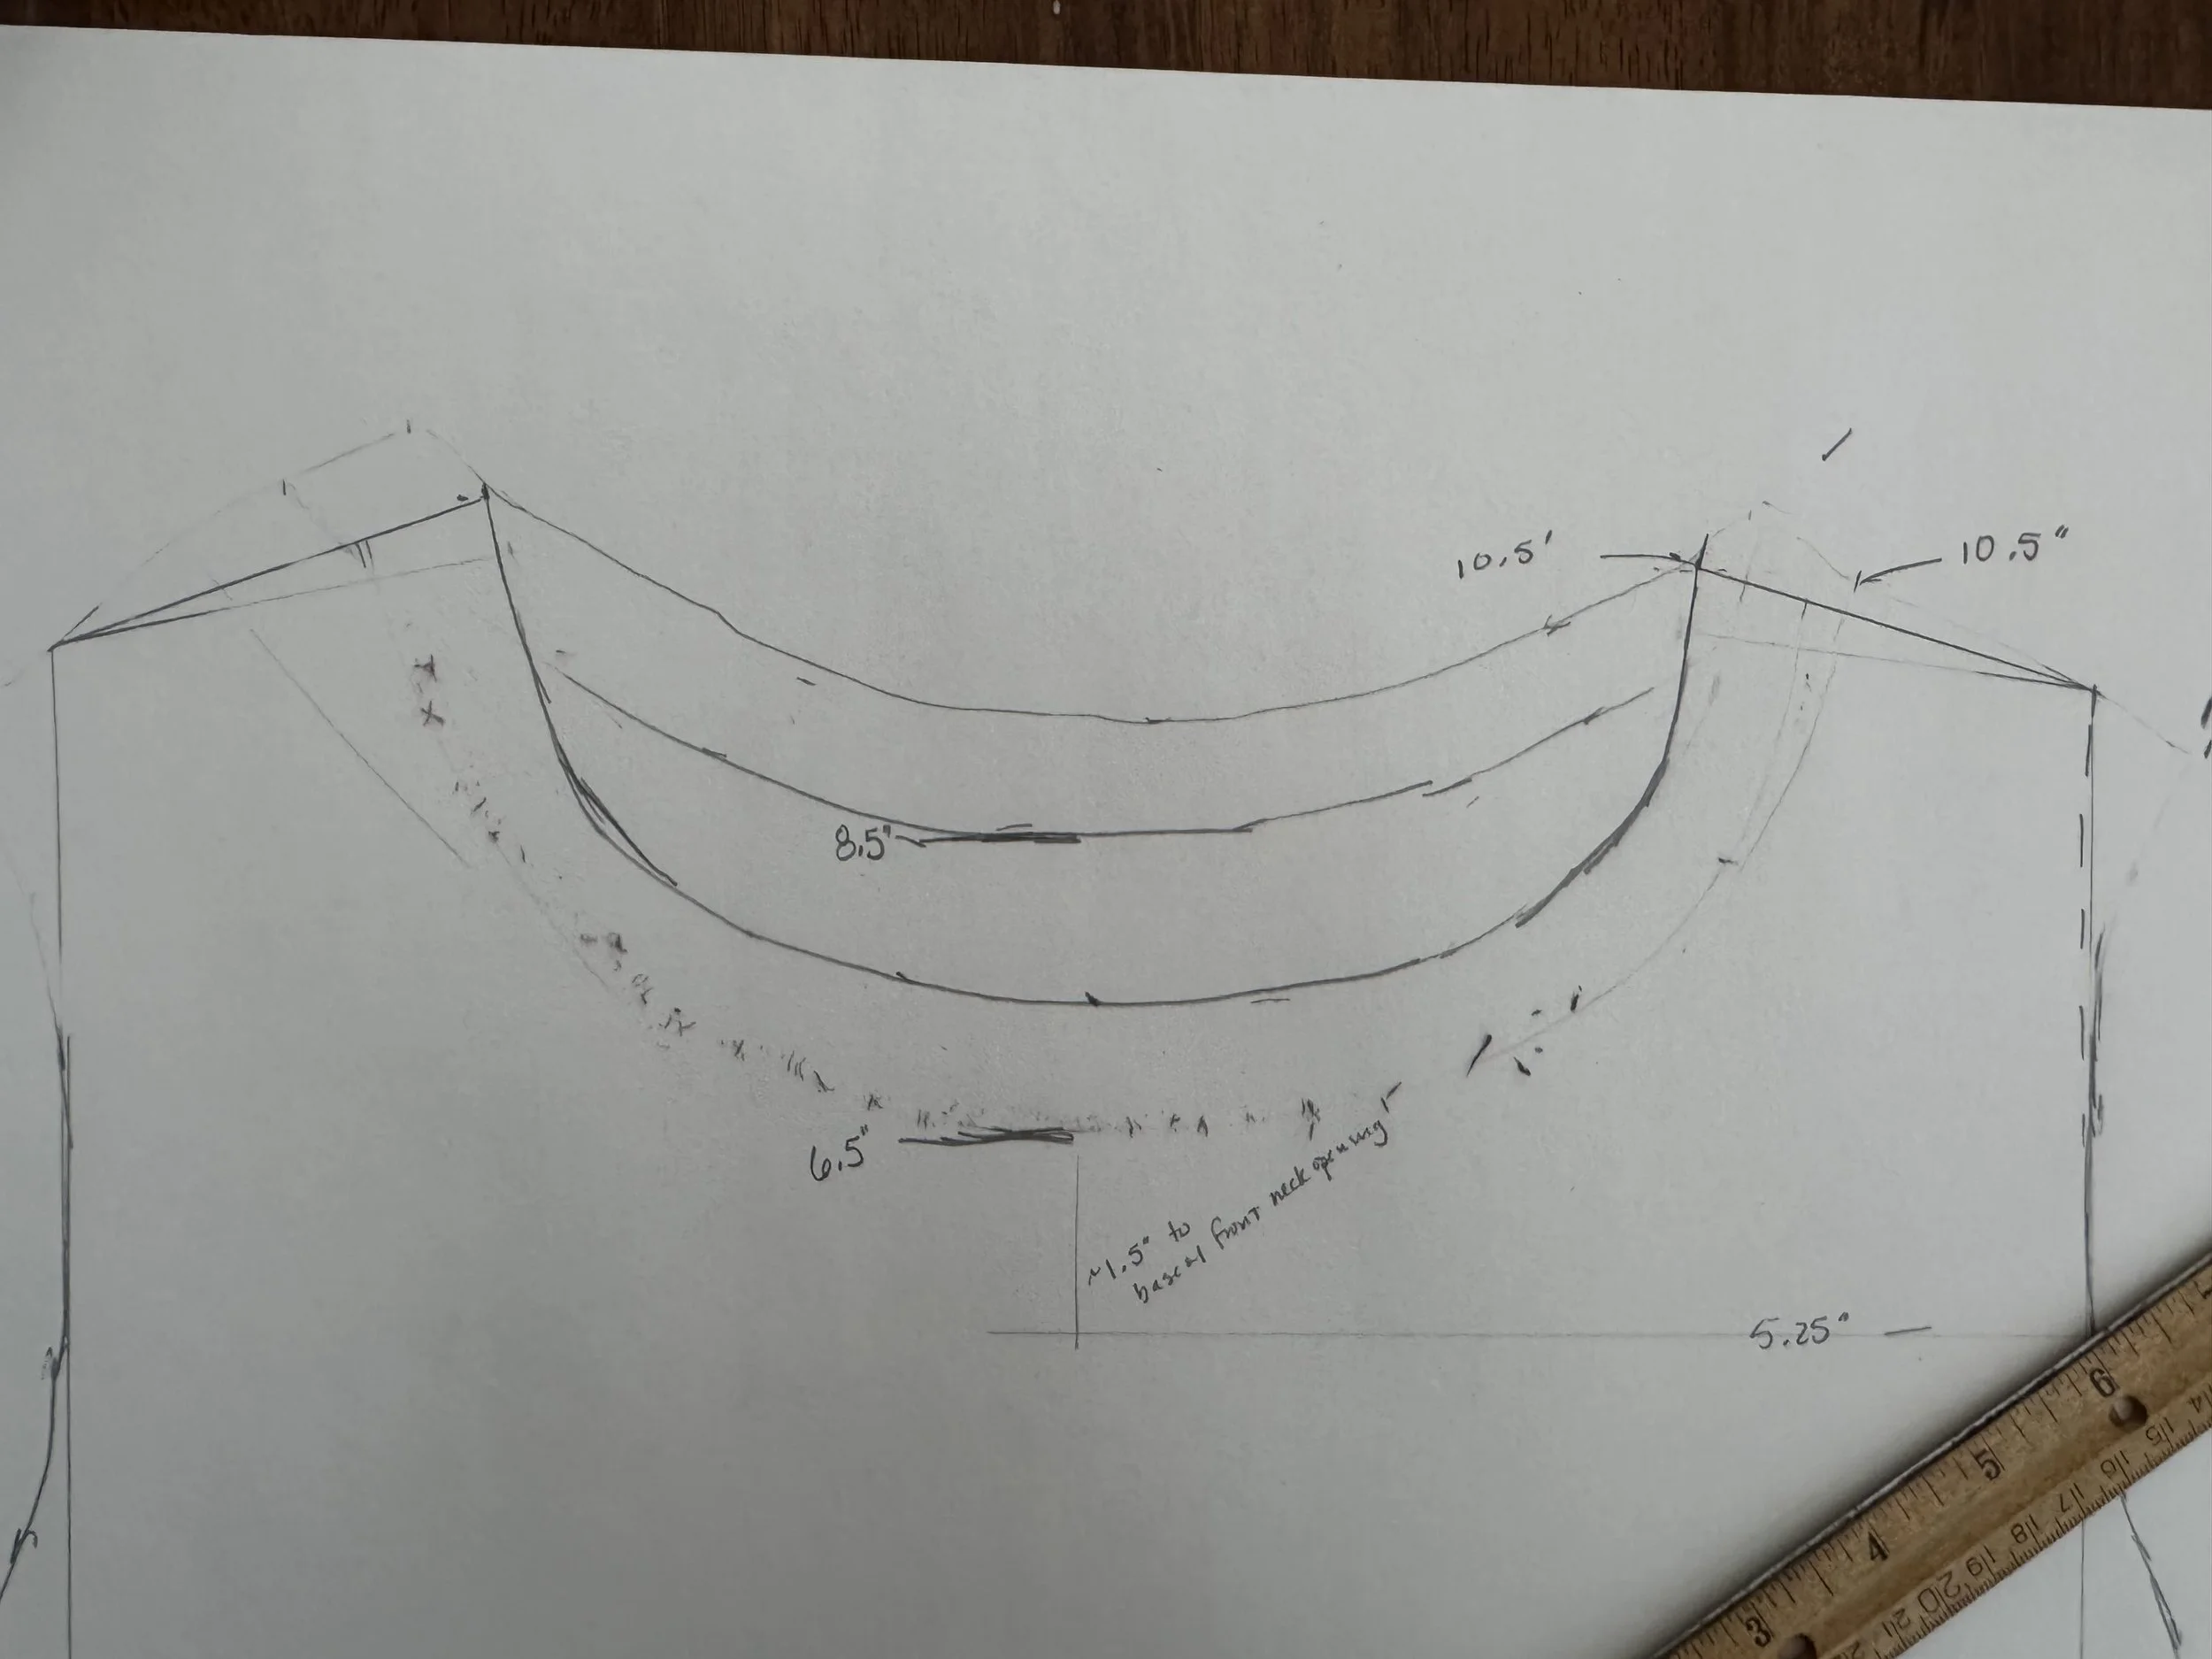
neck heights
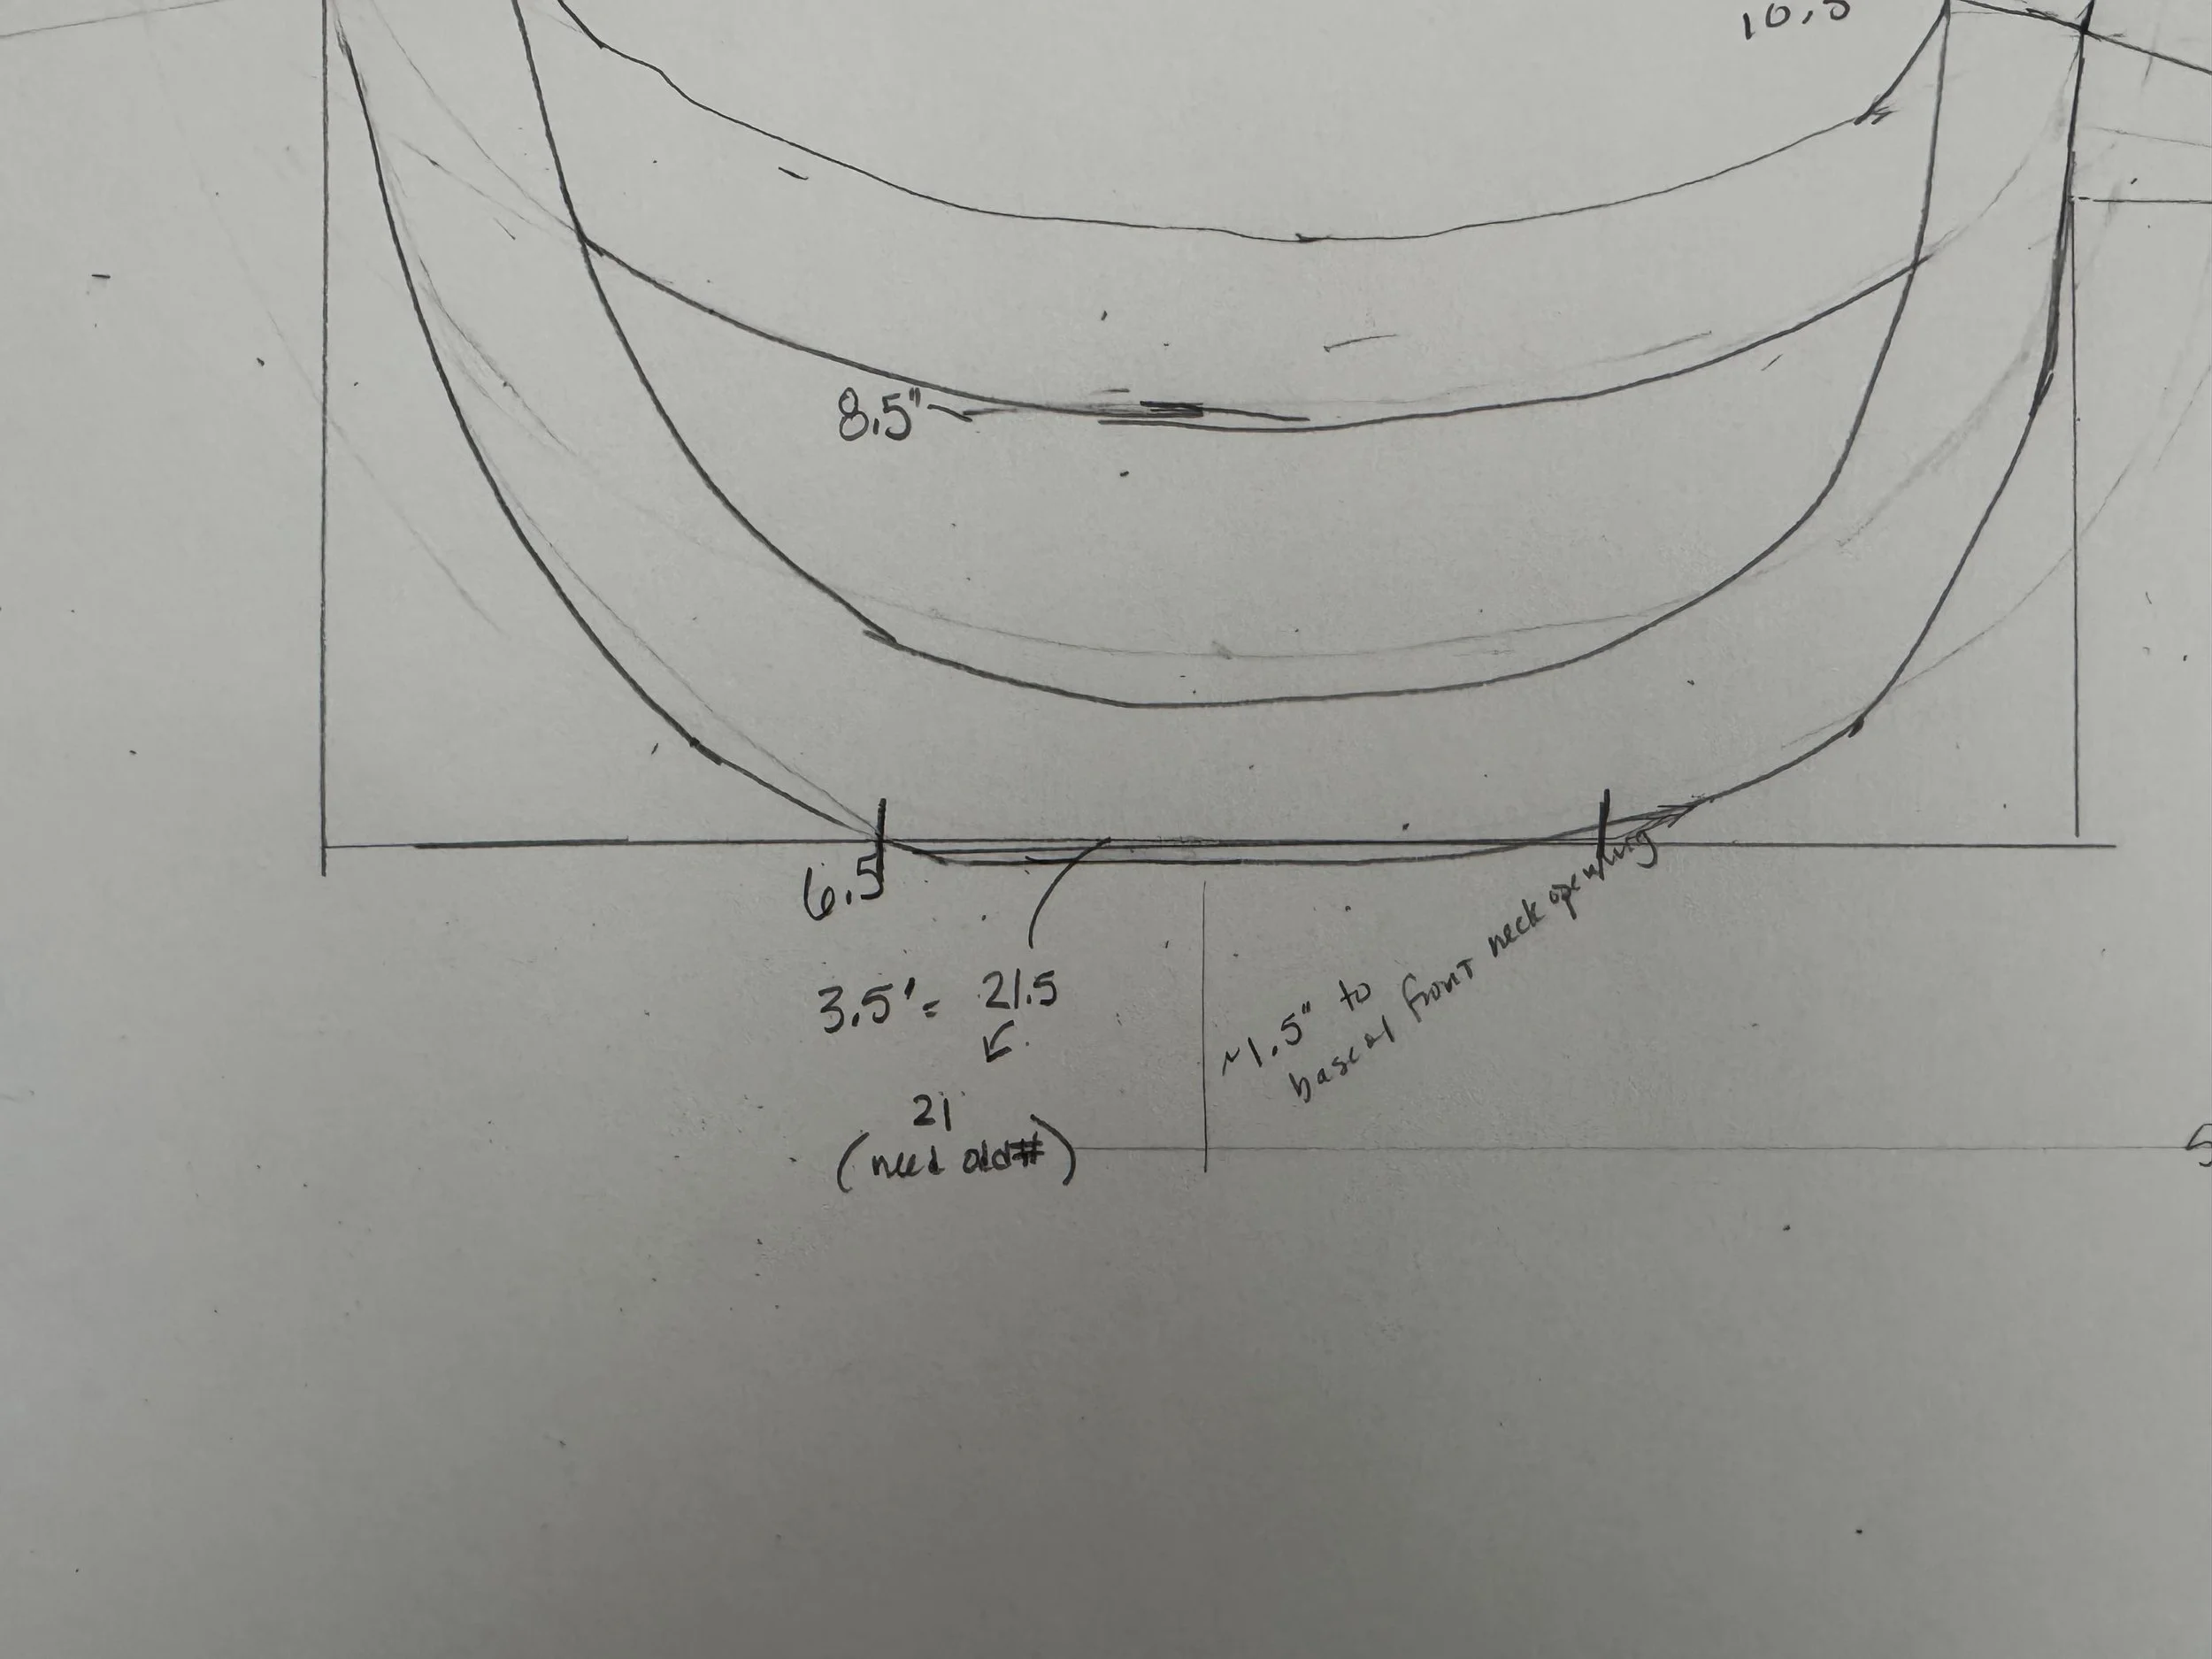
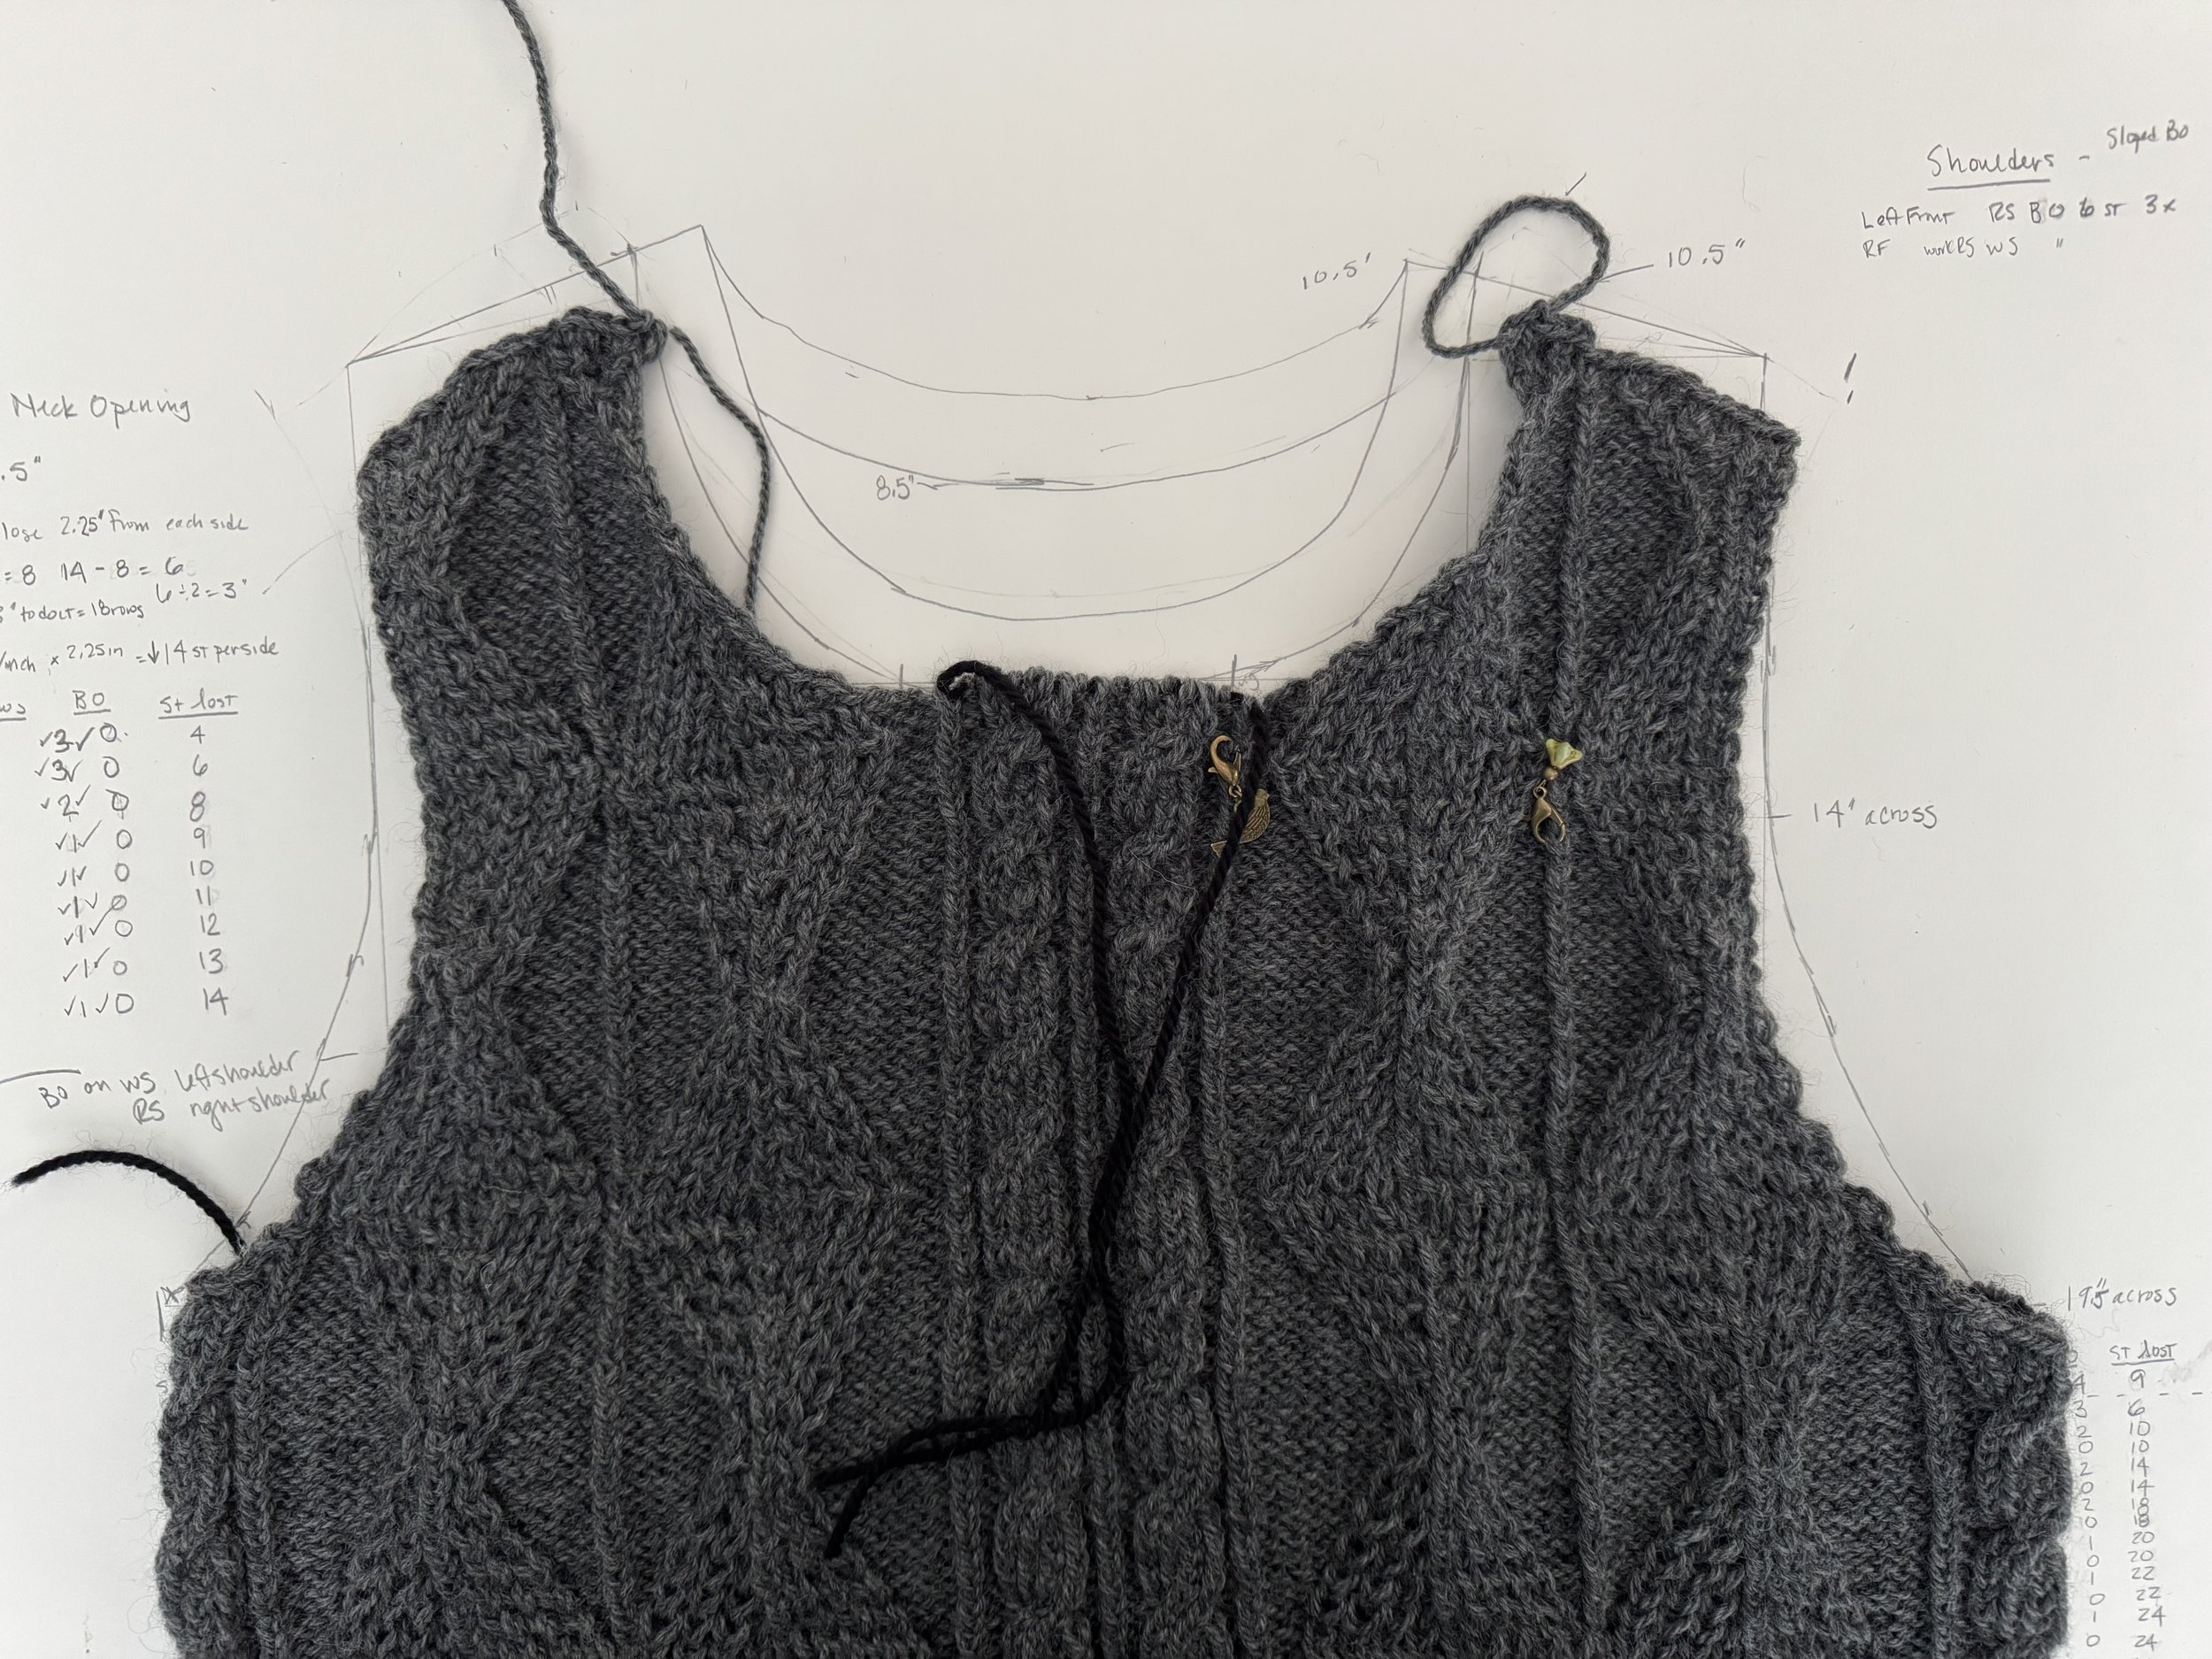
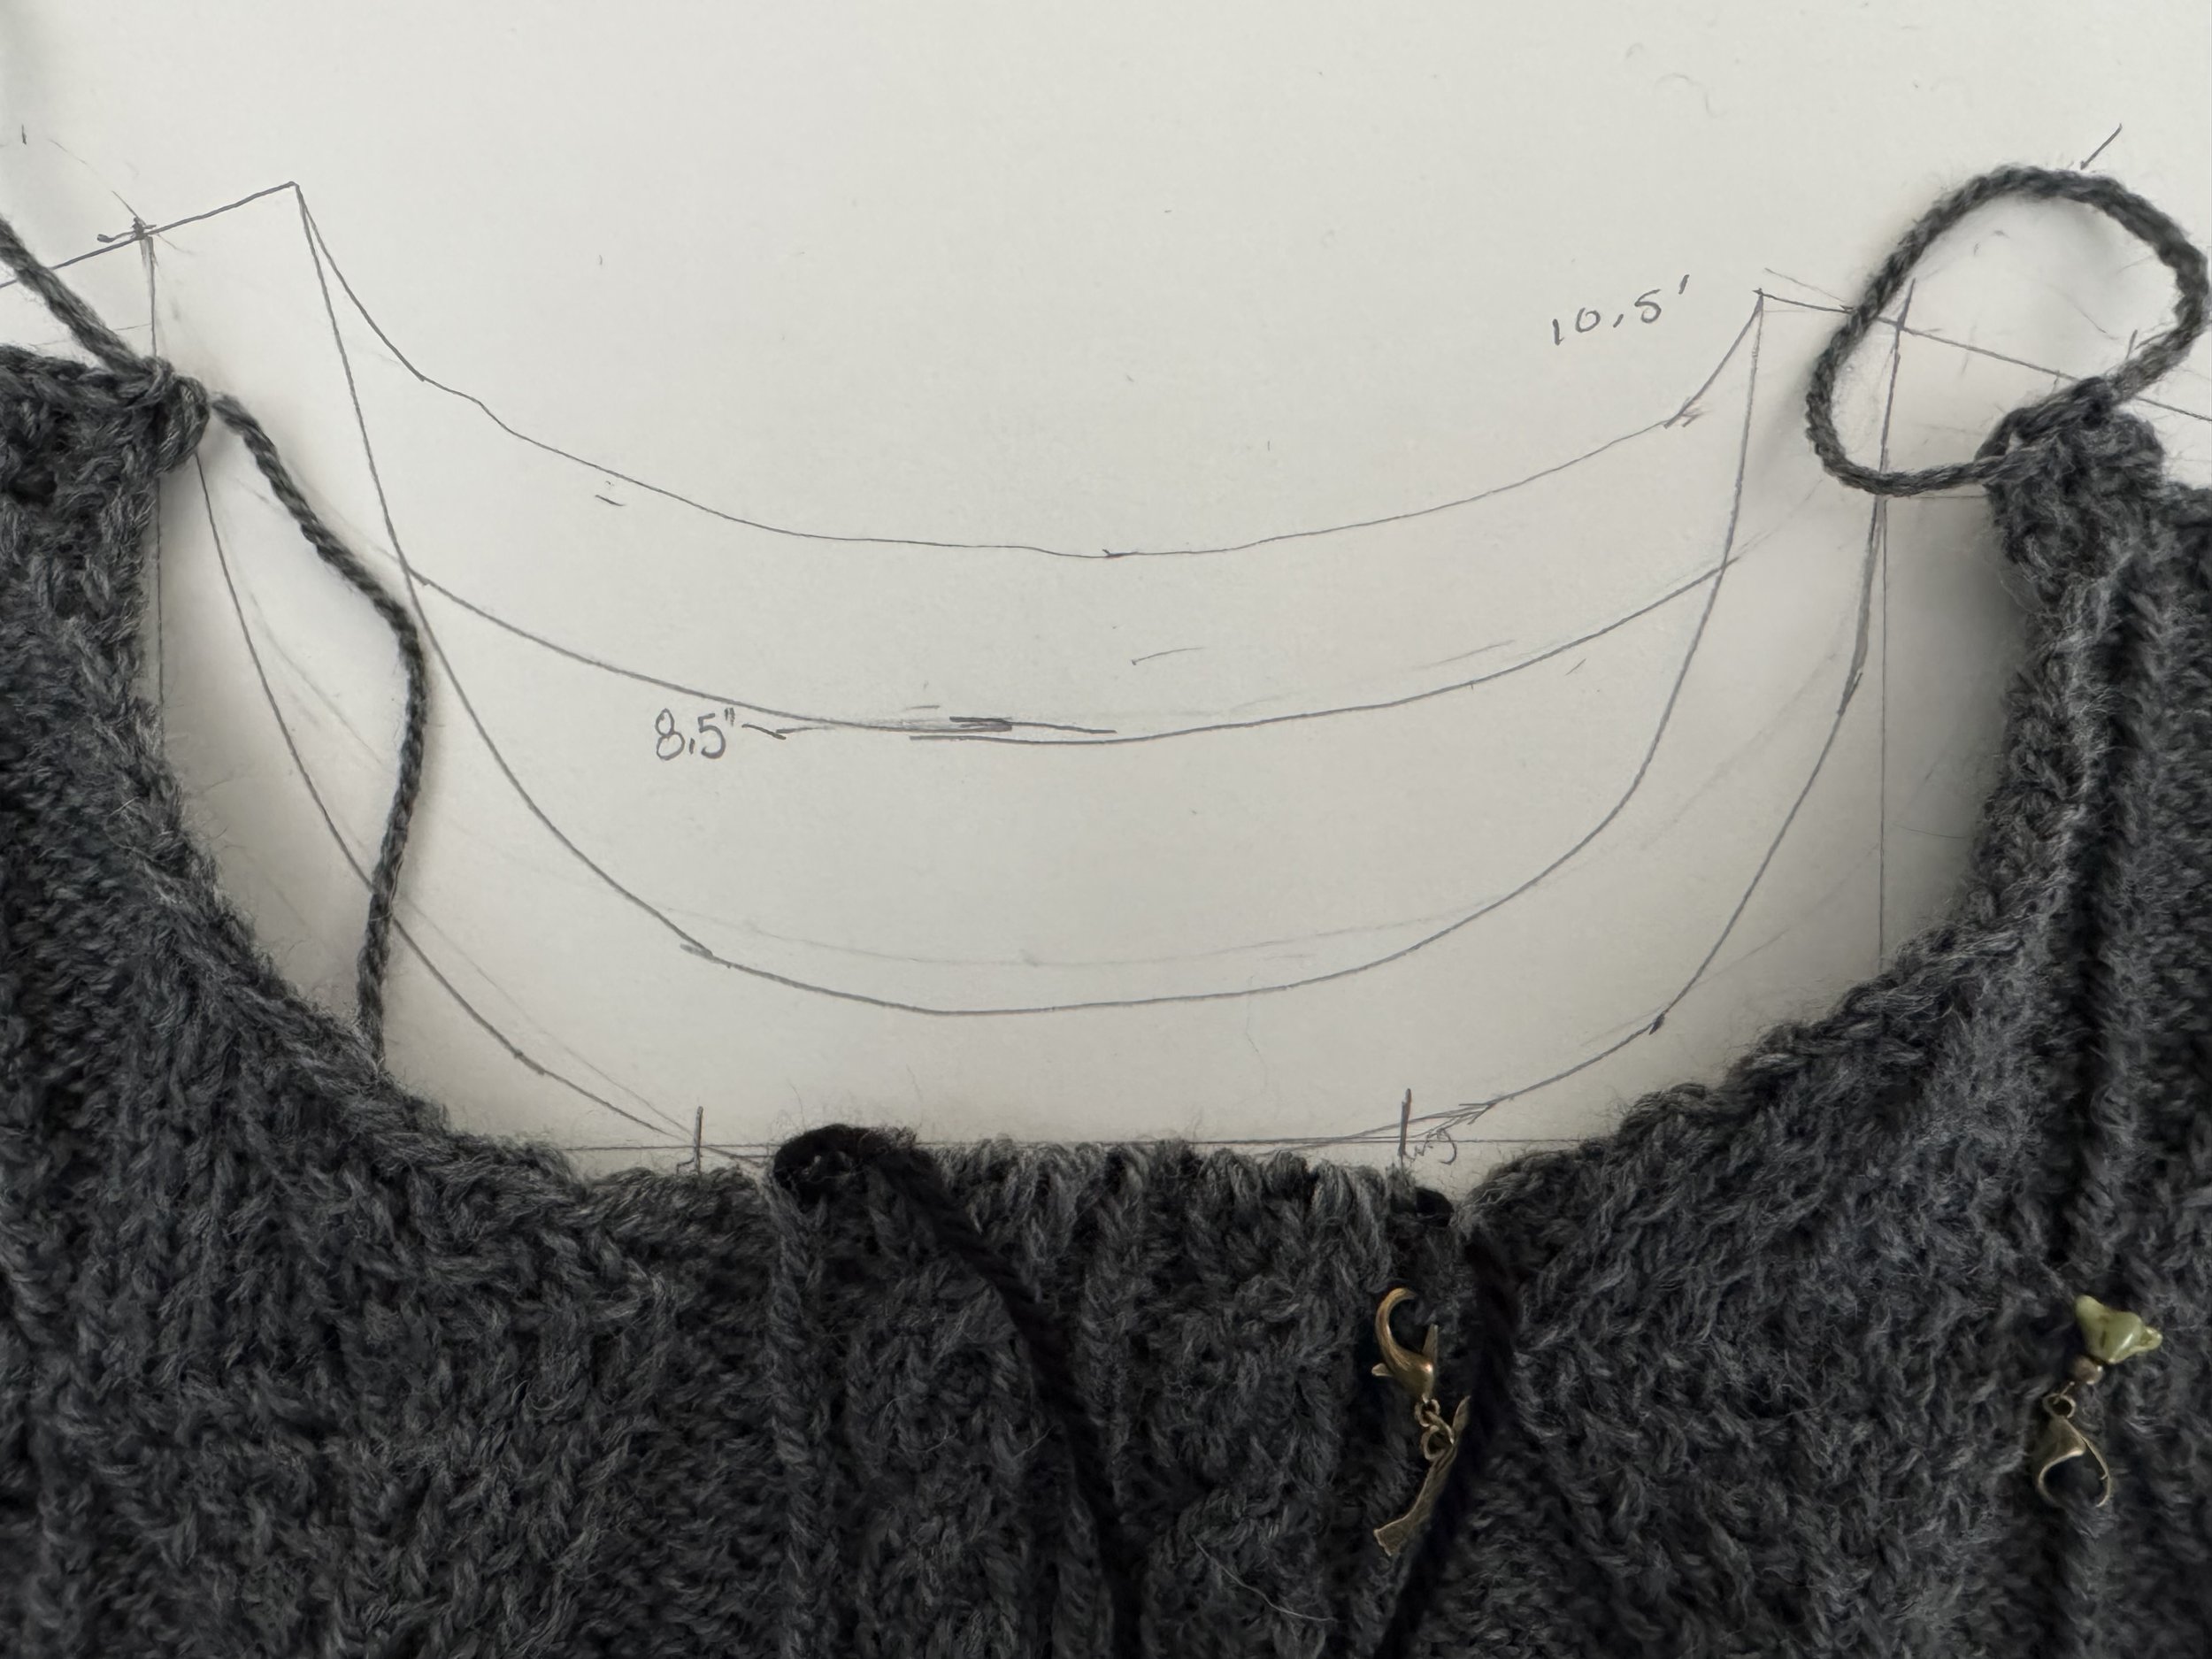
I looks like I will want to start the front neck opening at about 6.5” and the back at about 8.5”
-
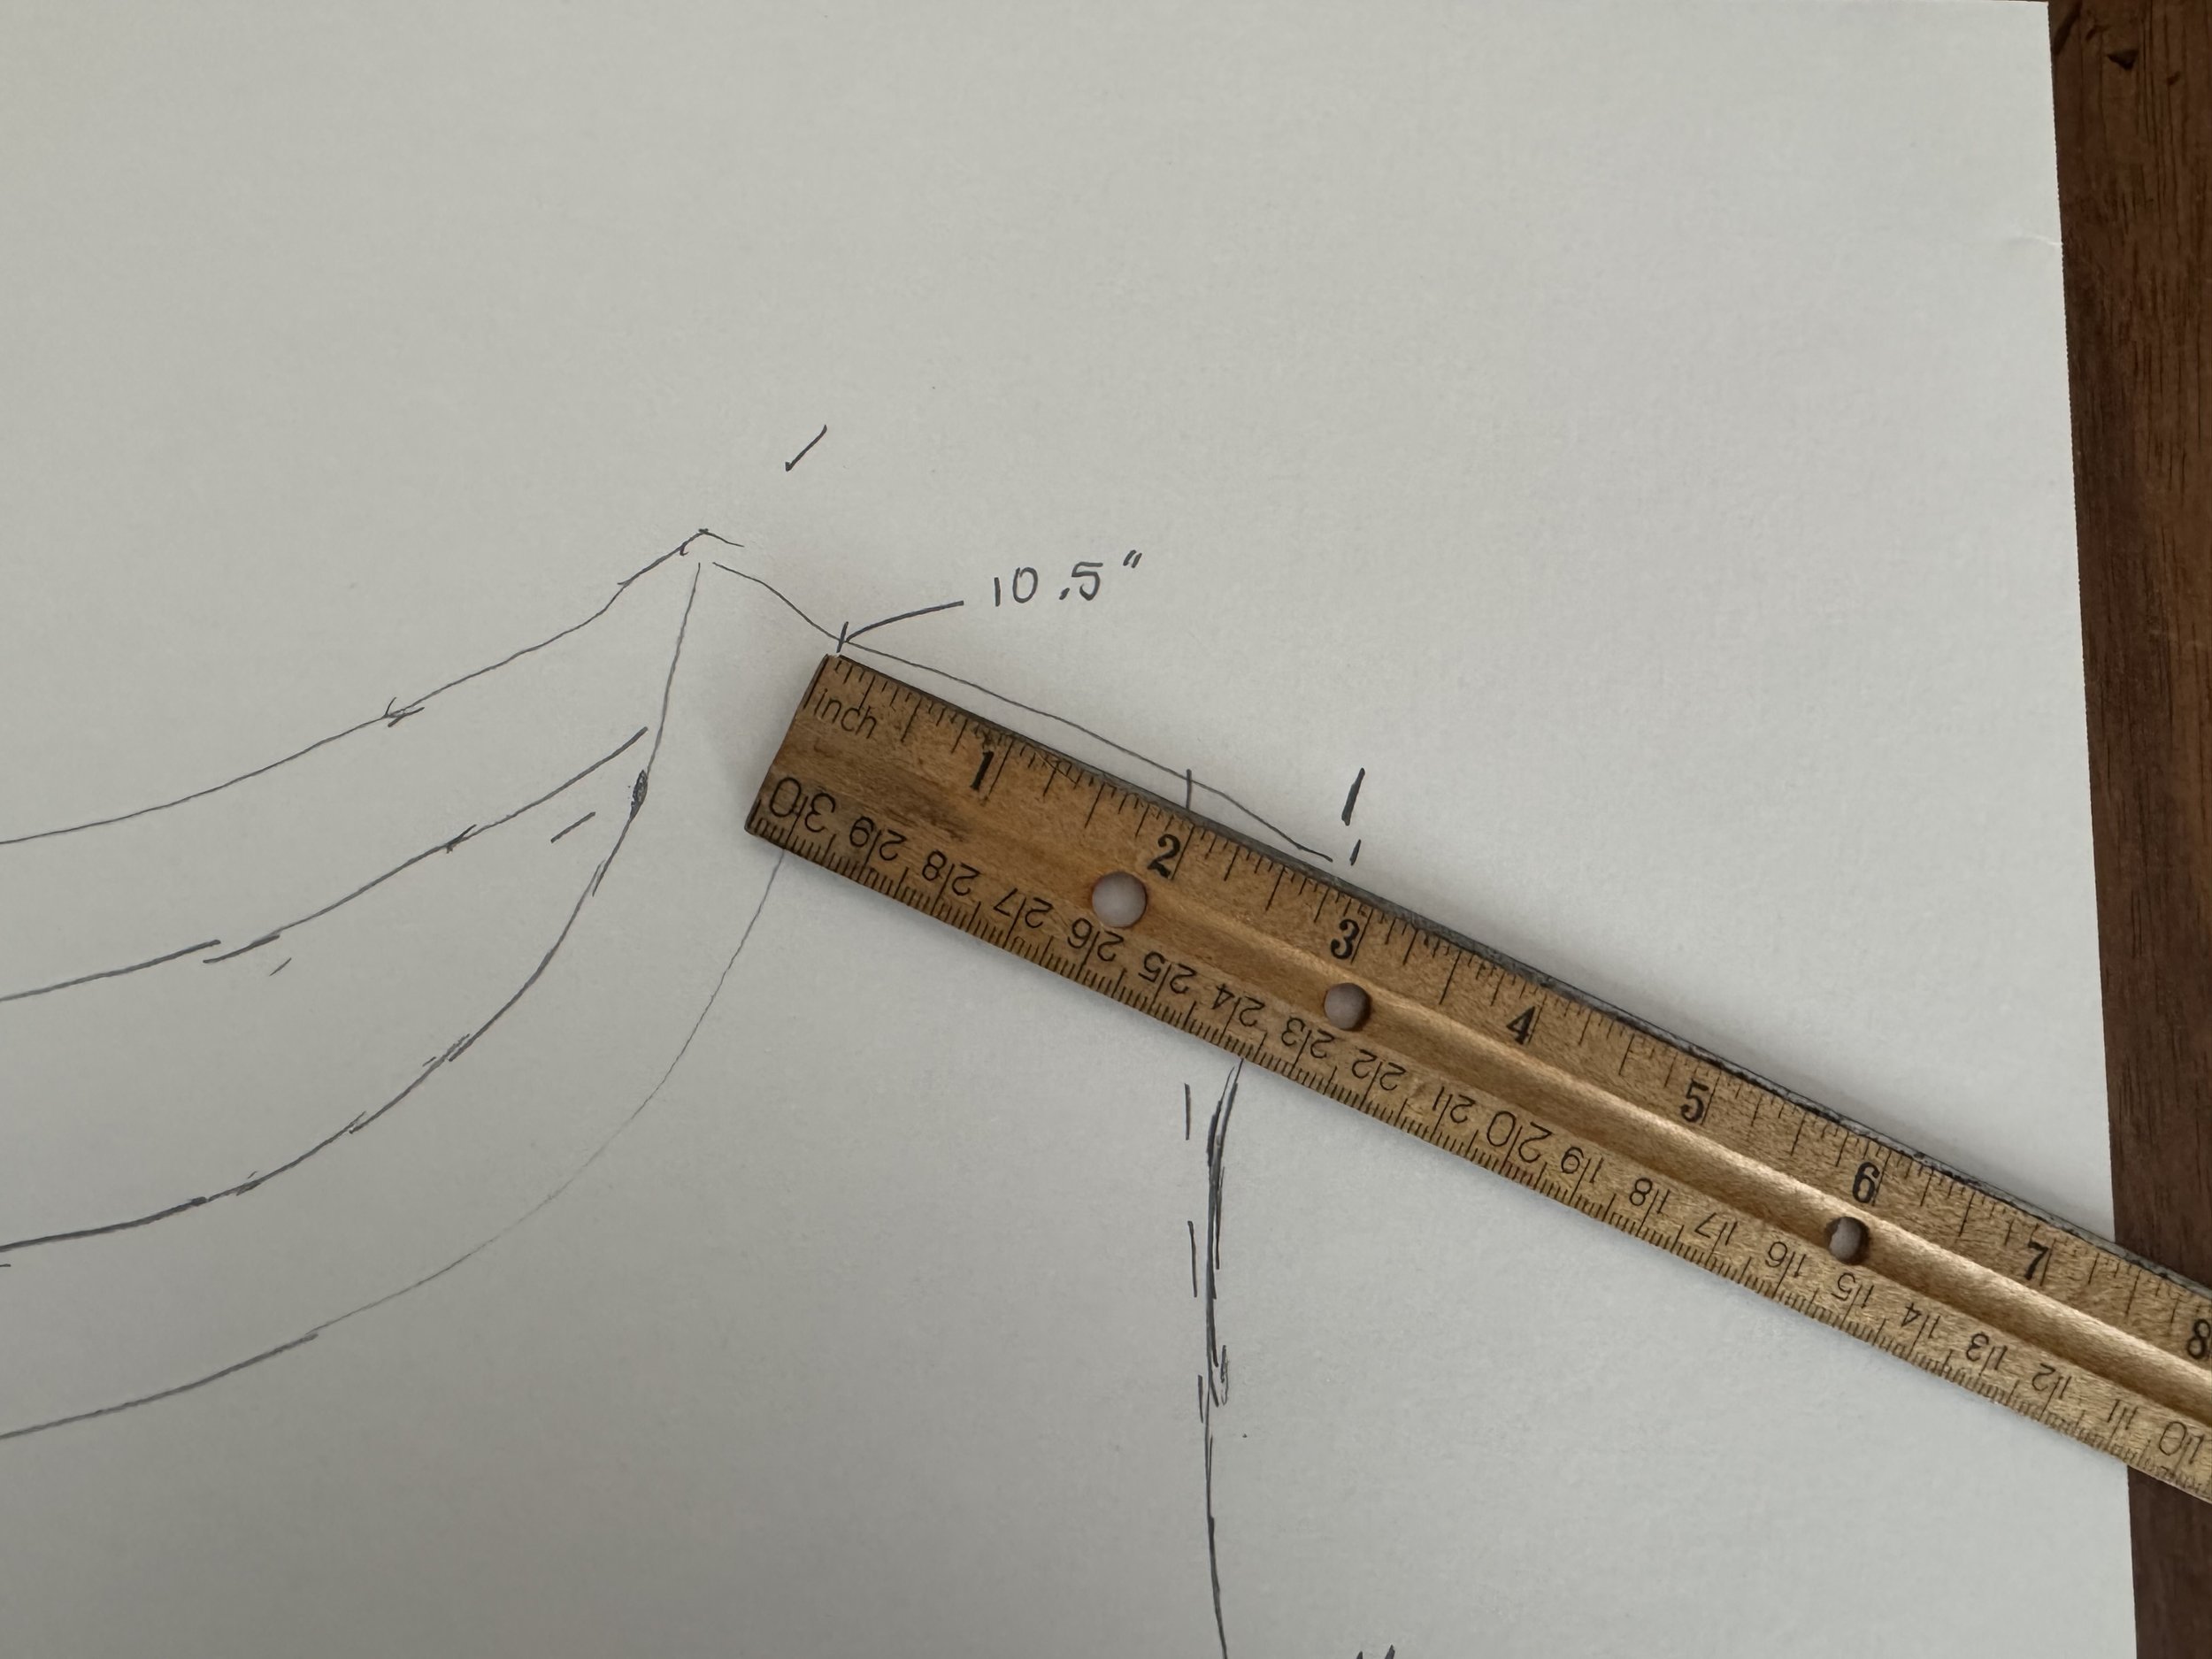
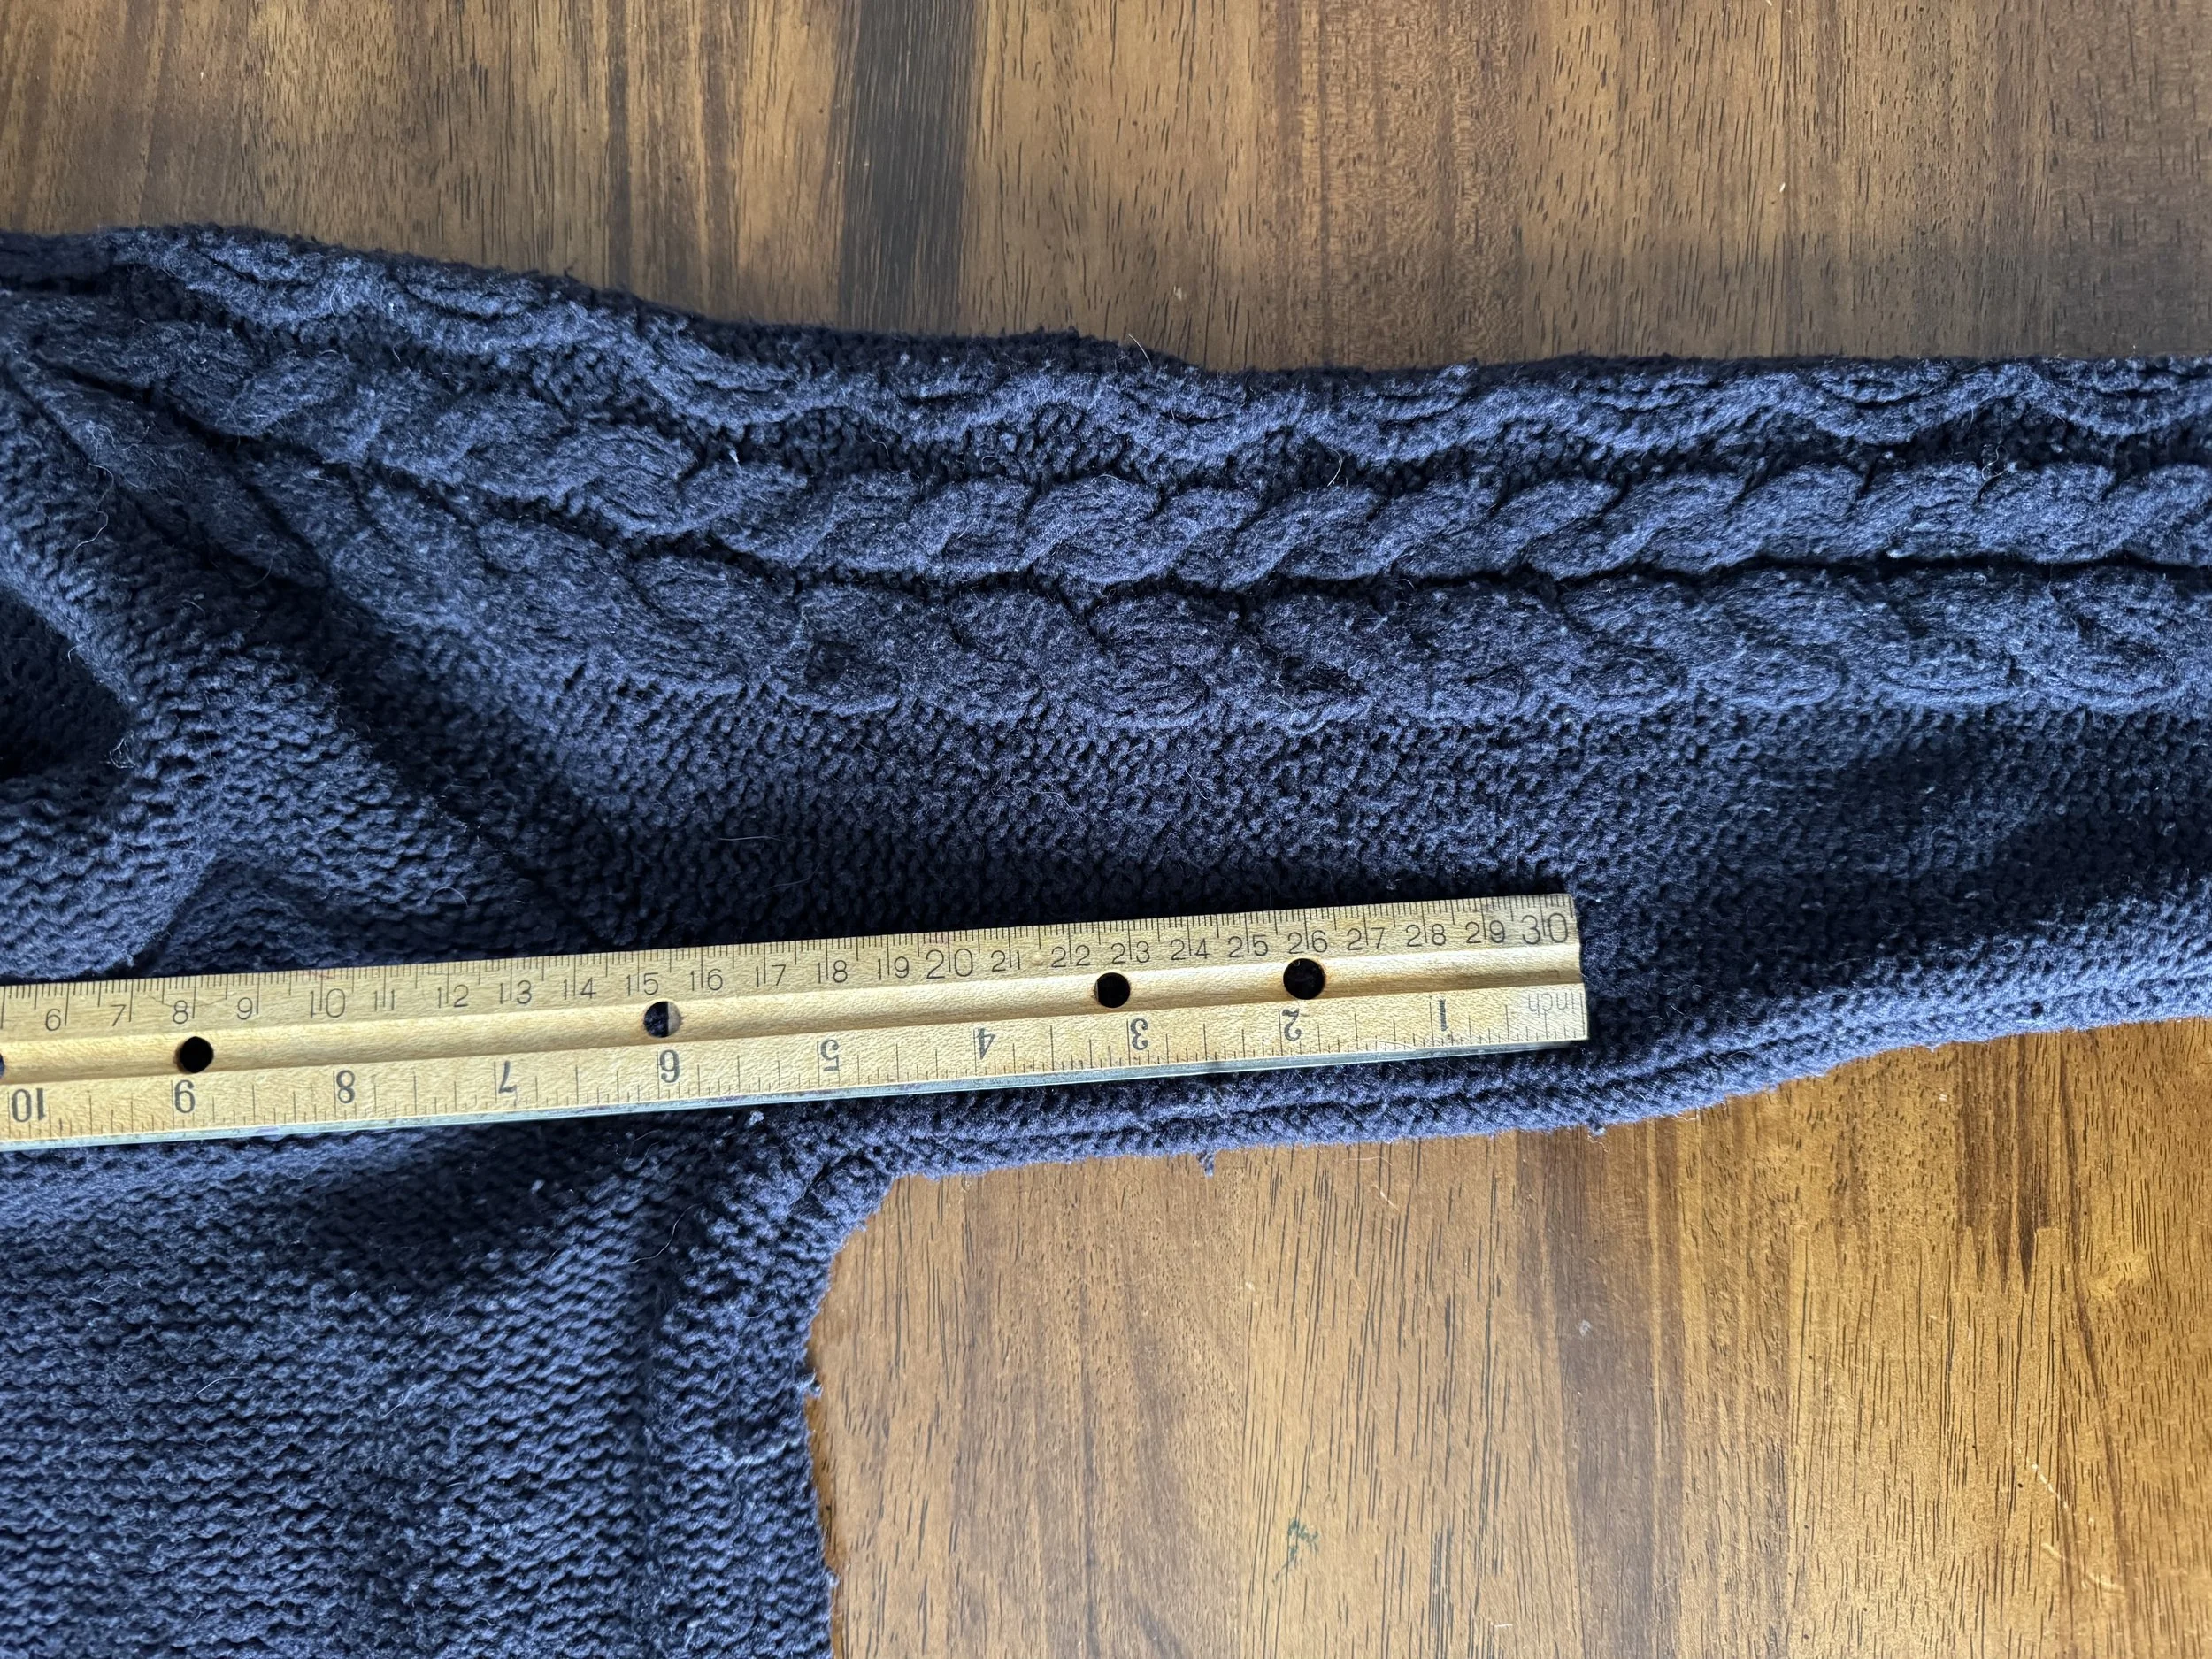
more measurements
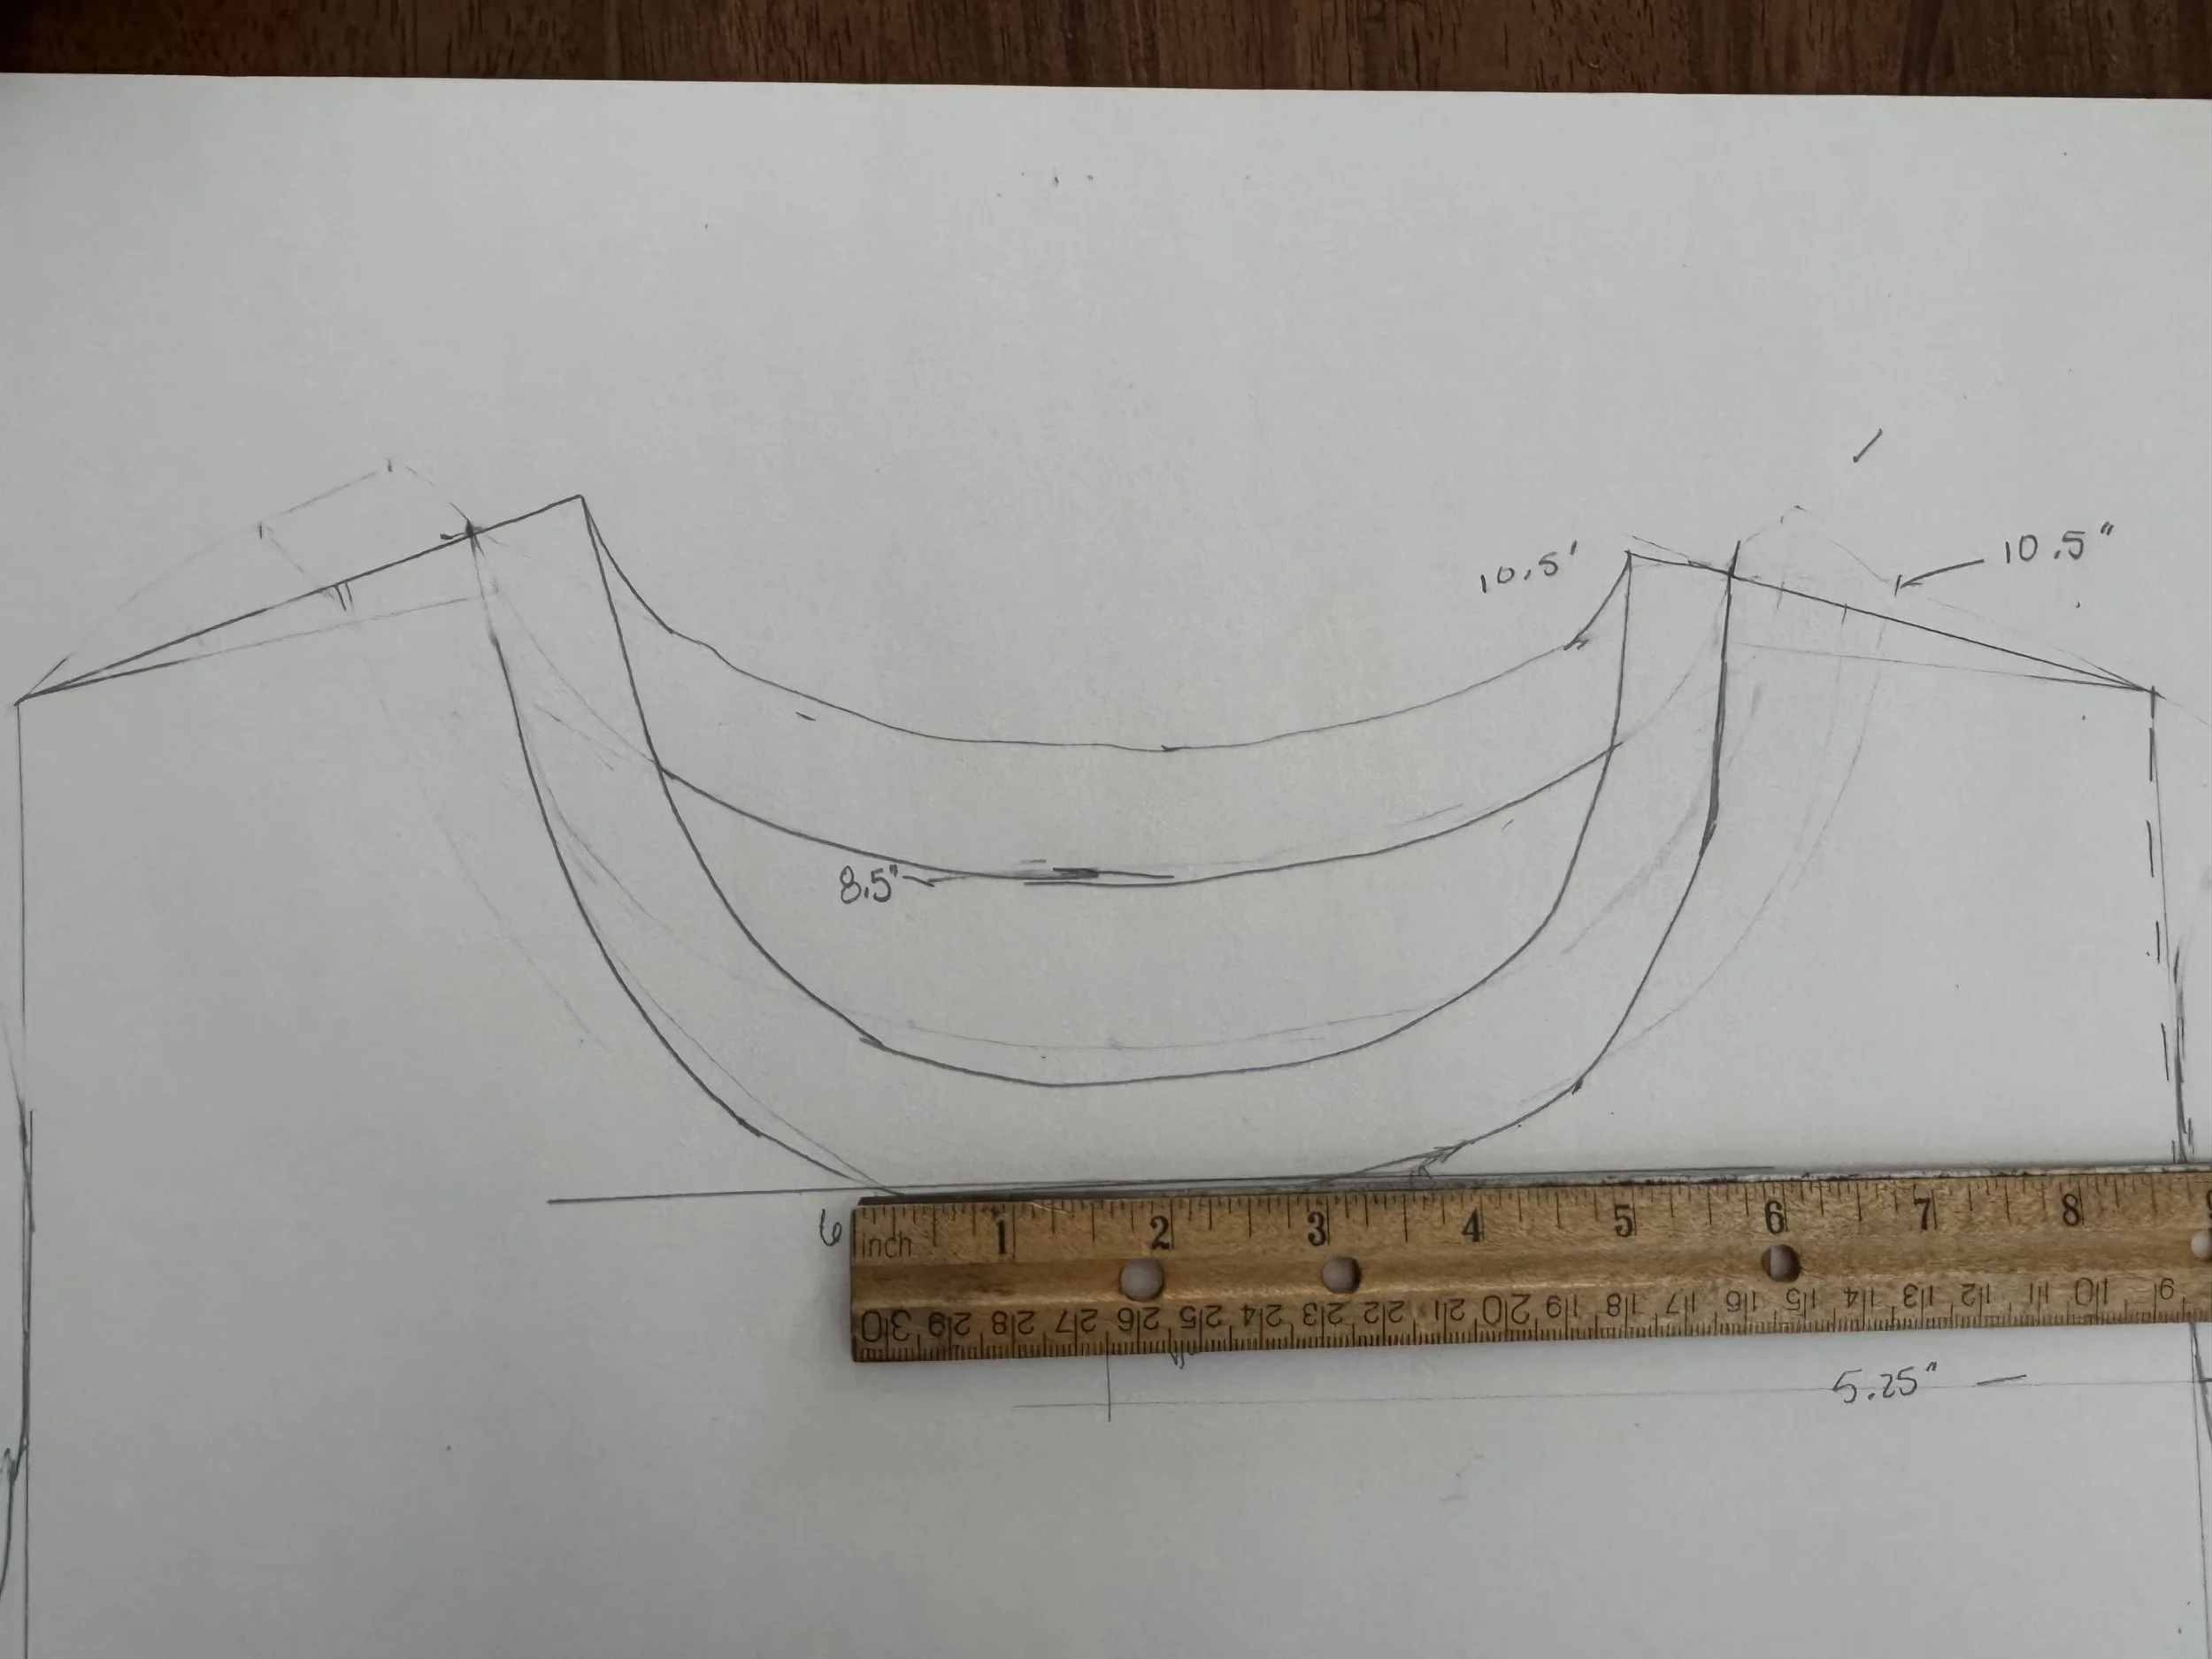
The top of the shoulder is 10.5” from the underarm split and the narrowest part of the body is 14” wide.
-
yeah, look how much that stretched
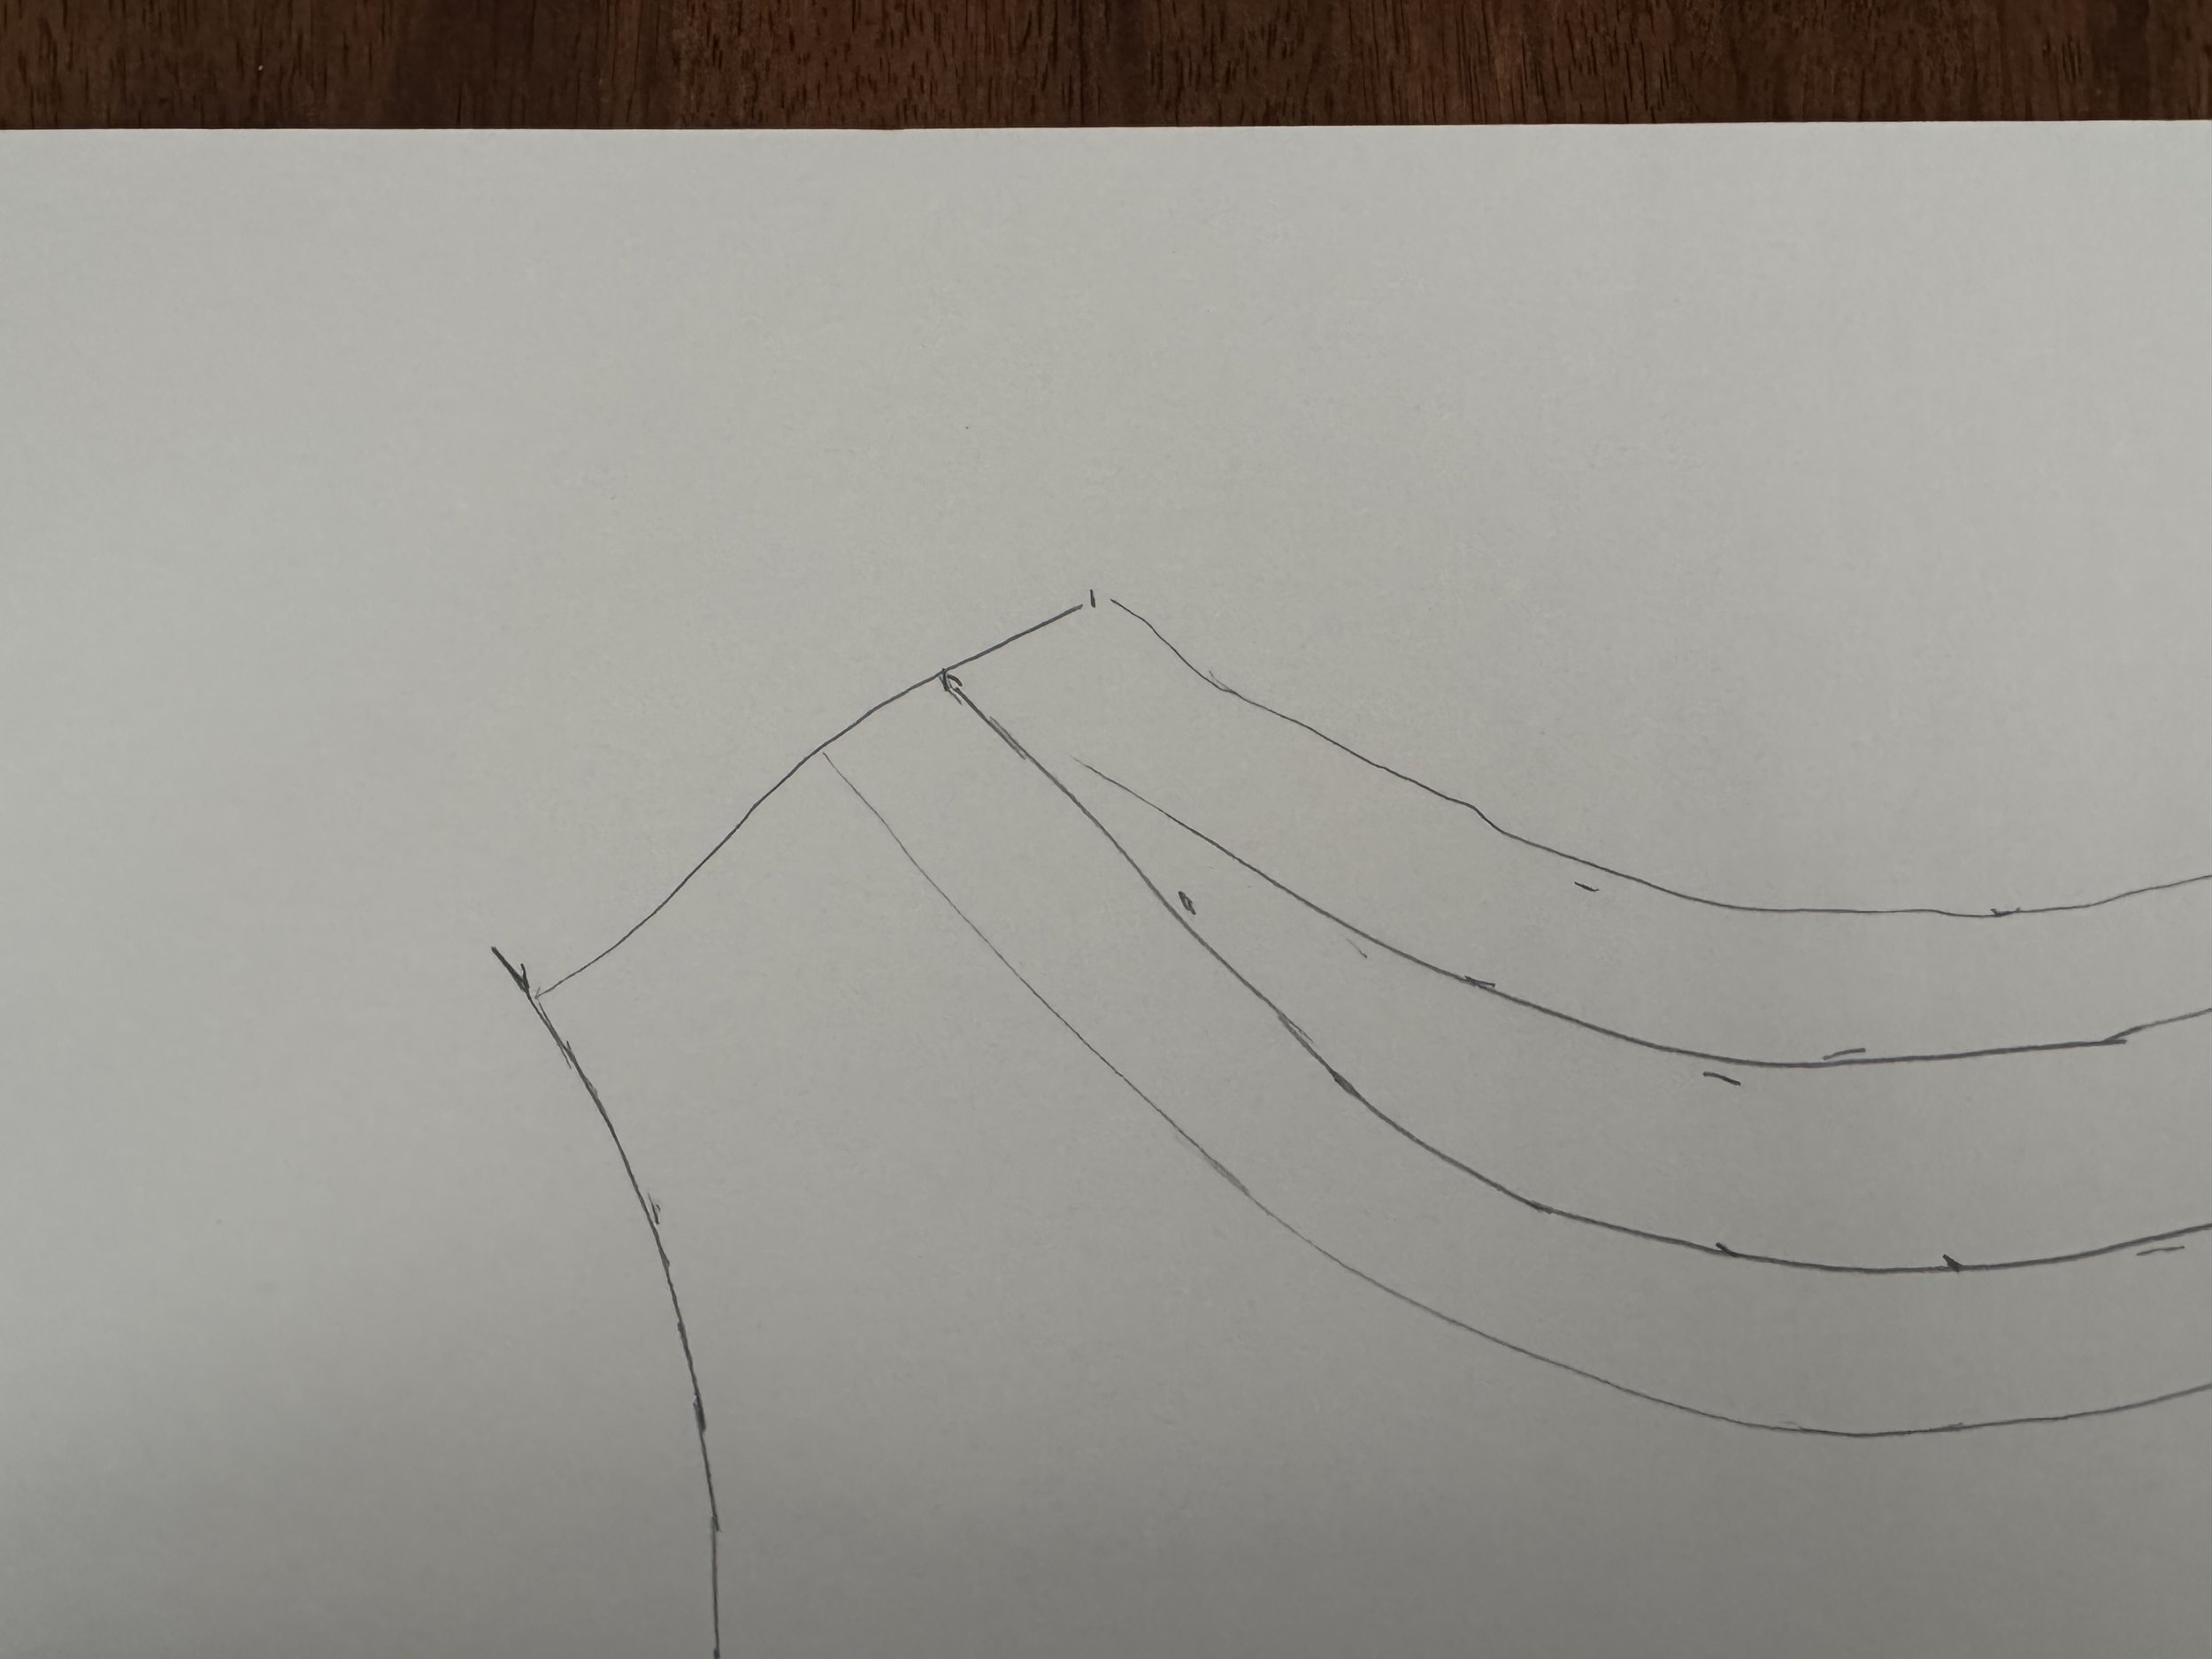
I am going to have to fix this on the drawing. Once I have finished my initial decreases, I want my shoulder opening to go straight up and not flare out again.
-
see that dotted line under the ruler?
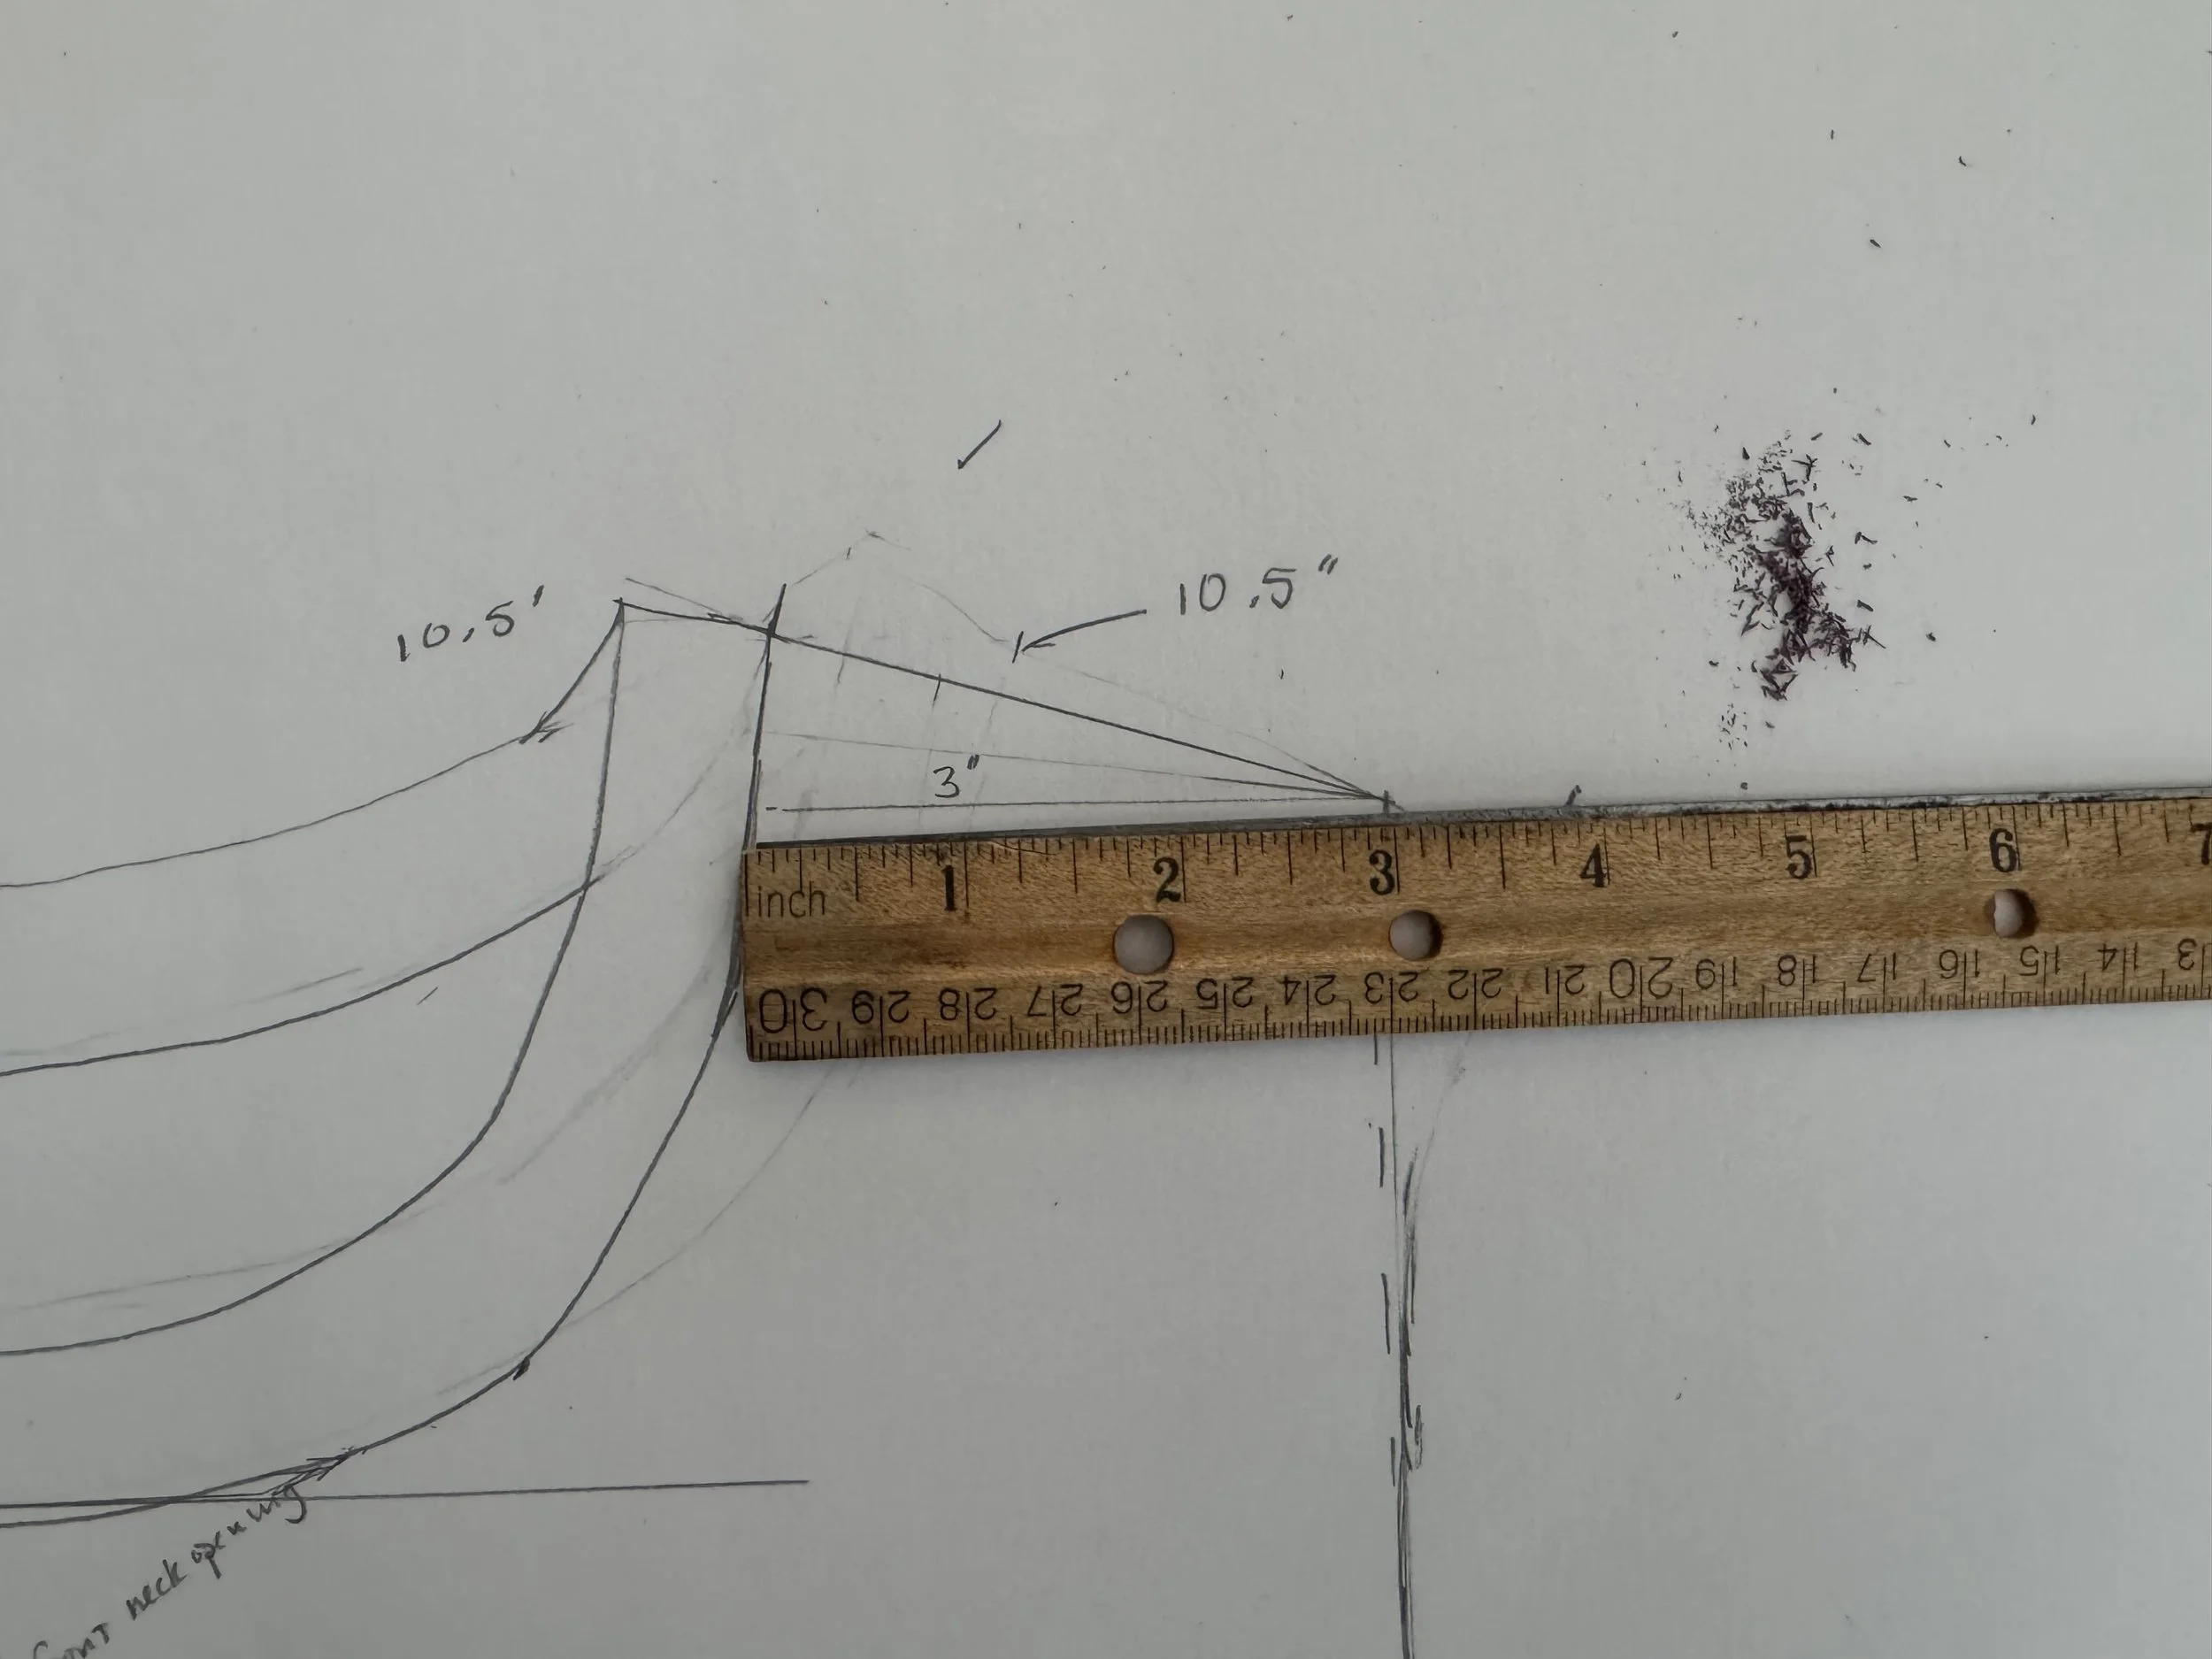
That is representing my desired outer edge. The top of the old shoulder is 3” wide and I will keep that but will move its outer edge to my new outer edge. I will still have its inner (neck) edge at the 10.5” height.
-
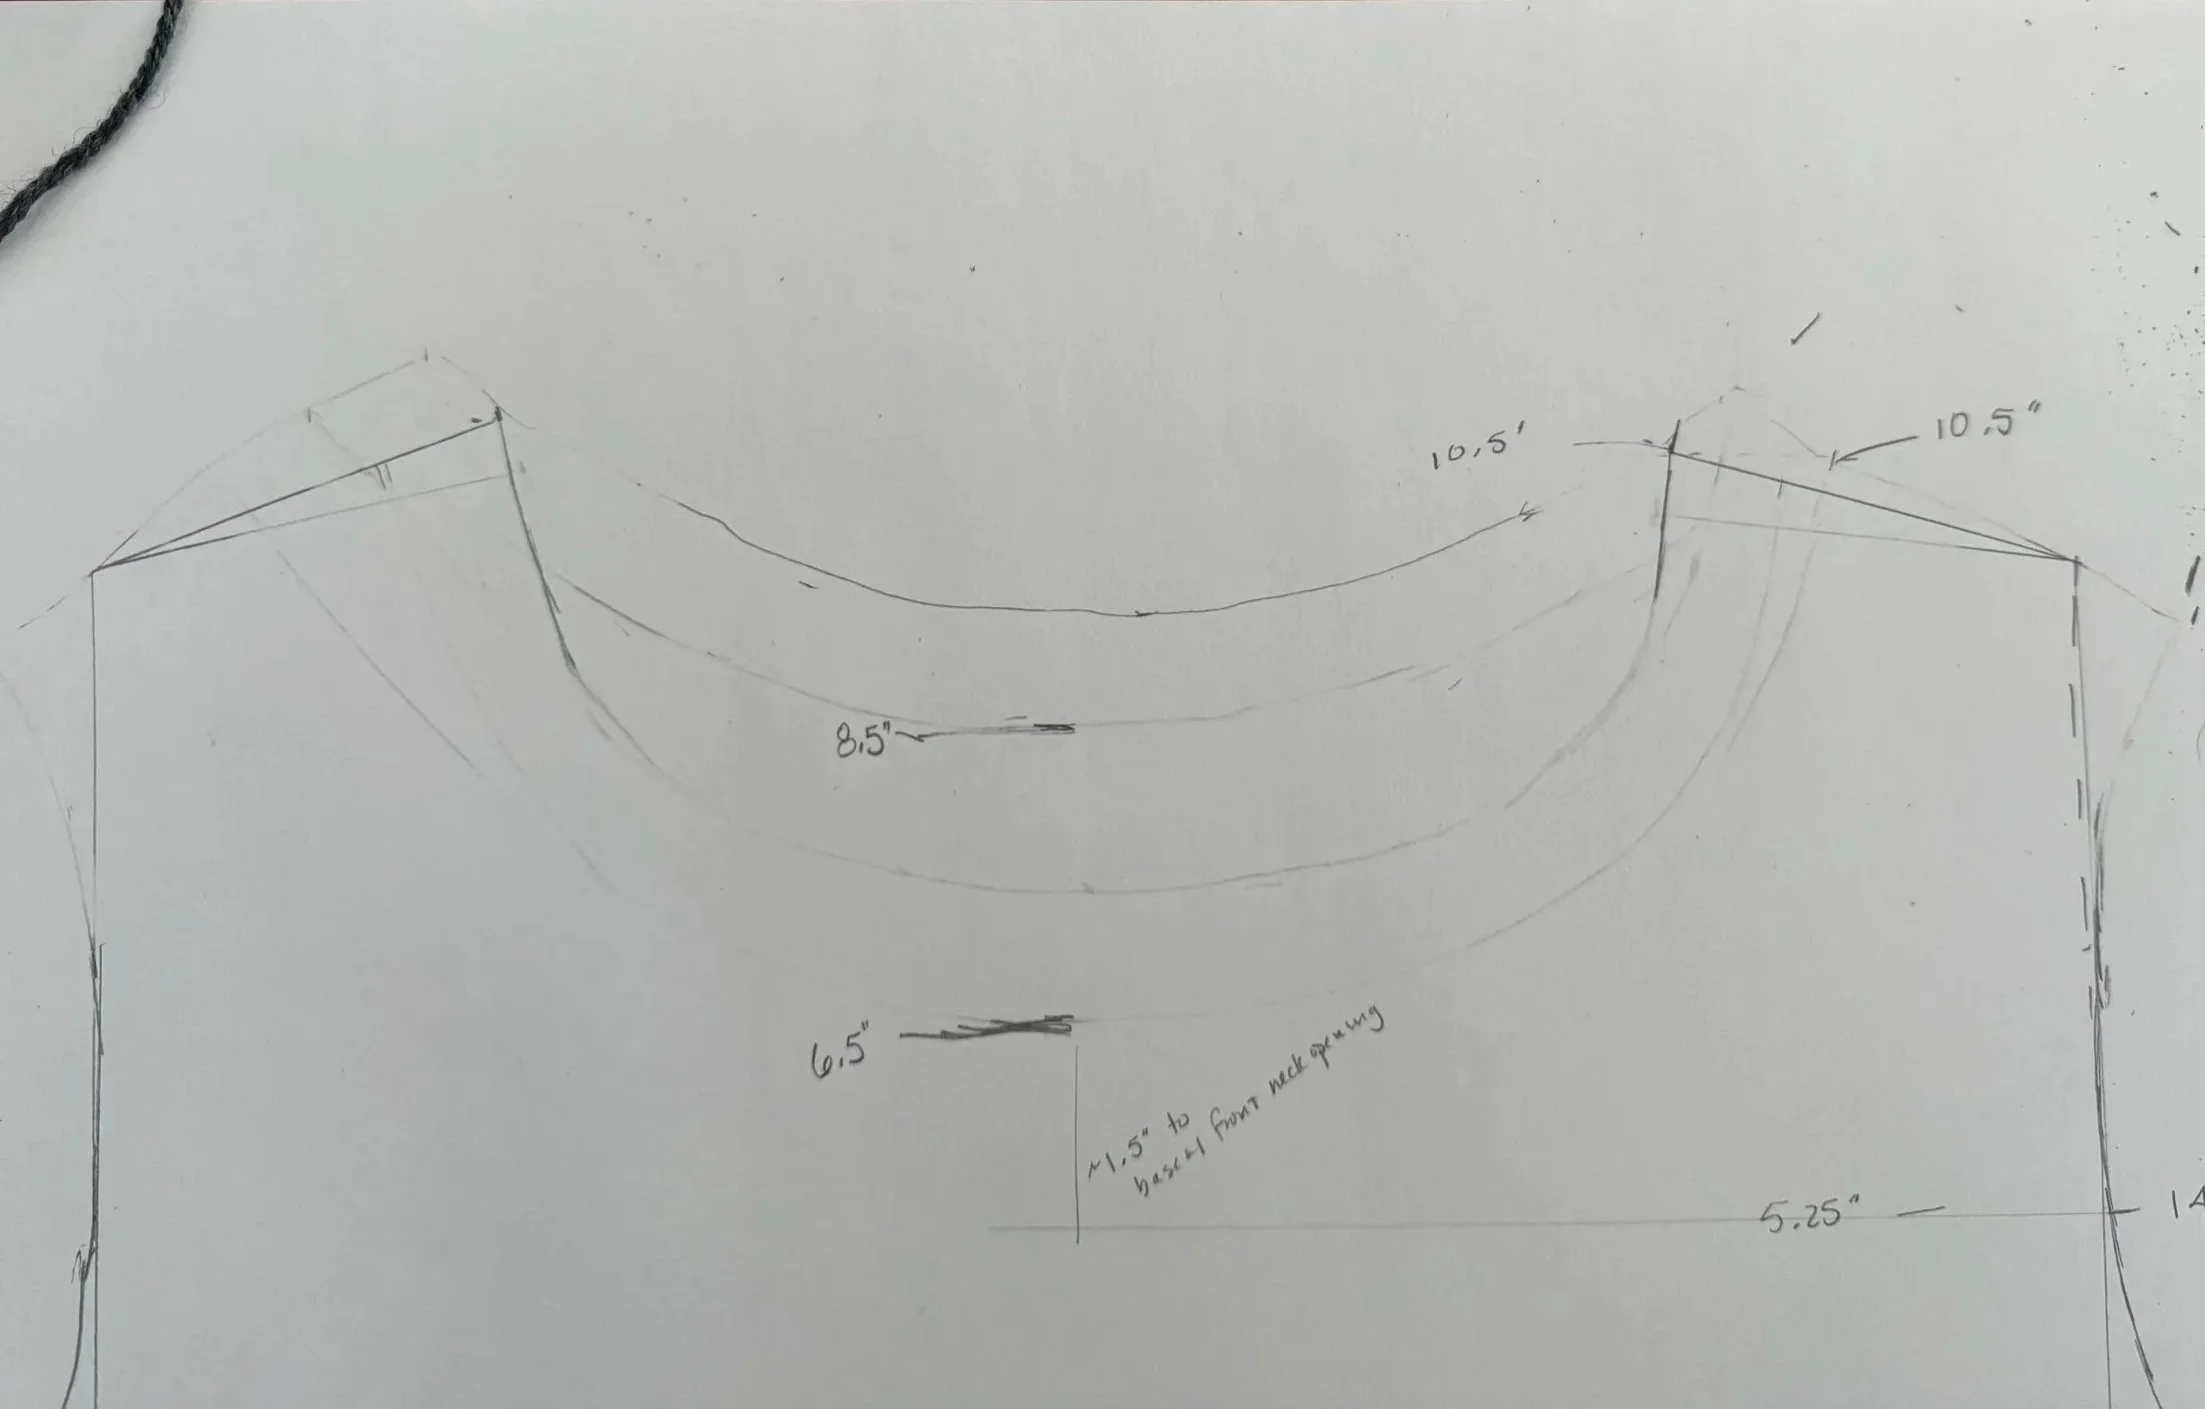
much has changed
The original lines are erased but still (I hope) visible. The armhole shaping now rises more or less straight up from the narrowest width (14”) but the top of the shoulder is still at 10.5”. I sure hope this is right.
-
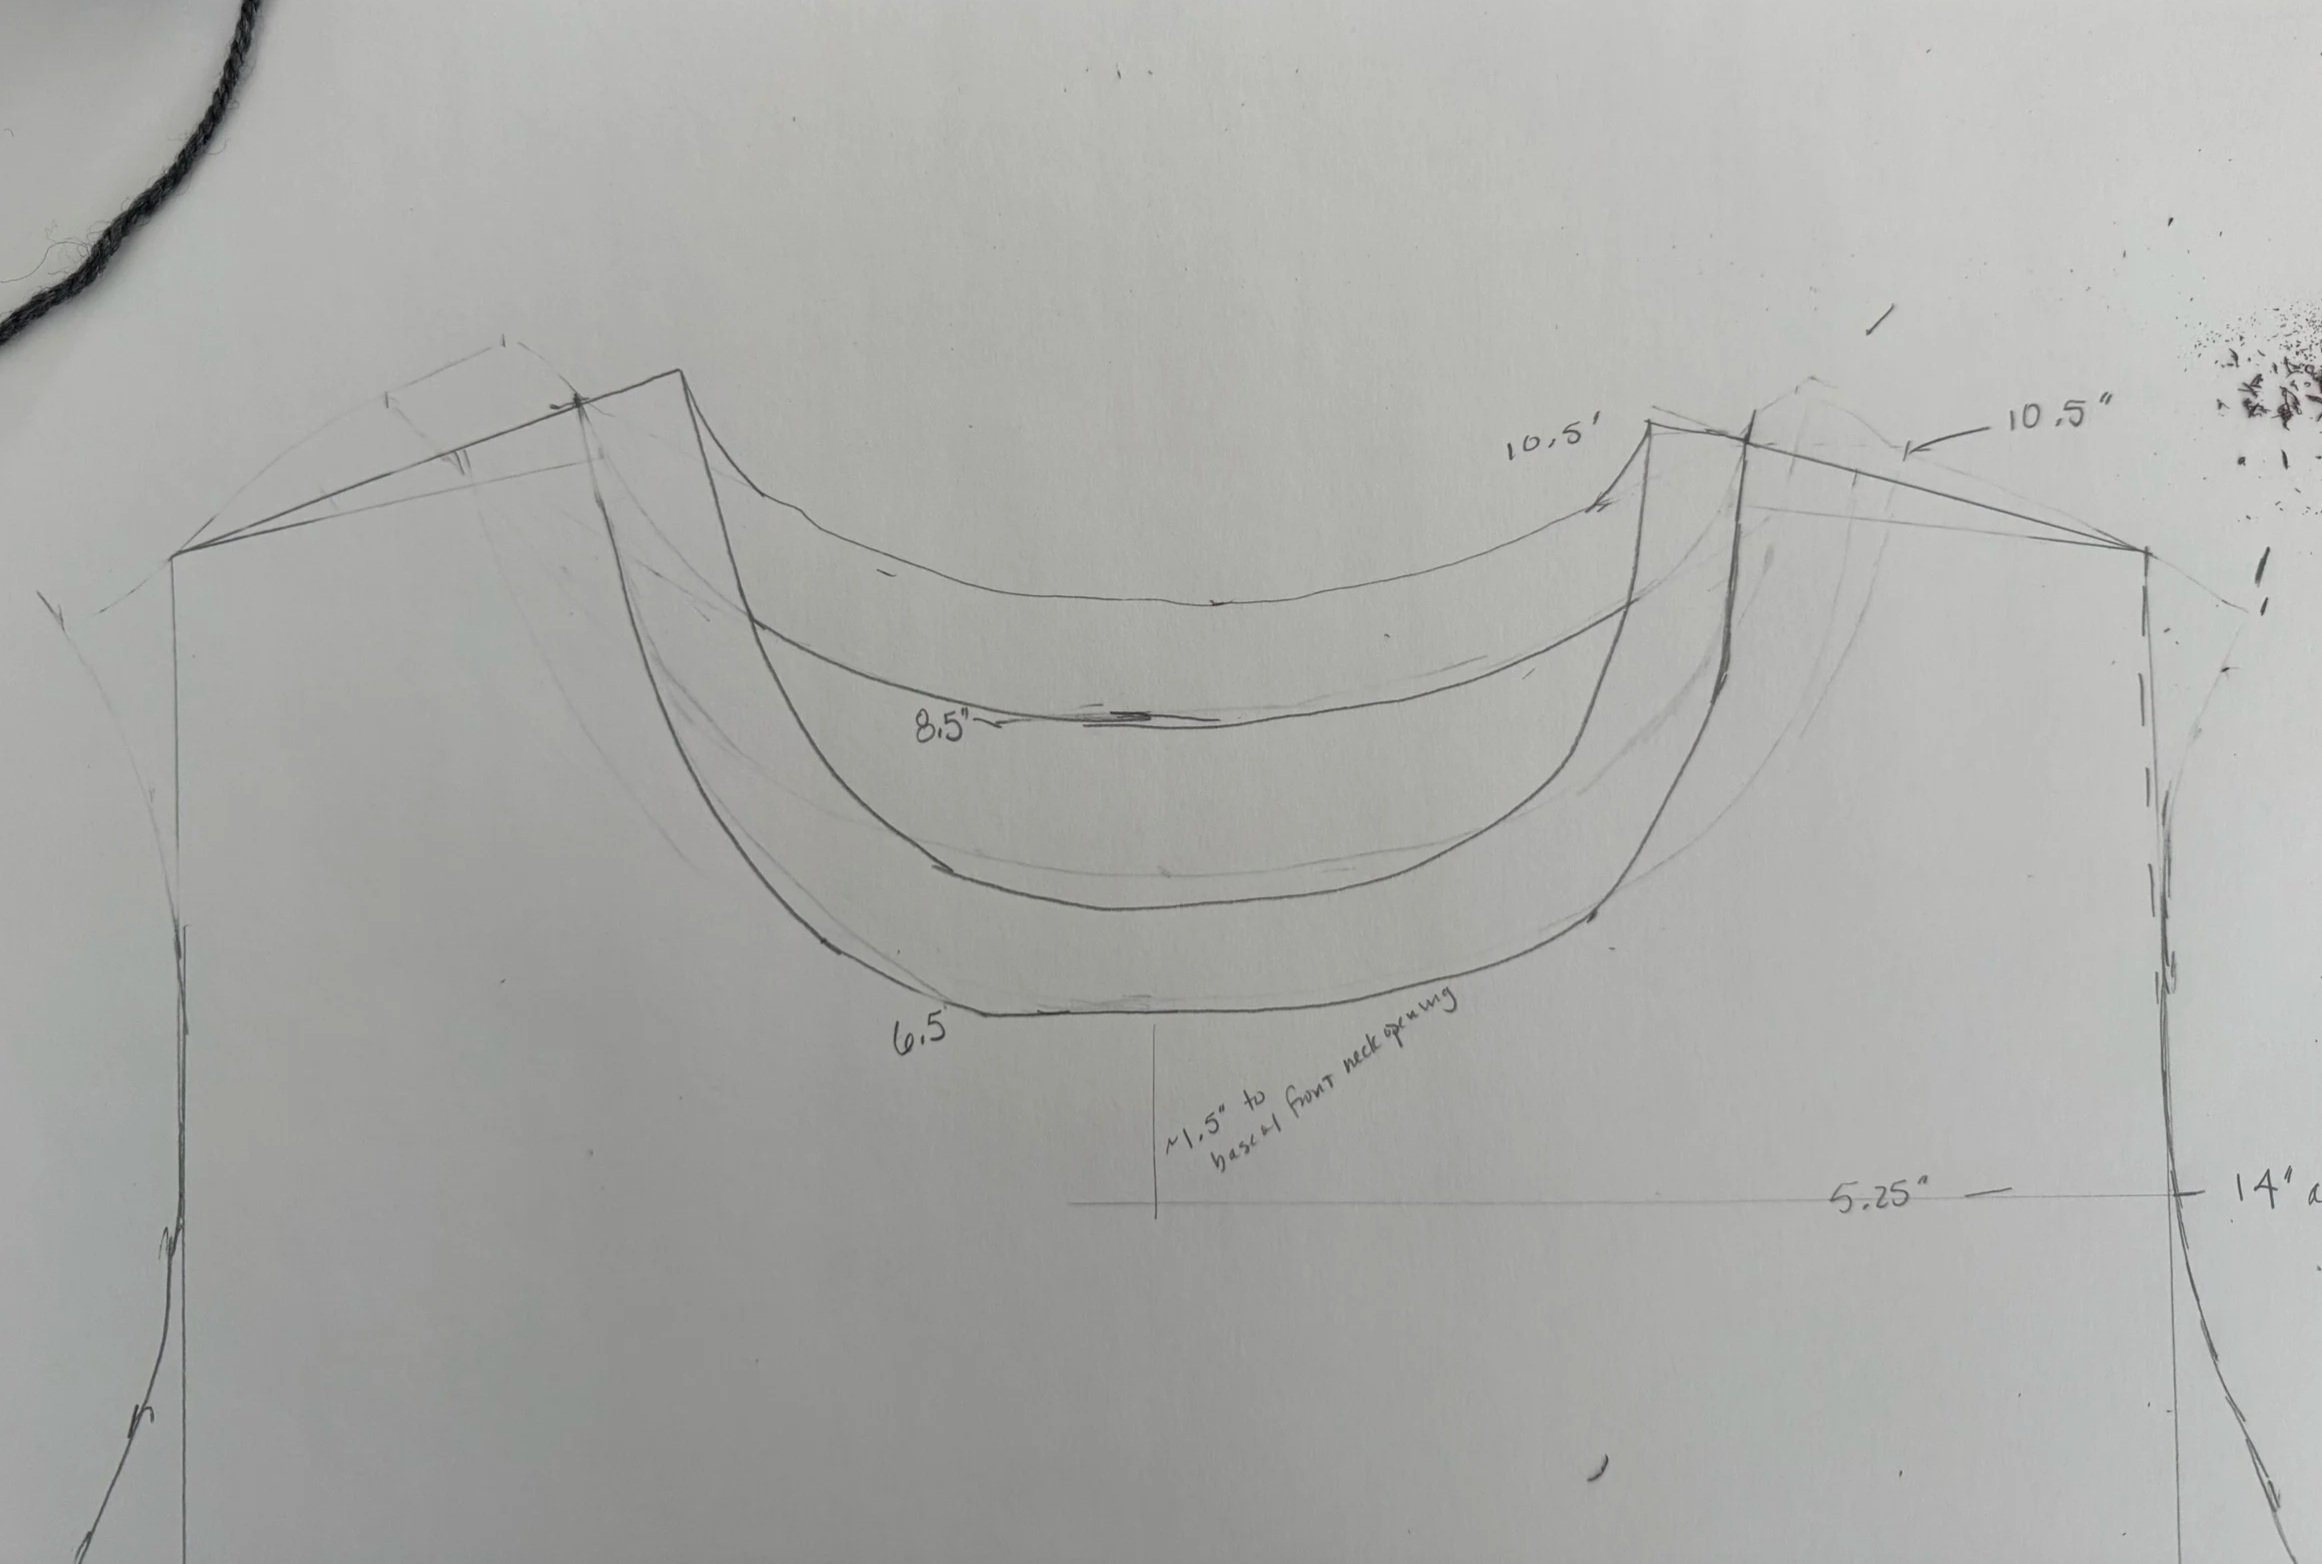
now for the armpits
That curvy triangle has to be eliminated and the decreases have to eat away at a lot of the fabric at first, and then sated, just nibble away at it here and there until all of the triangle is gone.
I do not show it on this image, but the long side of my wavy triangle is 5.5”. Time to measure my row gauge. Should I already know it? Yes I should.
-
i know it now
I have about 6 rows per inch, so that gives me about 30 rows in which to do my decreases.
-
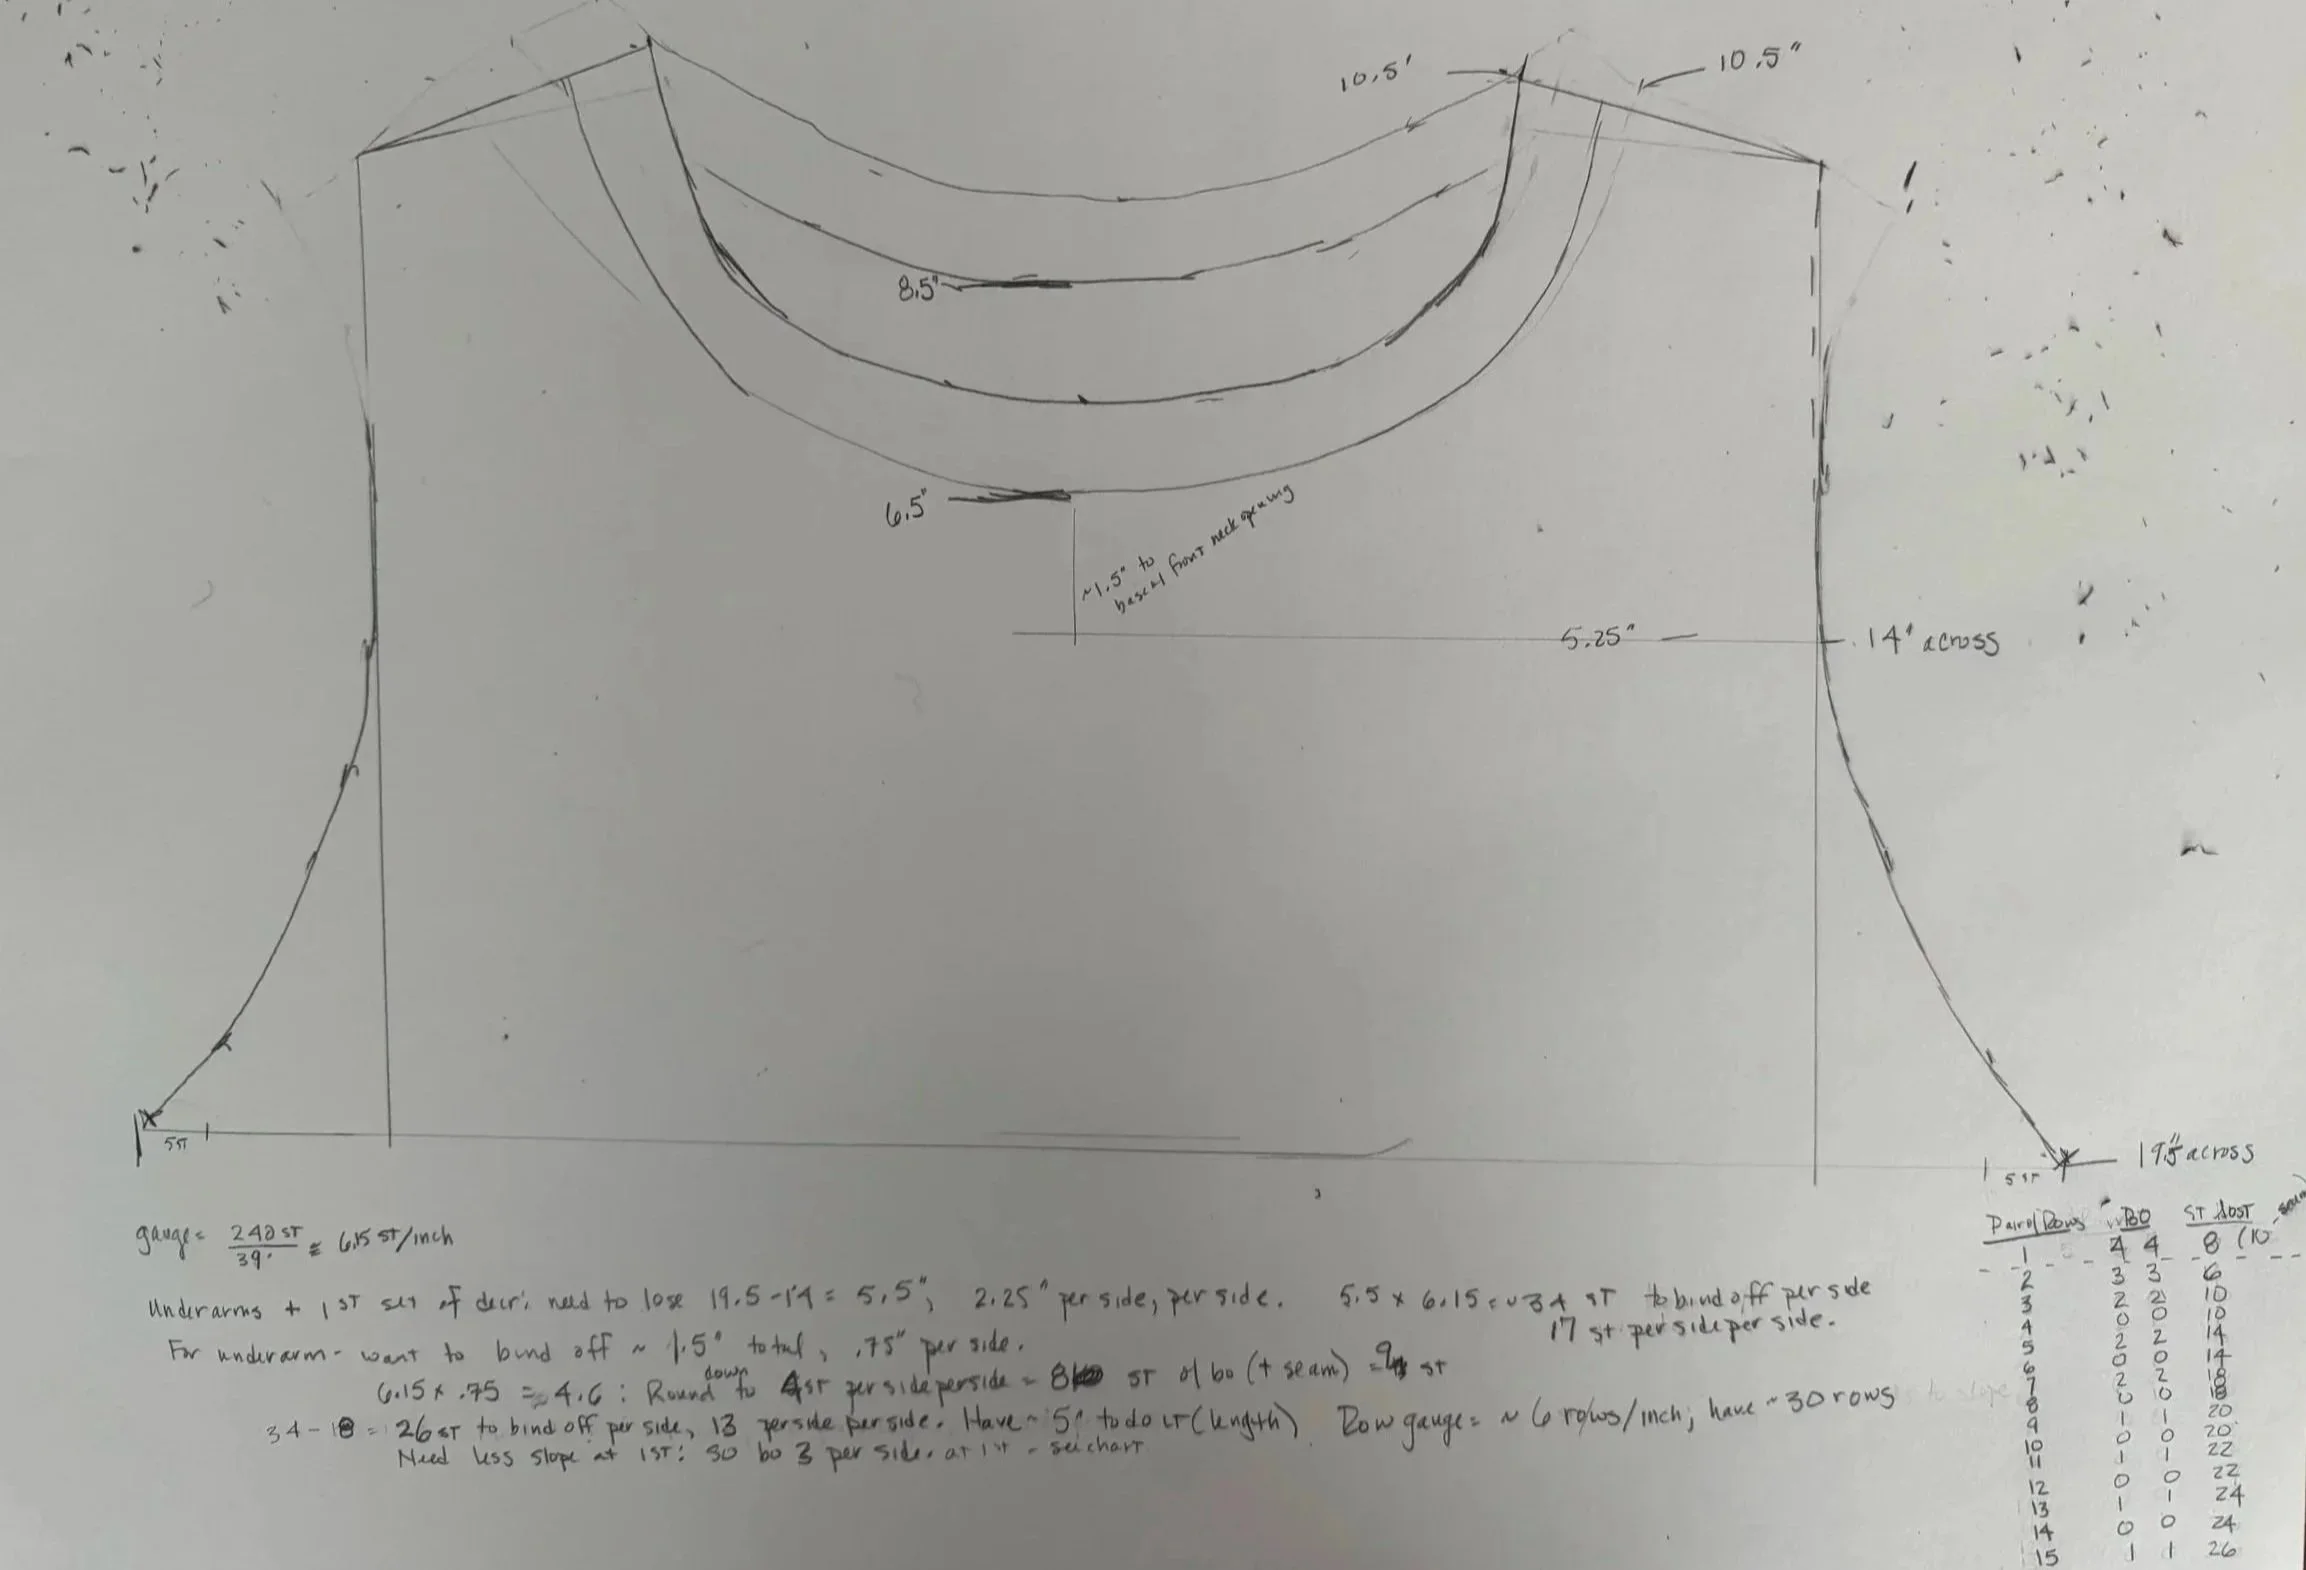
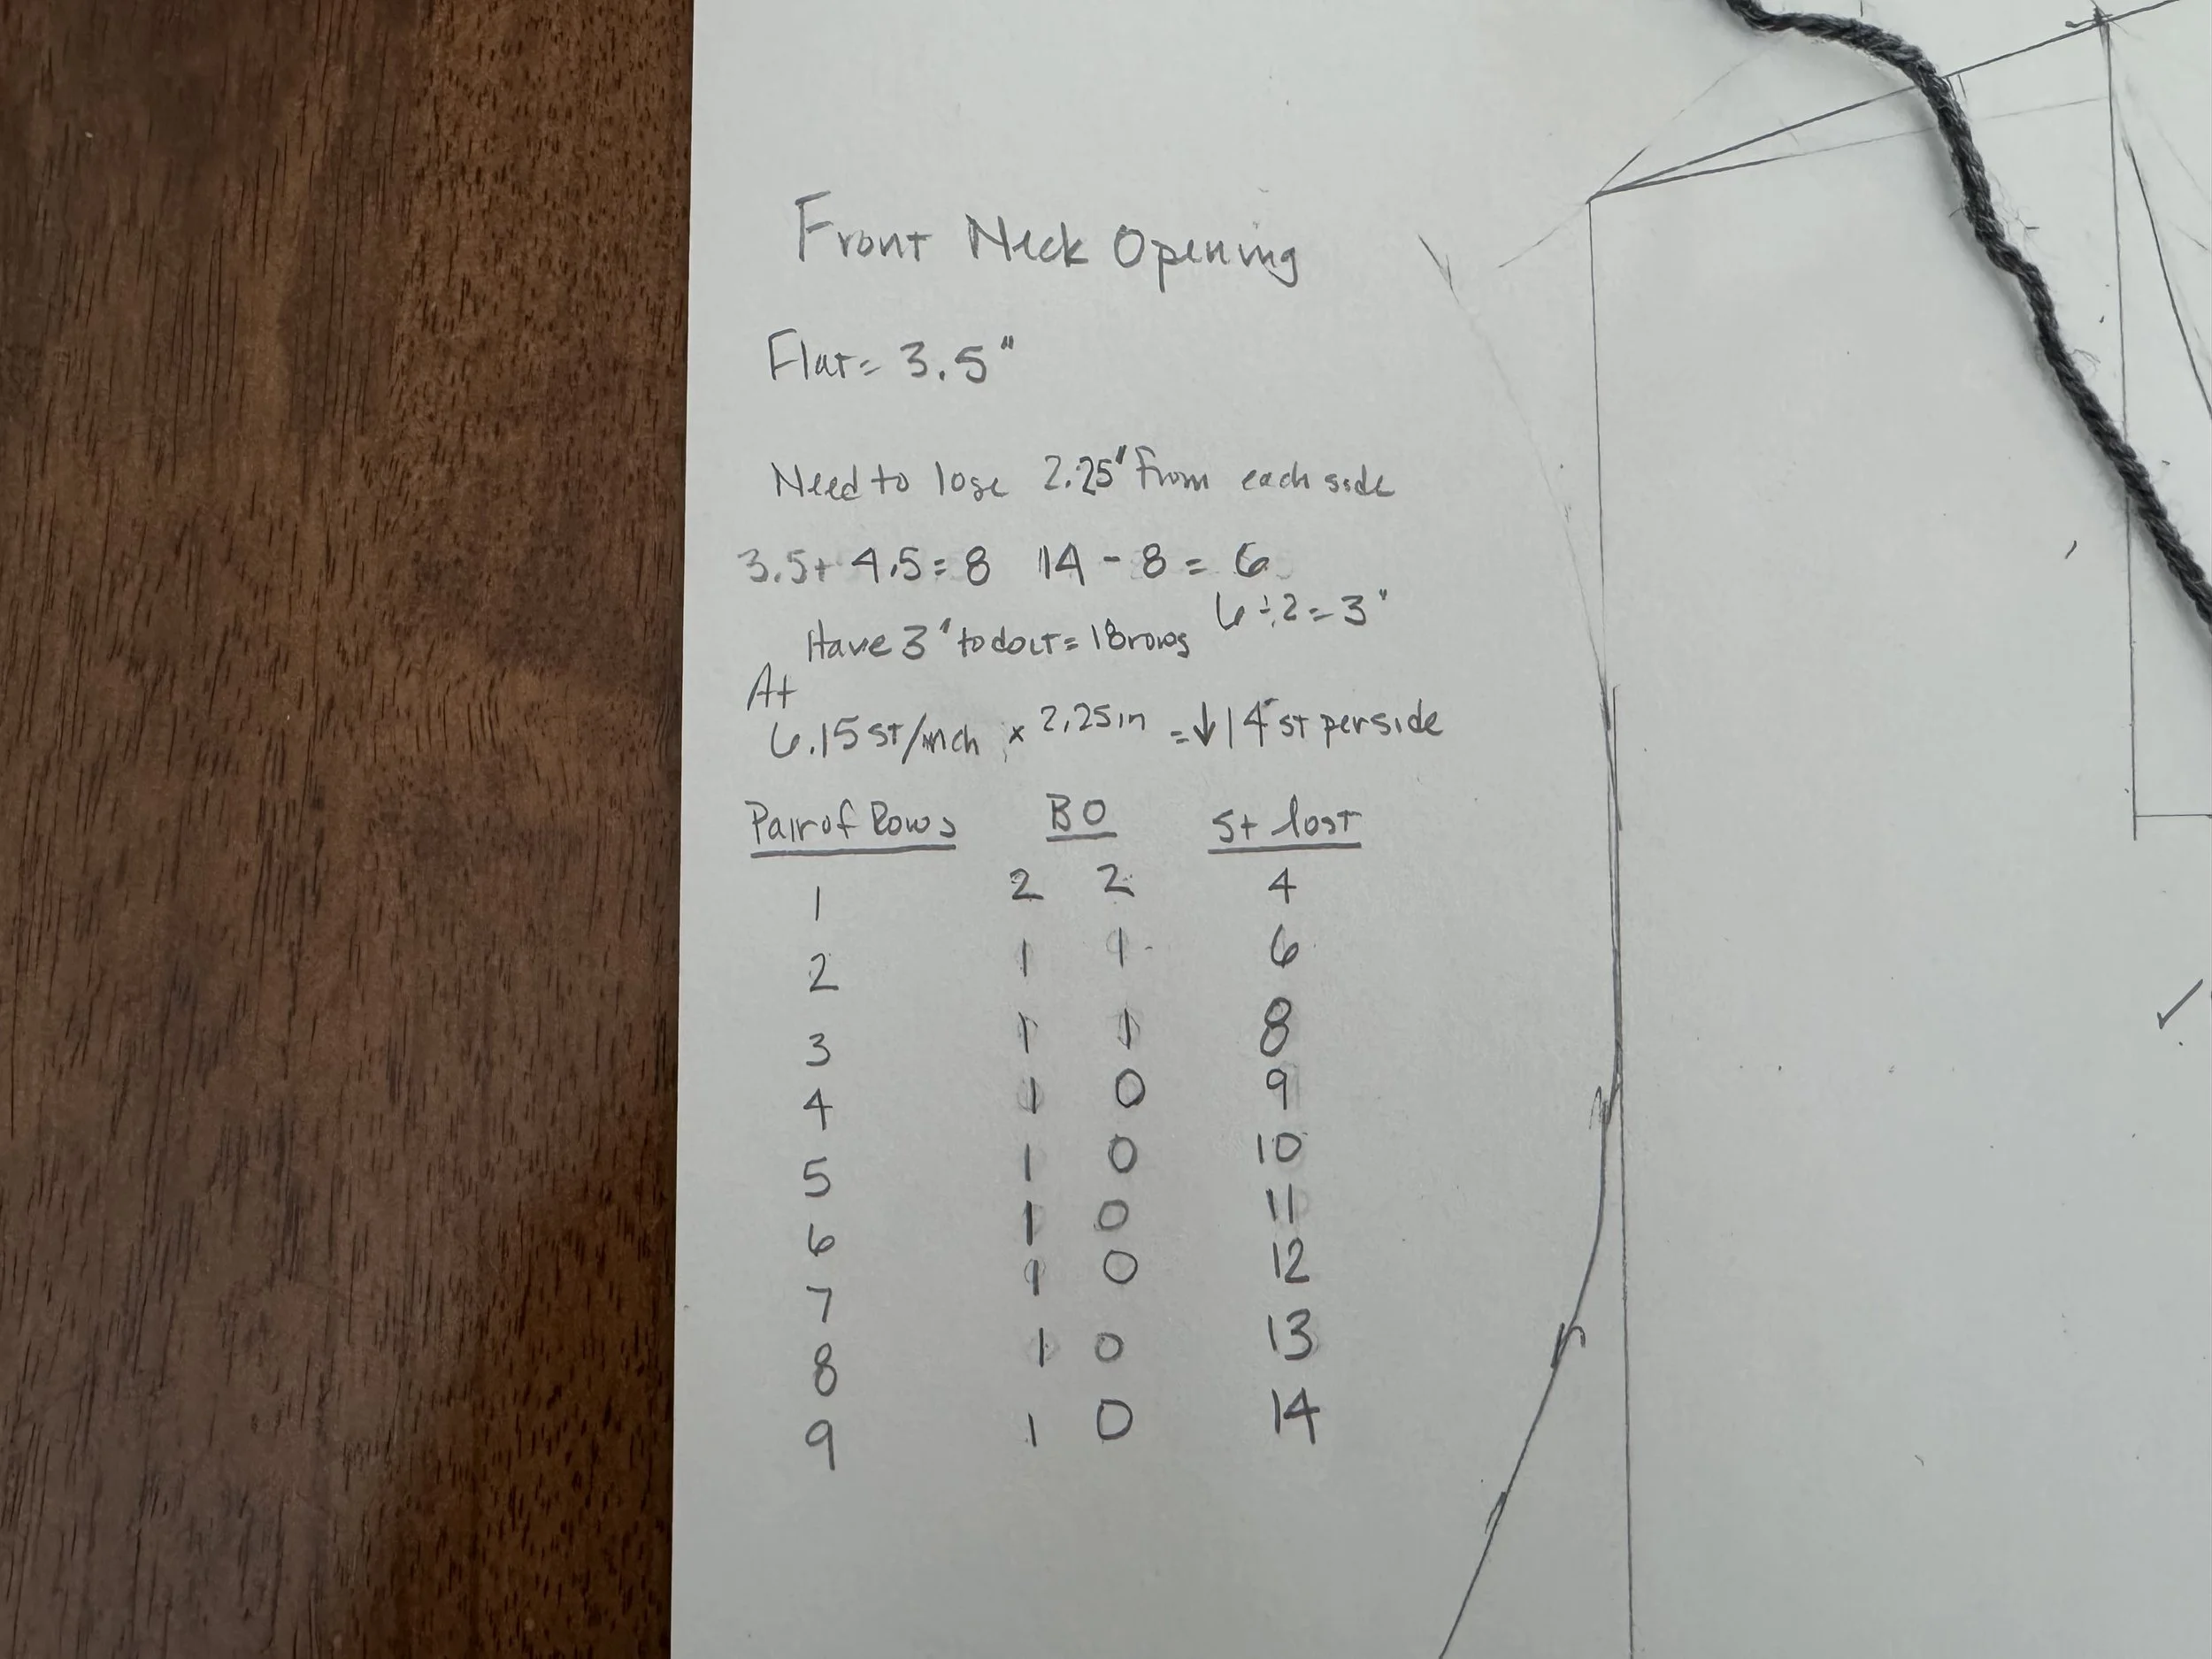
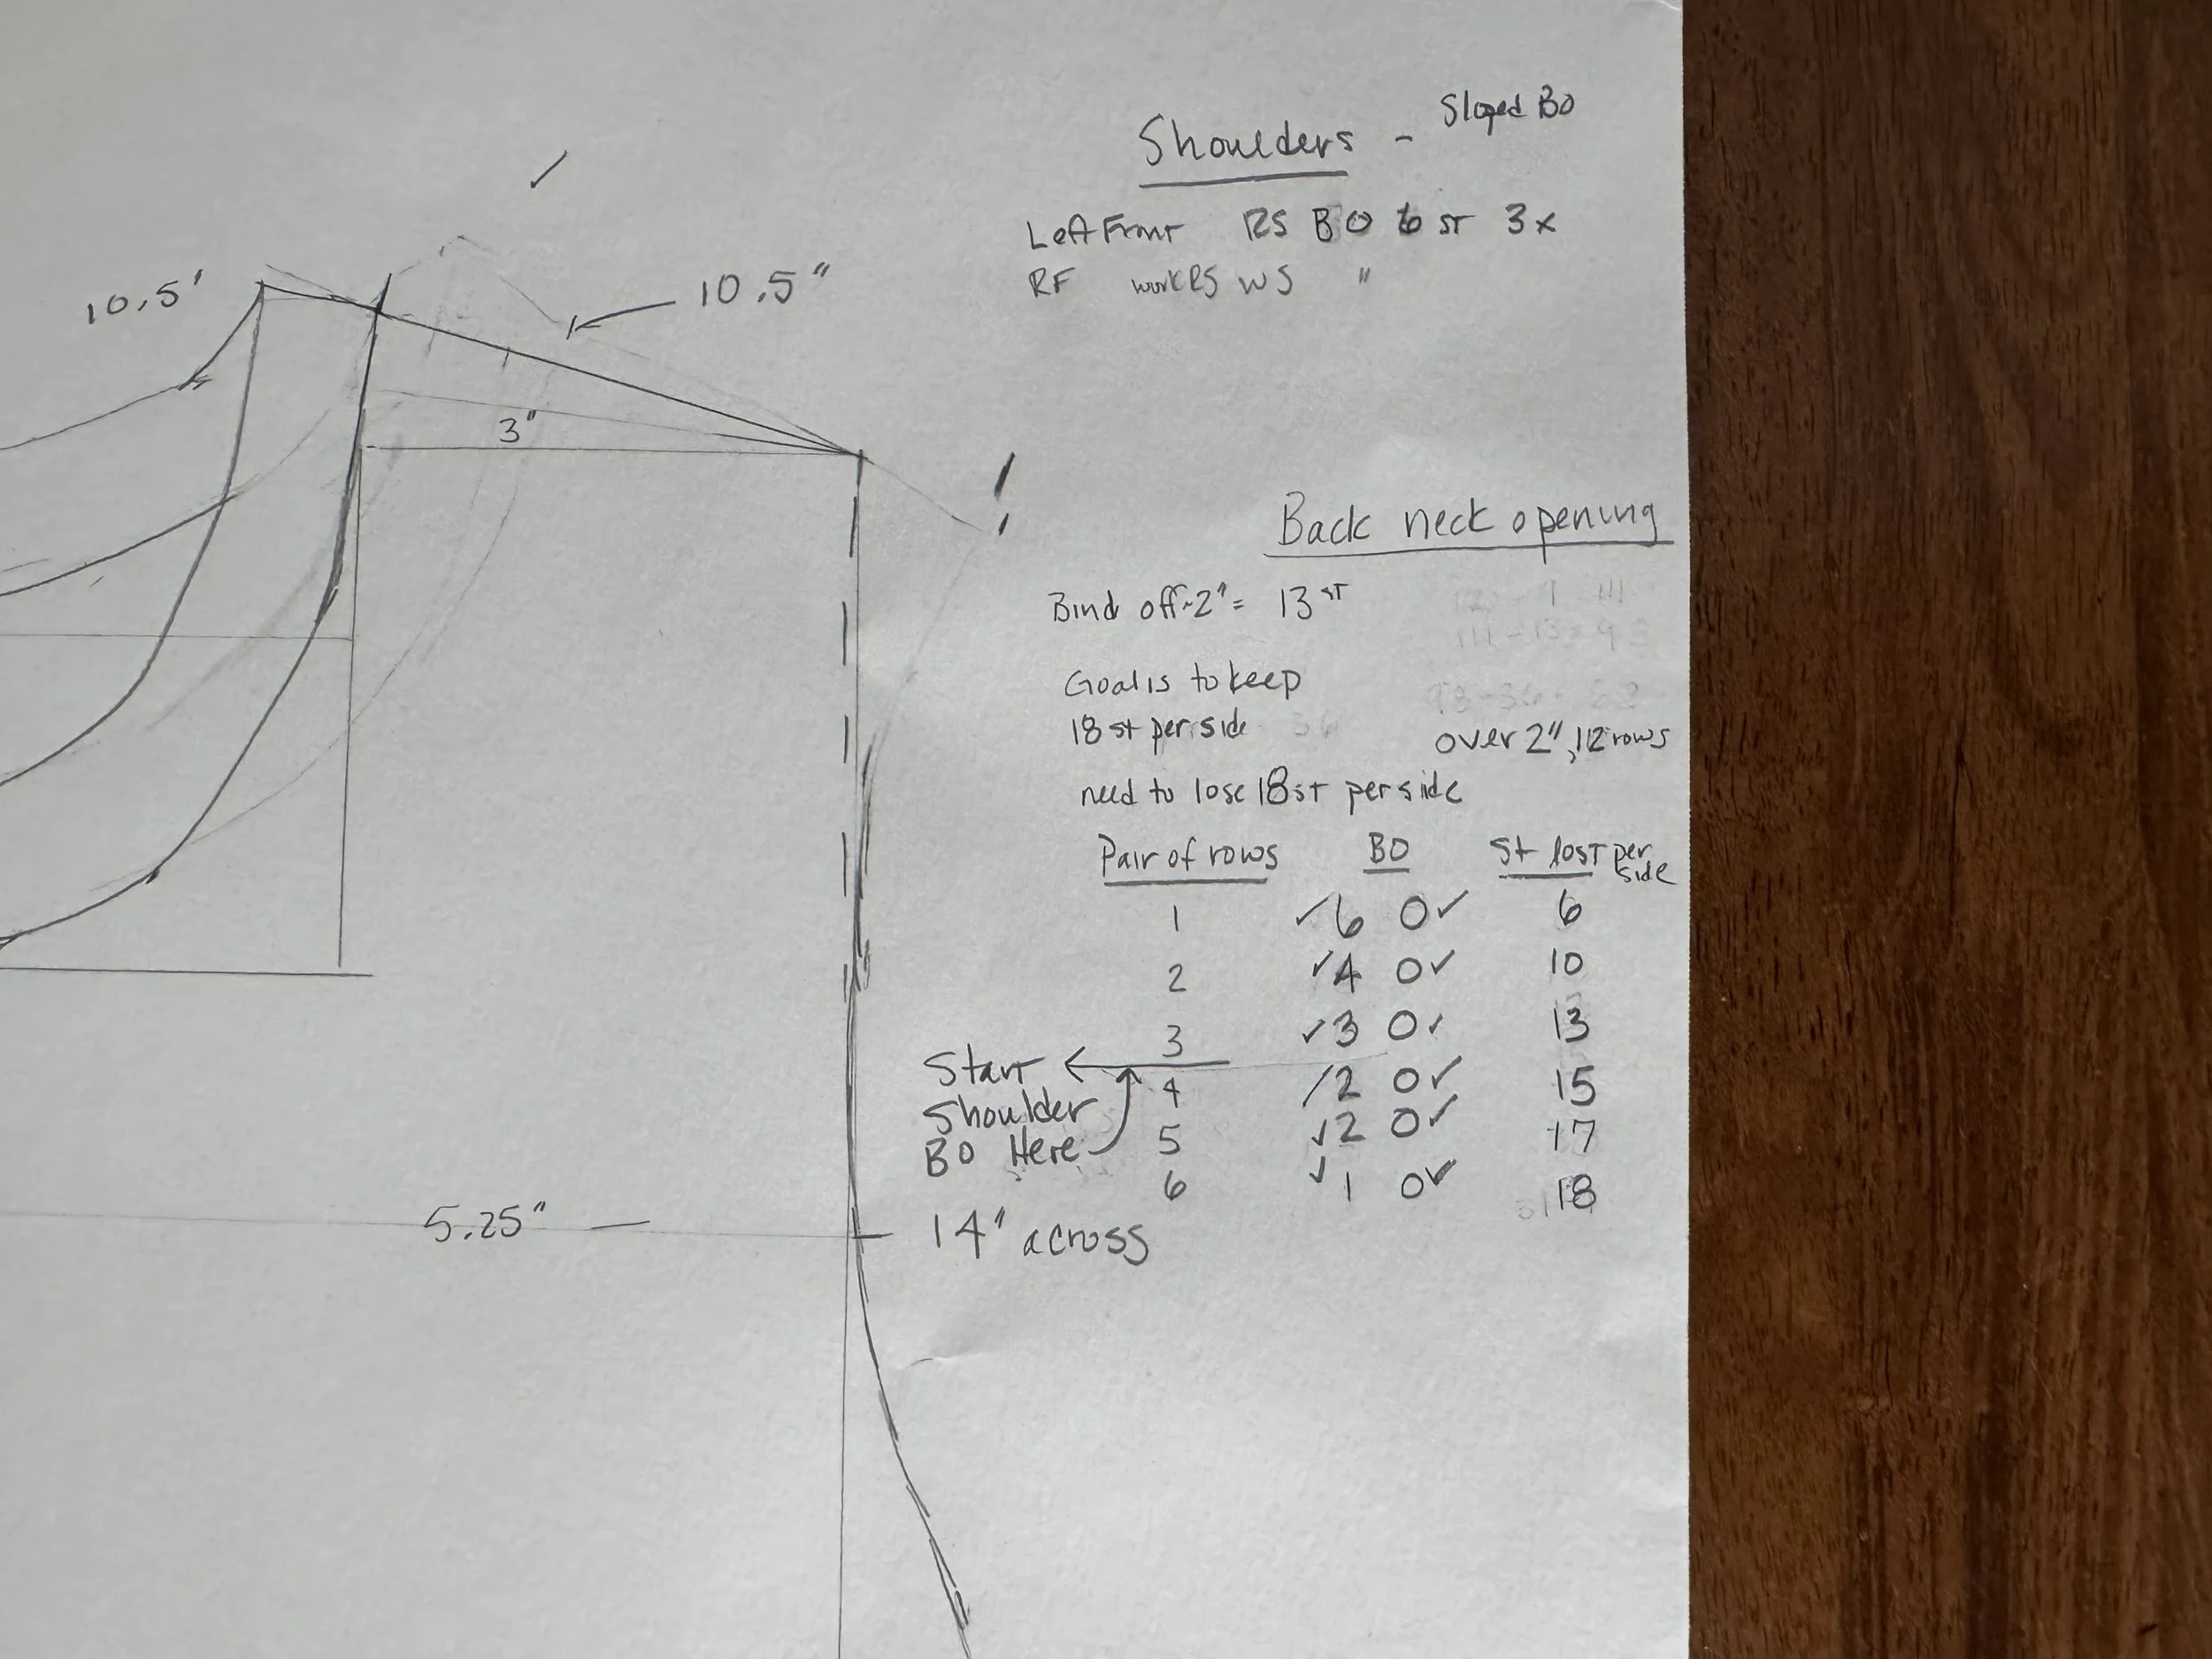
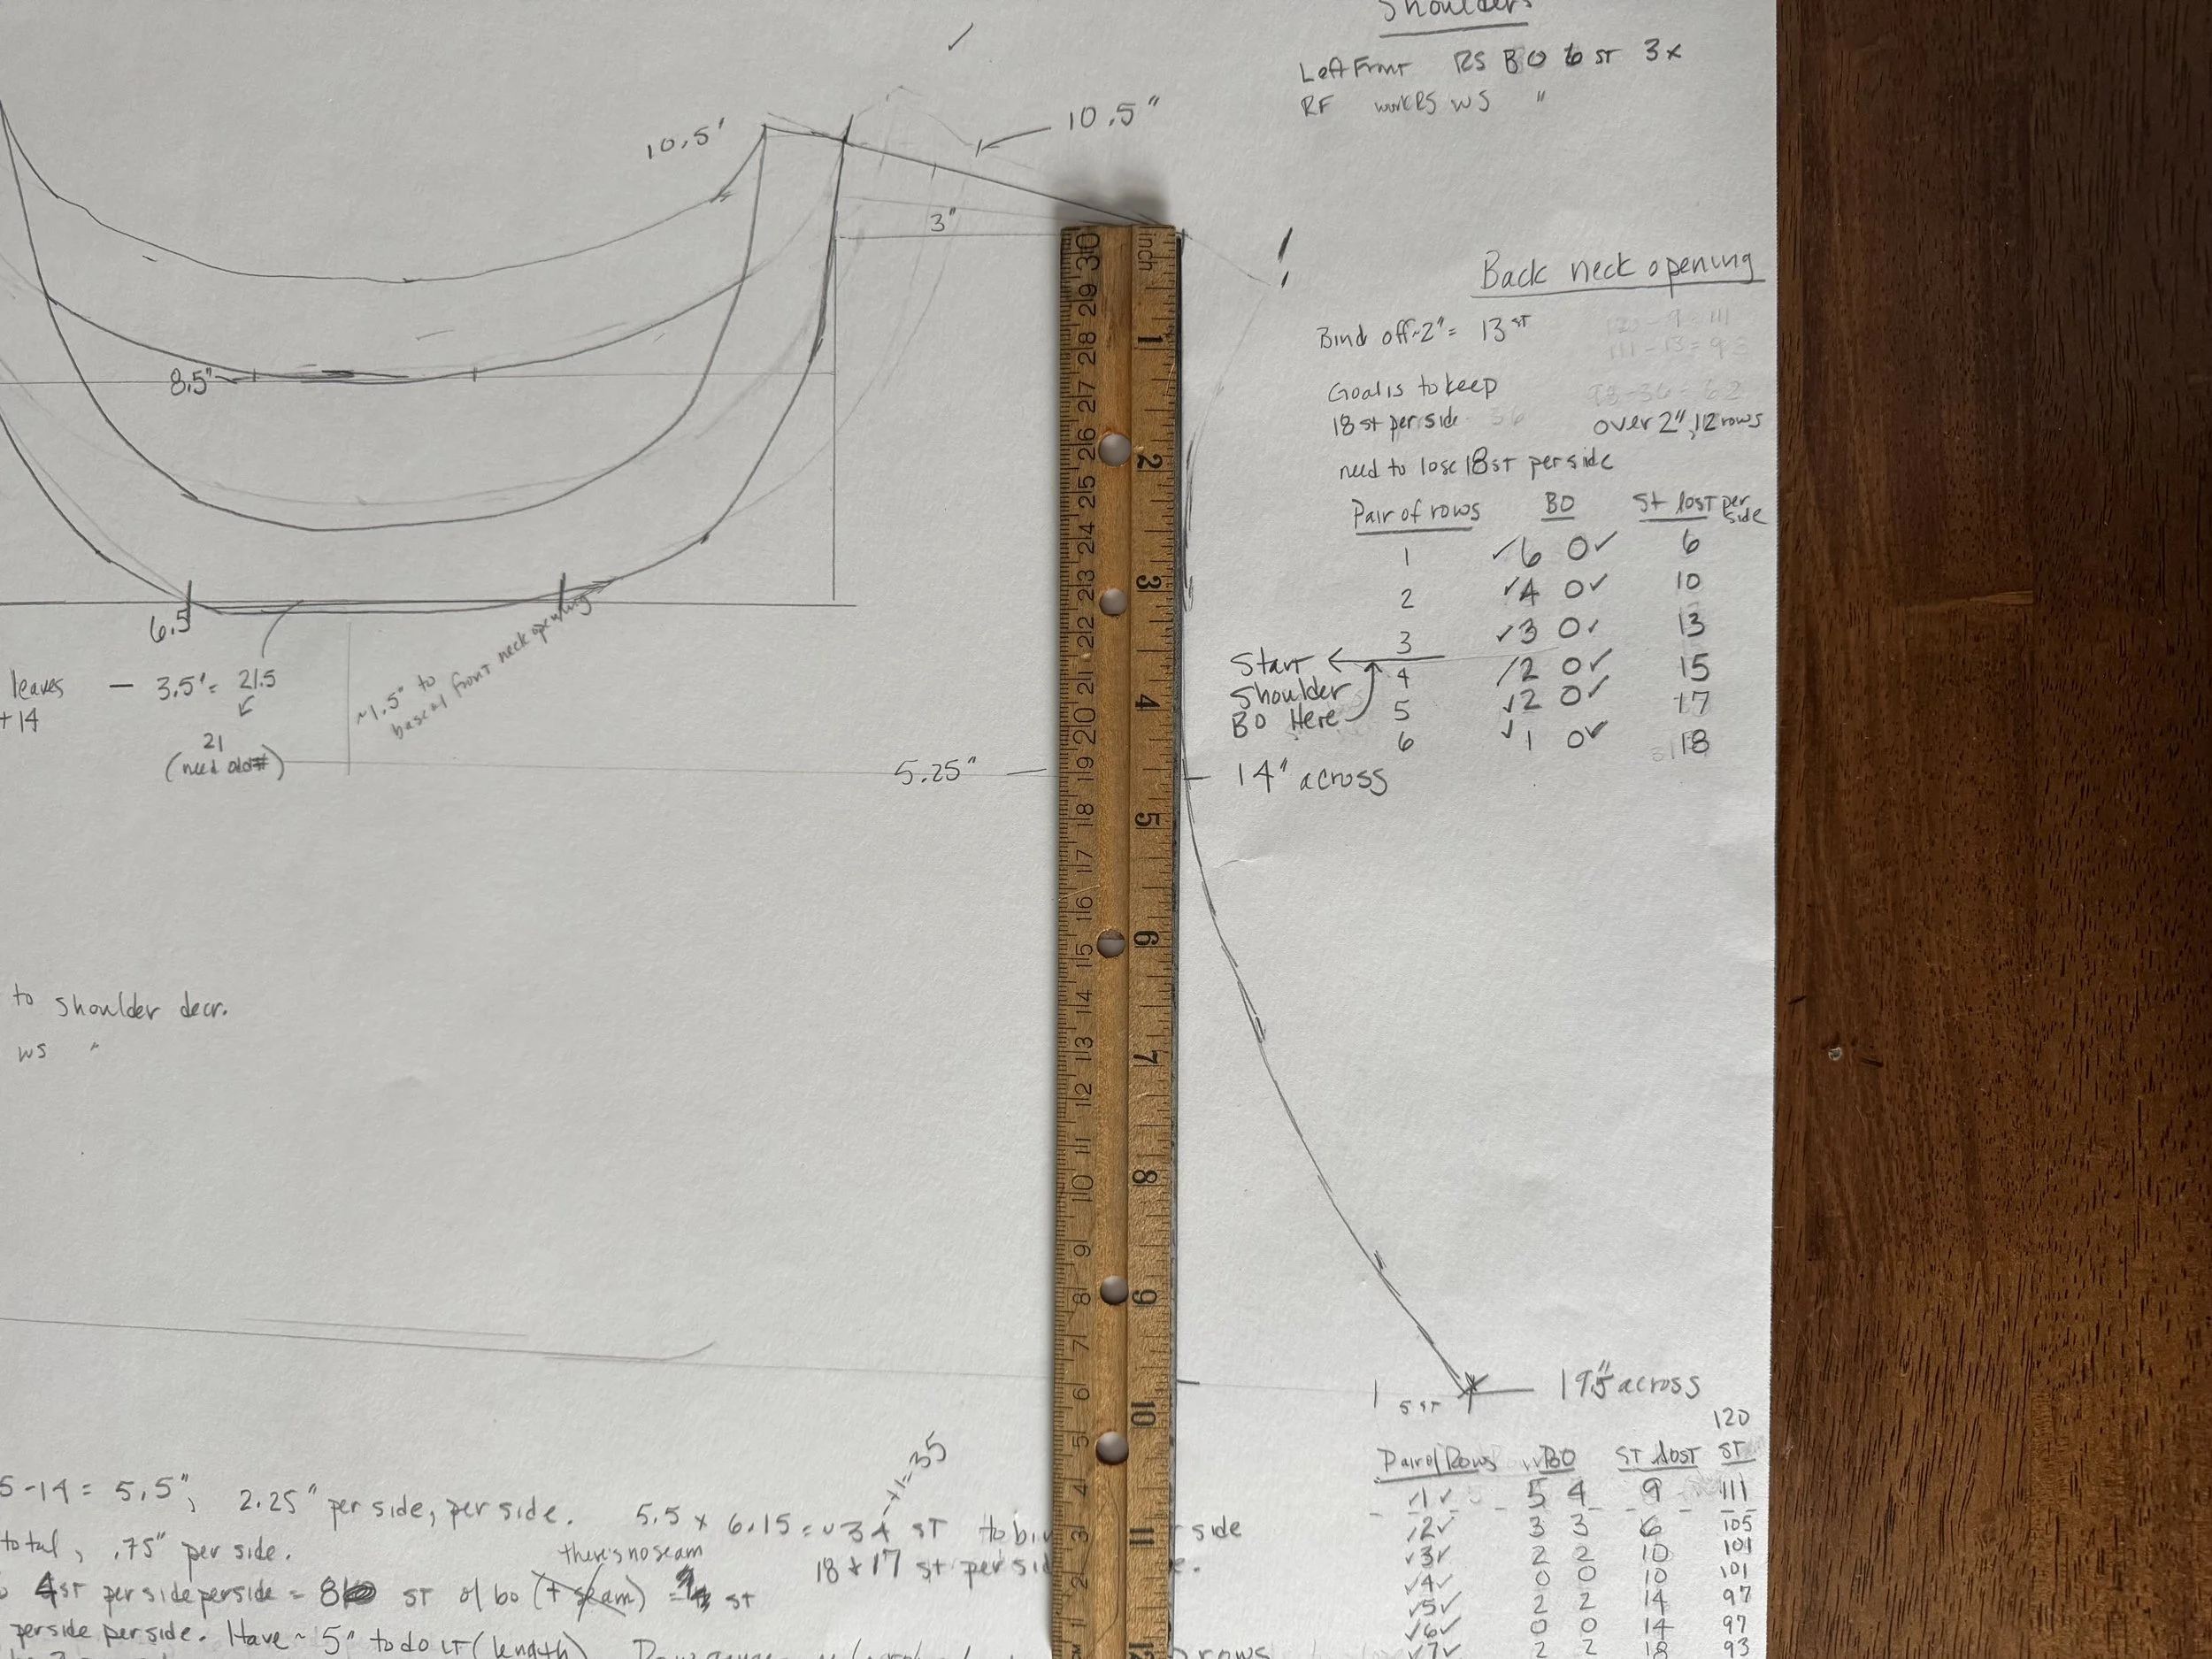
it almost all fits
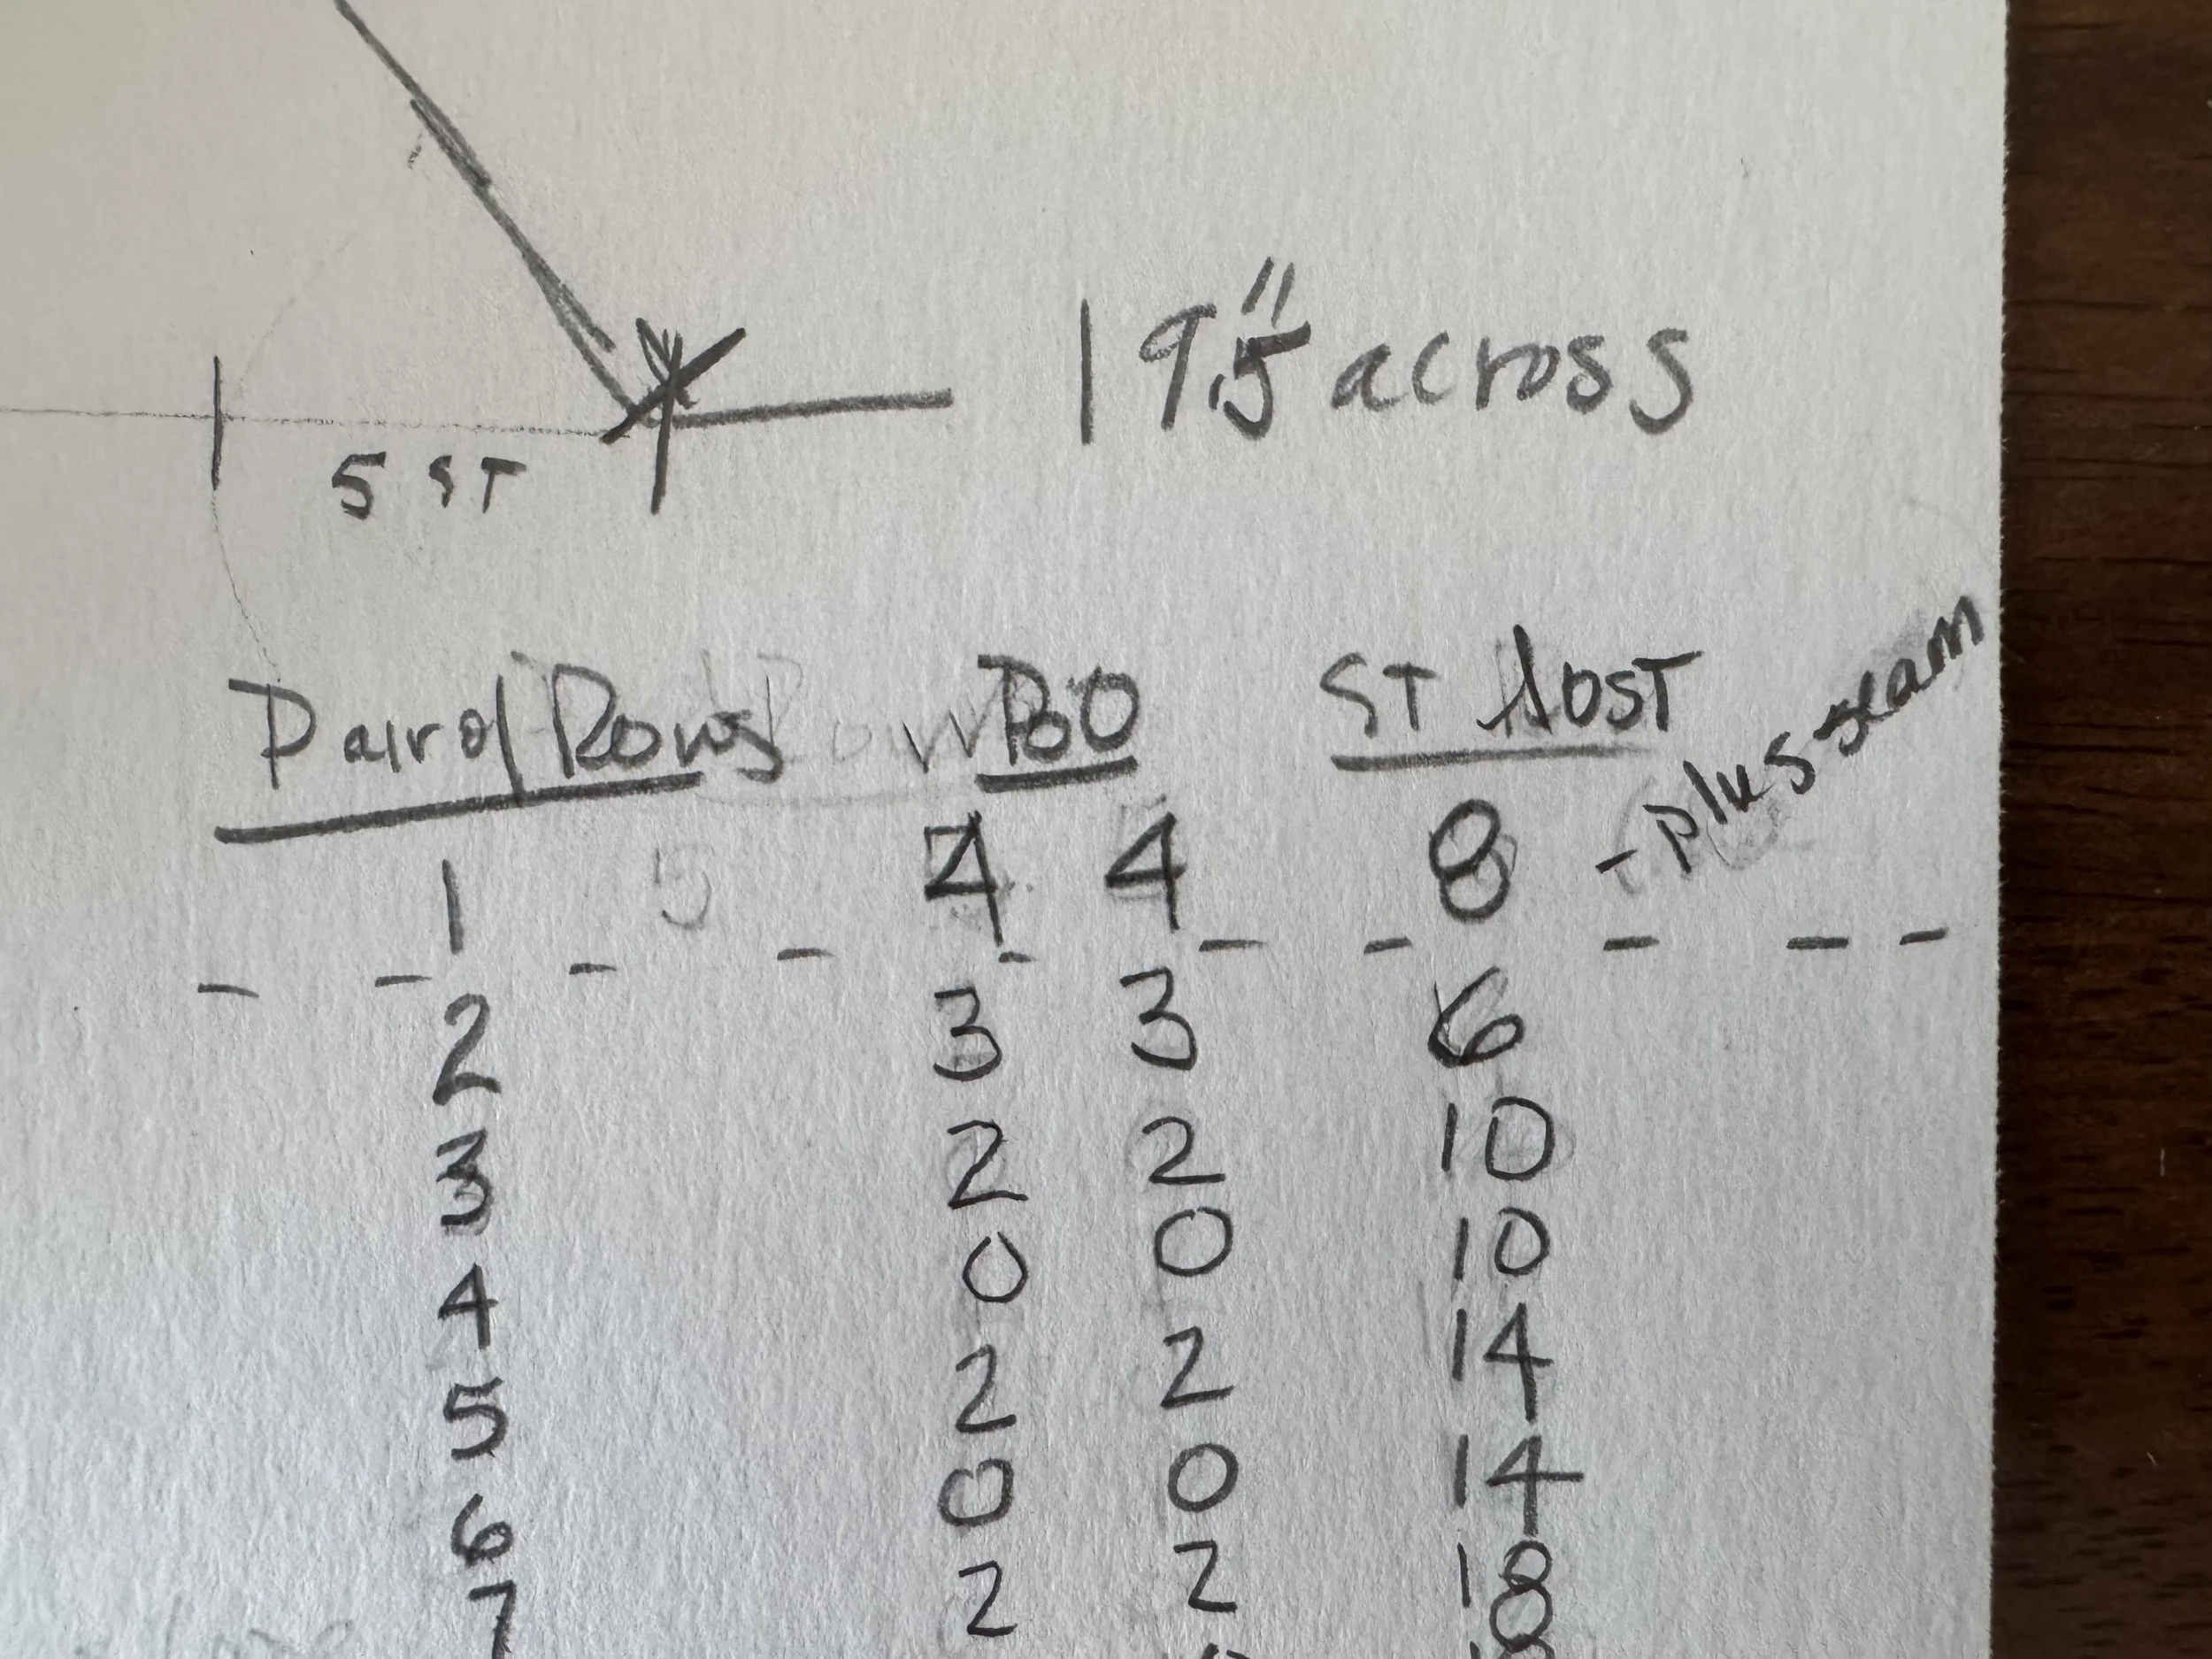
The scrawl at the bottom is me working things out and the columns at the bottom right are my guide for the decreases.
Basically, I will start working on the front, back and forth. First I will bind off 4 stitches (plus the “seam” purl) on each side and decrease more stitches at the beginning and then fewer as I go along, hoping to achieve a nice, gentle slope. Let’s get to it, shall we?
-
by the way
I am starting my decreases on an odd row - that is, on a row that contains the shaping stitches of the “fishnet” pattern. I want to do as little shaping as possible on the “back” parts of the “back and forth” knitting. I have a relative who would insist that it is “forth and back” knitting. Okay by me.
The cables will have to take care of themselves.
-
first check
But I do not say it with a grim smile. This should be an easy one. I am working on several projects right now, and the other big knitting project has purled “seams” at each side. I was thinking that this guy has the purled seams too, but no. The middle twisted rib stitch is itself the seam, and it is included in my 240 stitches.
So. I will need to bind off 9 stitches for the underarm, not 8, under each arm and since the twisted knit stitch is the first stitch in the round, I will bind off 5 stitches at this end and then only 4 at the other end.
-
that changes this:
-
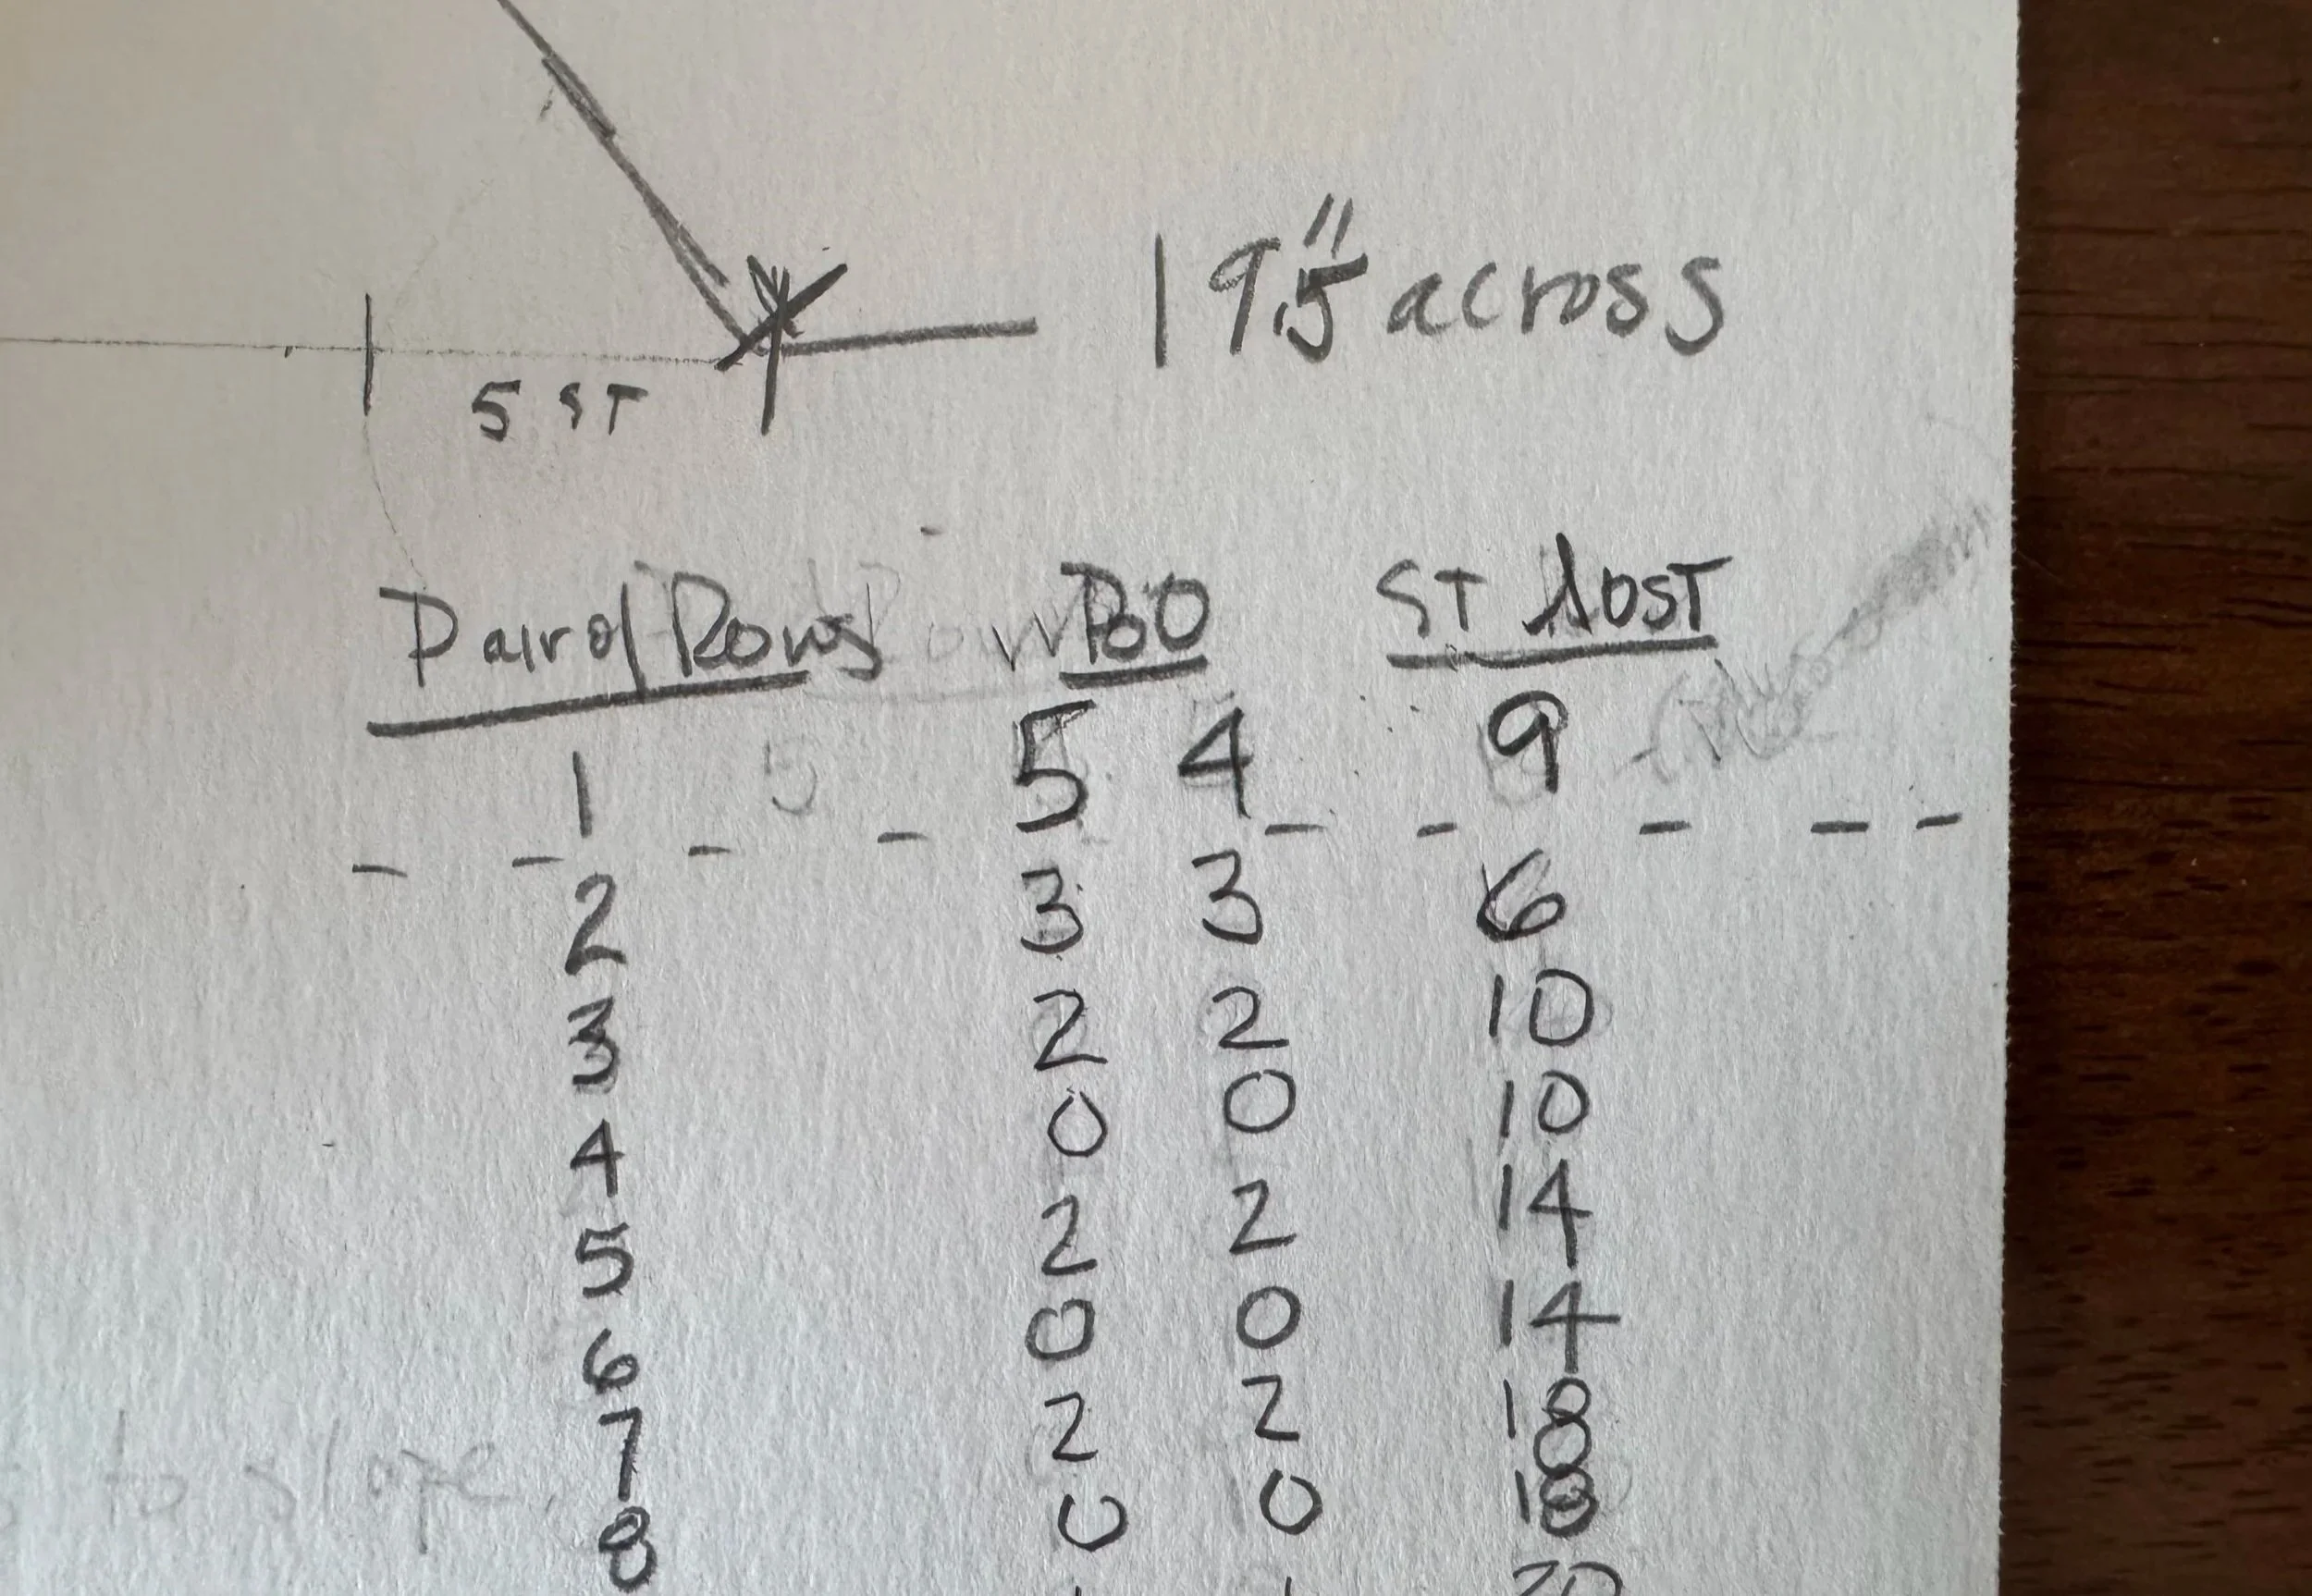
to this:
And now I will be losing 35 stitches per side instead of 34.
-
more business
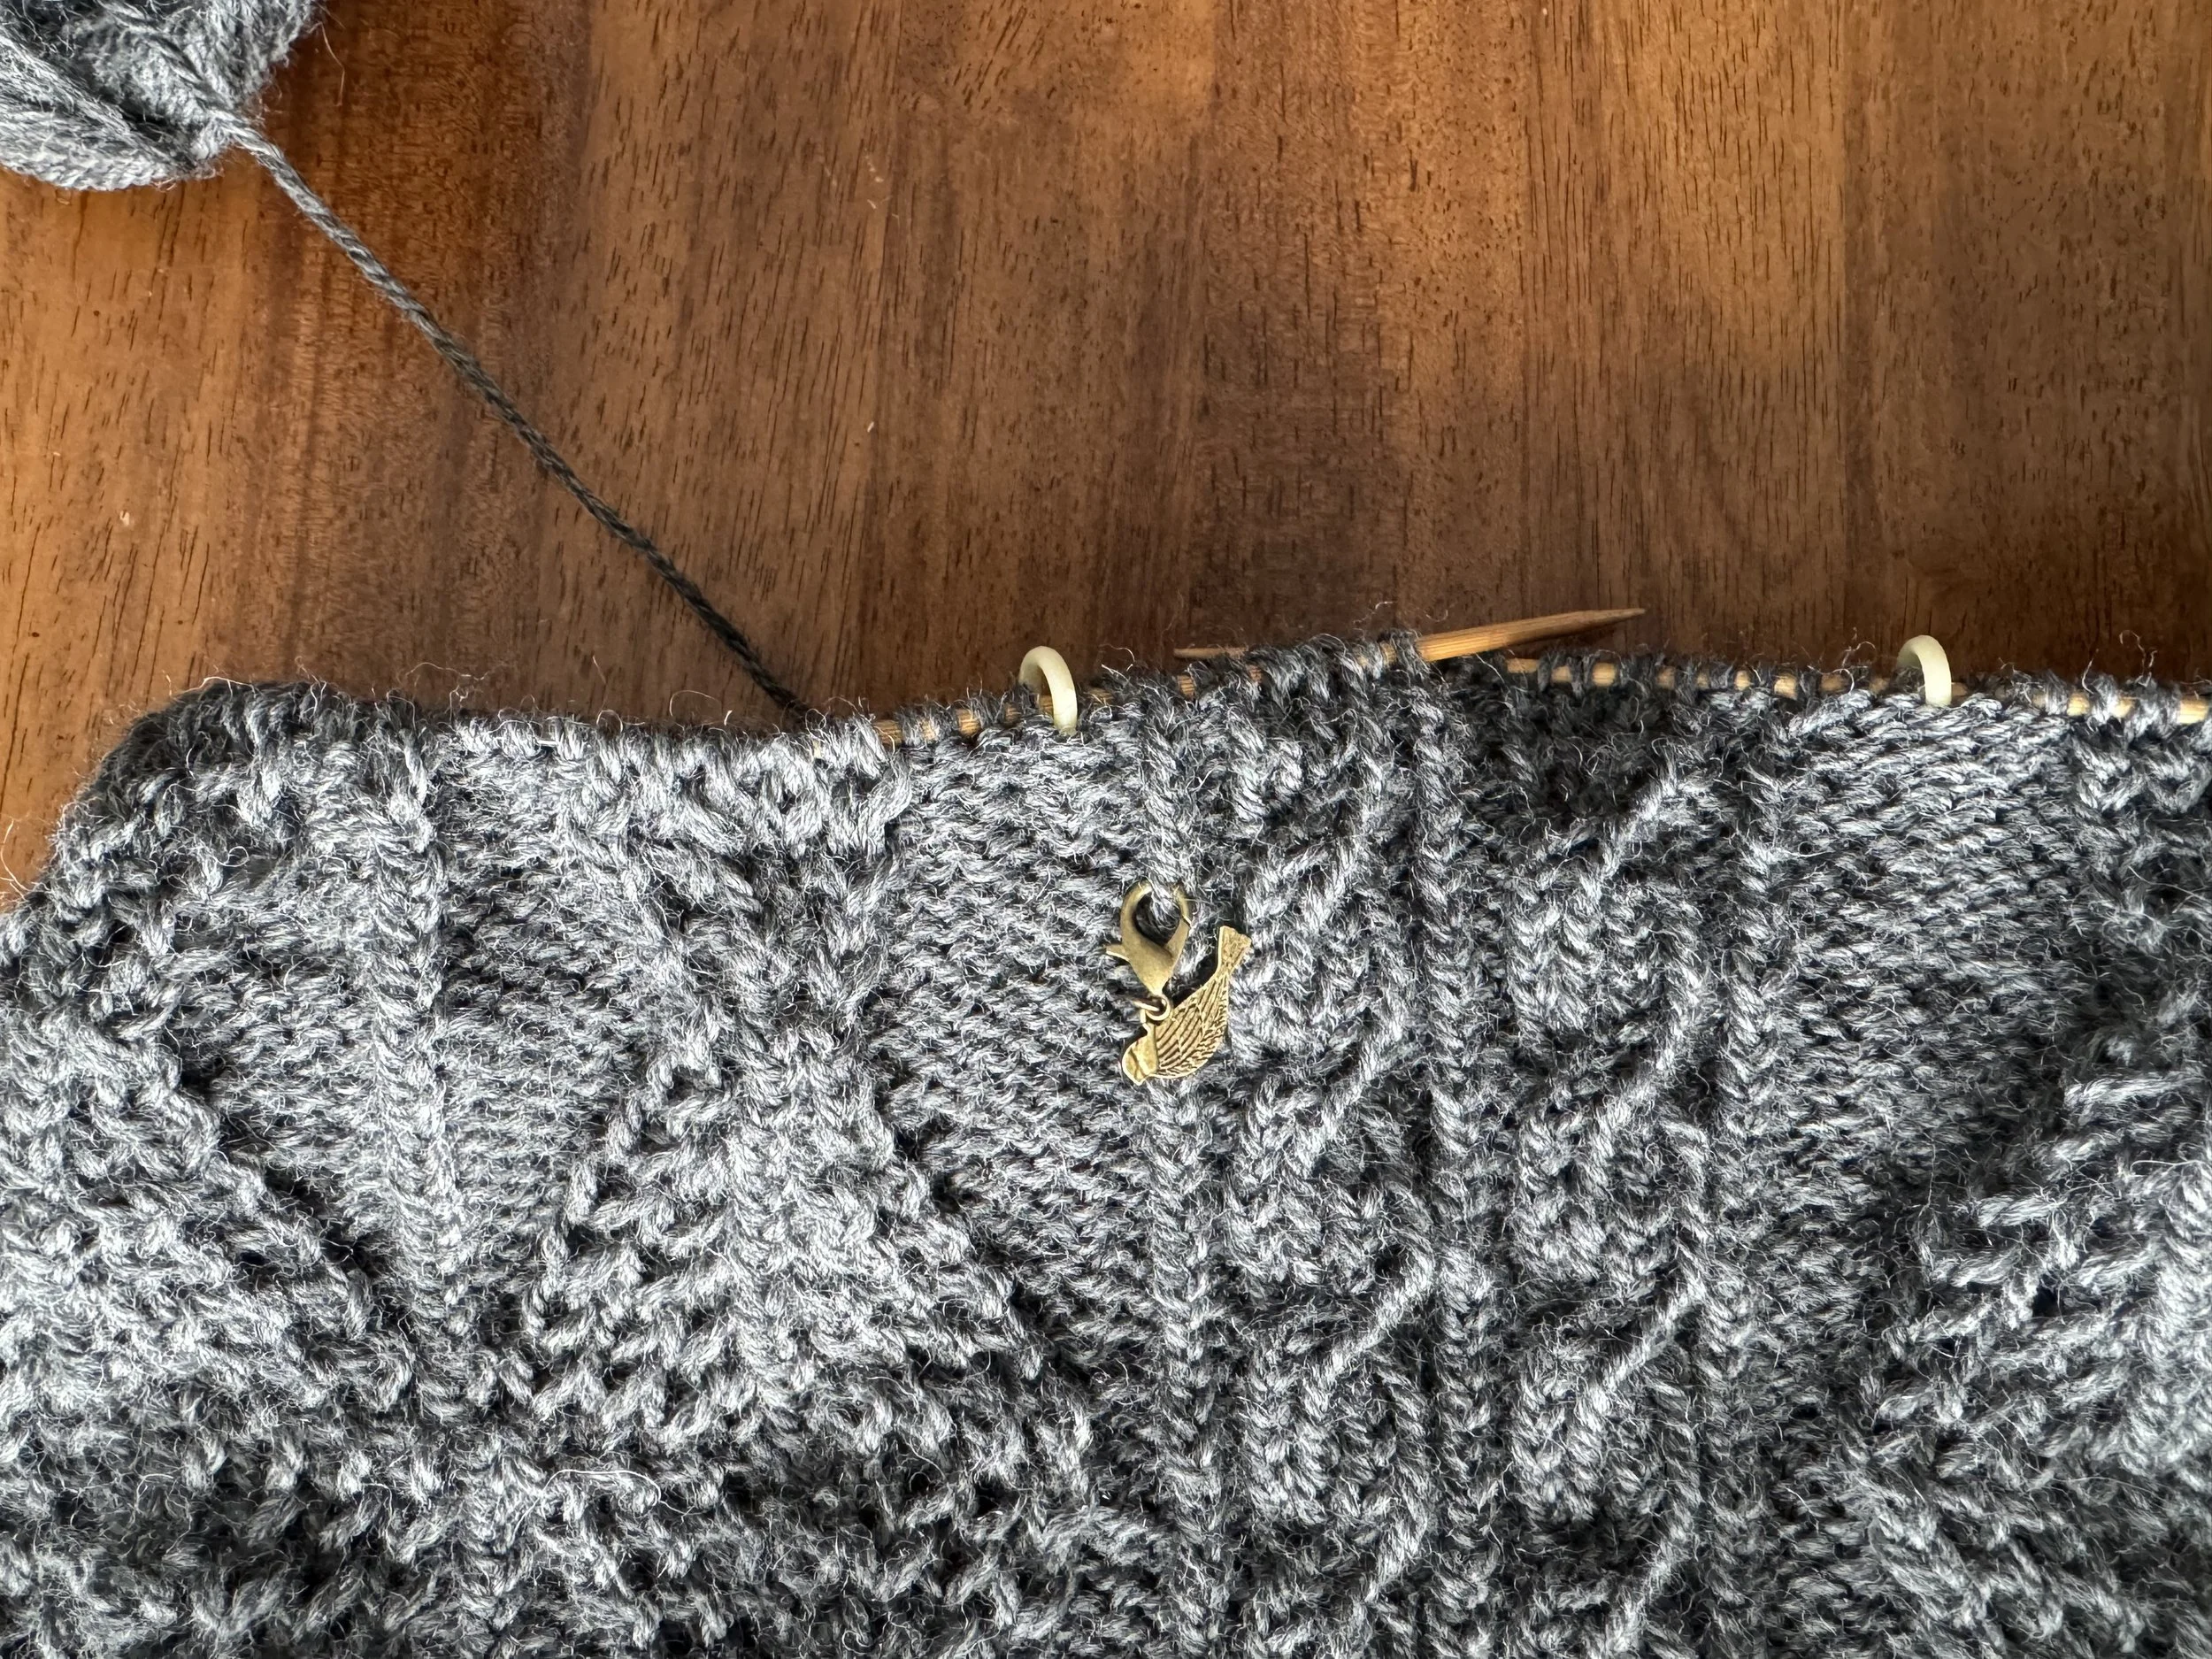
I just finished my first row on the front, and am ready to turn around and bind off 4 stitches. But I have to plan for the future; when I get to the point where I can start decreases for the back of the sweater, I need to know how many more rows to work before my next cable twist, so I had better add a row marker now. This birdie goes 6 rows down. I use the very visible single twisted knit stitches to hold my markers. As I lose stitches from the edges, the birdie will have to migrate inland, to the center of the front.
Also. I plan to slip every first stitch — knitwise on the RS and purlwise on the WS — and to knit every last stitch on the RS and to purl every last stitch on the WS. This will make seaming so very much easier.
Also. I am knitting all of the stitches that are decreased on the RS and I am purling all of the stitches that are bound off on the WS.
-
same day, different gray
As I start on the wrong side, thoughts of steeks float into and out of my mind. Turns out that I have to do a cable twist on this very first WS row, yikes.
A firm No to the steeks. I don’t want any extra bulk on this sweater. It is already going to be a heavy bear.
Besides, the cable twists turned out to be a lot easier than I anticipated. I hold the stitches on the dpn in the back, as I did for the other cables, and just do a purl twist instead of a knit twist. La. Knit without fear, friends.
-
nearly done with the decreases
And we are back to a closer-to-accurate gray.
I only have to do one more decrease on each end. The goal was to match the sweater to that 5.25” line, and I think I will manage it. I also want to have 14” of knitting at this point, and that is looking pretty hopeful, too.
One more technical note: when I decrease more than 1 stitch at each end, I do it at the beginning of every row. But when I only decrease 1 stitch at each end, I do it at the beginning and end of the RS row.
-
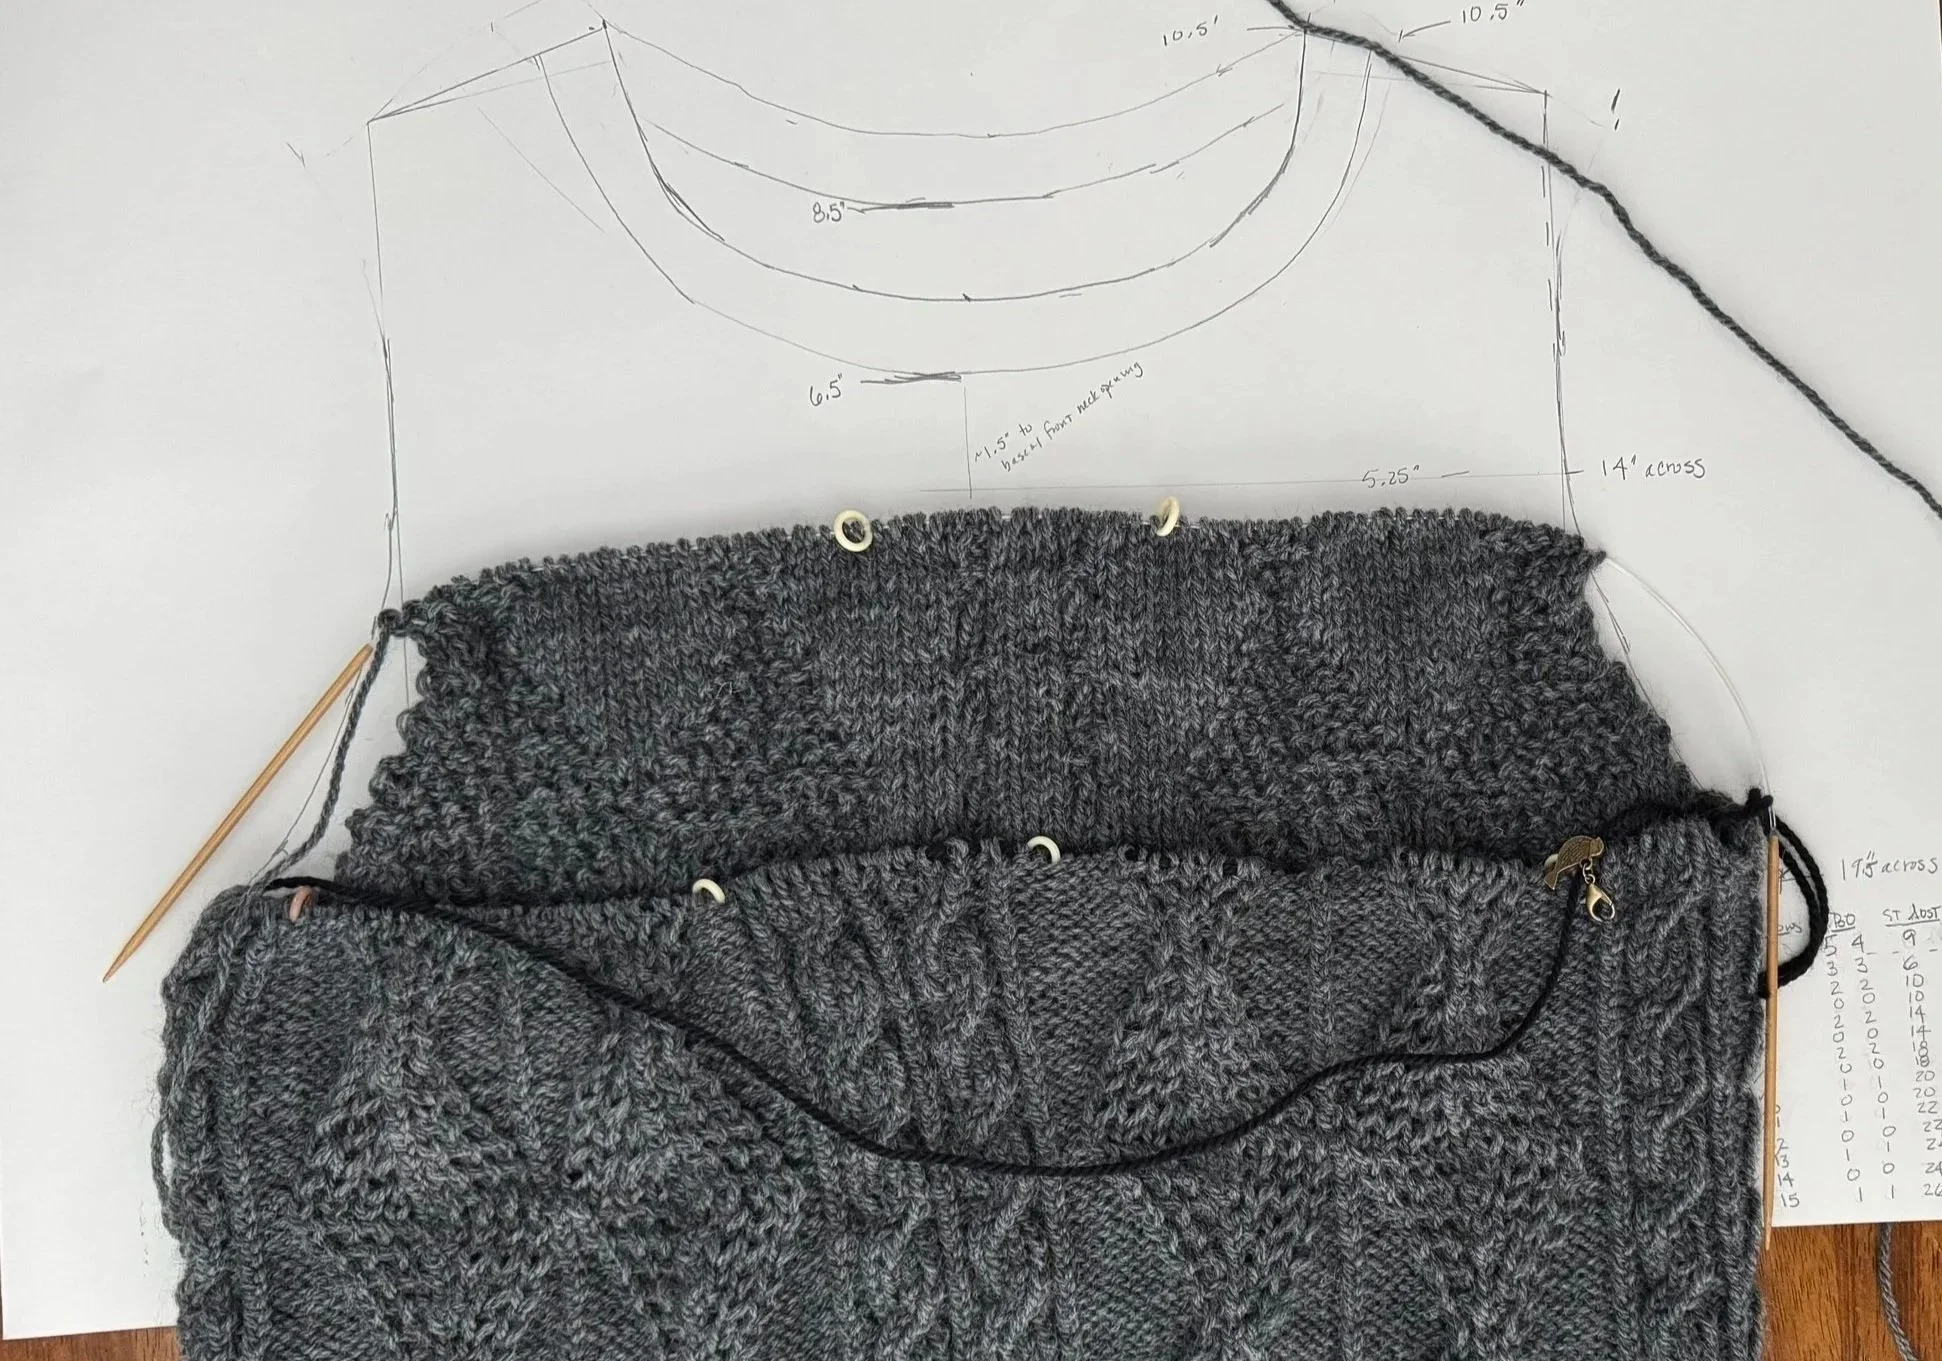
the other side
It makes life easier if you put the back stitches on waste yarn (or some other holder).
For the record, I do peep over to the front of the work when I am working my way back on the WS. You do have to think backward and sometimes you get mixed up. Me, not you.
-
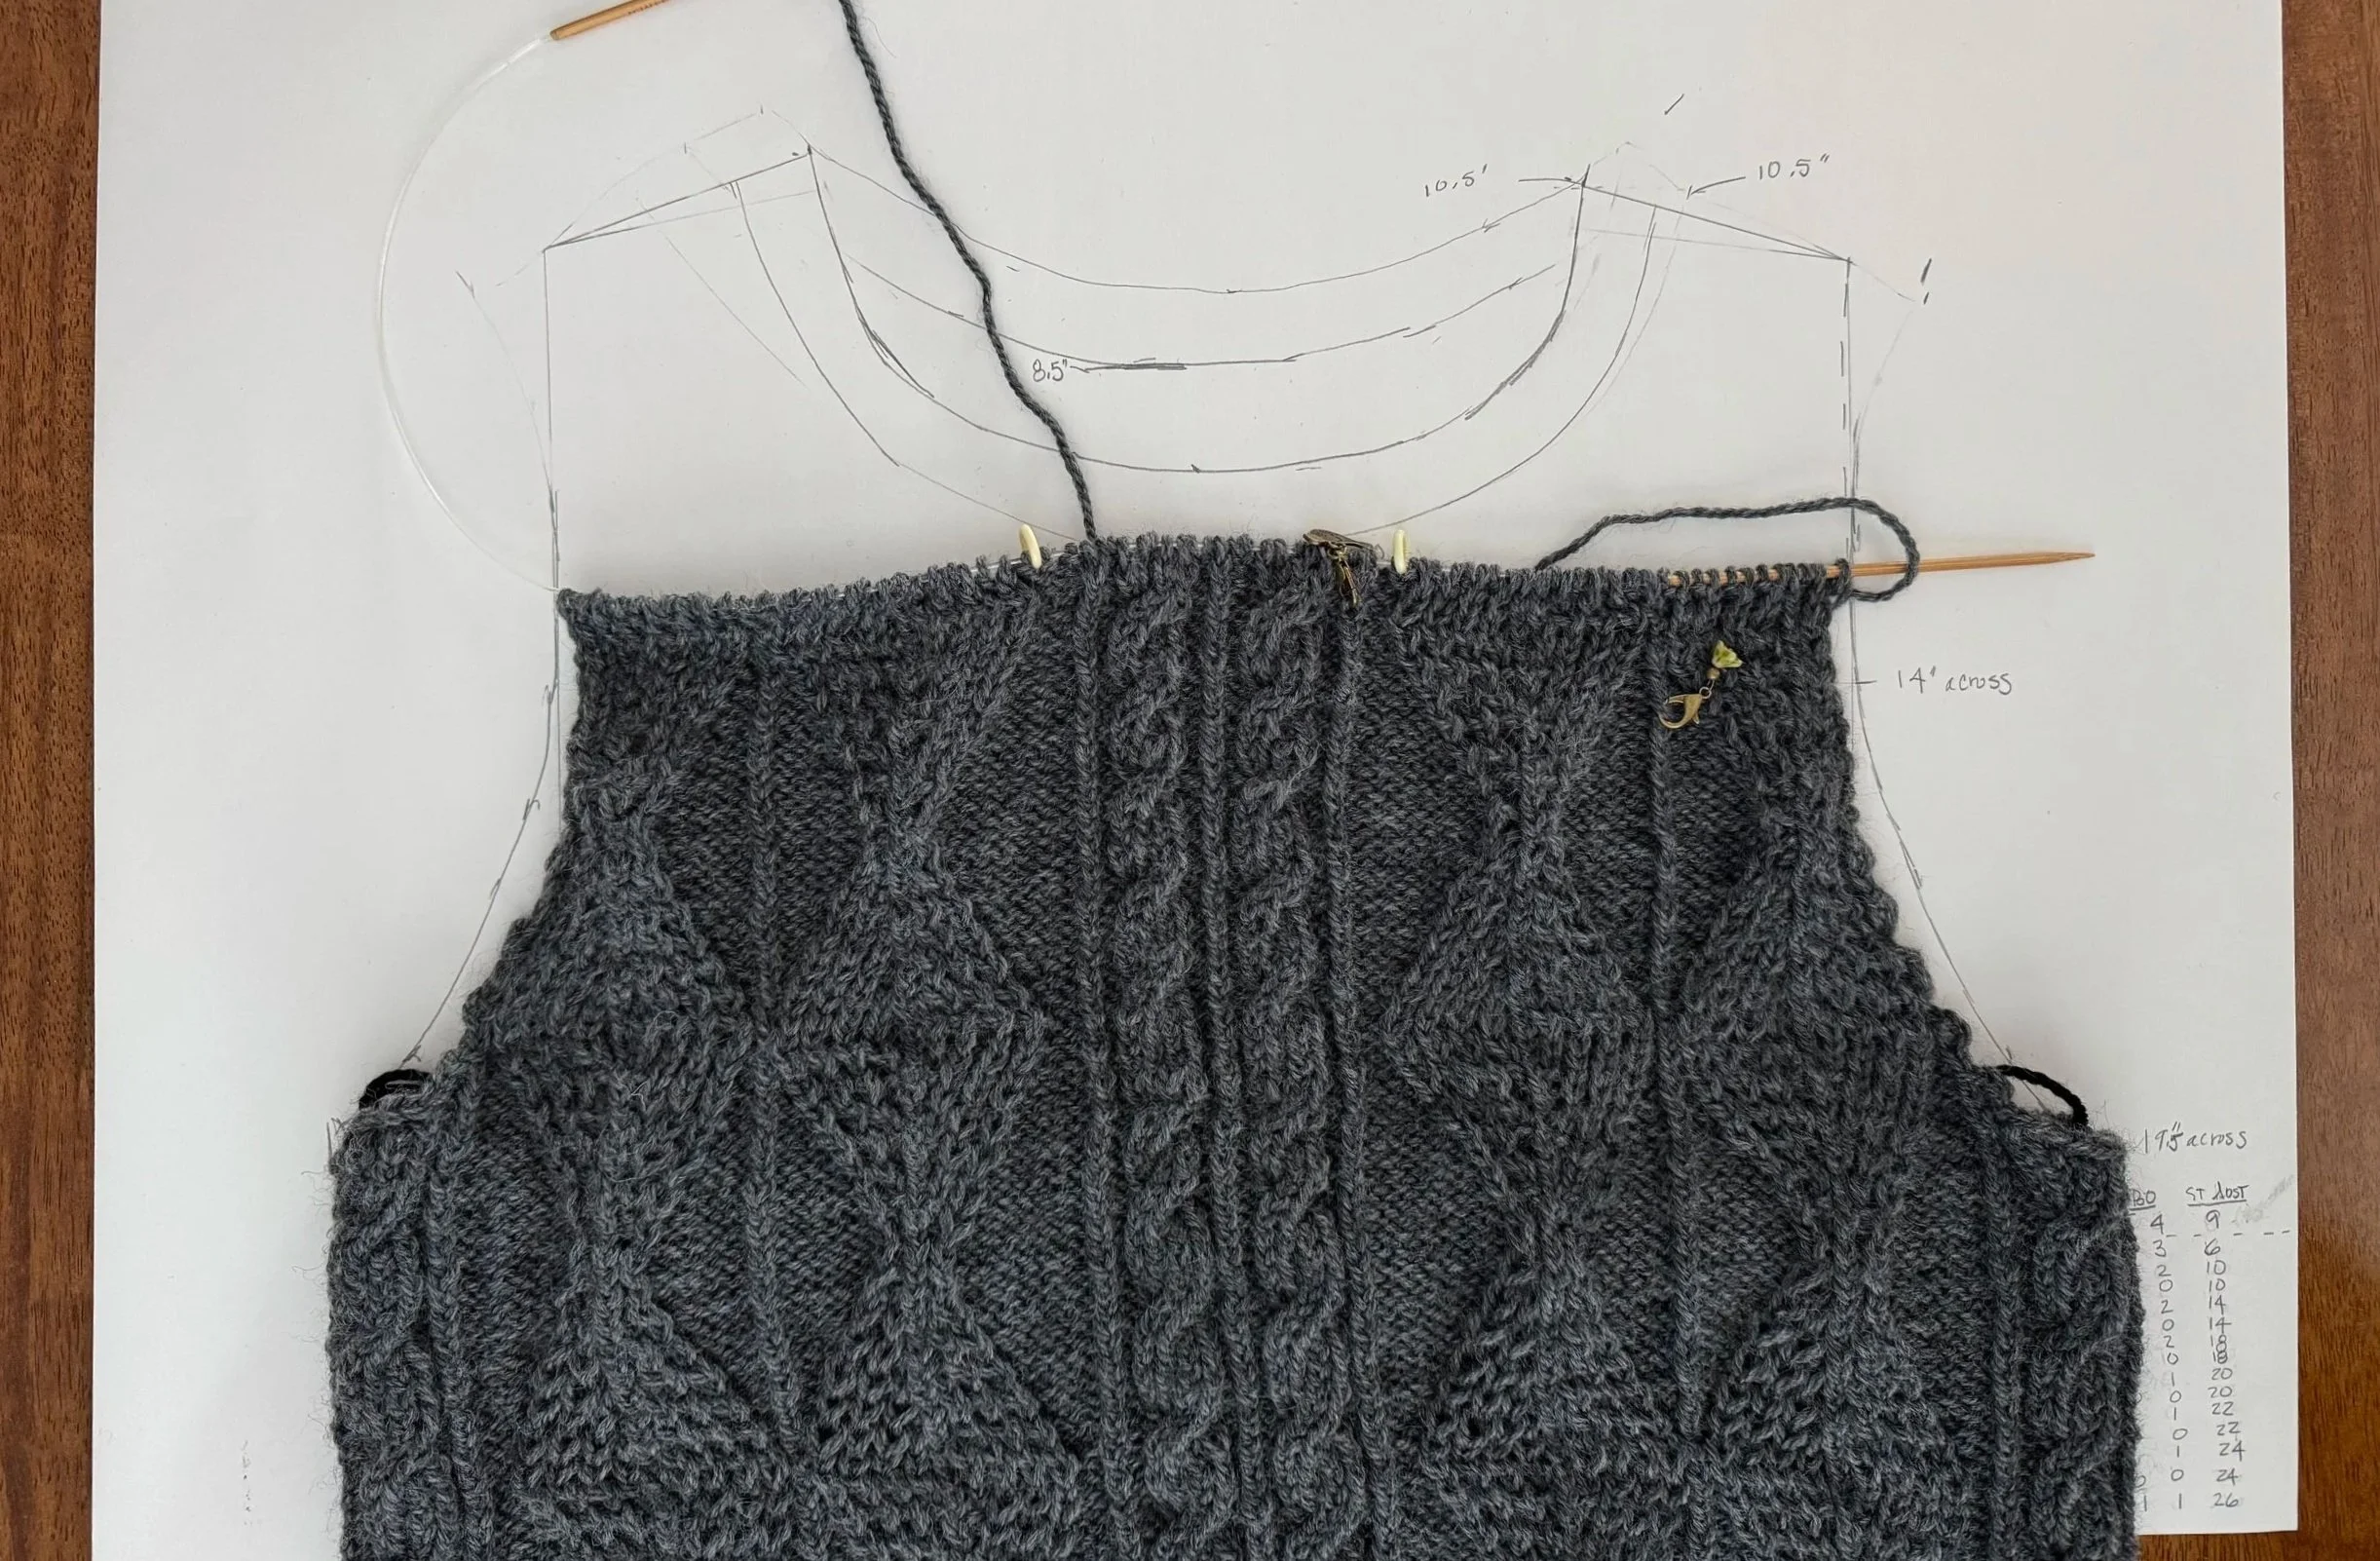
okay!
So now I have reached the 6.5” mark from the first underarm decreases and it is now time to start figuring out how I will manage the front neck decreases.
-
small snafu
I want my shoulders to be 3” wide before the neck ribbing, not after. This looks like a boatneck in the making and that is not what I am after. I have some erasing to do.
-
some erasing
I still want my neck to start at the 6.5”-from-the-underarm mark, so it will end up being a bit narrower than it looks now.
-

just double checking
I want to verify that I really do want my neck opening to start where I think I want it to start. Looks good.
-
back (well, shoulder) to 3"
This will narrow the neck opening considerably, which is a good thing.
-
new lines
I just eyeballed the new lines. The front will still have the neck opening at 6.5” from the underarm and the back will have it at 8.5” from same underarm.
-
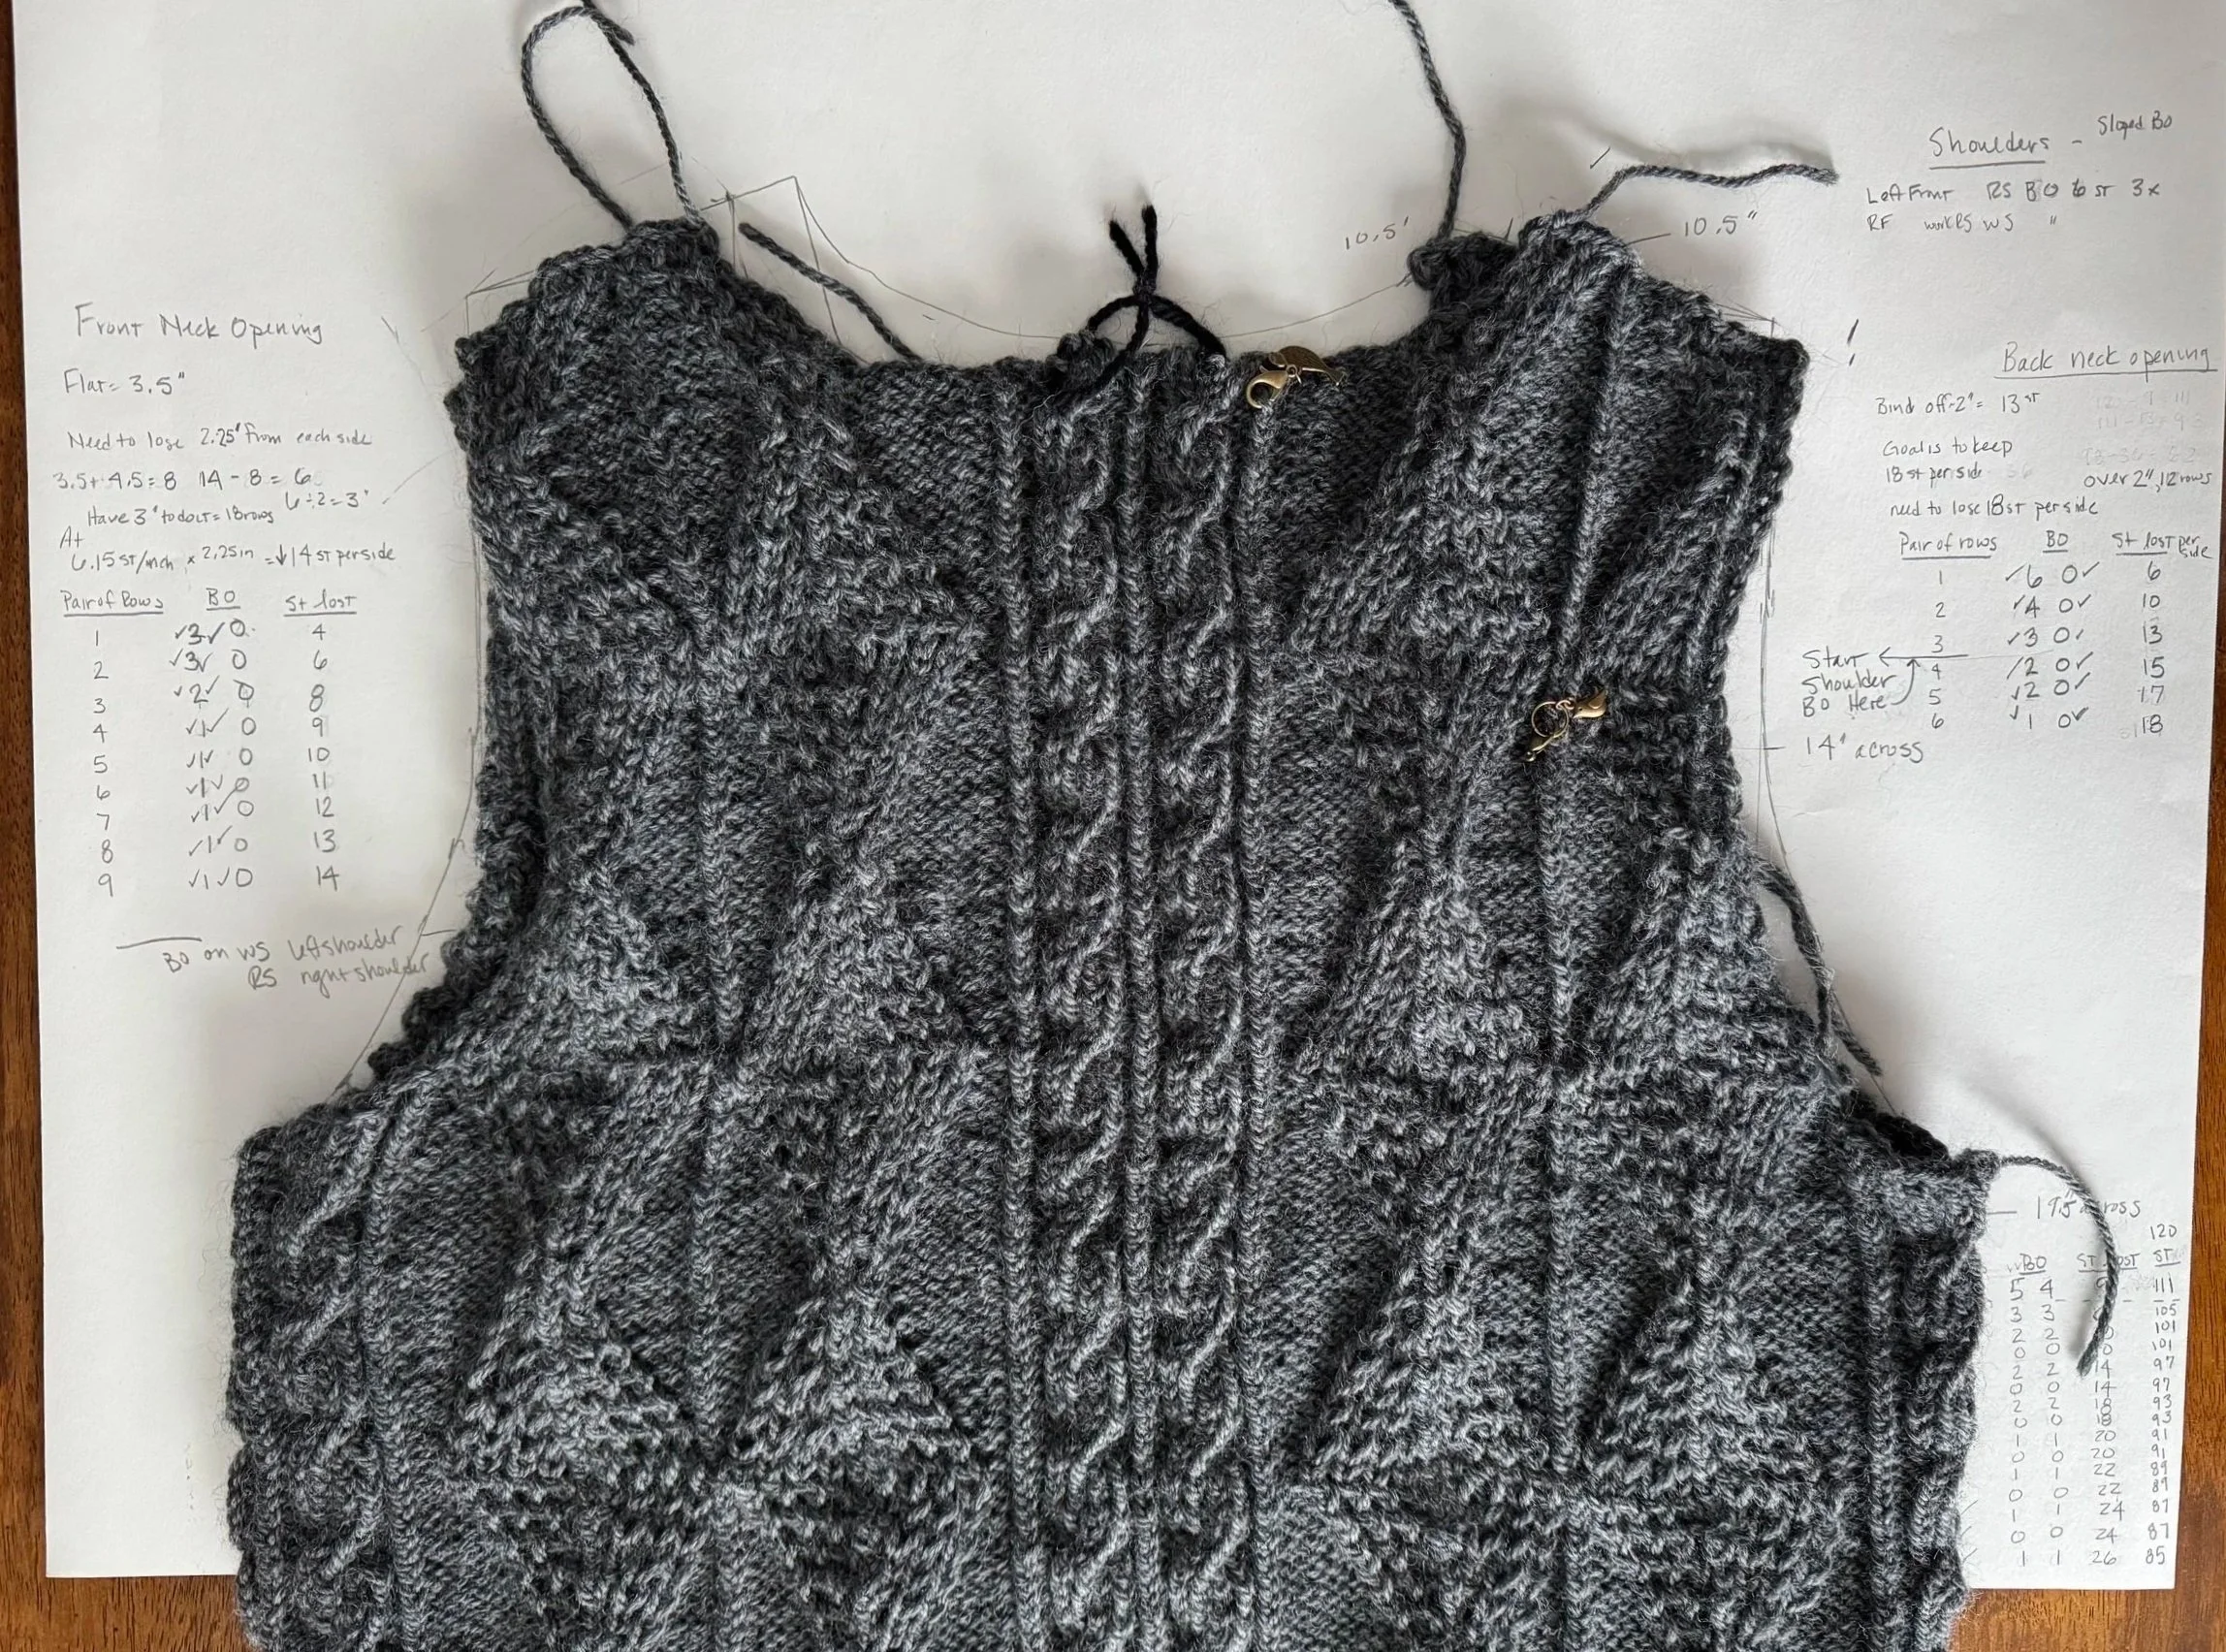
the straight part of the neck opening
I will make this about 3.5” wide. With a stitch gauge of 6.15 st/in, that makes 21.5 stitches. Since I have a twisted knit stitch in the middle of my sweater, I want to bind off an odd number of stitches here, so I will choose 21.
-
3" for shoulder
Time to draw the “triangles” that will magically disappear as the decreases progress.
-
and here they are
-

a new chart
I want to decrease about 2.25” at the base of each triangle and I have 3” of length in which to do it (that is, about 18 rows). So I came up with this series of decreases. It will leave me with about 18 stitches for the shoulder, which is a good-enough approximation of 3”
-
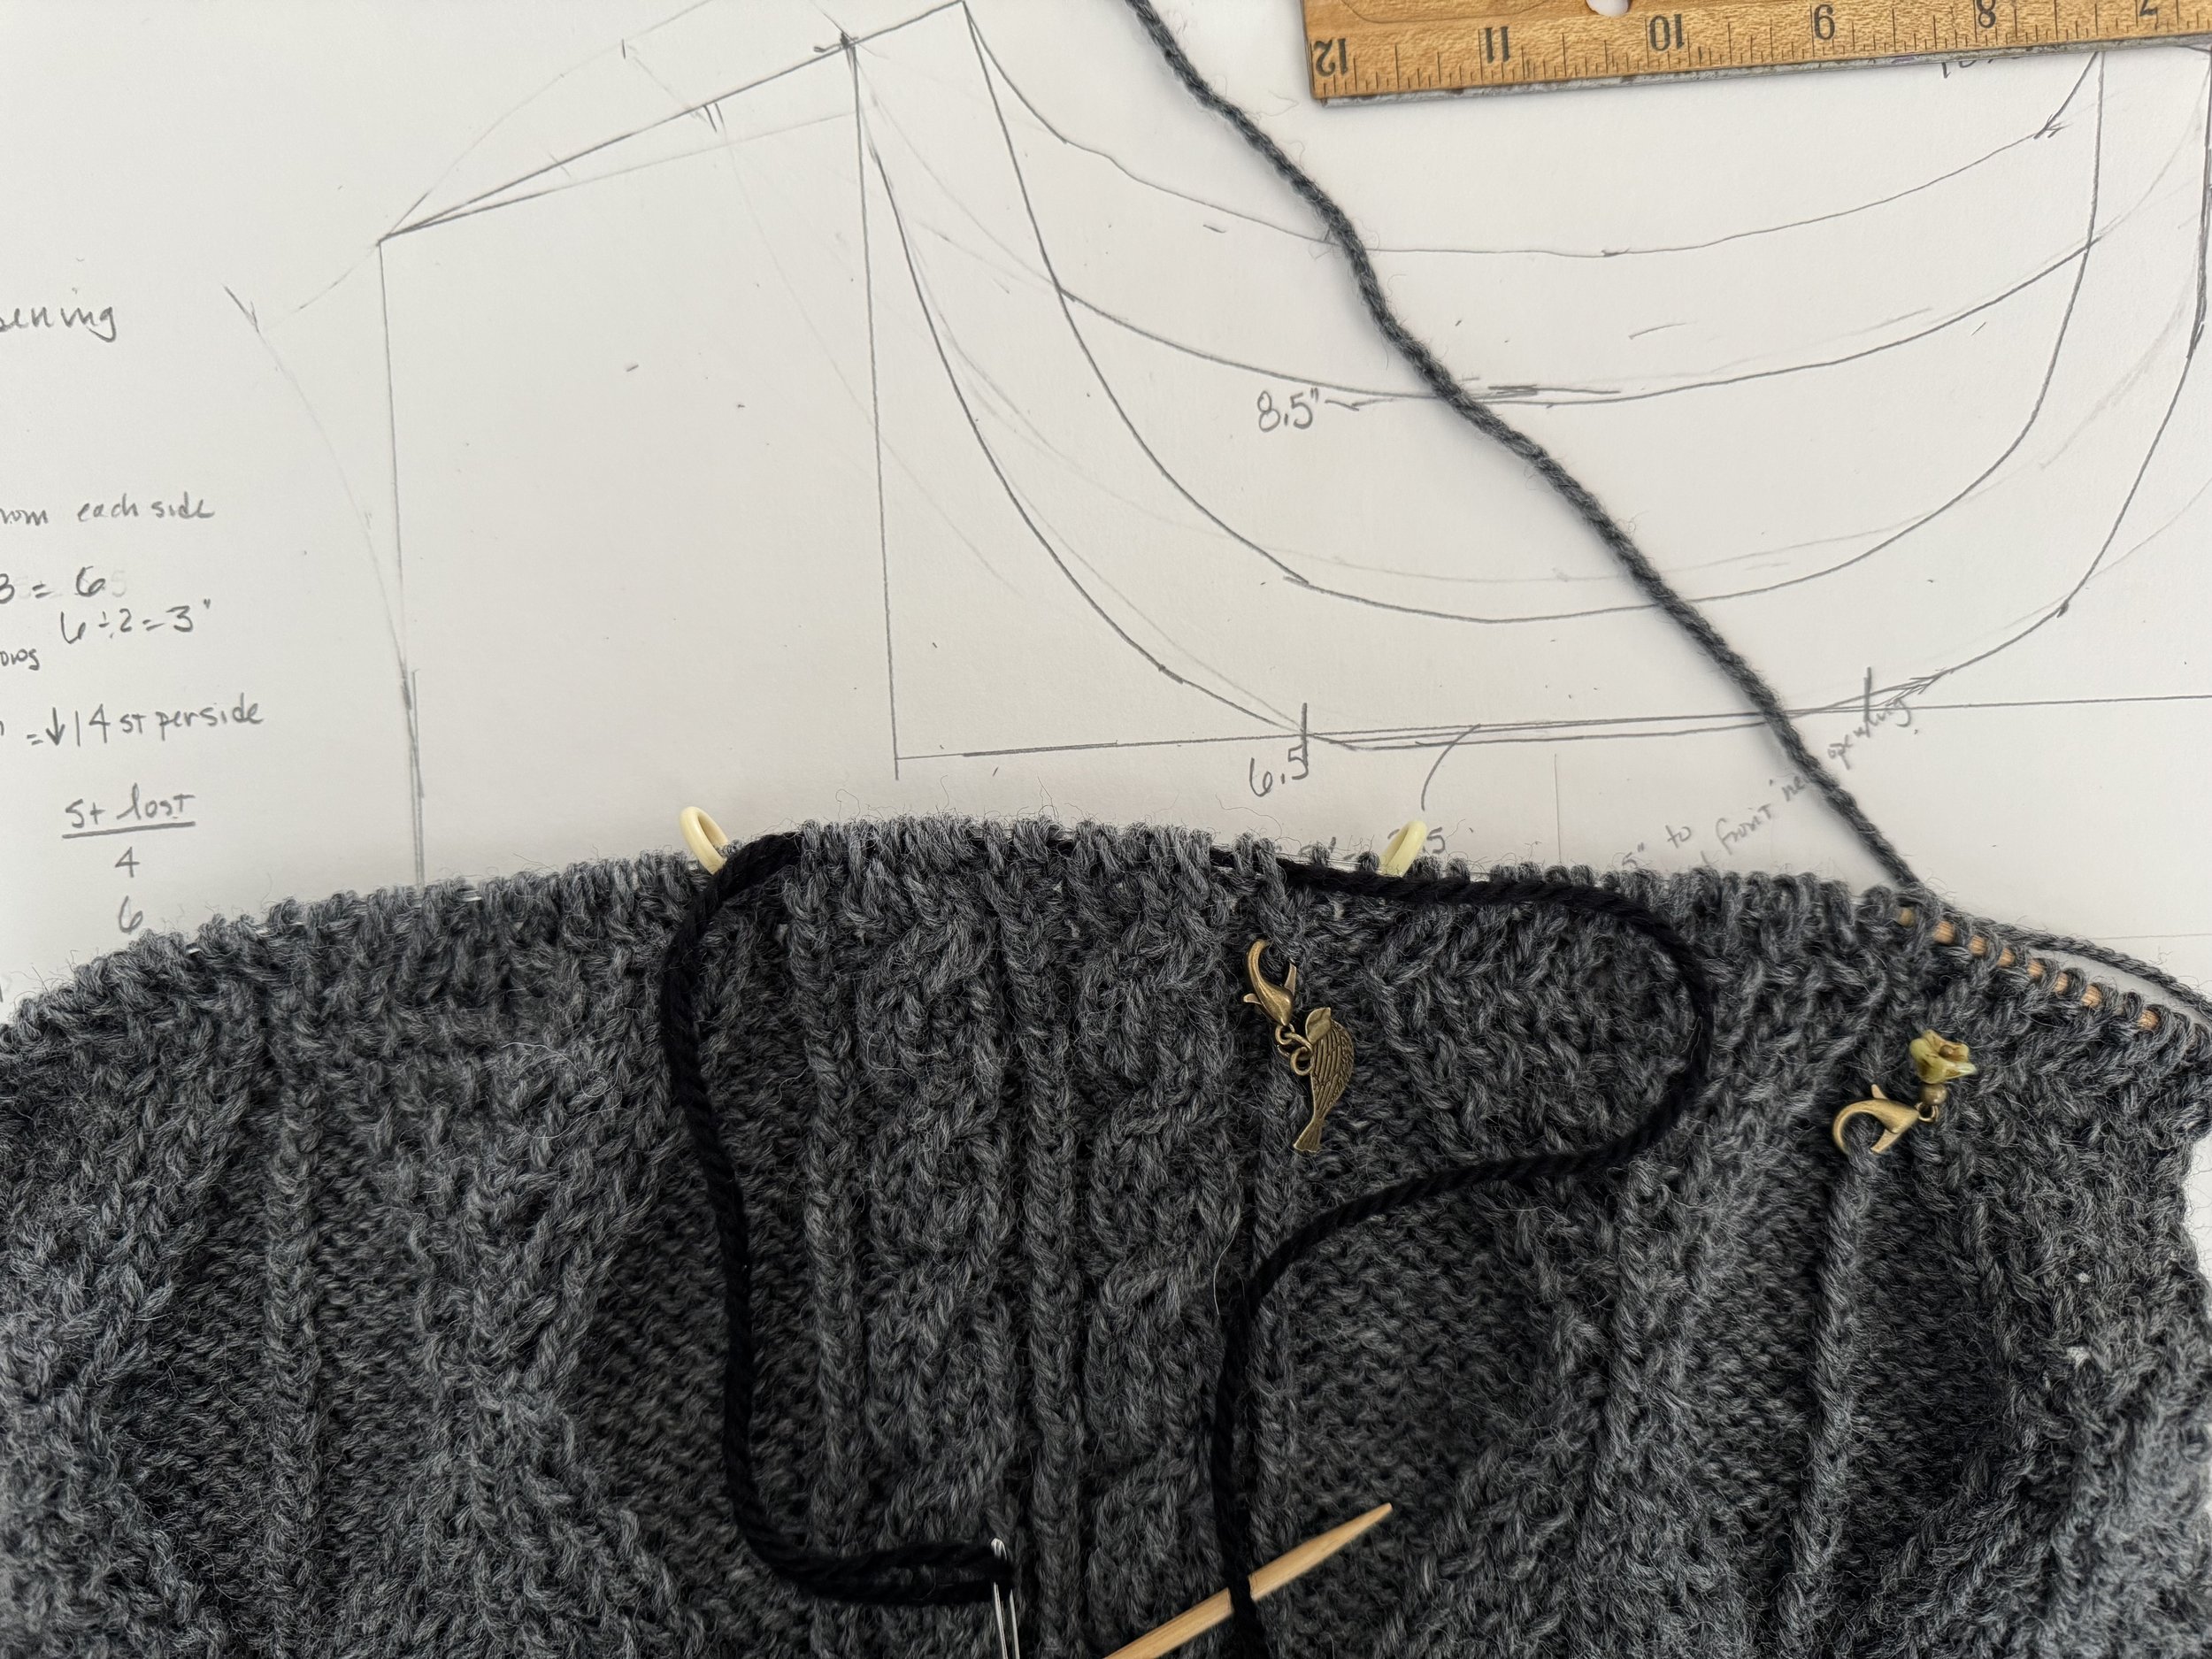
center 21 stitches on waste yarn
This is handy; I am done making cables on the front and I can just remove my little markers, because the only stitches left of my non-fishnet pattern are purls.
I will, however, knit the last stitch of every RS row, as before.
-
corrected chart
Getting the knitting into my hands reveals all kinds of things. For this part of the job, I am only decreasing at one end of the work, so I needed to adjust my decrease rate accordingly. I am still about to eat up 14 stitches at the neck edge, but most of the decreases will be on the RS of the work.
-
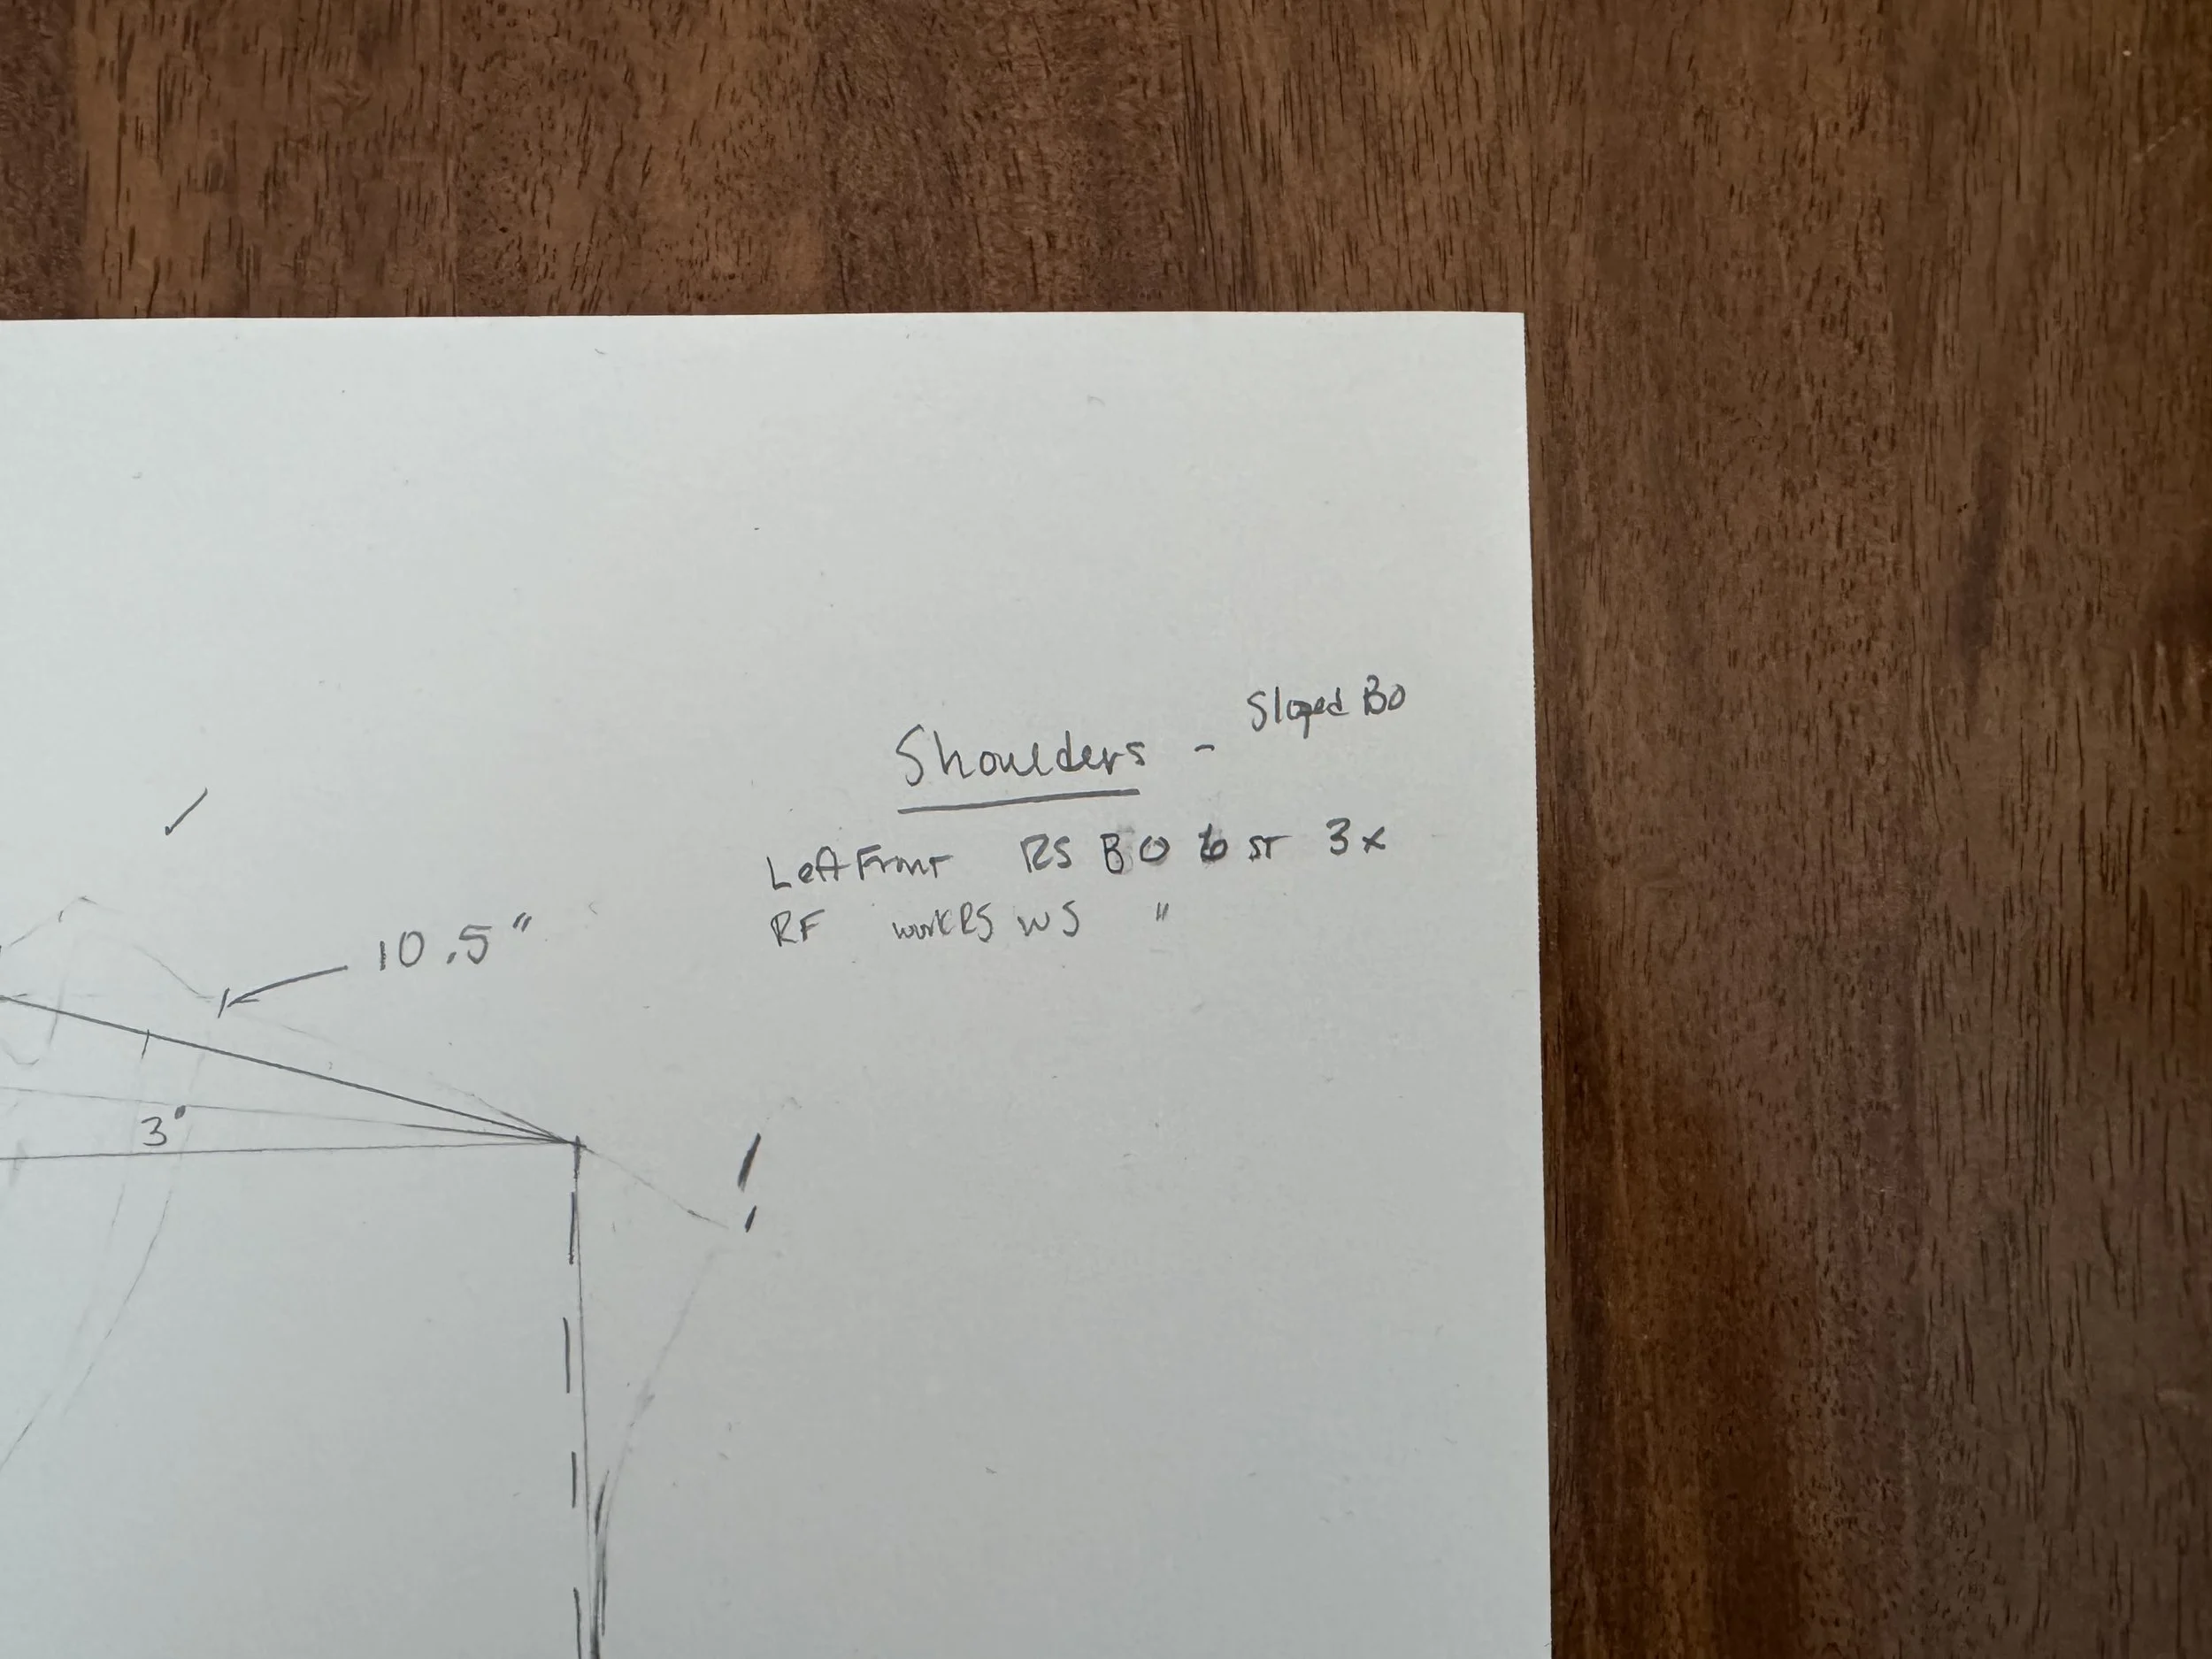
when i get this far
I want to have a little triangle for the shoulders. I need about 3” so want to have 18 stitches. Over 5 or 6 rows, I will decrease 6 stitches every other row. That will eliminate all of the stitches on this side of the front.
-
and just like that
I used a sloped bind-off on the shoulders and liked it so much that I used it for all of the binding off on the other side of the neck.
-
see the difference?
On the right is the non-sloped bind-off and it looks a bit irregular. On the left is the sloped bind-off; it looks smooth and even.
To do a sloped bind-off, do not work the final stitch of the previous row. Then, as you are about to start working the bind-offs, slip the first stitch and then, without working the second stitch, pass the first stitch over the second. Continue with binding off in the regular fashion, working a stitch and passing the previous stitch over it.
One warning: Do not work the sloped bind-off if you are only binding off one stitch. If you do, your work will get really short on the bound off rows and you will have to take it all out and start over again. Ask me know I know.
-

ready to work on the back
I will decrease for the underarms in the same way I decreased on the front. And then I need to work 3.5” before I can start on the neck decreases, as I want my back neck opening to be 2” higher than my front neck opening.
-
I only have about 2" for these decreases
The binding off will be rather extreme on the first couple of rows and then it will smooth out a bit.
I also have to remember to start the shoulder slopes, on the armhole side, when I have 6 rows to go.
By the way, when you do these flat decreases, sometimes you are binding off on the RS and sometimes on the WS, depending on which side of the garment you are tackling. I used to worry about the rows not matching up, but they will, as long as you make a chart for yourself and stick to it with all the doggedness you can muster.
-
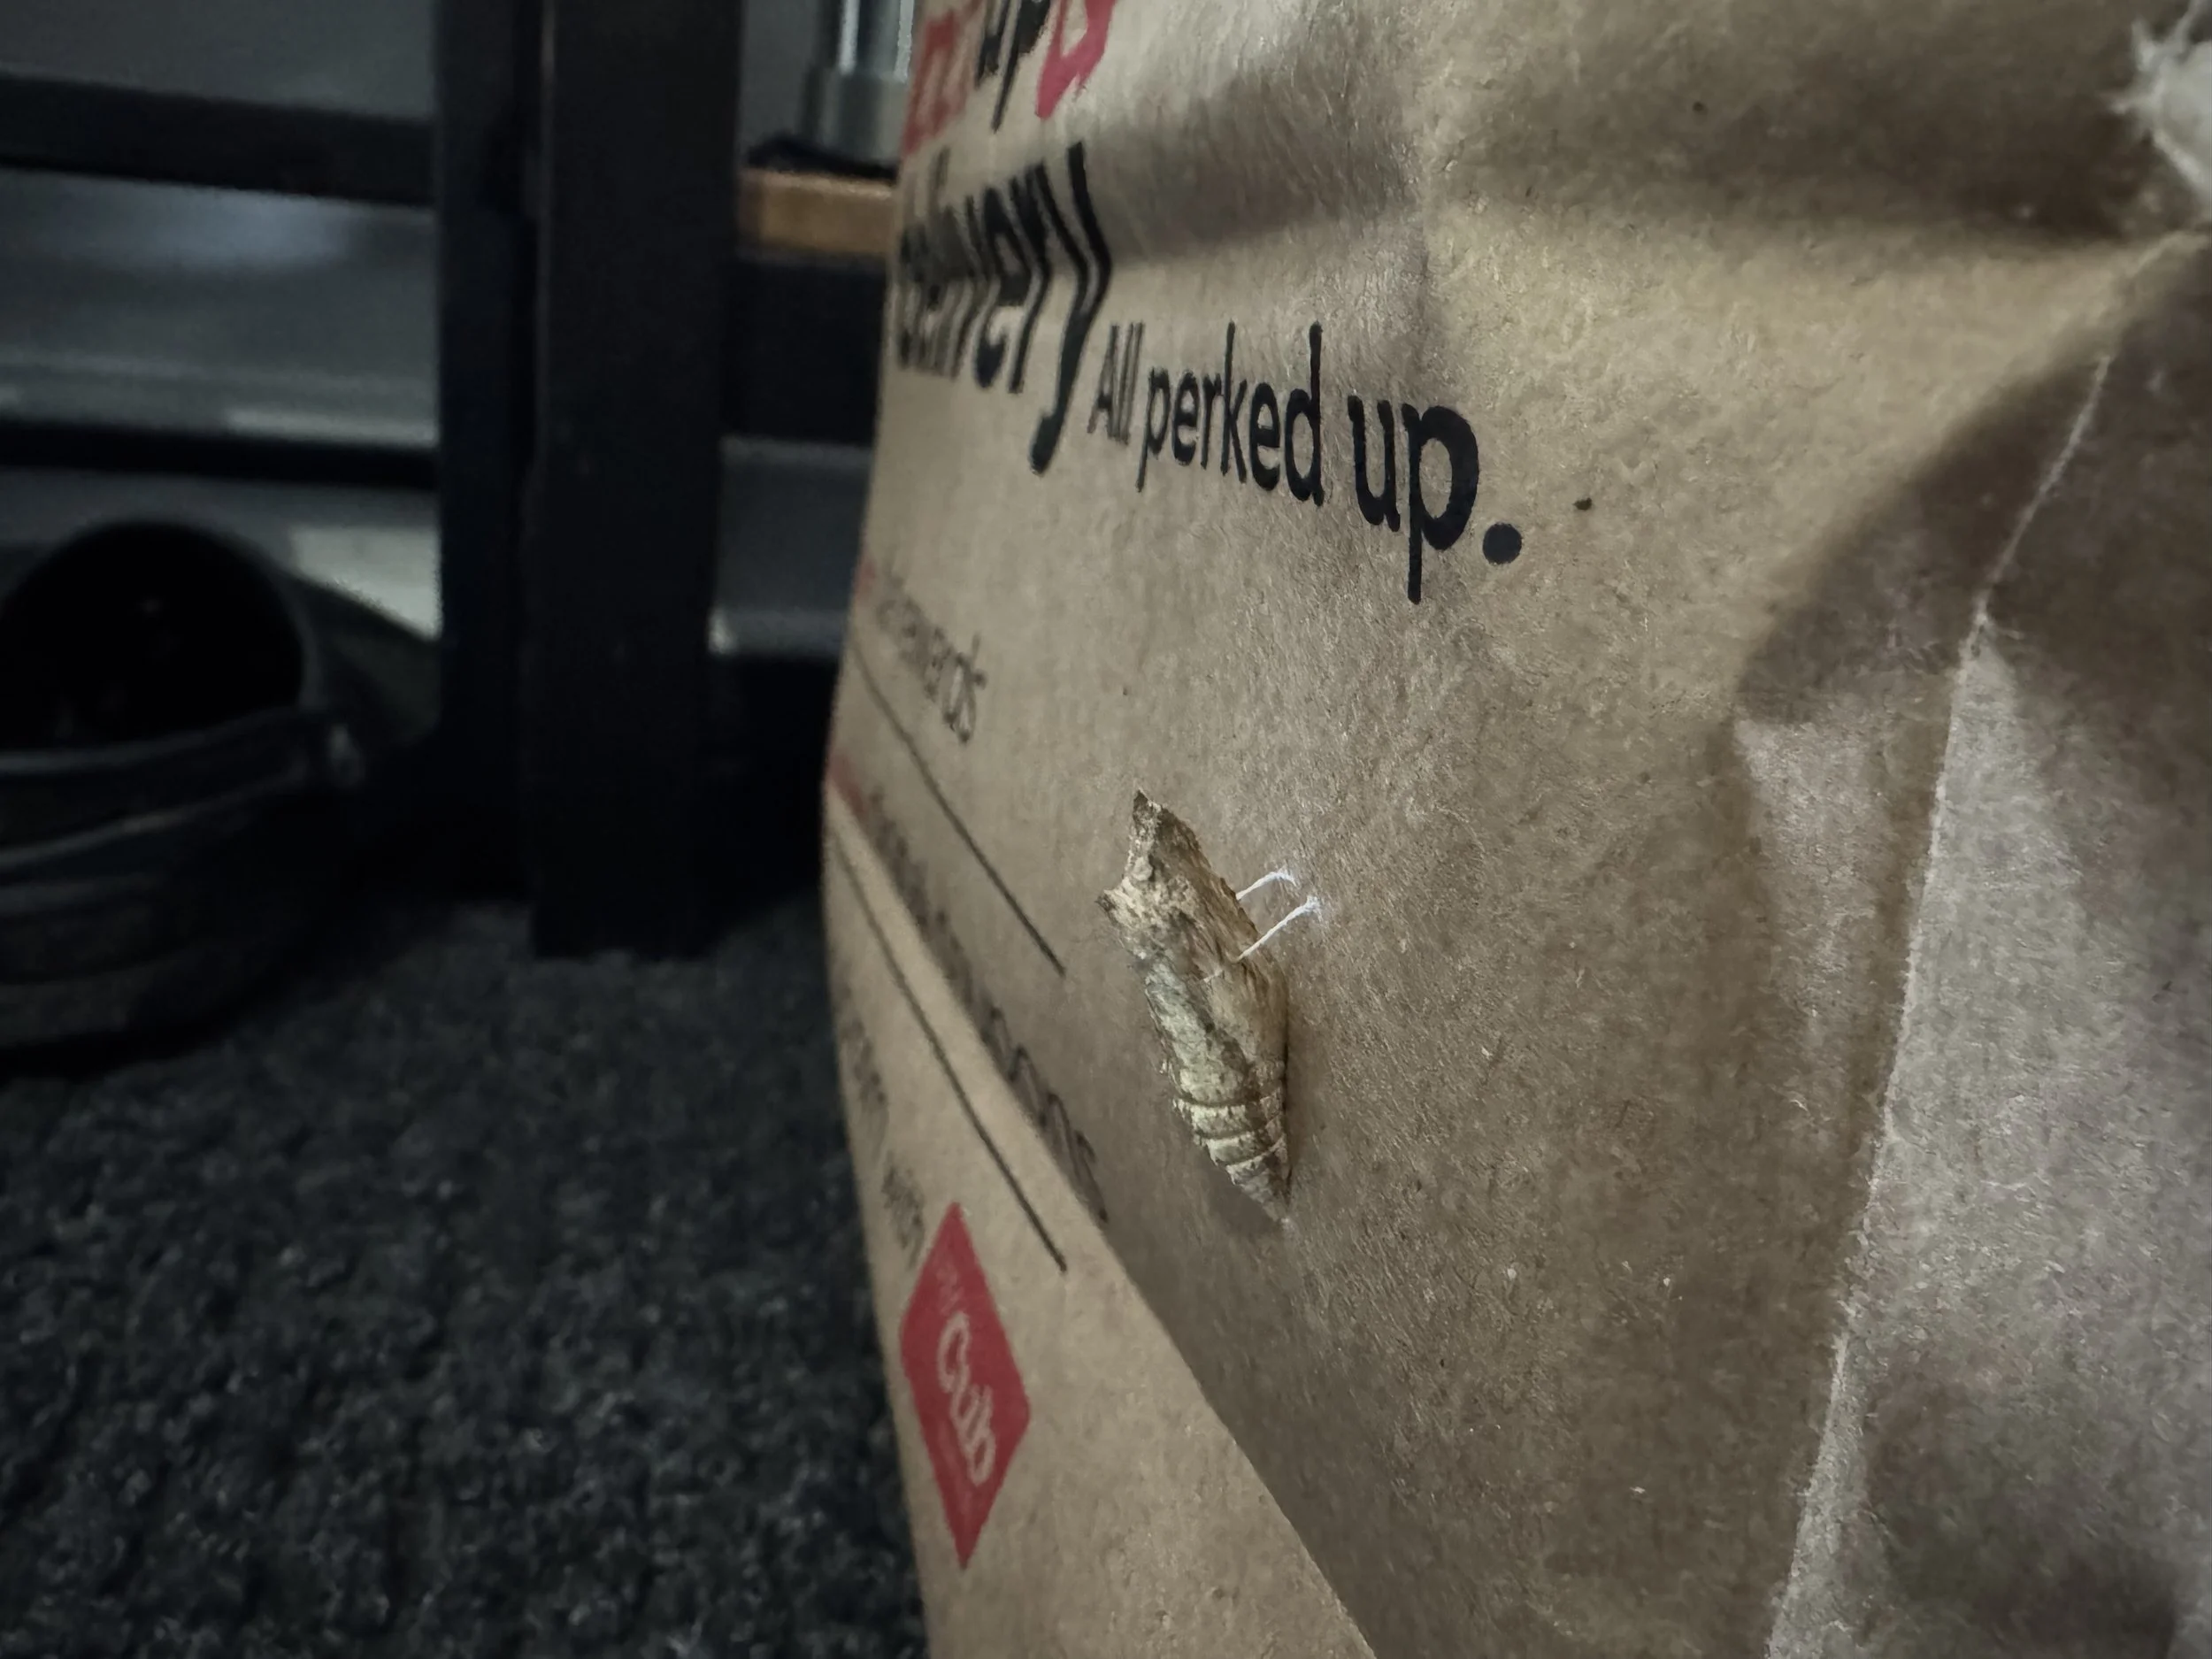
a house guest
We brought in a bag of printer cartridges from the garage on their way to be recycled, but it looks like a swallowtail caterpillar chrysalized on it. It is now sacred and we moved the cartridges to another bag and the chrysalis is back in the garage, waiting for spring. We will be sure to keep a sharp eye out, as we do not want a hatchling flying around in the garage in April or May.
-
back is done
So here we are. I am pretty sure that this is all going to match up. I have been pondering the sleeves and think I have a good plan.
-
and on to the sleeve
First, some measuring. The cuff on my “pattern sweater” is only about 8” around. I think I will make mine 9” around.
This cuff is about 2.75” long and I think I will keep that. But I will make mine with k1.p1 rib, not a wider 2 x 2 or 3 x 3 rib.
-
another essential measurement
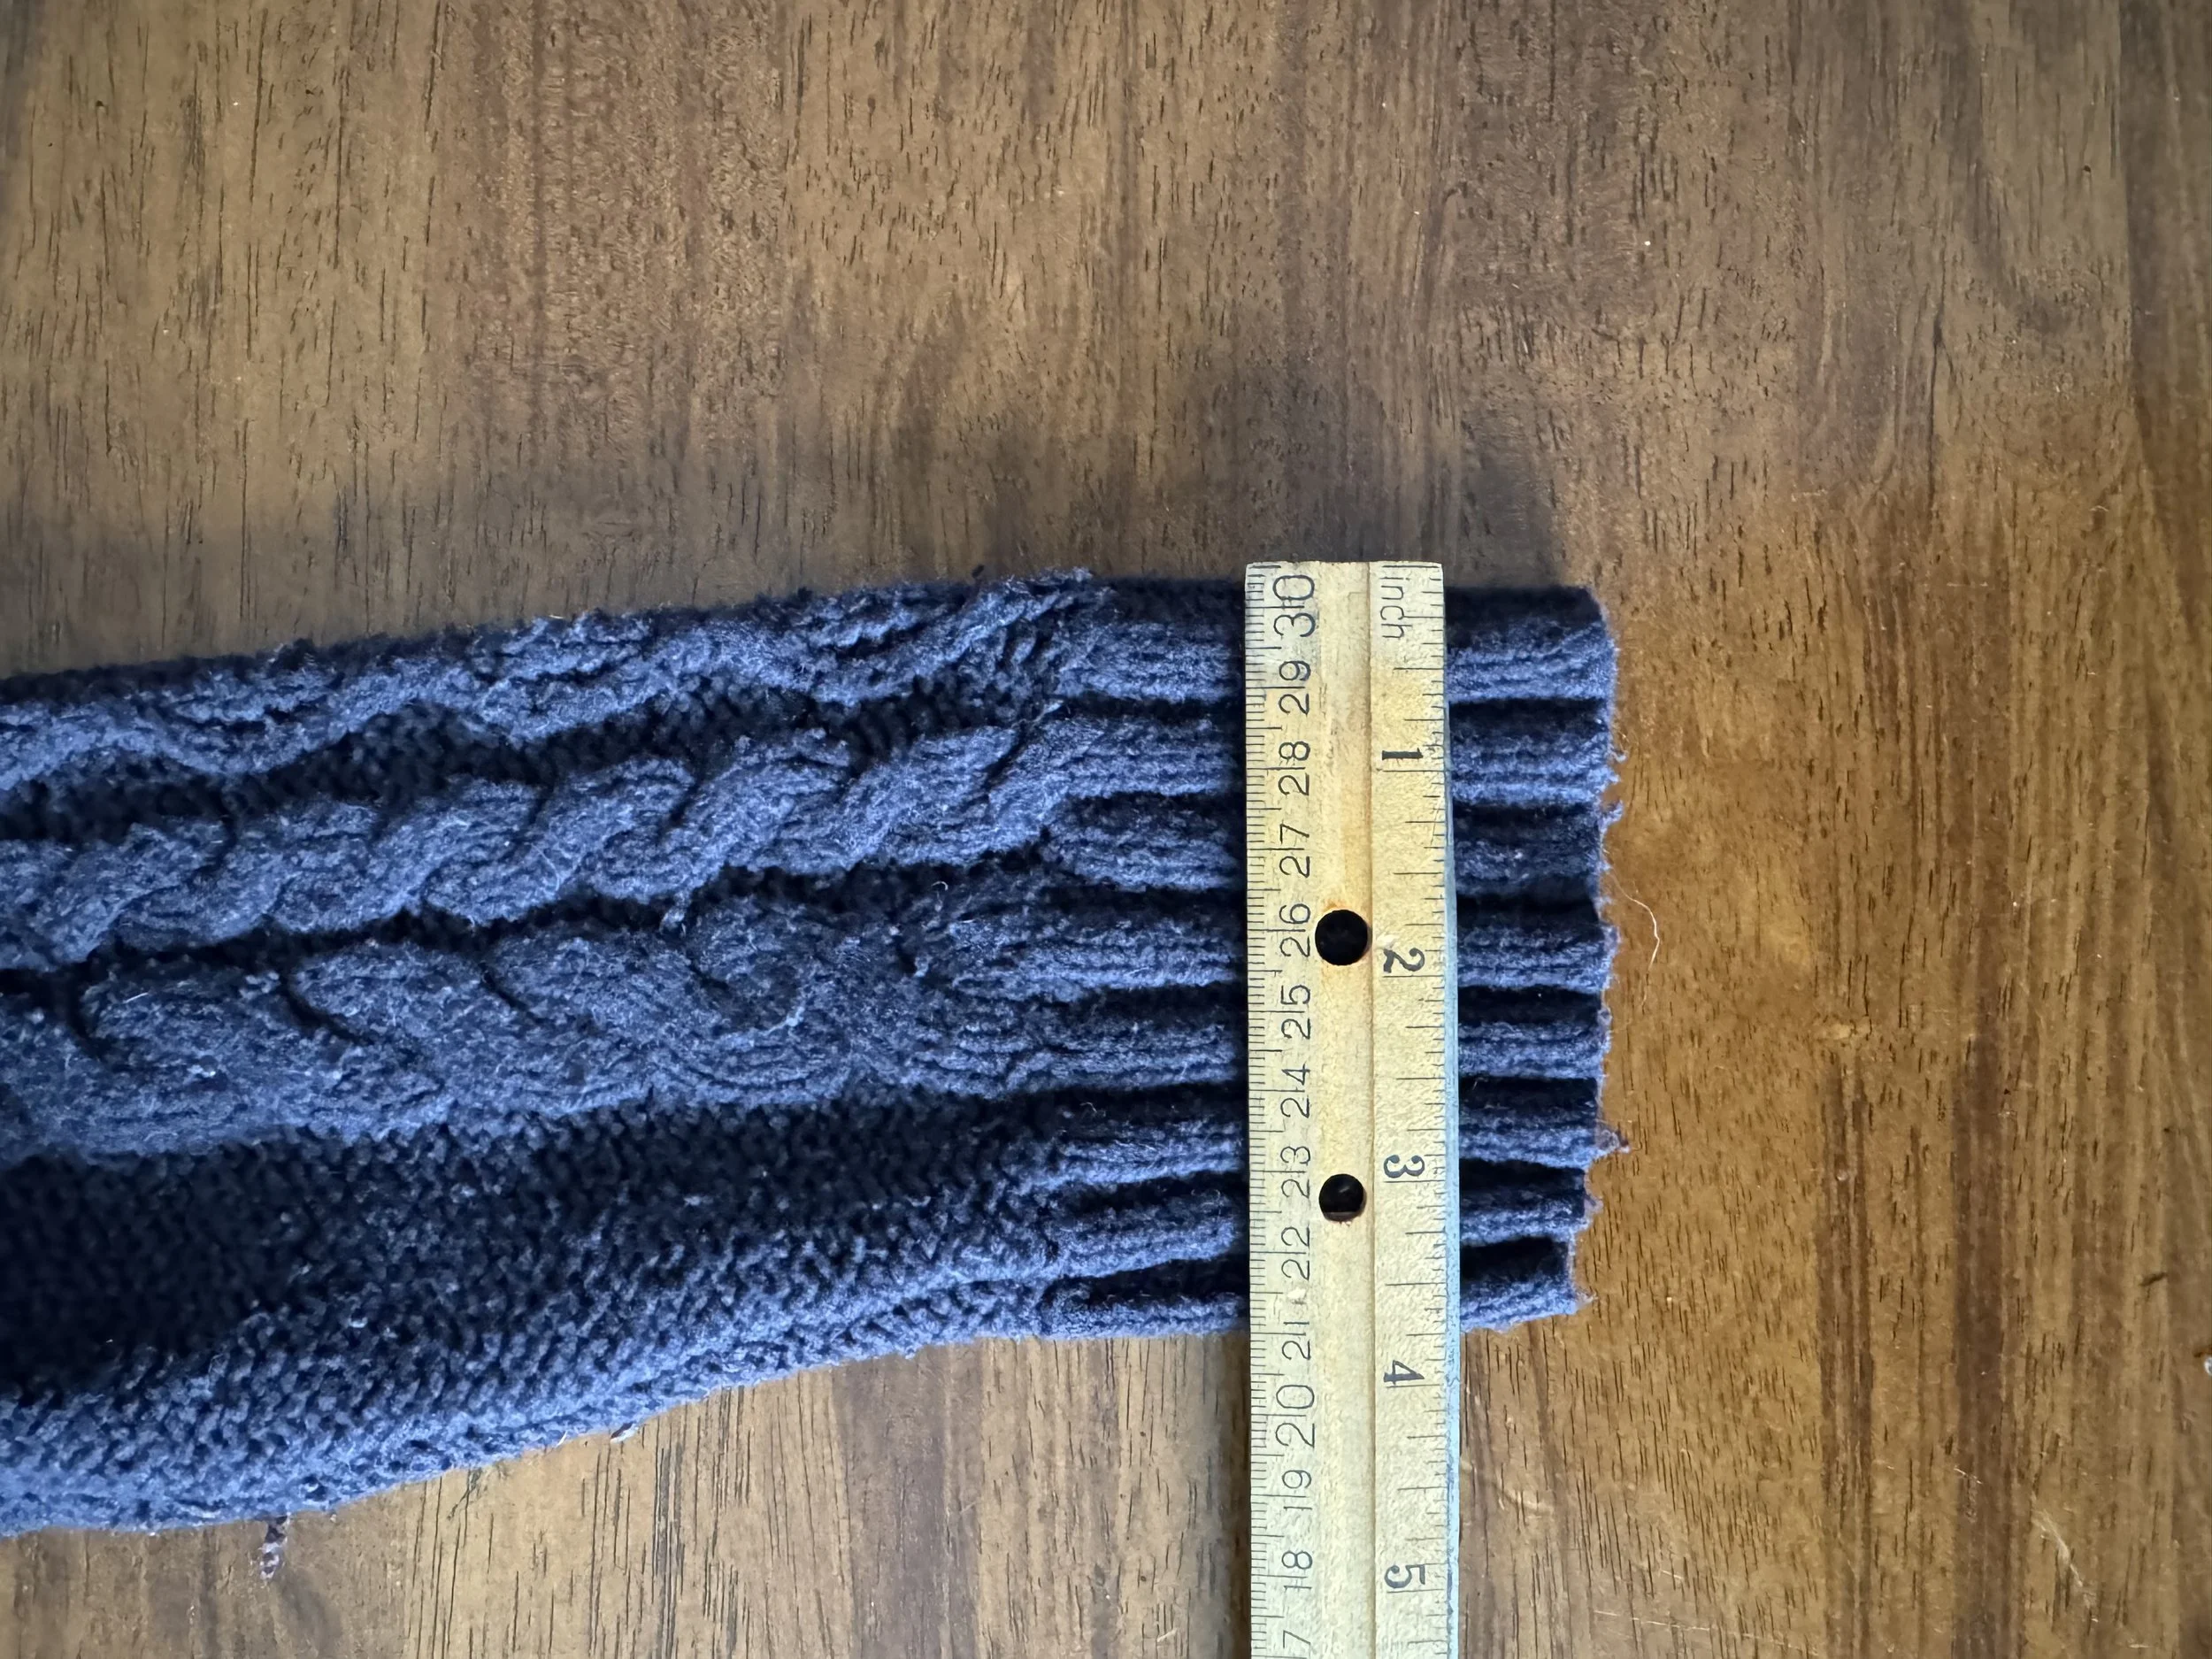
The sleeve is about 12” around at the underarm. I will make mine 13”
-
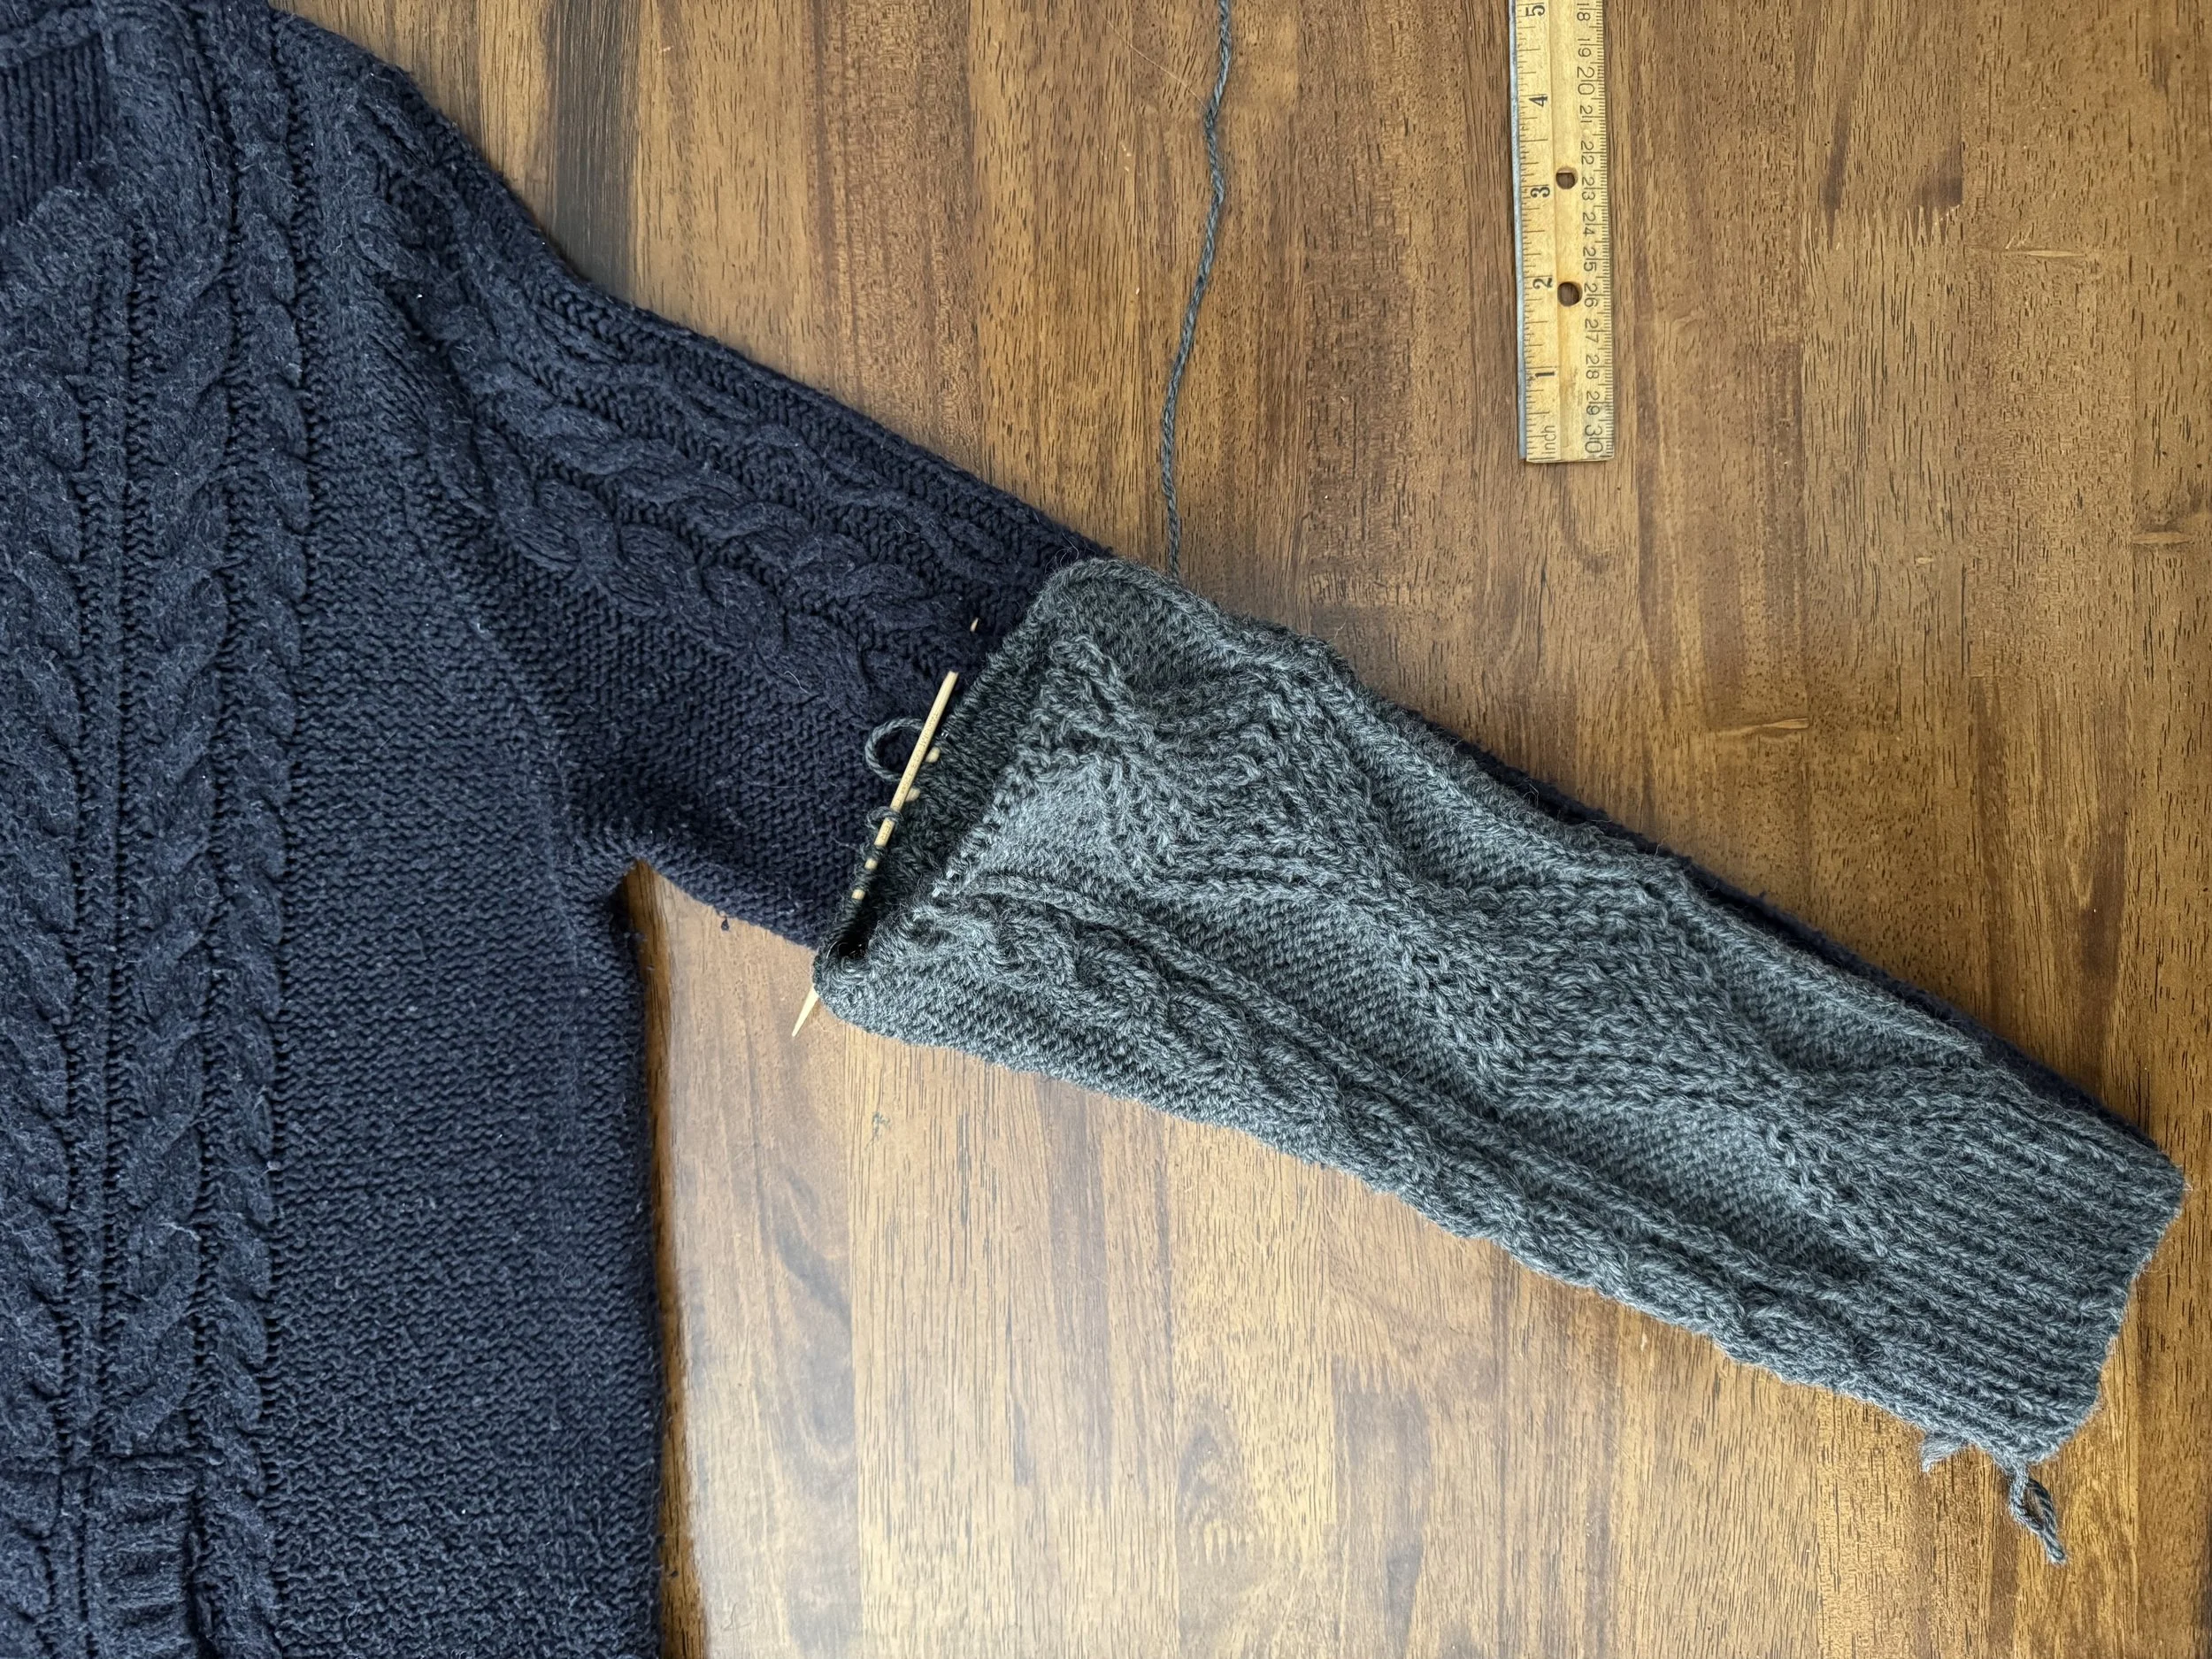
sleeve length
We are at about 17” here. I usually make my sleeves 18” long, so I will continue with the “add an inch” approach I seem to be taking, and make my new sleeves 18” to the underarm.
-
back to the drawing
The distance from the underarm to the top of the outside of the shoulder is about 9 7/8” so that is how long I will want my sleeve cap shaping to be.
-
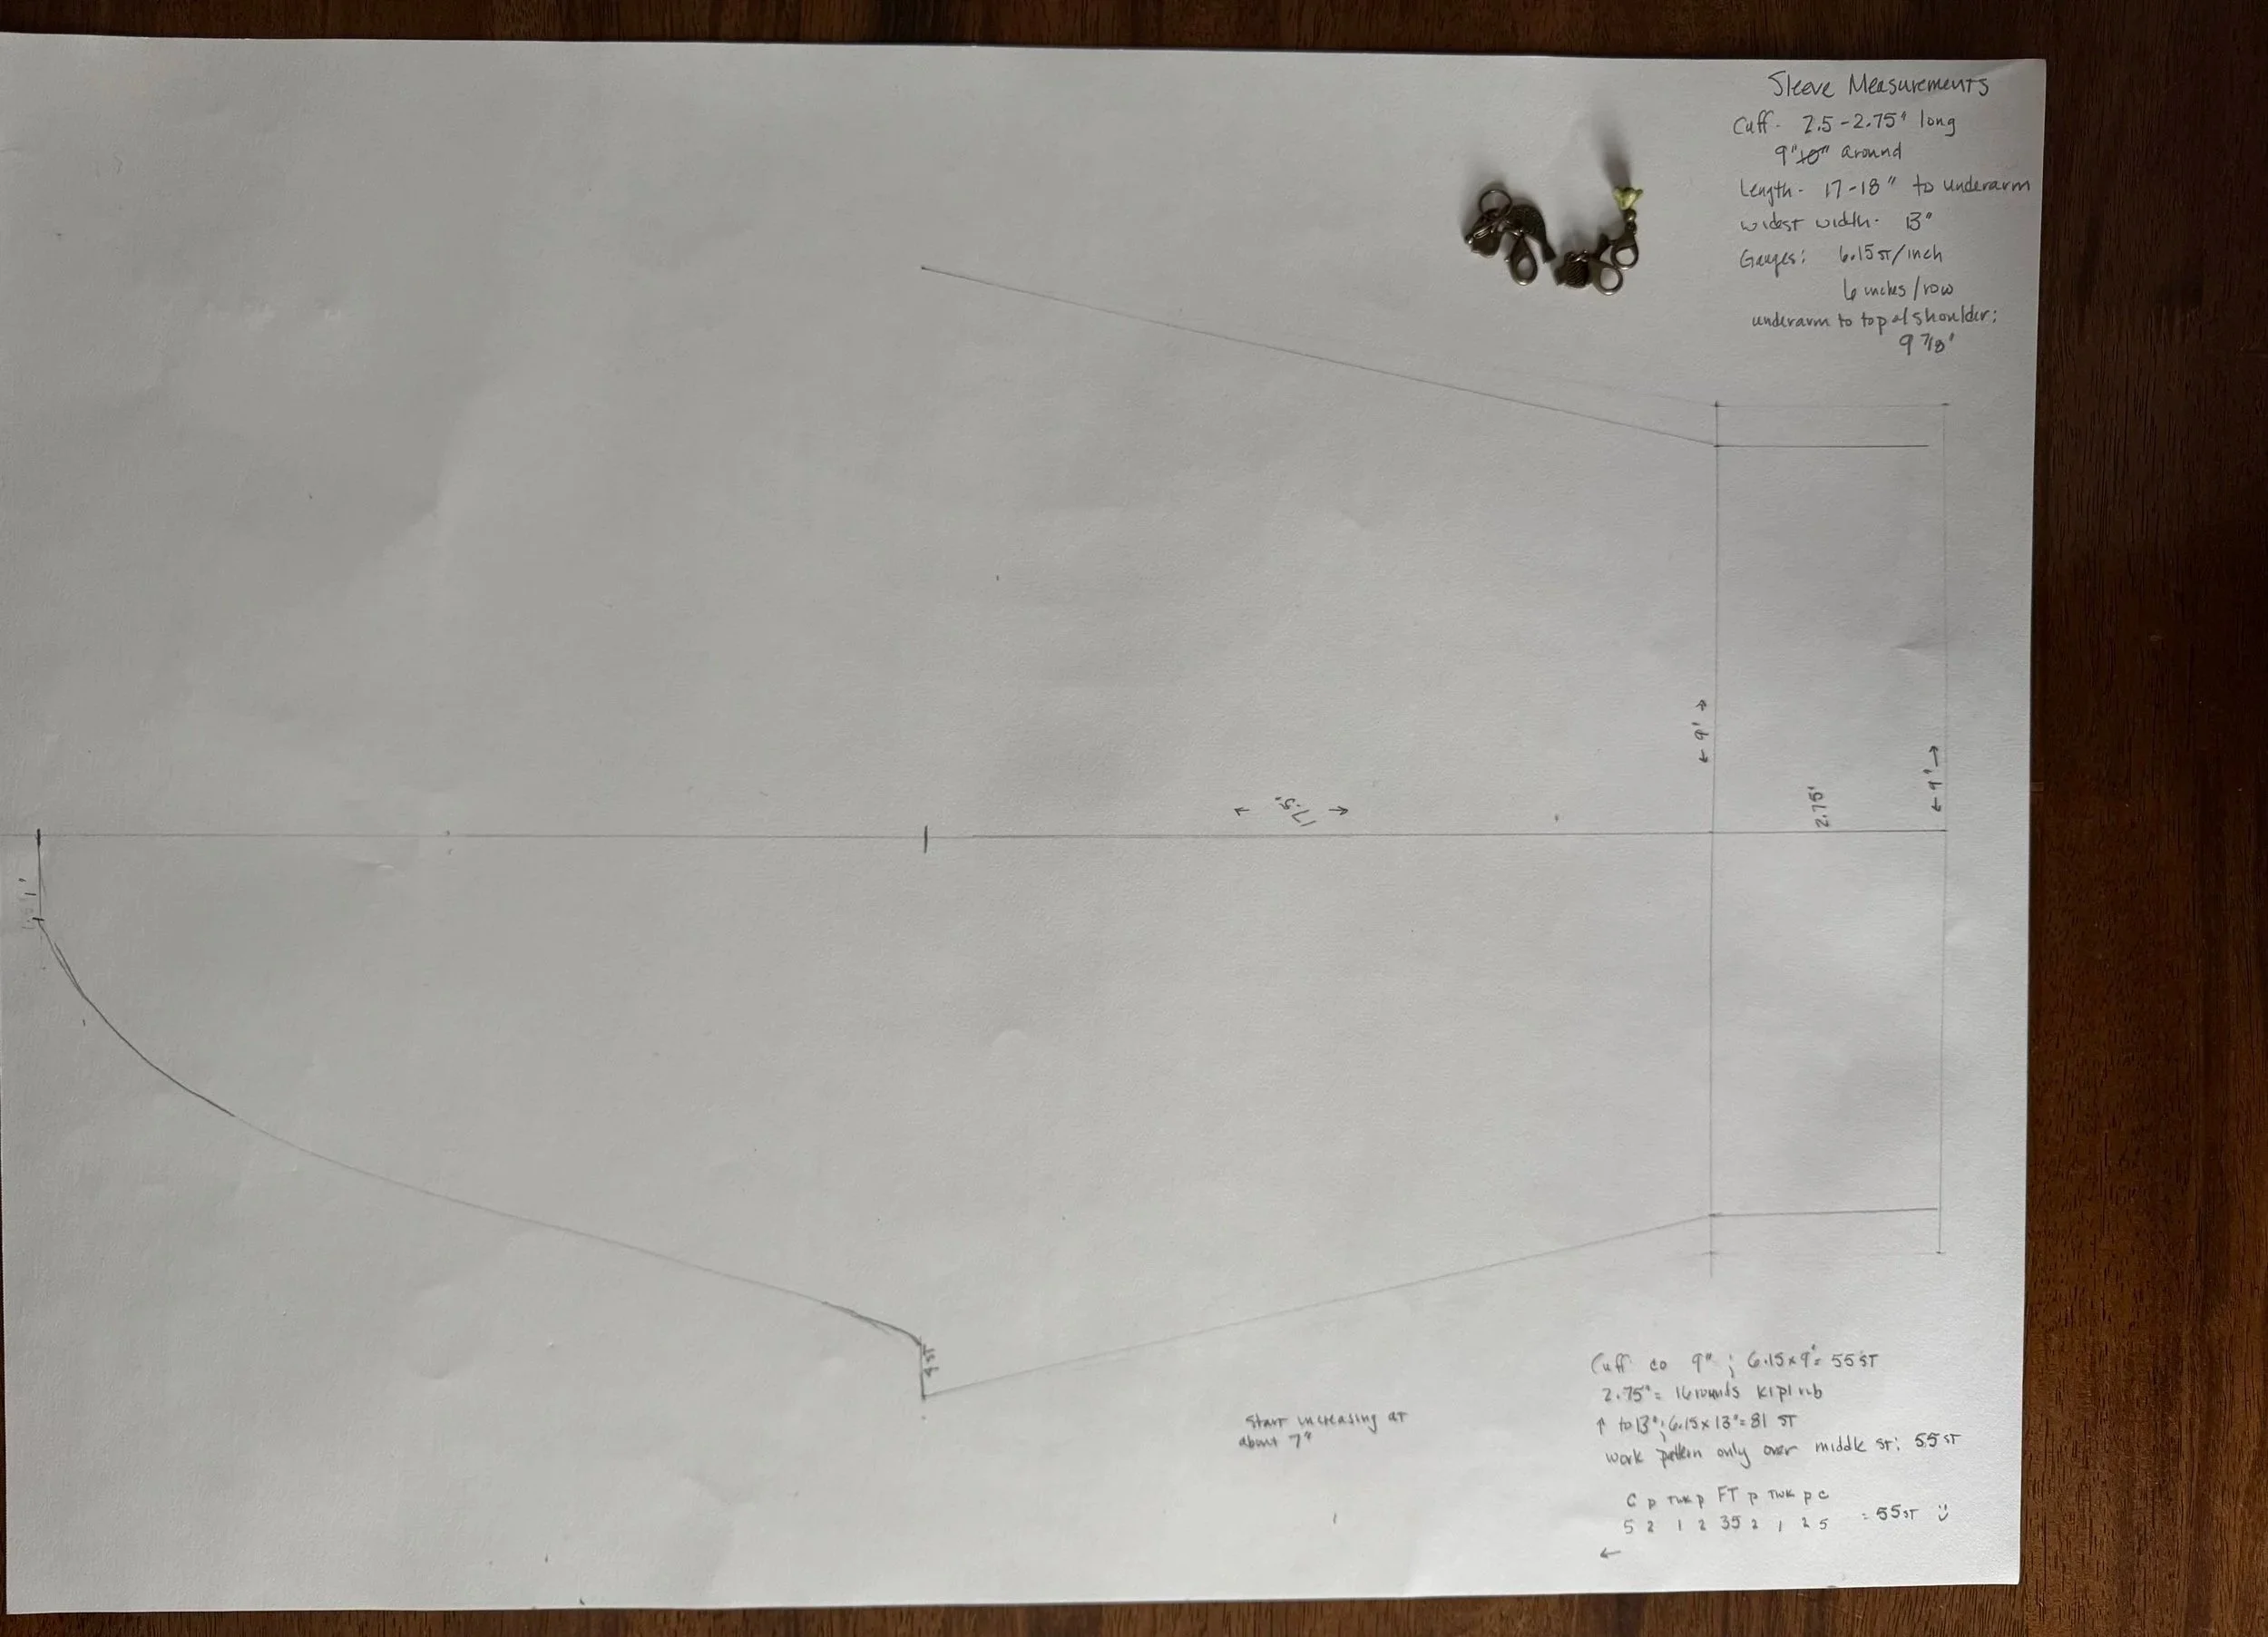
a very light drawing
This is the flip side of my other drawing. I have the measurements for the cuff and the cap, with a squished 15” or so in between for the actual sleeve.
I am going to get started with the main part of the sleeves and then cope with the cap shaping when I get to that point in the process.
-
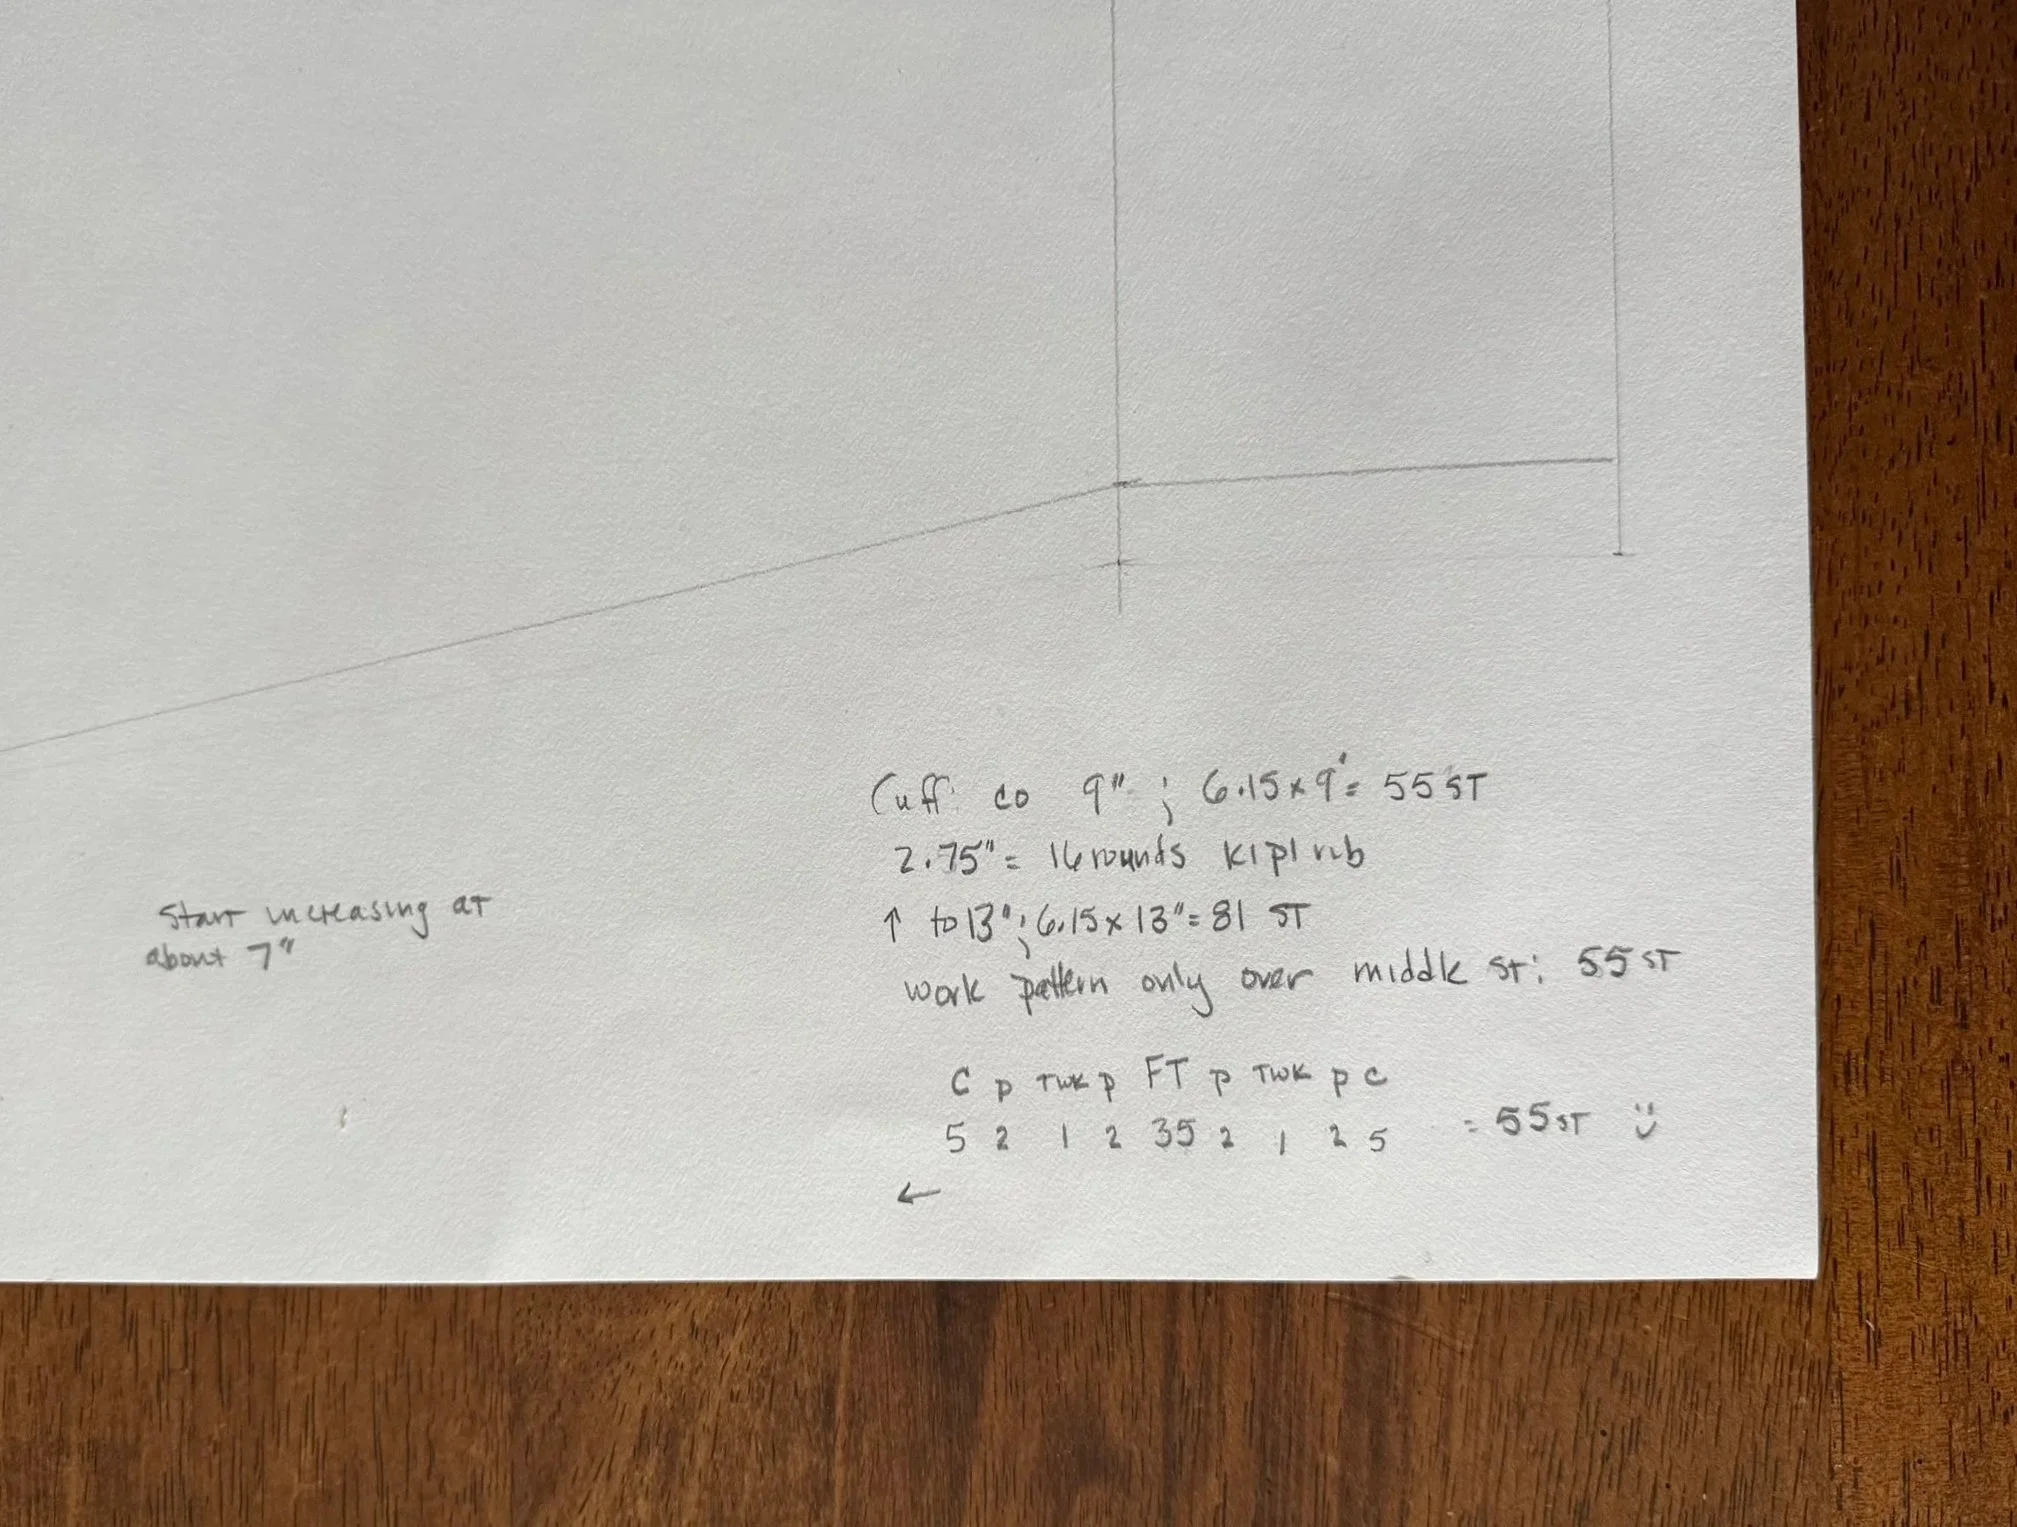
more ciphering
I think that this is all I need to get started. I plan to cast on 55 stitches for the cuffs and then keep working those 55 stitches for a few inches before I start increasing.
I am fortunate in that a full repeat of my patterns takes exactly 55 stitches. I will work the pattern on only those 55 stitches and the stitches that I increase will all be purled. They will sit underneath my arm and I think I would prefer that they not be patterned; this should eliminate a bit of bulk. Though the patterned stitches do sit fairly flat.
N.B. I only cast on 54 stitches, as I wanted an even number for the ribbing. I will add that extra stitch when the ribbing is done and I am ready to begin the patterning.
-
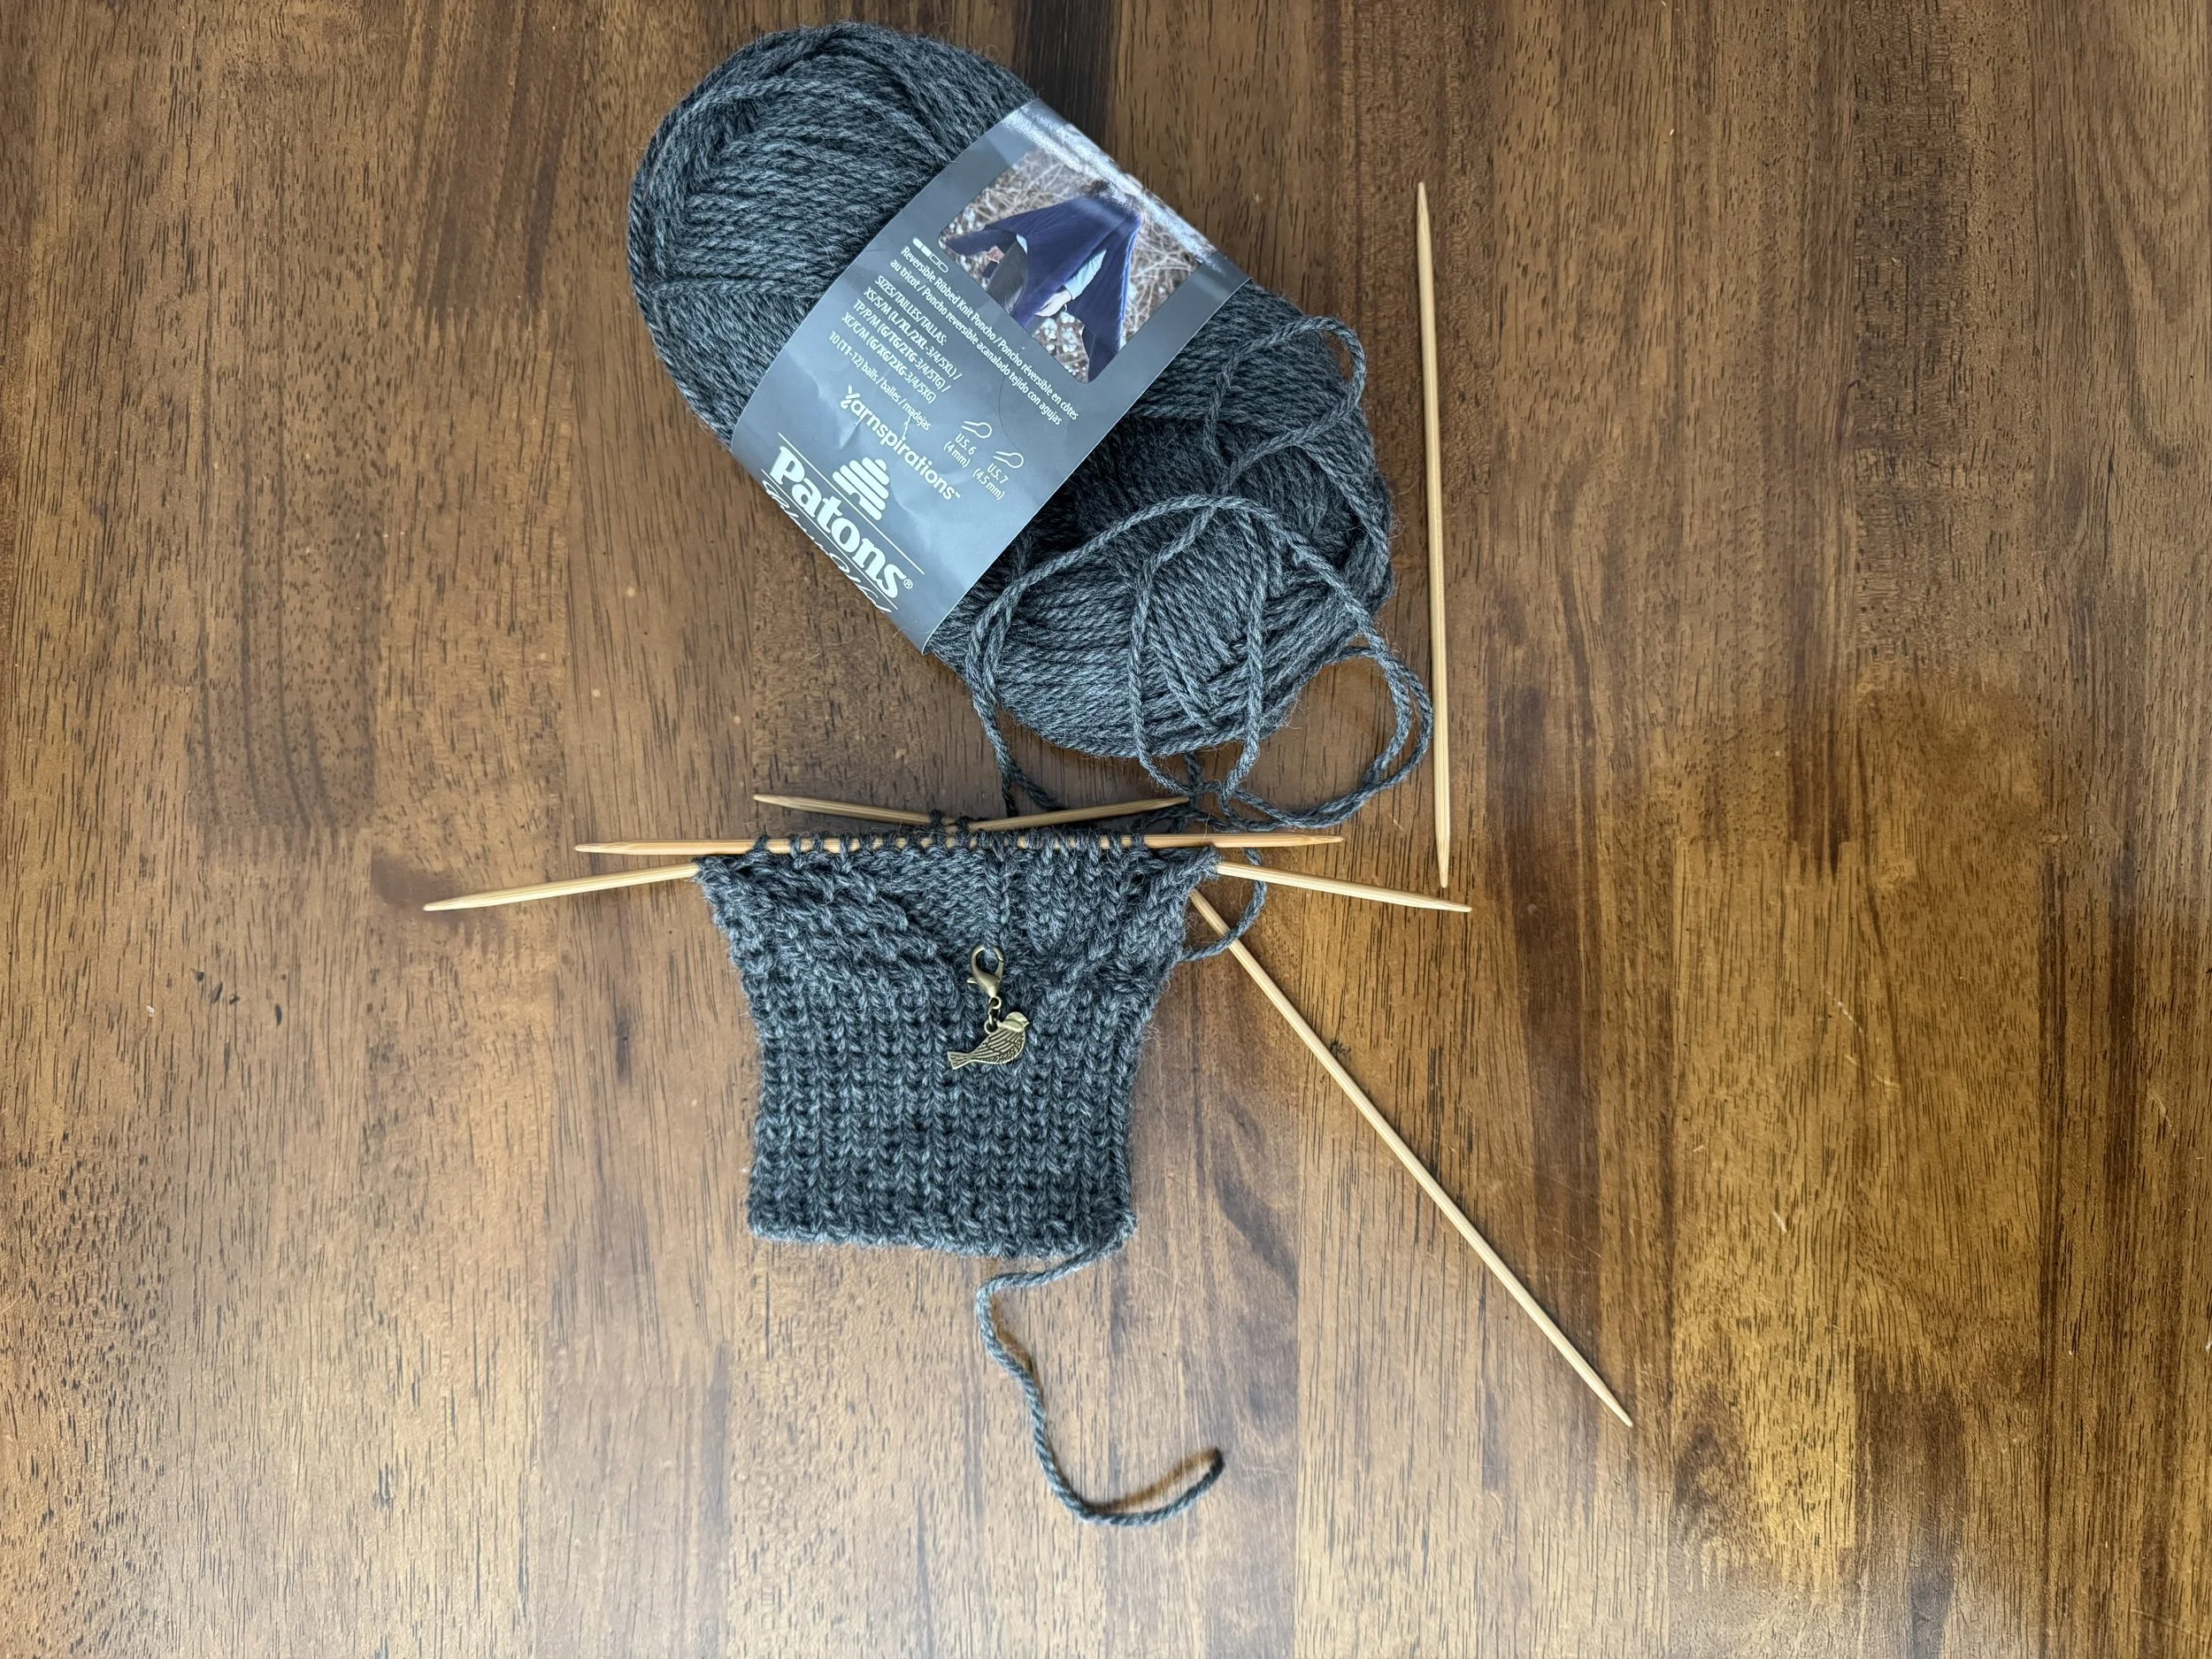
55 stitches knits up a lot faster than 240
There are actually only 54 stitches on the cuff and there are 56 stitches of patterning. So I guess I am averaging 55.
I ribbed 18 rounds here to get to about 2.75”. That seems like more rounds than I worked for the body, but there we are. I used my same No. 3 needles that I am using for the patterning.
-
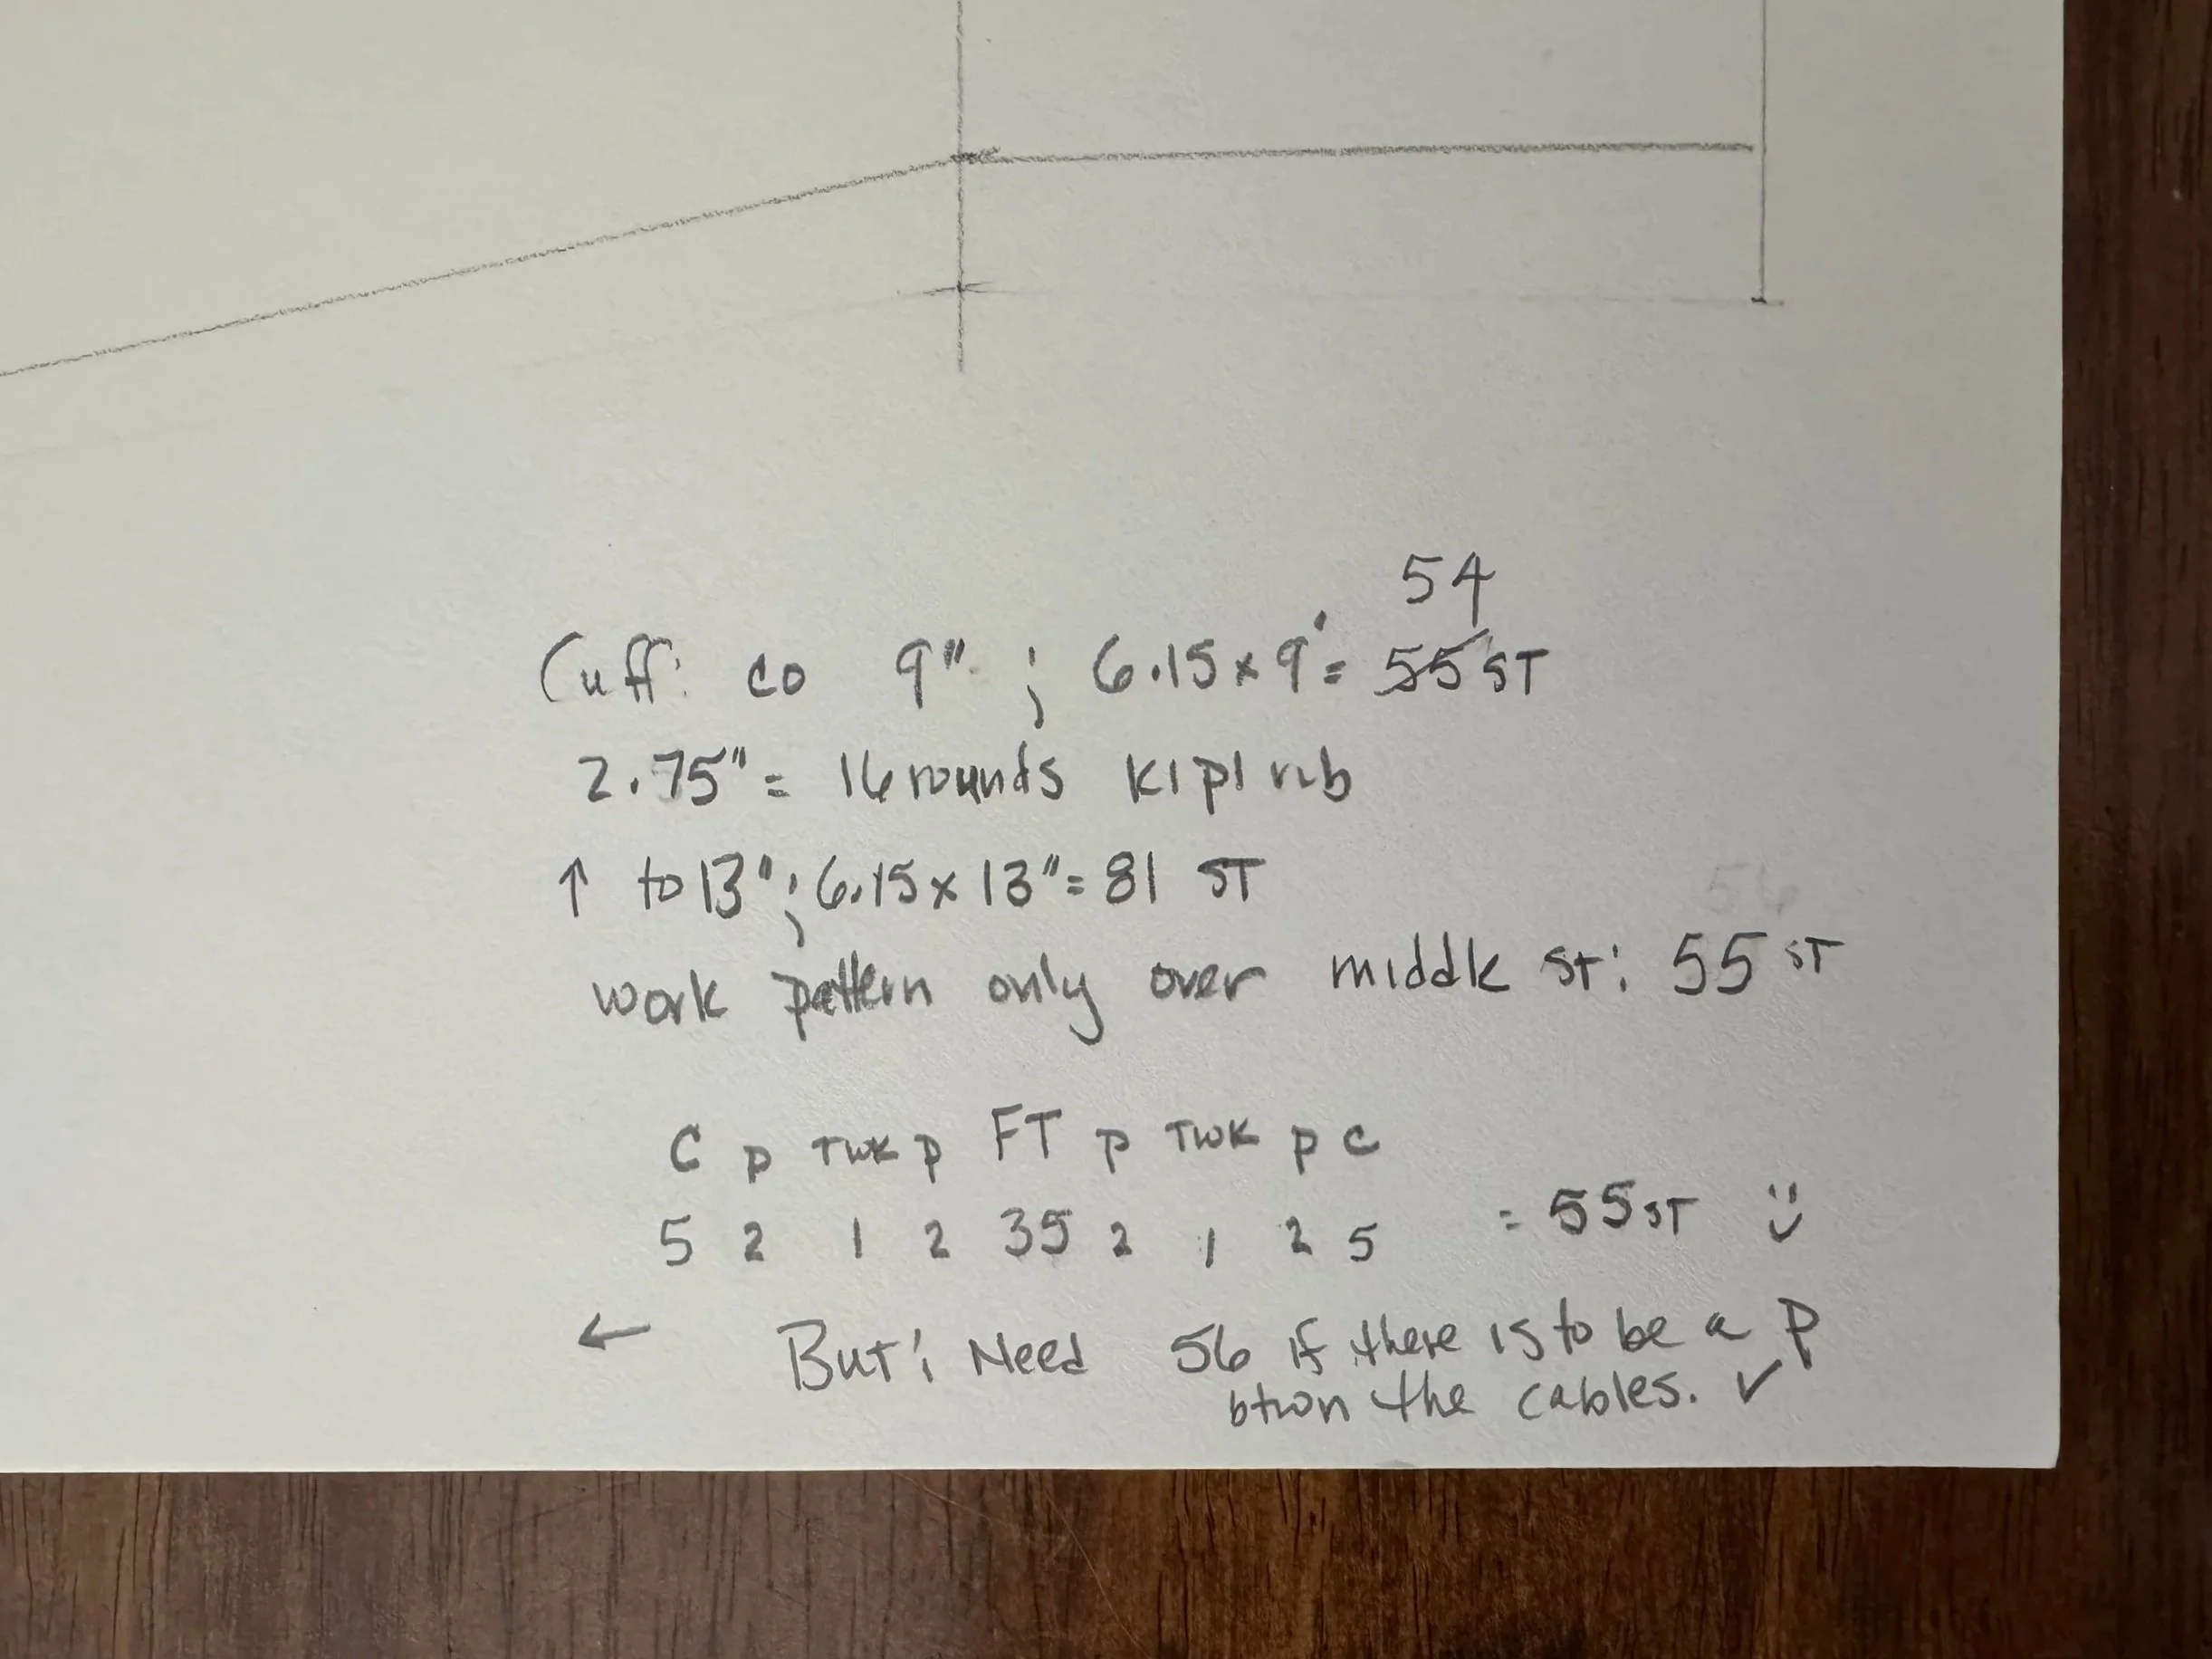
the best laid plans
Not gone a-gley, but they do need a tiny bit of tinkering. I want a k1.p1 rib, so of course I need an even number of stitches; hence the 54 stitches cast on.
And when I started the patterning, I realized that I need a buffer stitch in between the beginning cable and the ending cable; hence the 56 working stitches.
-
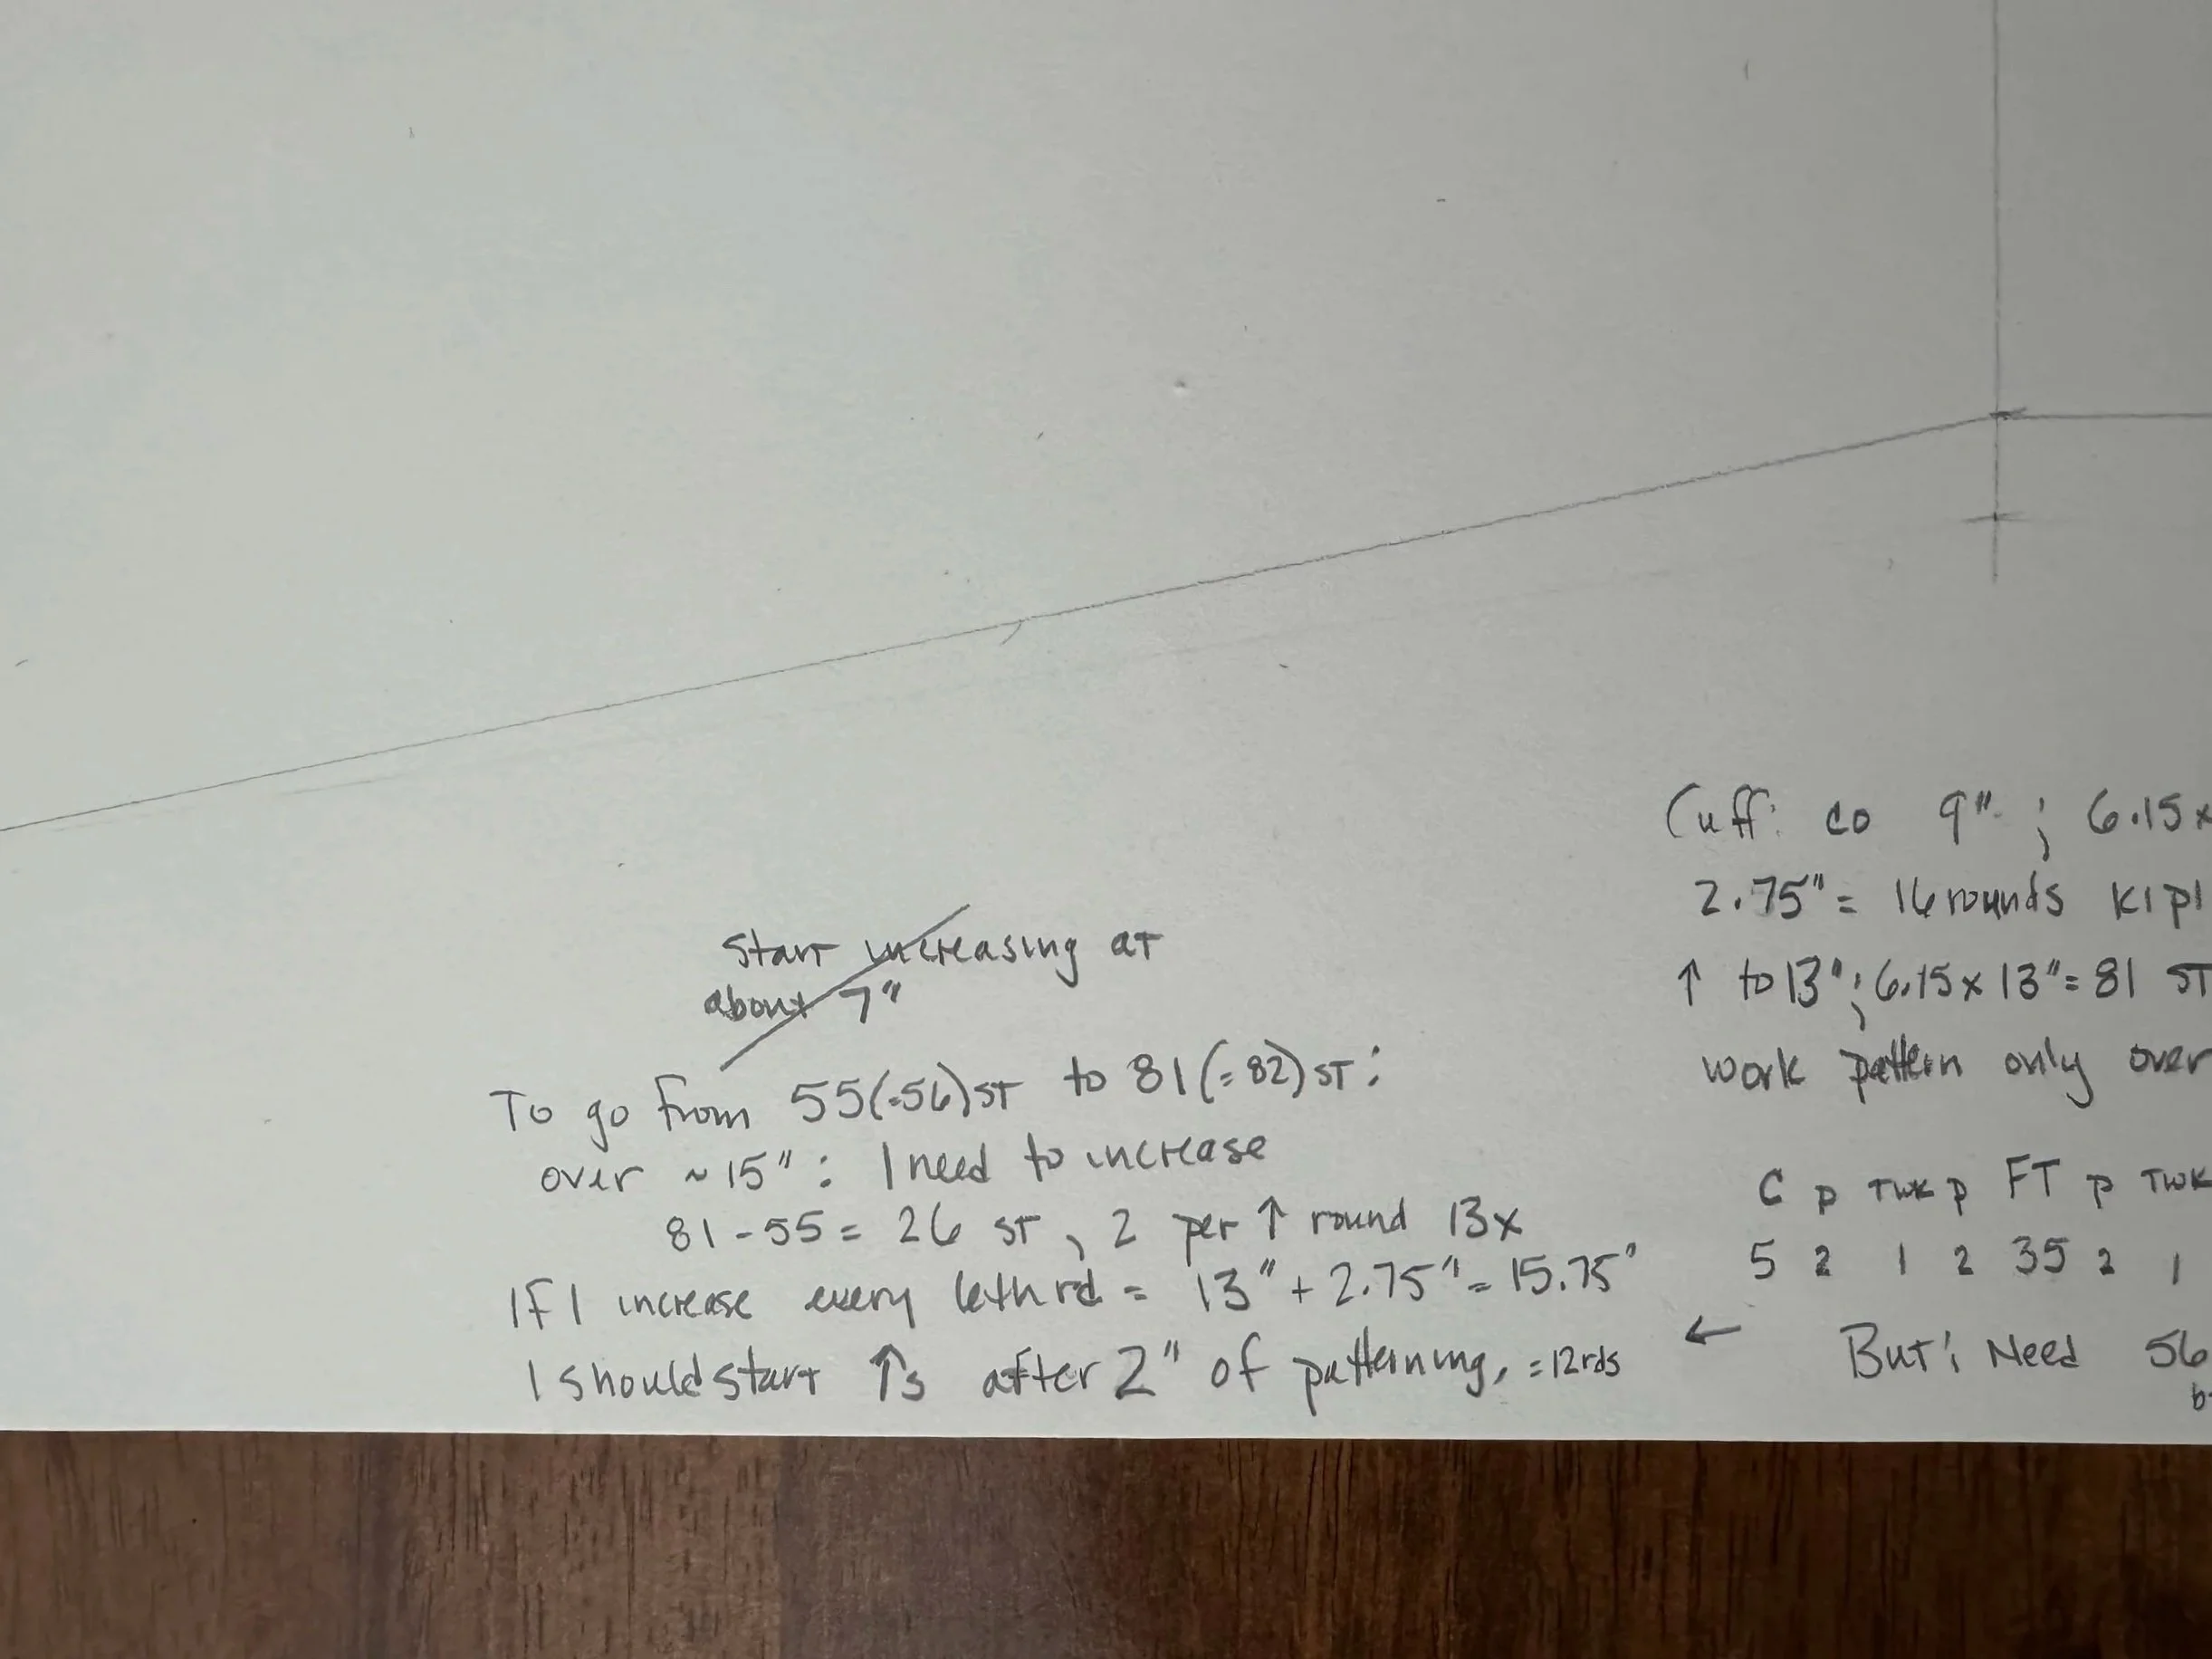
and the planning of the increases could not wait
I will start increasing 2 stitches every 6th round, one on each side of my buffer purl stitch, after I have worked about 2” even; that should be about 12 rows.
-
two options
I am worried that keeping track of cable-twisting every 7th round, increasing every 6th round, and working even on the fishtrap pattern every 2nd round will not be a fun time. But I started this with the sleeve on the right. On the left, I experimented with doing the increases on my cable-twisting rounds; that is, on every 7th round. That takes 33.3% of the mental gymnastics out of the equation and I rather like the way it looks; it slopes more gently and will have less of a balloon effect at the wrist.
-
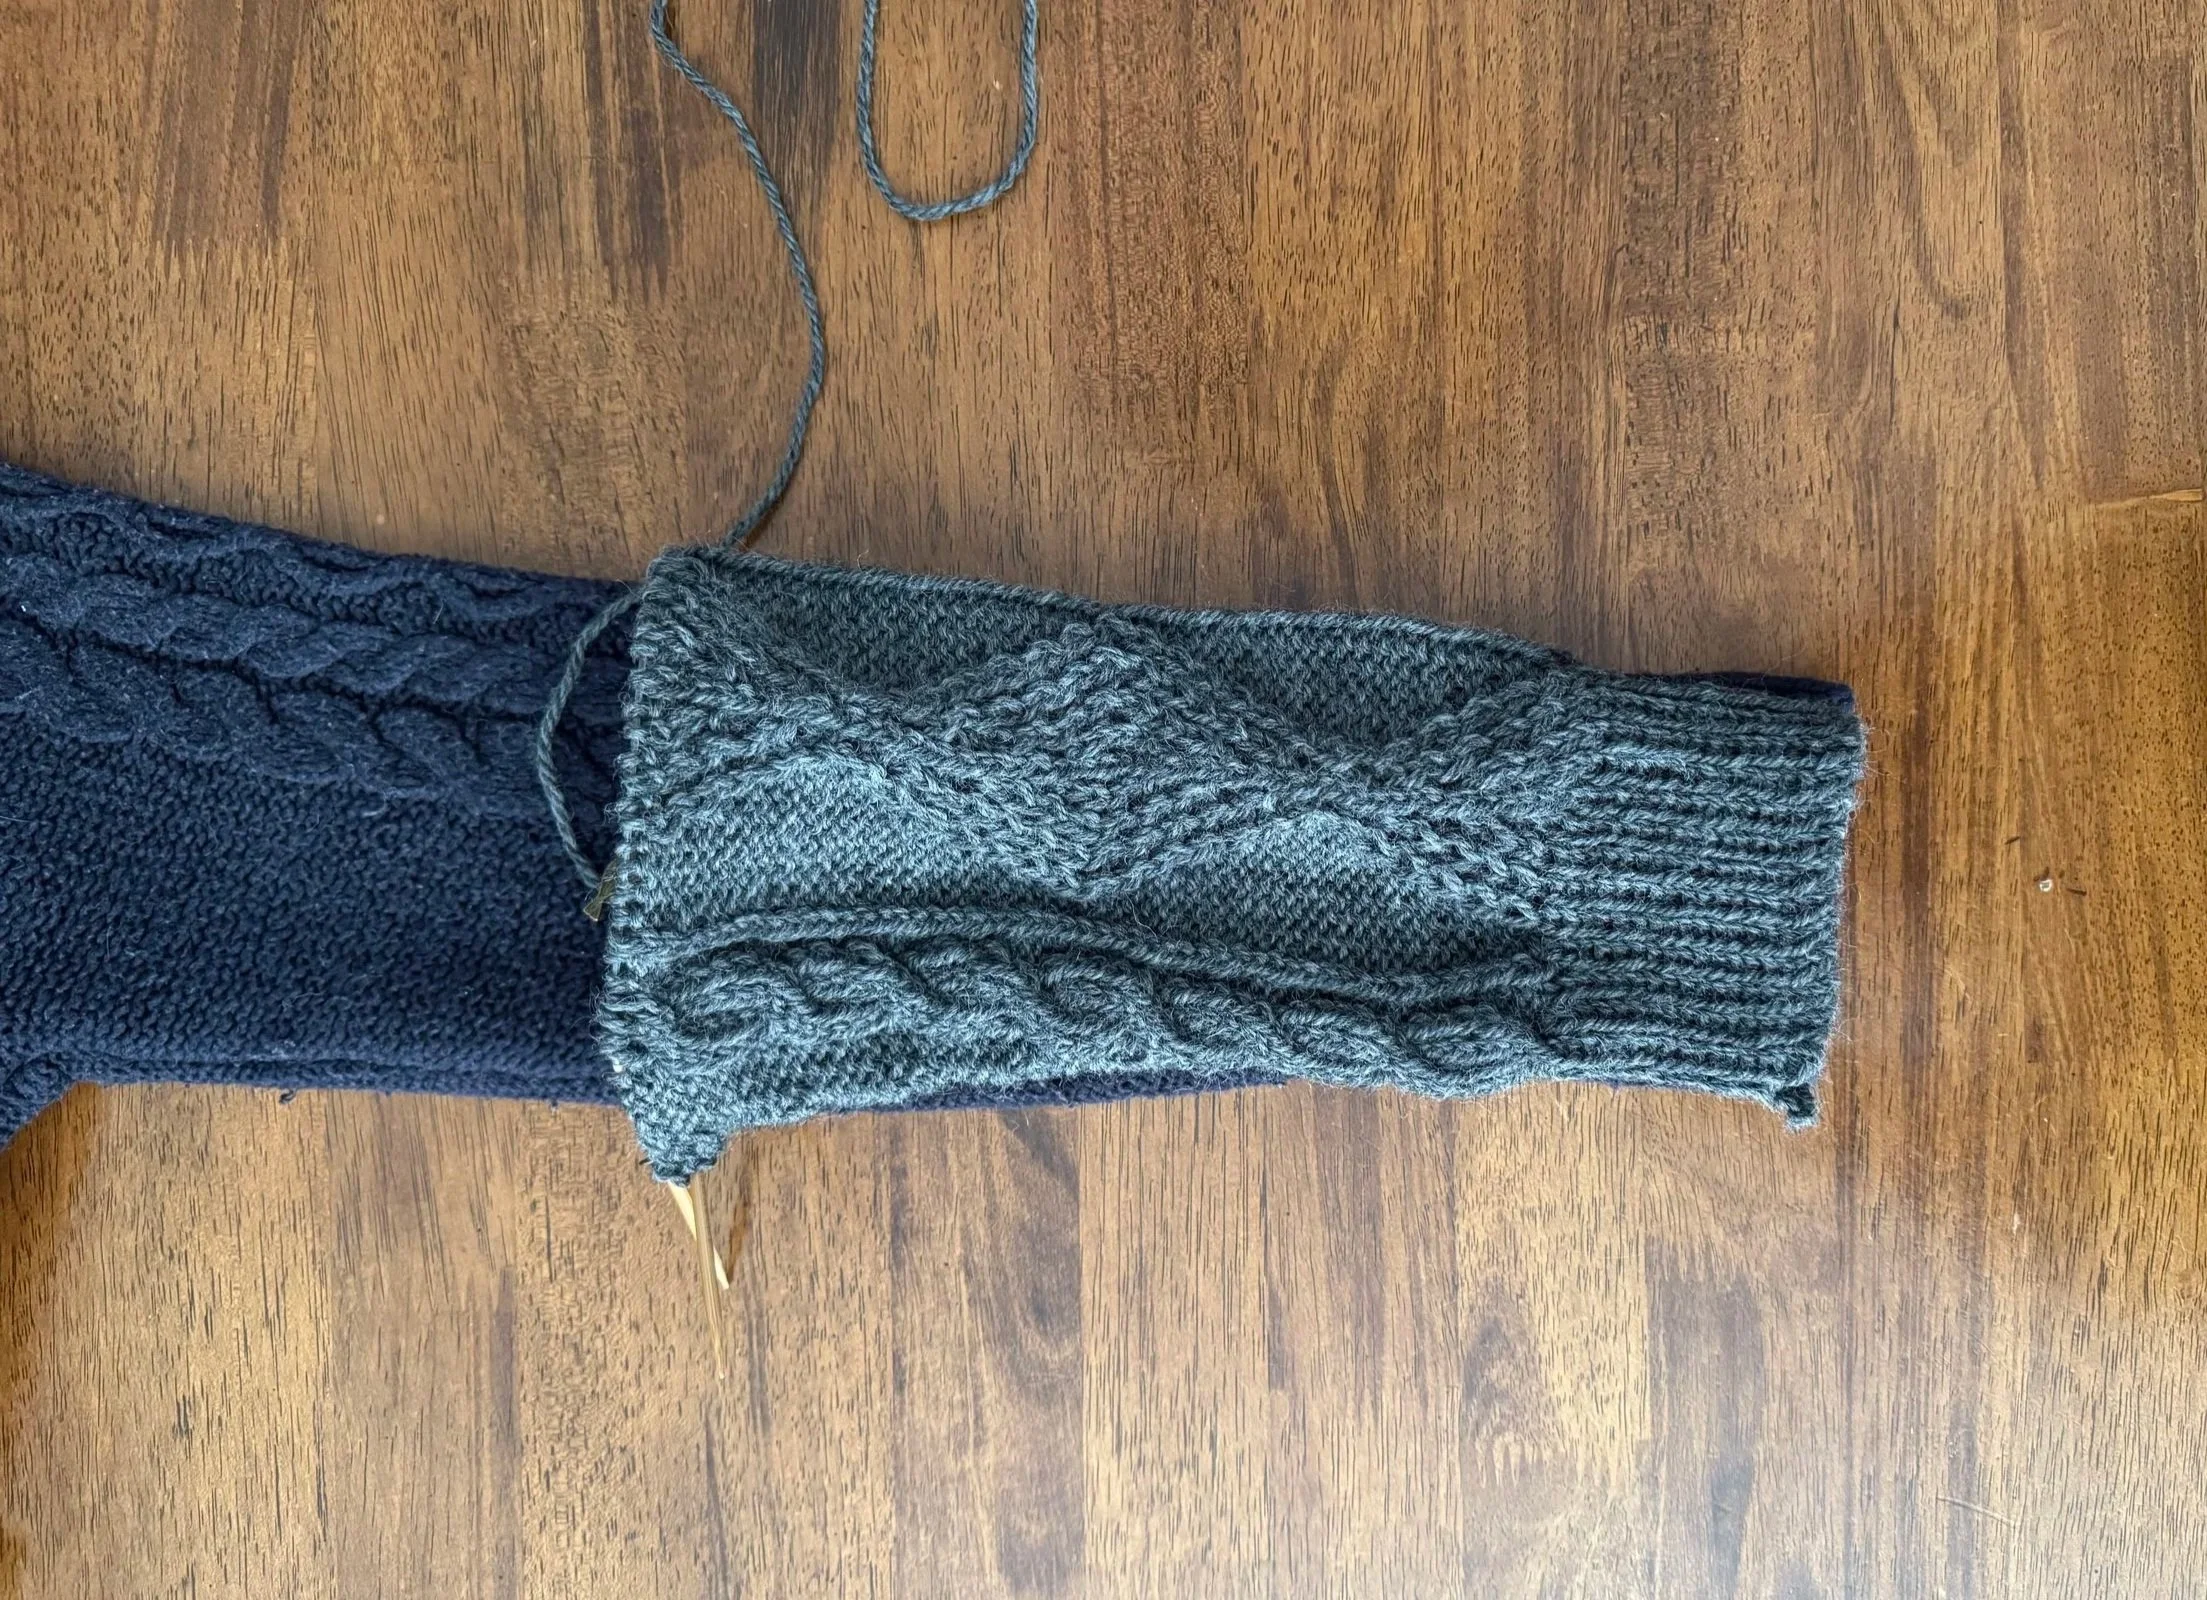
easier to see?
With more of the sleeve done, I am happy with my choice. It more or less tracks with the sleeve on my old sweater. It is a tiny bit bigger, but that is okay, as this yarn is fluffier than the old yarn and there will be less room on the inside of the sleeve, until this sweater is hoary with age.
-
wide enough?
I want these sleeves to be a bit wider at the underarm than my pattern sweater’s sleeves, but not much. I still have about 3” to work before I have to figure out the shaping, but I think I might be done increasing.
-
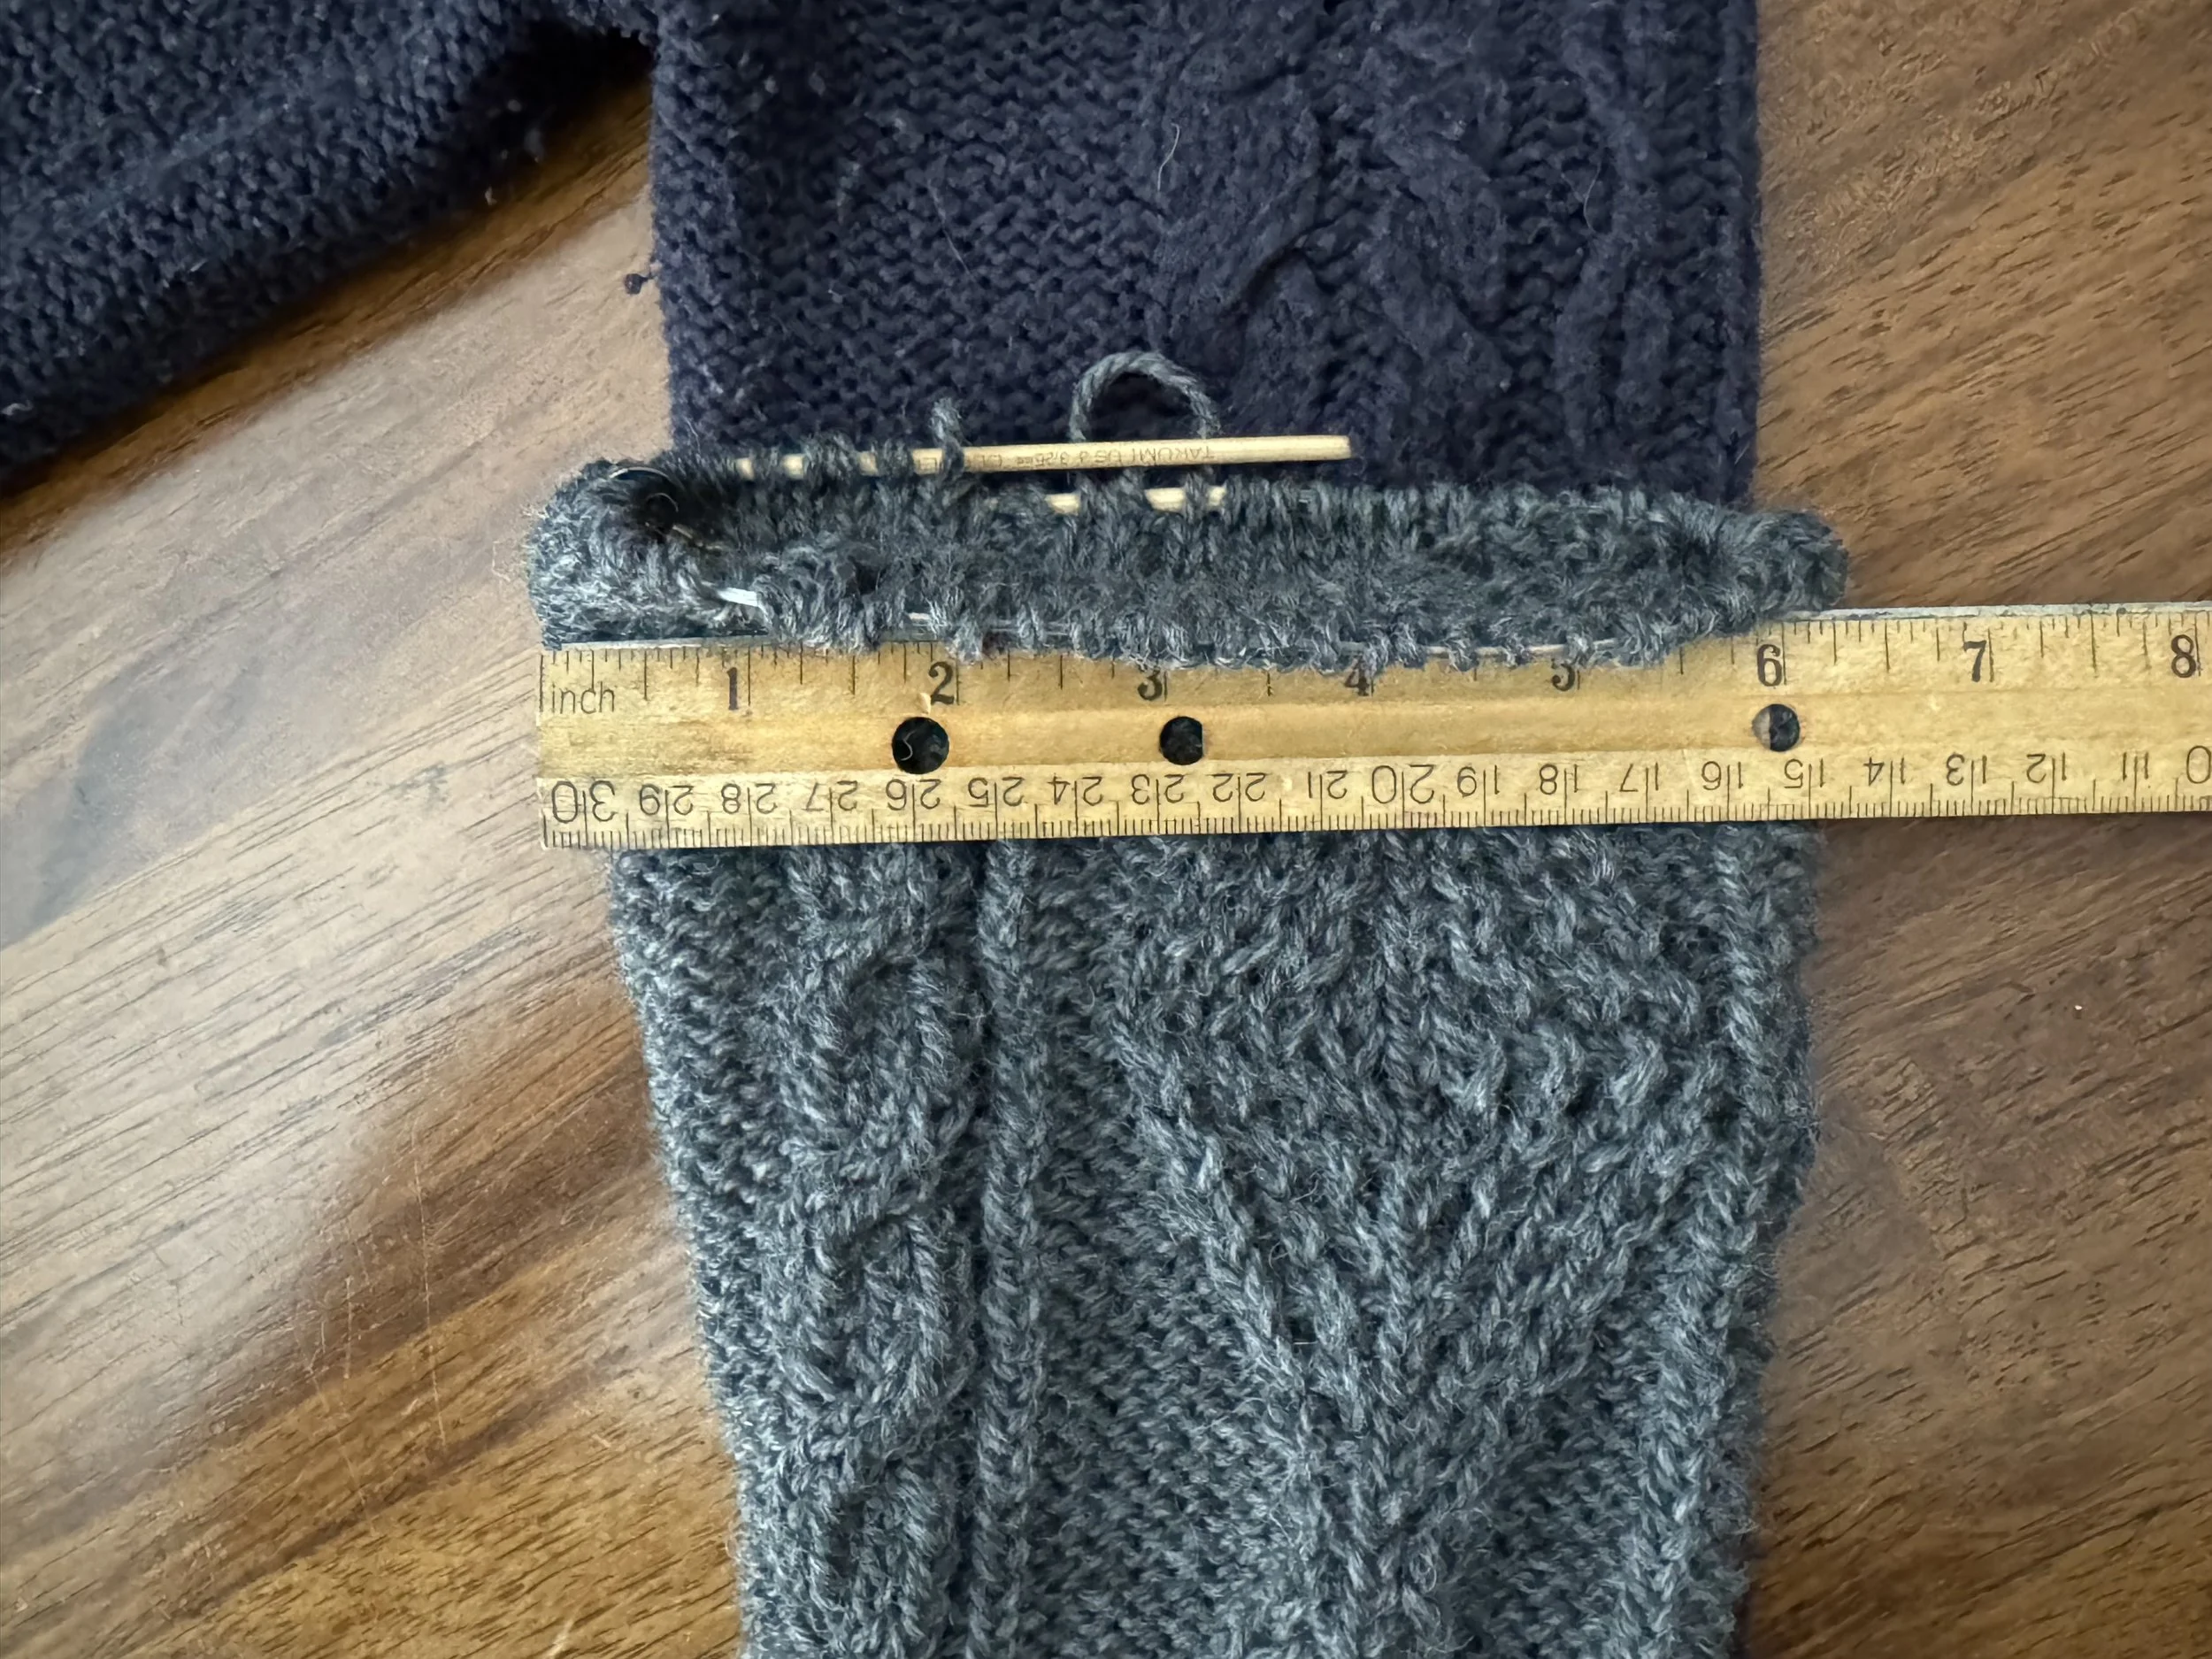
yes.
When I switched from dpns to the circular needle, I felt like I was stretching the work a bit, but I still think I’ll stop increasing here. I only have 72 stitches on the needle, which should give me a width of 12.19” at my gauge of 6.15 stitches per inch. It looks a lot bigger than that and I will trust my eyes.
Time to get cracking on that sleeve cap planning.
-
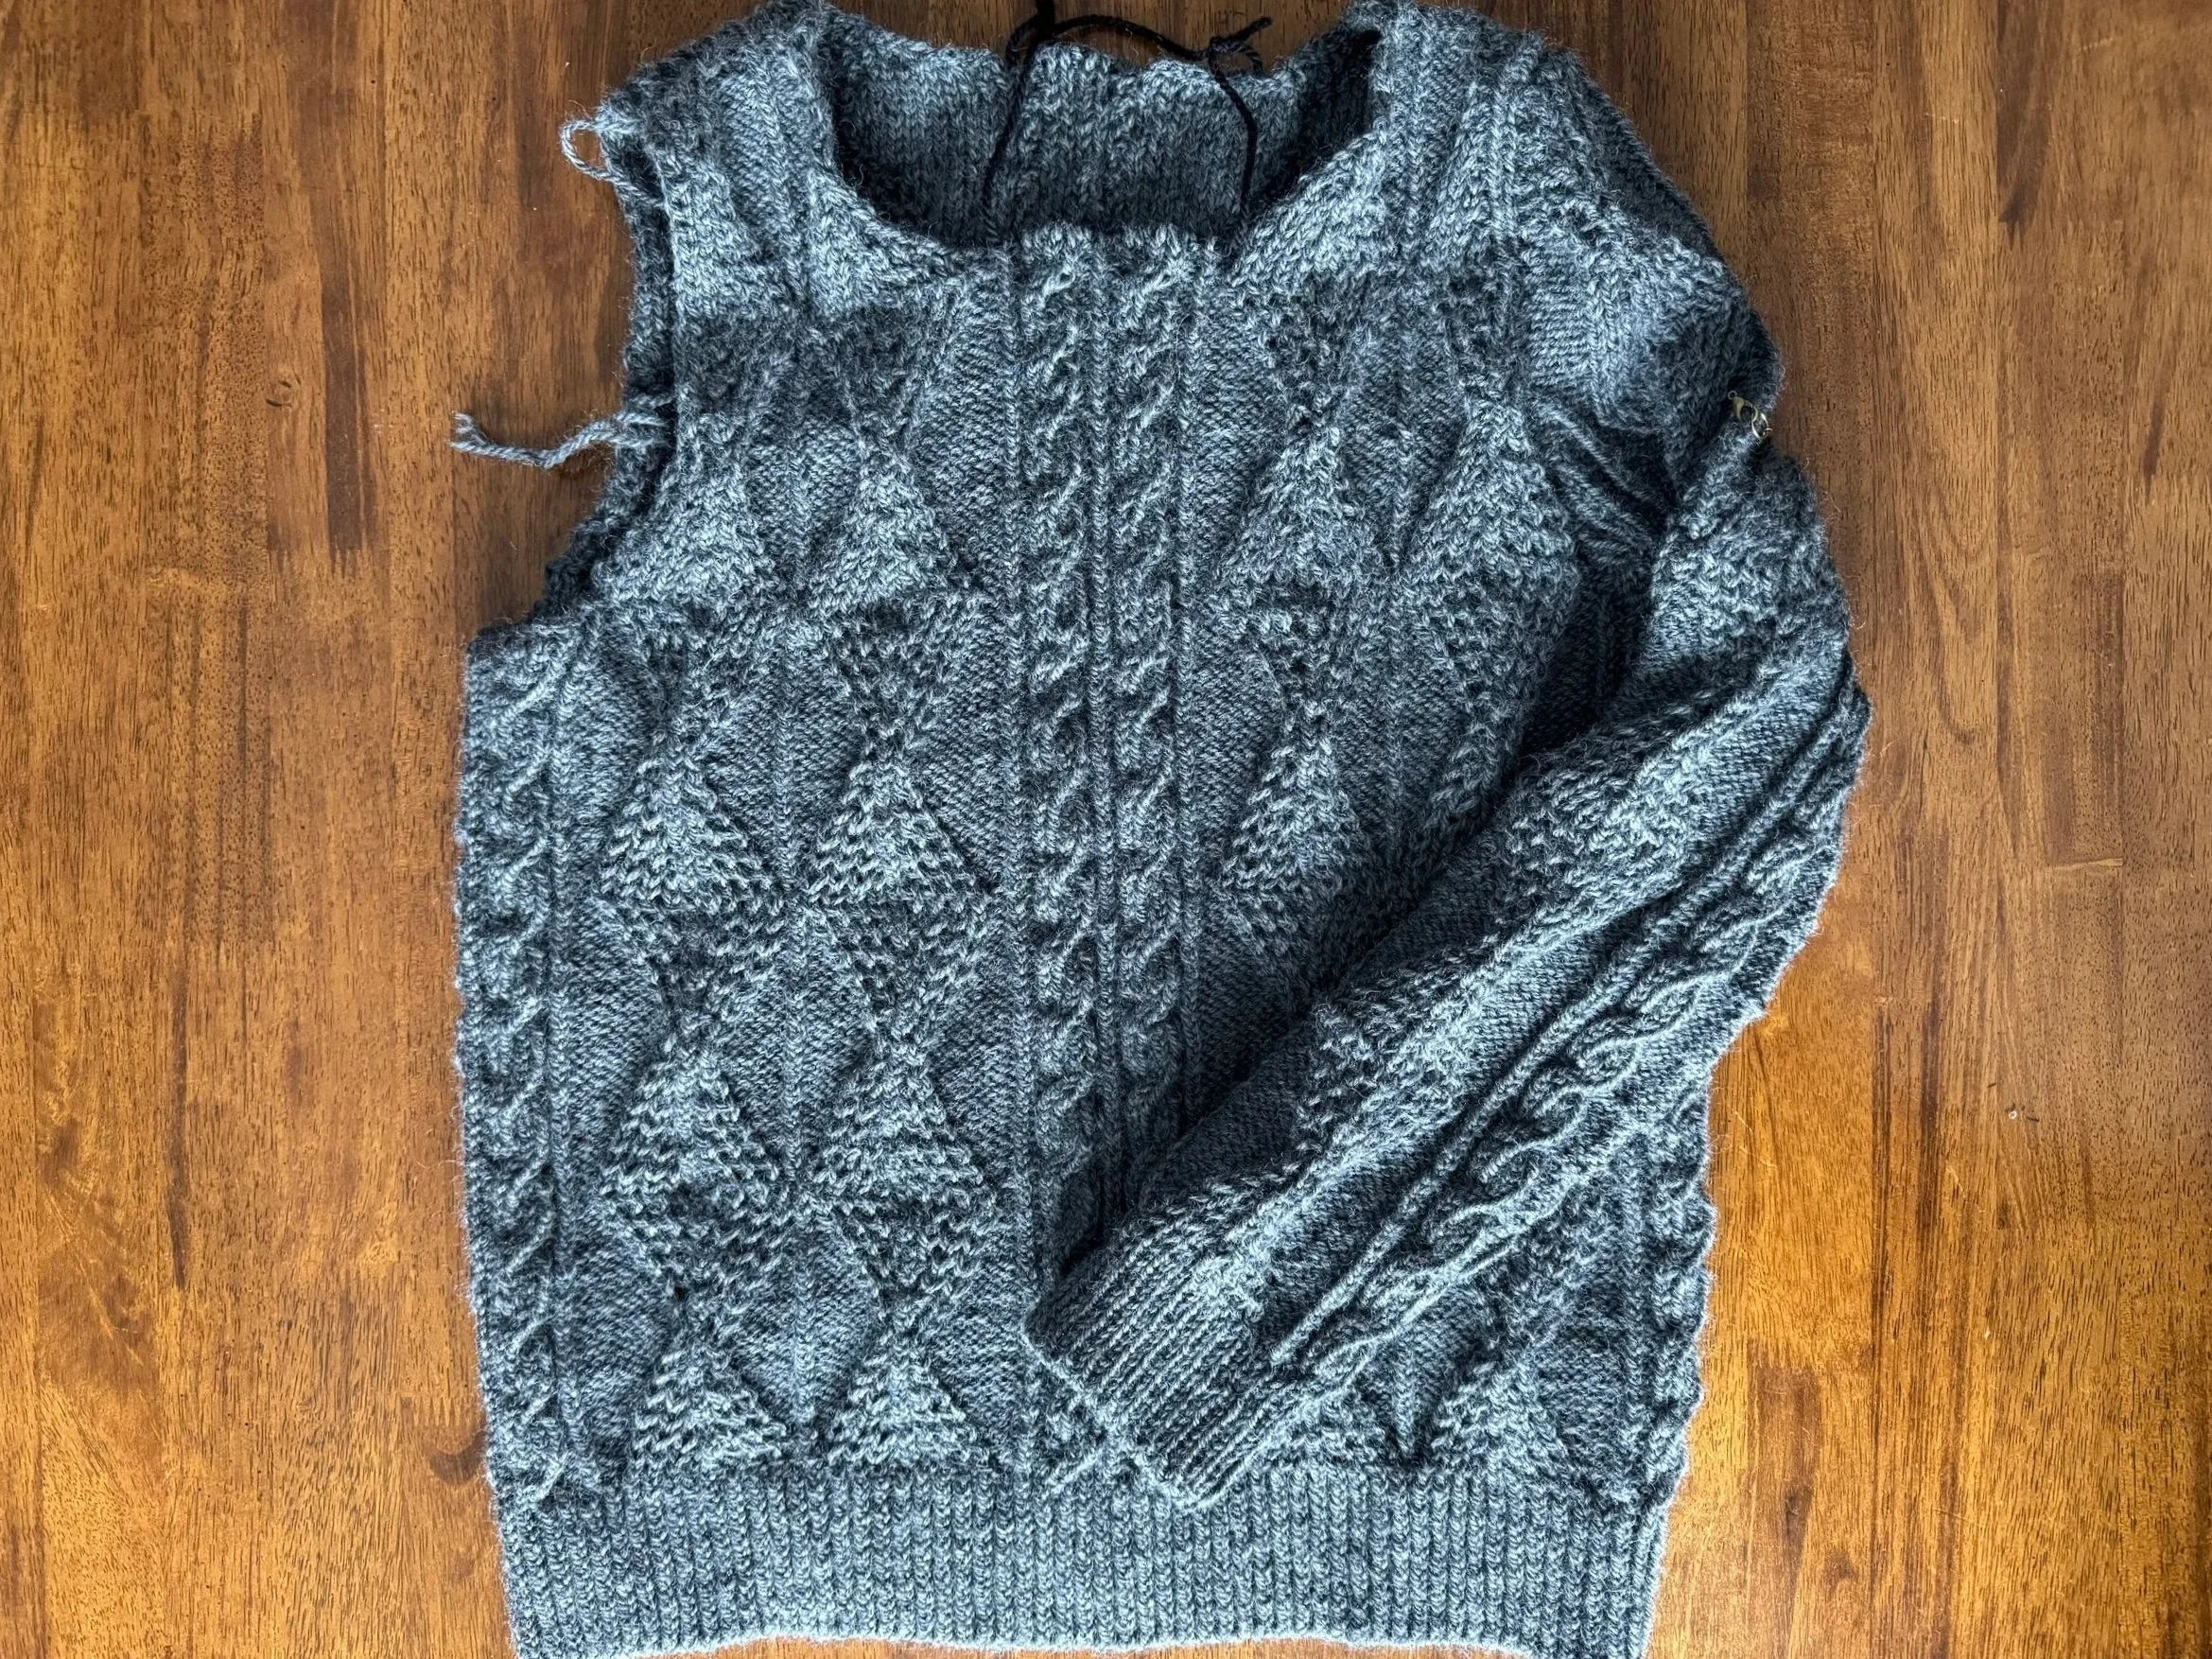
and hey presto, one is done
I thought I had better get this figured out, at least mostly, before posting my “how-to”. I think it turned out really well and I feel very lucky.
The first thing I did was to seam the shoulders (I used mattress stitch), which you cannot see real well here.
Then I took a swing at the decreases. I started with 74 stitches and my target stitch count for the very top of the shoulder was 15. It looked like just getting rid of two stitches every other row would get me there in a reasonable number of rows. I did a few rows of decreasing and then sewed the arm to the body as far as I could, and then did a few more rows of decreasing and then sewed a bit more of the arm to the body, repeating until I got close to the top. Then bound off more aggressively until I had 15 stitches left, bound those off, and then sewed the rest of the sleeve on.
Details to follow.
-
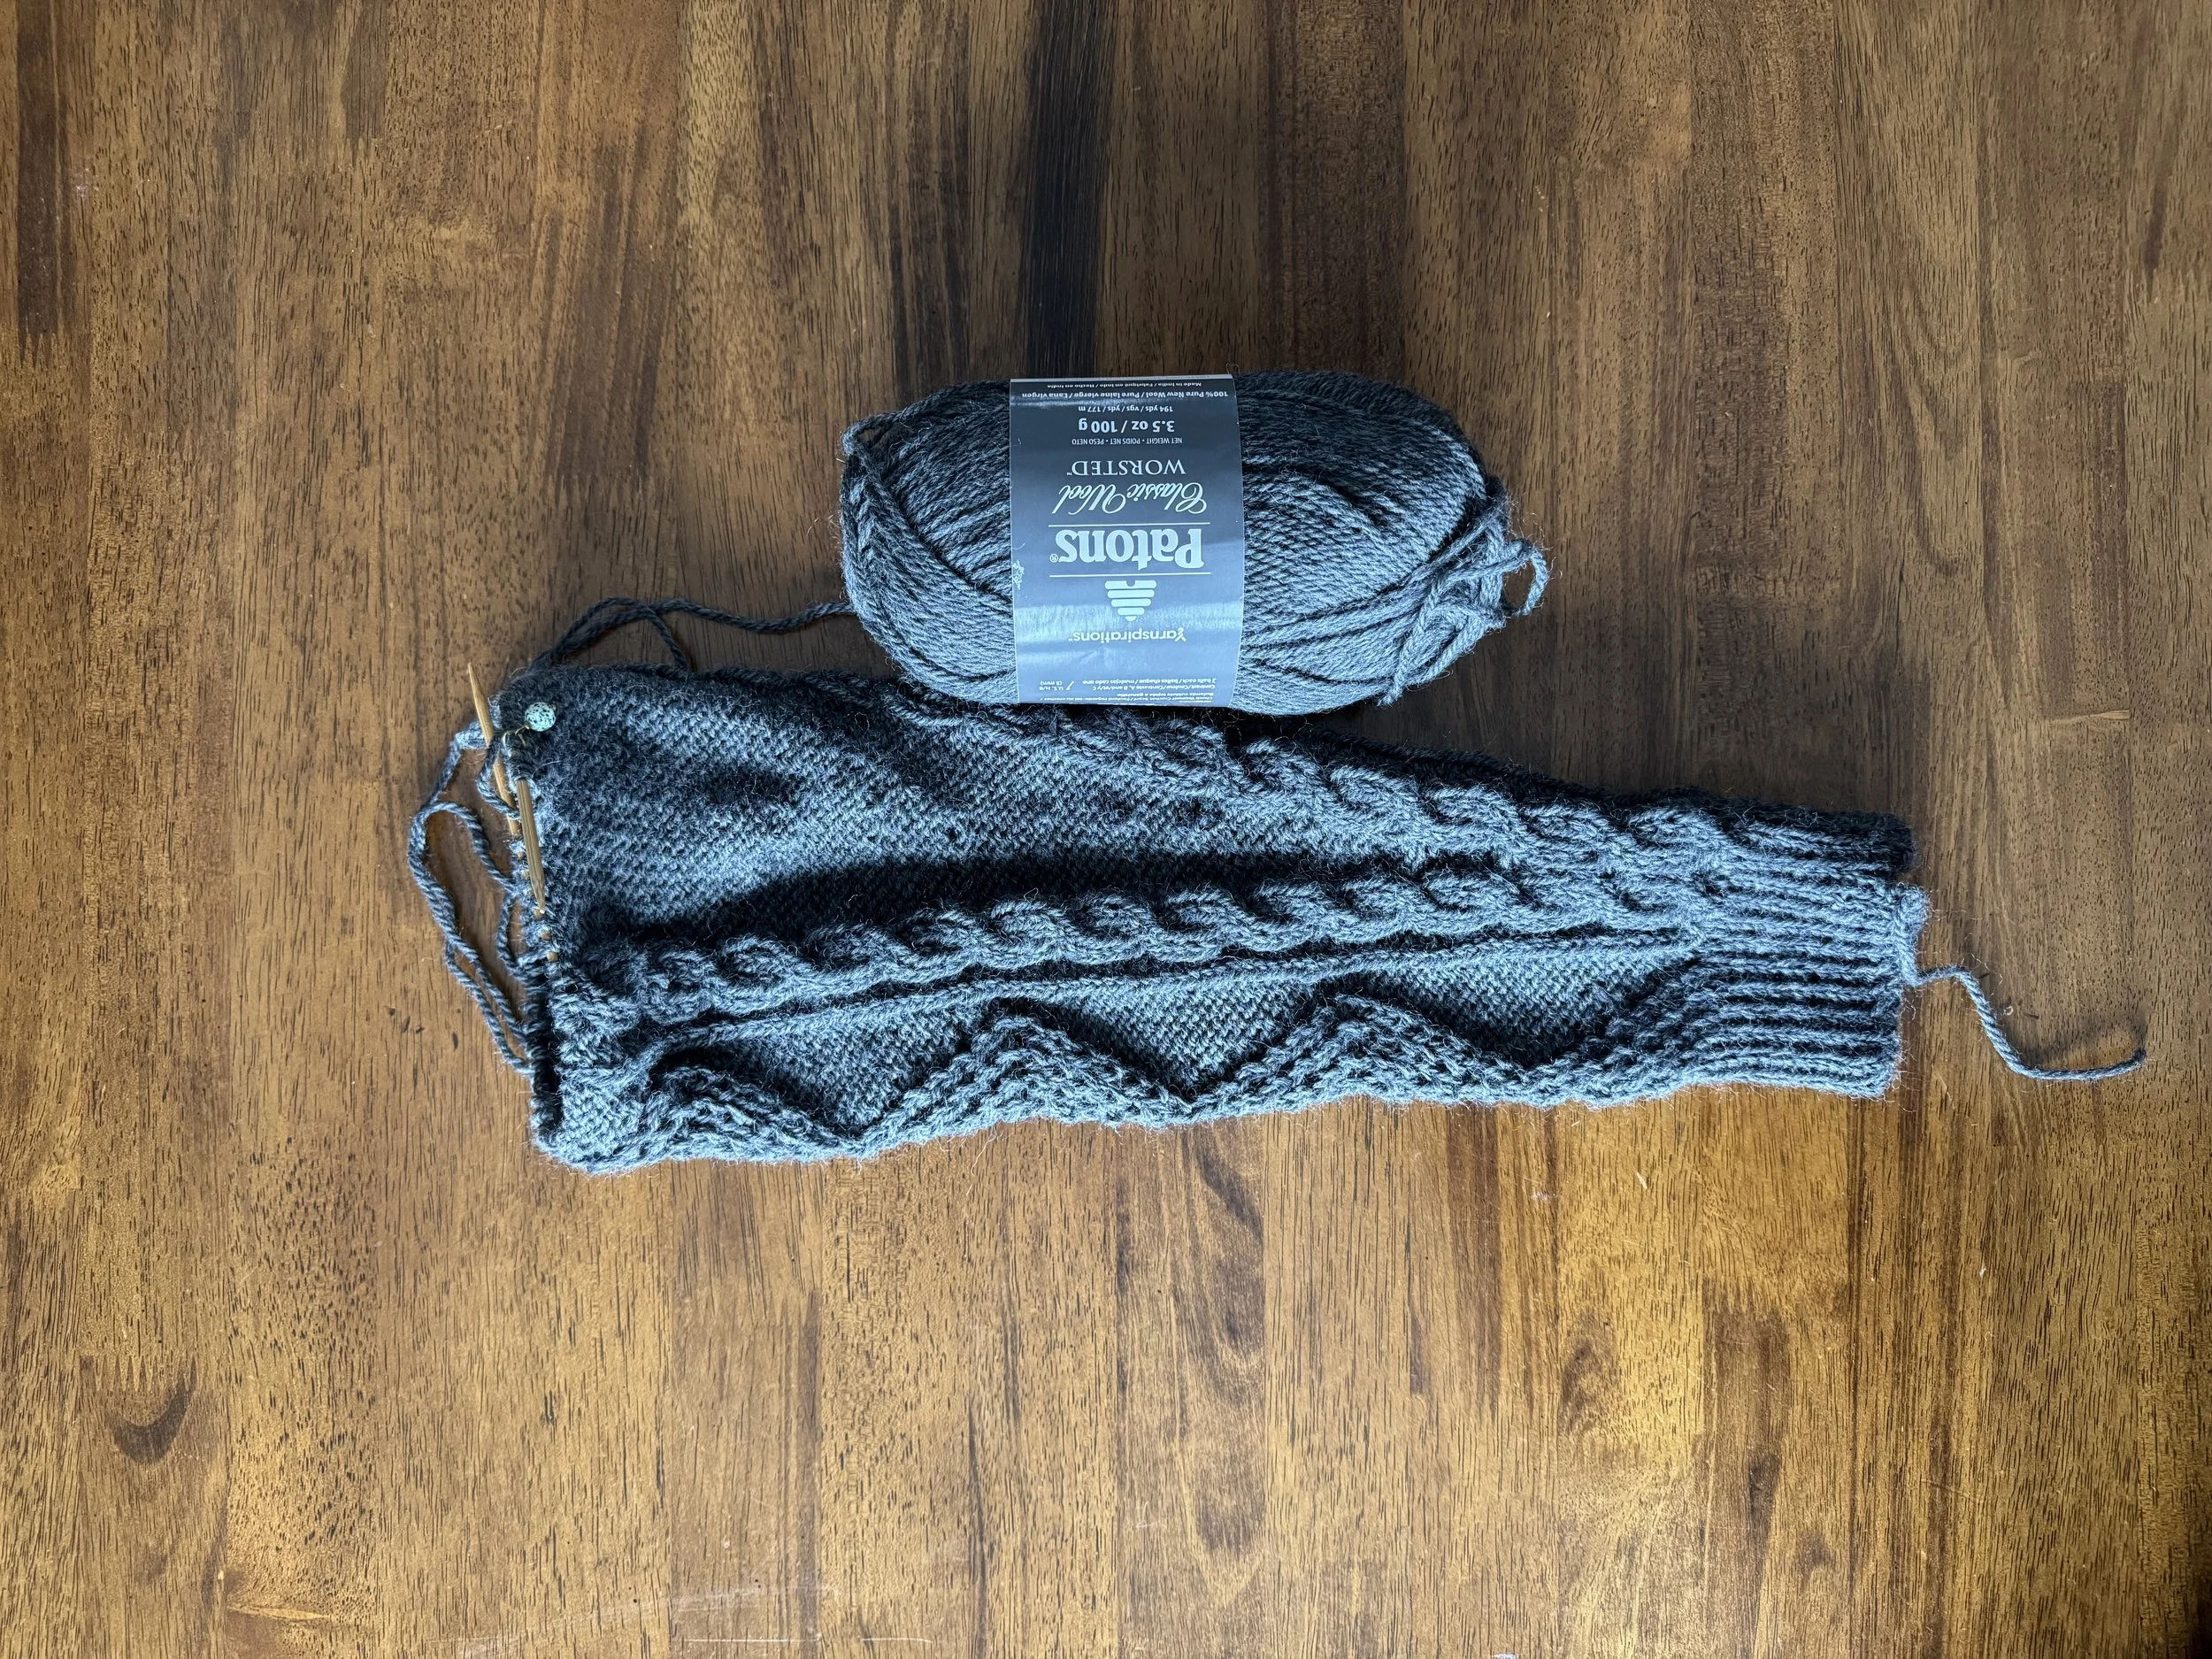
I still have caterpillars on my mind
Here is Sleeve Number Two. Time for her to join her sibling.
-
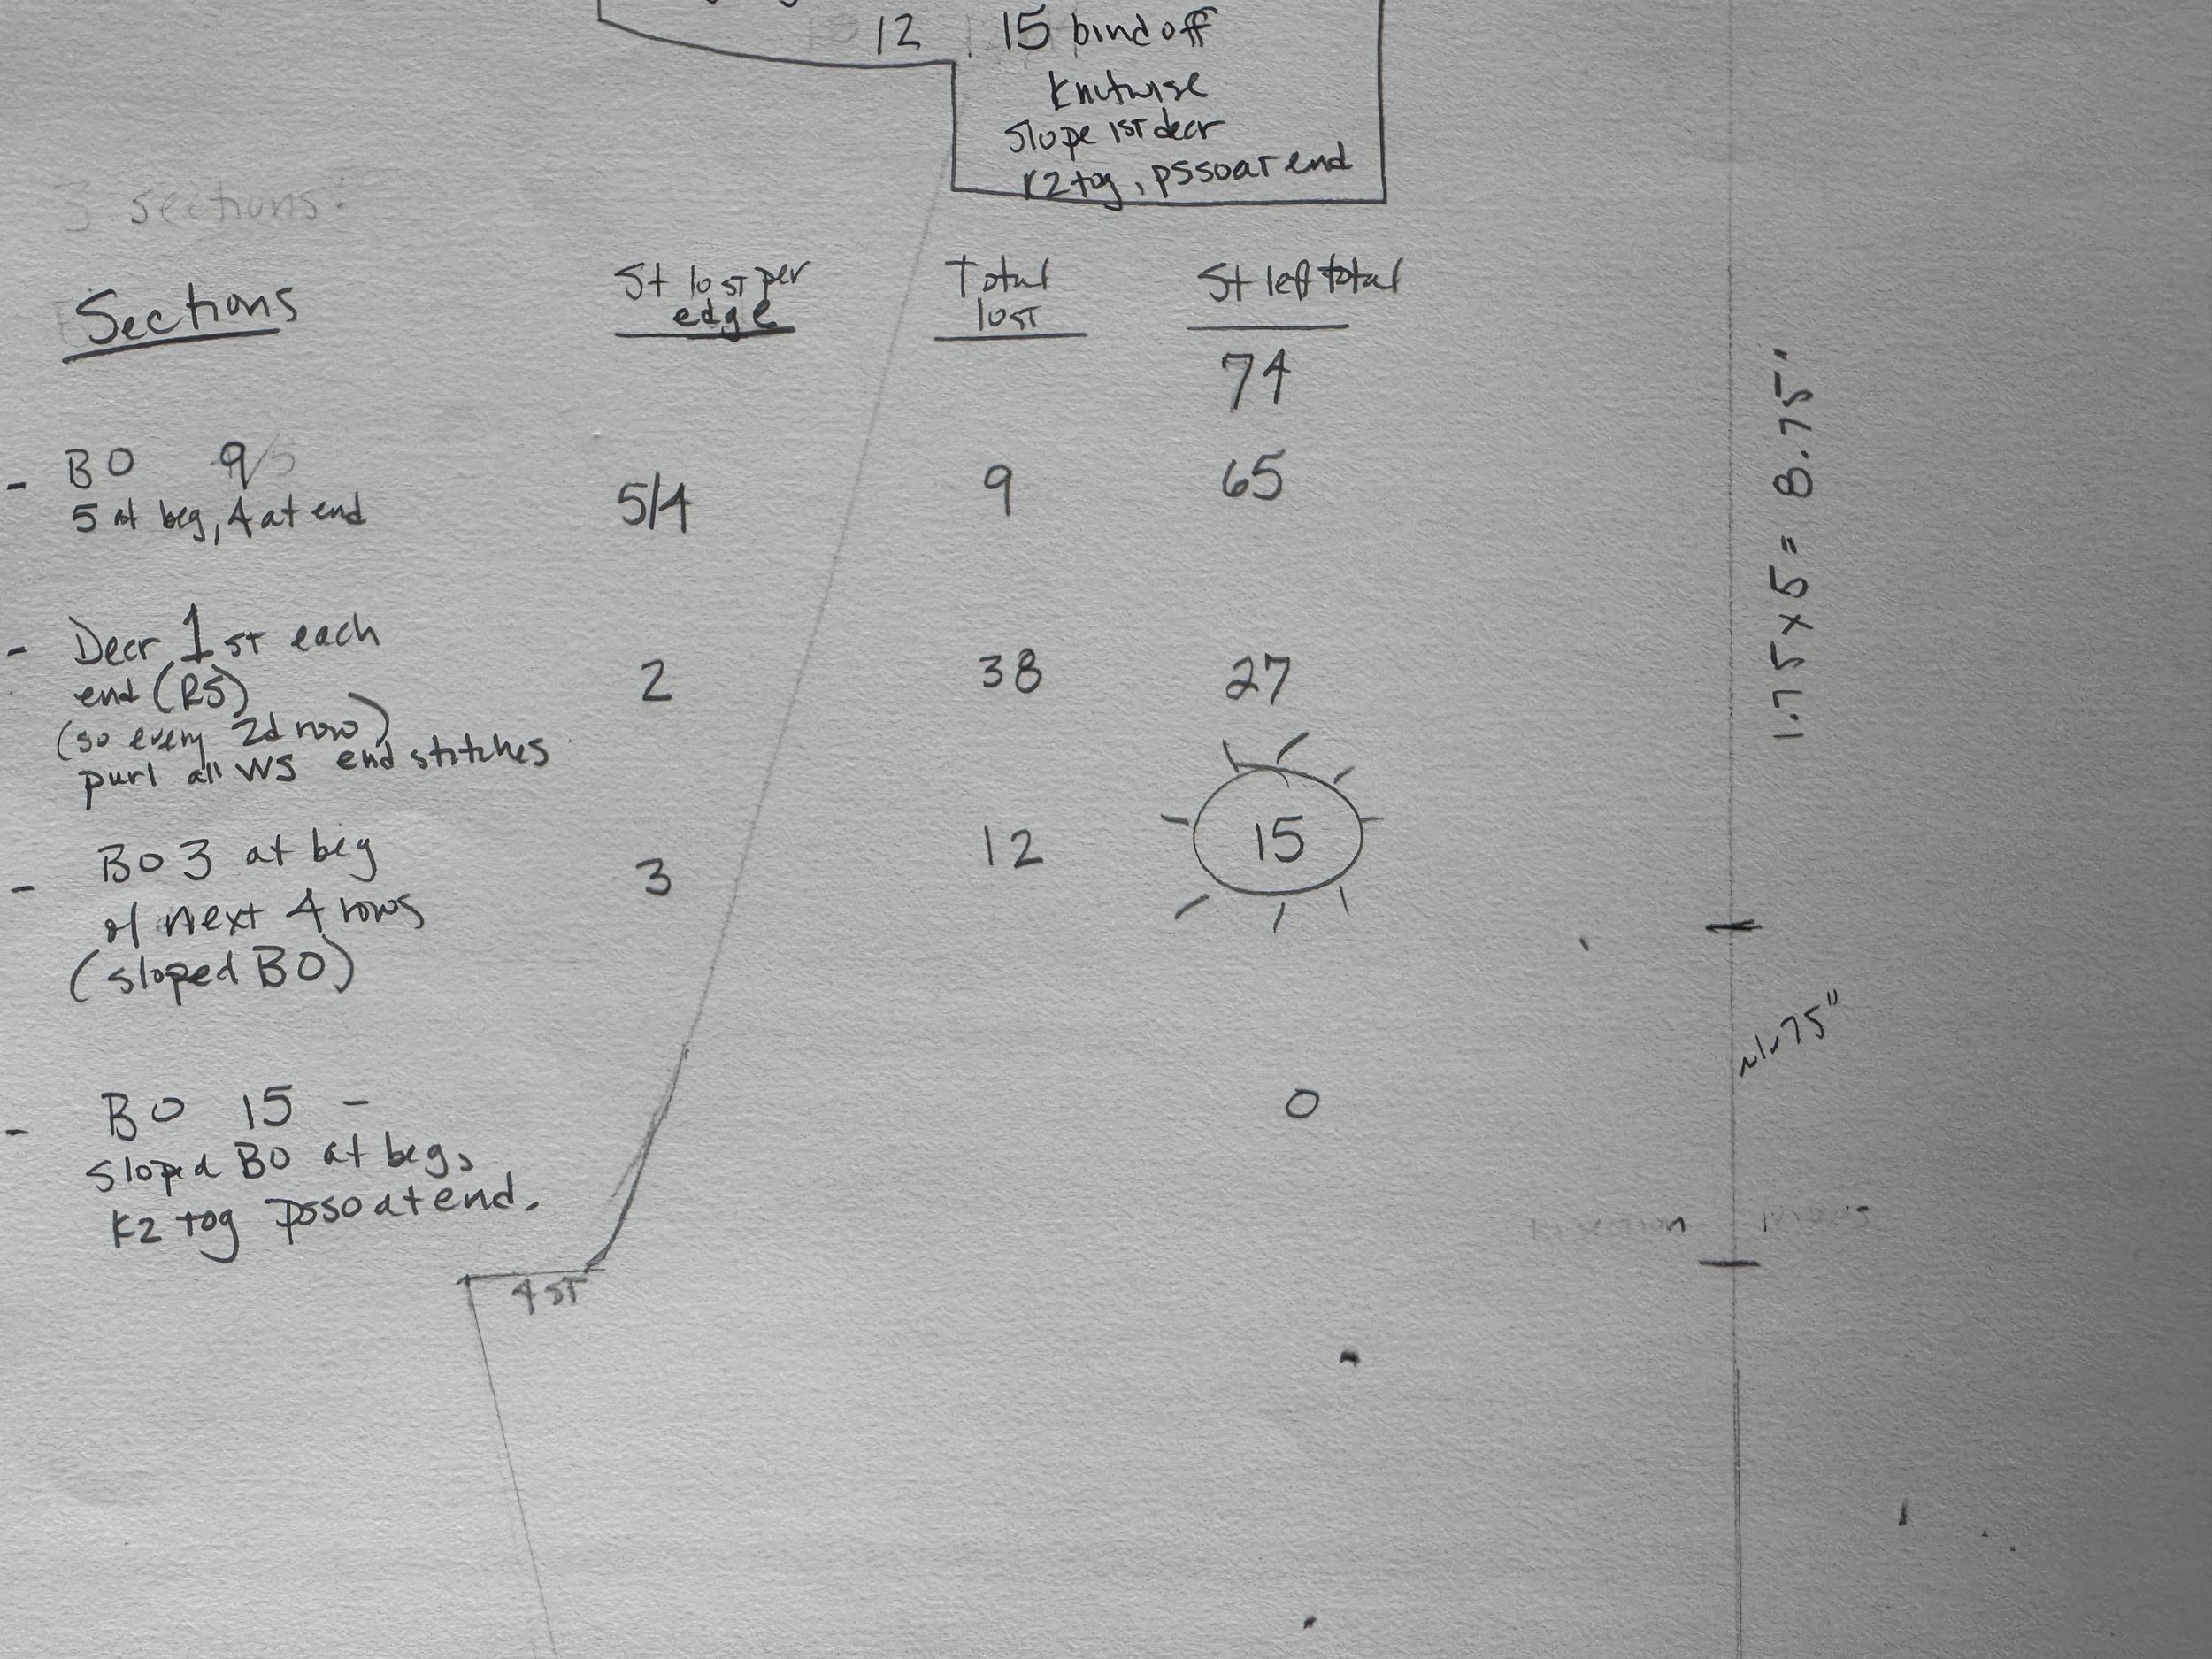
so you can see my process
Here is how things looked after I finished the first sleeve. I had planned to decrease much more gradually but I realized after my first 8 rows or so that if I did, I would have a sleeve cap that might reach to the top of my head, not desirable.
I also noticed that my first 10 rows had taken up about 1.75” of vertical space, so I experimented and found that 5×1.75”=8.75”, and that is just about exactly 1.5” below where I wanted the top of the sleeve to sit.
-
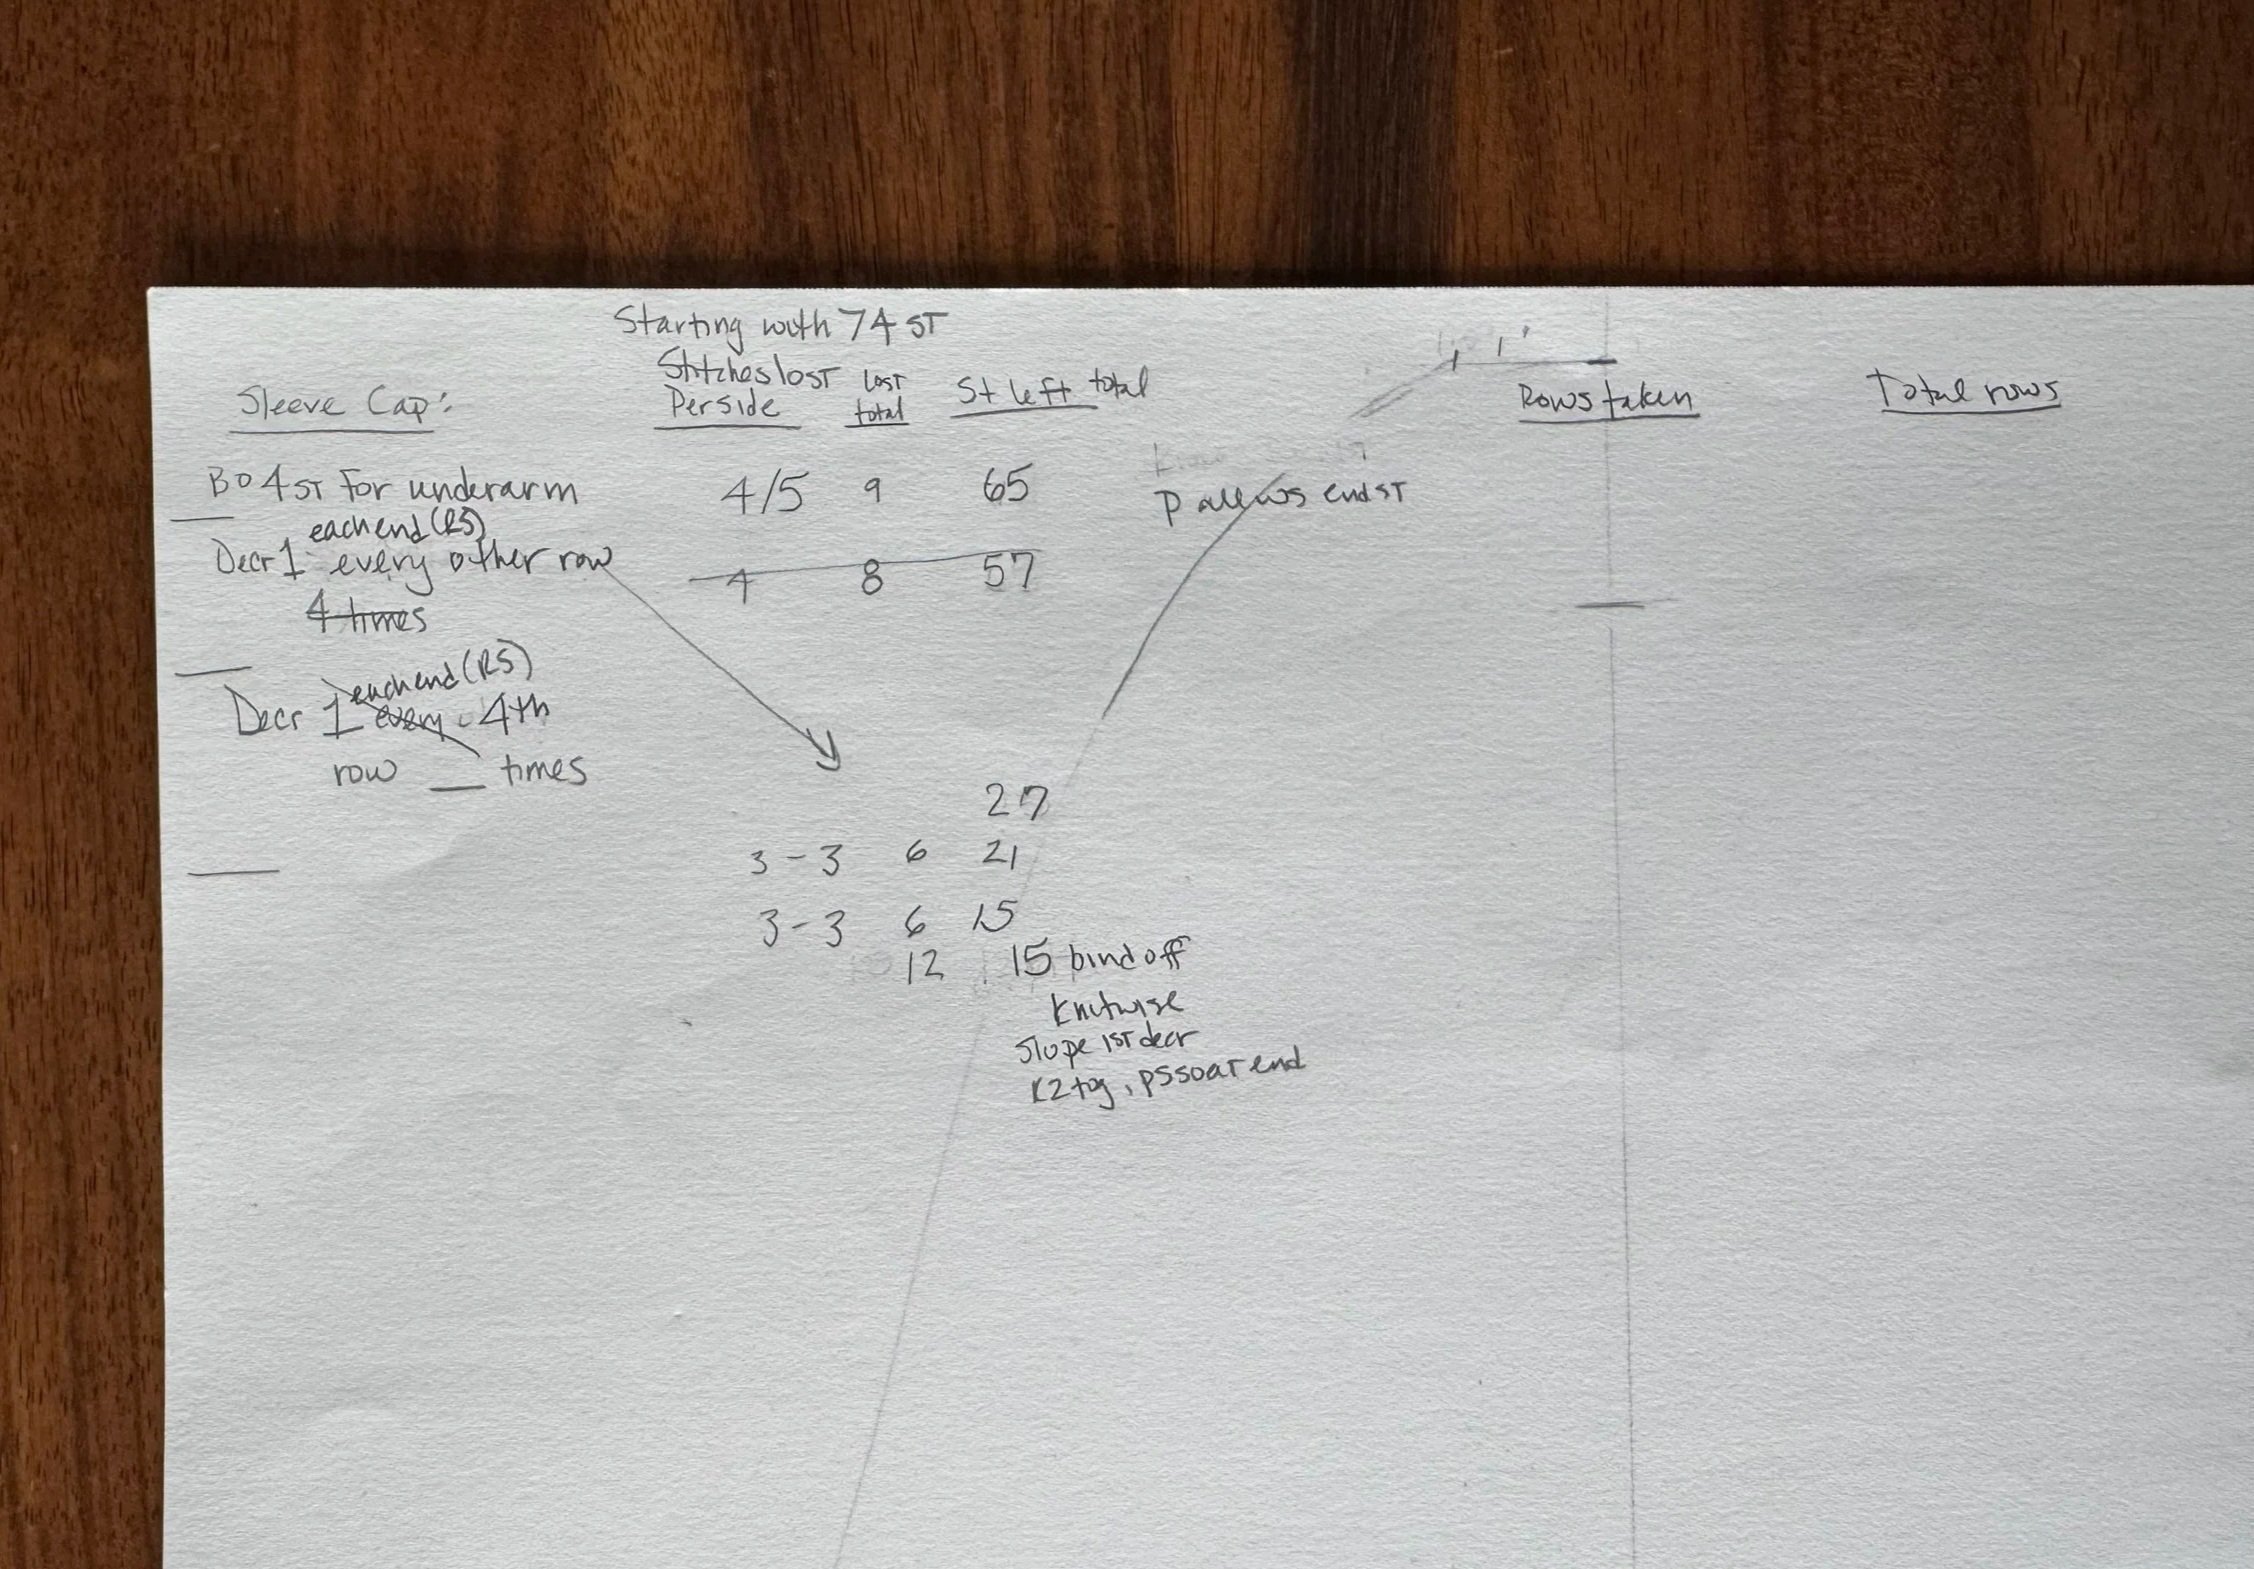
a cleaned-up version
This is a more streamlined version of my process on Sleeve Number One, and I will follow it for Number Two and will attempt to translate it along the way.
-
it has begun
I started the process by binding off 5 stitches at the beginning of an odd-numbered row and 4 at the end, and then breaking the yarn. That eats up 9 stitches so now I have 74-9=65 stitches left.
I then reattached the yarn to work the WS and made my way back. From this point on I will be working back and forth, not in a circle.
Then I started the “bind off one stitch at each end on RS” game and this will continue until I have only 27 stitches left.
On the WS rows I am purling every first and last stitch, regardless of what the pattern might suggest. It will make for a smoother slope.
-
time to attach it to the sweater
At this point it I started seaming the first sleeve to the sweater, and so I will repeat the process here. I wanted to see if the shaping was going to work out.
-
first side of the sleeve
I started the seaming at the center of the underarm, using half of quite a long piece of yarn. I used both horizontal and vertical mattress stitch for this curved seam.
Here is a tutorial on horizontal mattress stitch:
https://www.interweave.com/article/knitting/mattress-stitch-tutorial-horizontal-seams/
And here is a tutorial on vertical mattress stitch:
-
starting the second side
I am seaming up to about an inch from the working part of the sleeve, so that when I start knitting again, I won’t be bumping up against the seamed part.
-
ready to start knitting again
This seems (no pun intended) to be shaping up (pun intended) in the same way as the first sleeve, so I will go ahead and continue decreasing until I have 27 stitches left. See you then.
-
new day, new gray
Here we are, with 27 stitches left. I will sew up to about a half inch below my live stitches and then will reduce them to the final 15 stitches.
-
marking points
But as I am sewing, I need to make sure that the 15 stitches that are left on the sleeve will fit politely into the top body part of the shoulder, so I marked my target 15 stitches on the body and will, it is to be fervently hoped, match the seaming and the final 15 sleeve stitches to those blue pins.
-

back inside
We had some very warm days and our friend started to turn alarmingly dark, so we brought things inside and we are hopeful that we will have a butterfly in the next day or two.
-
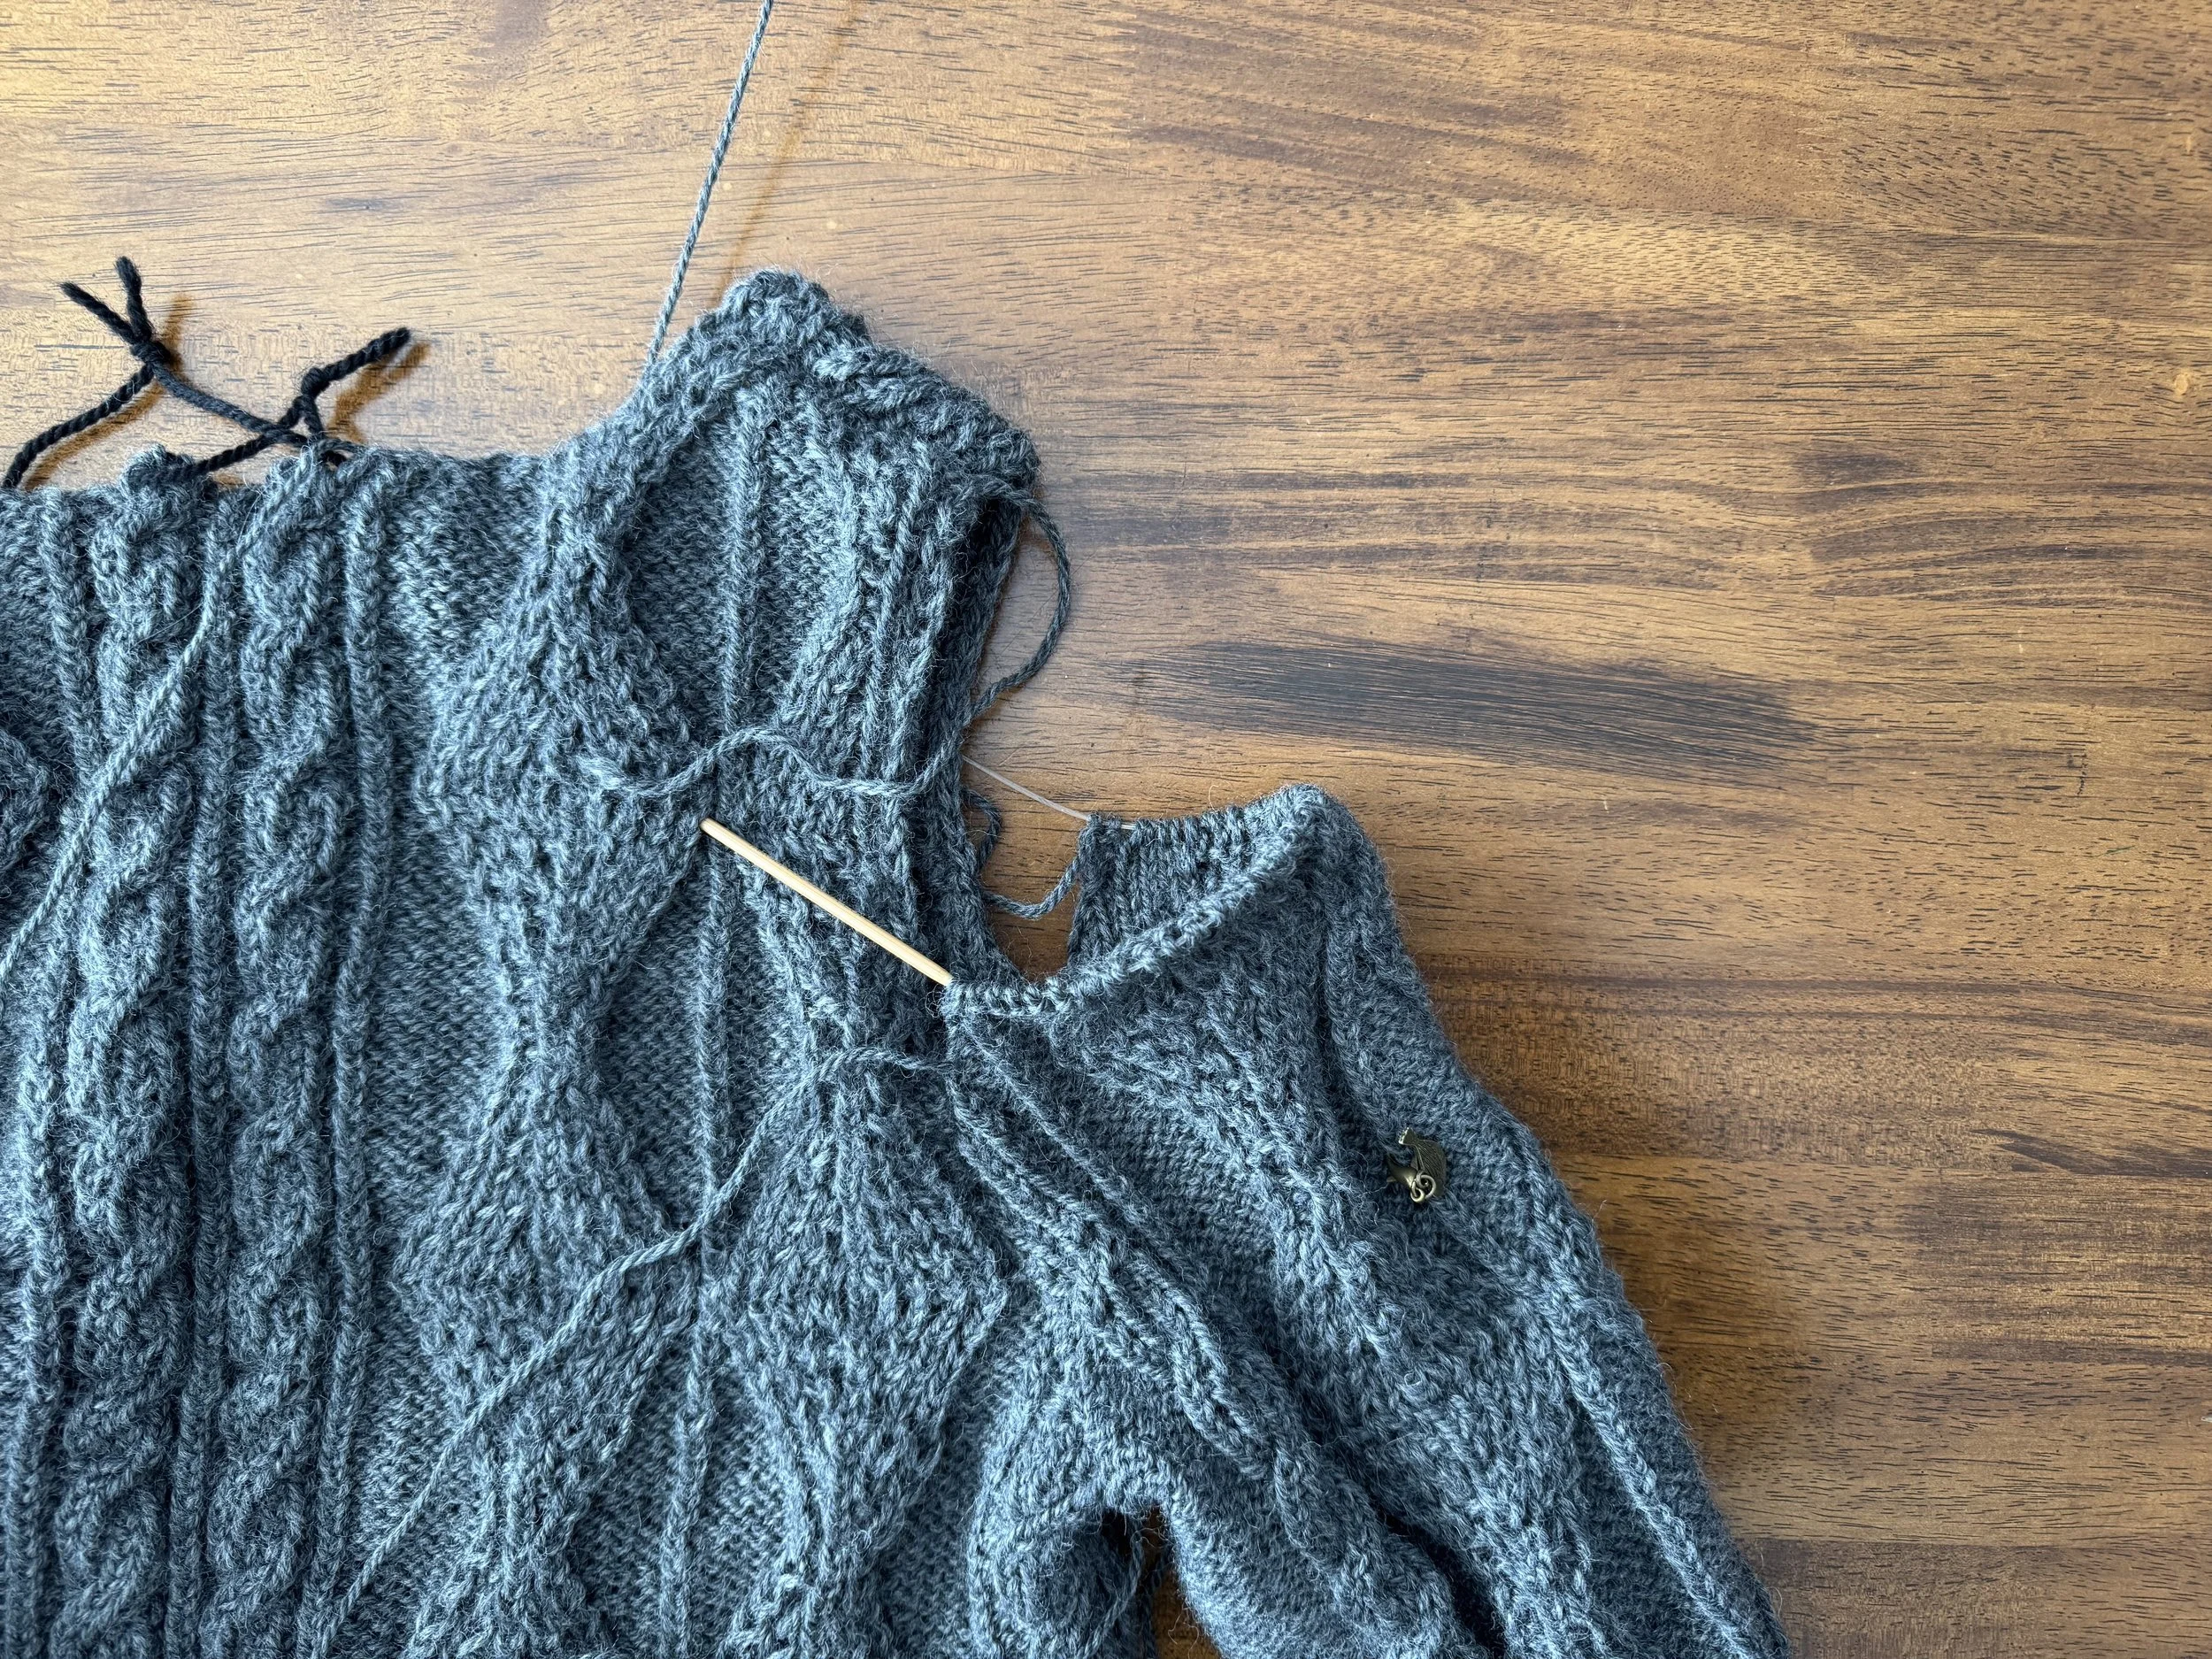
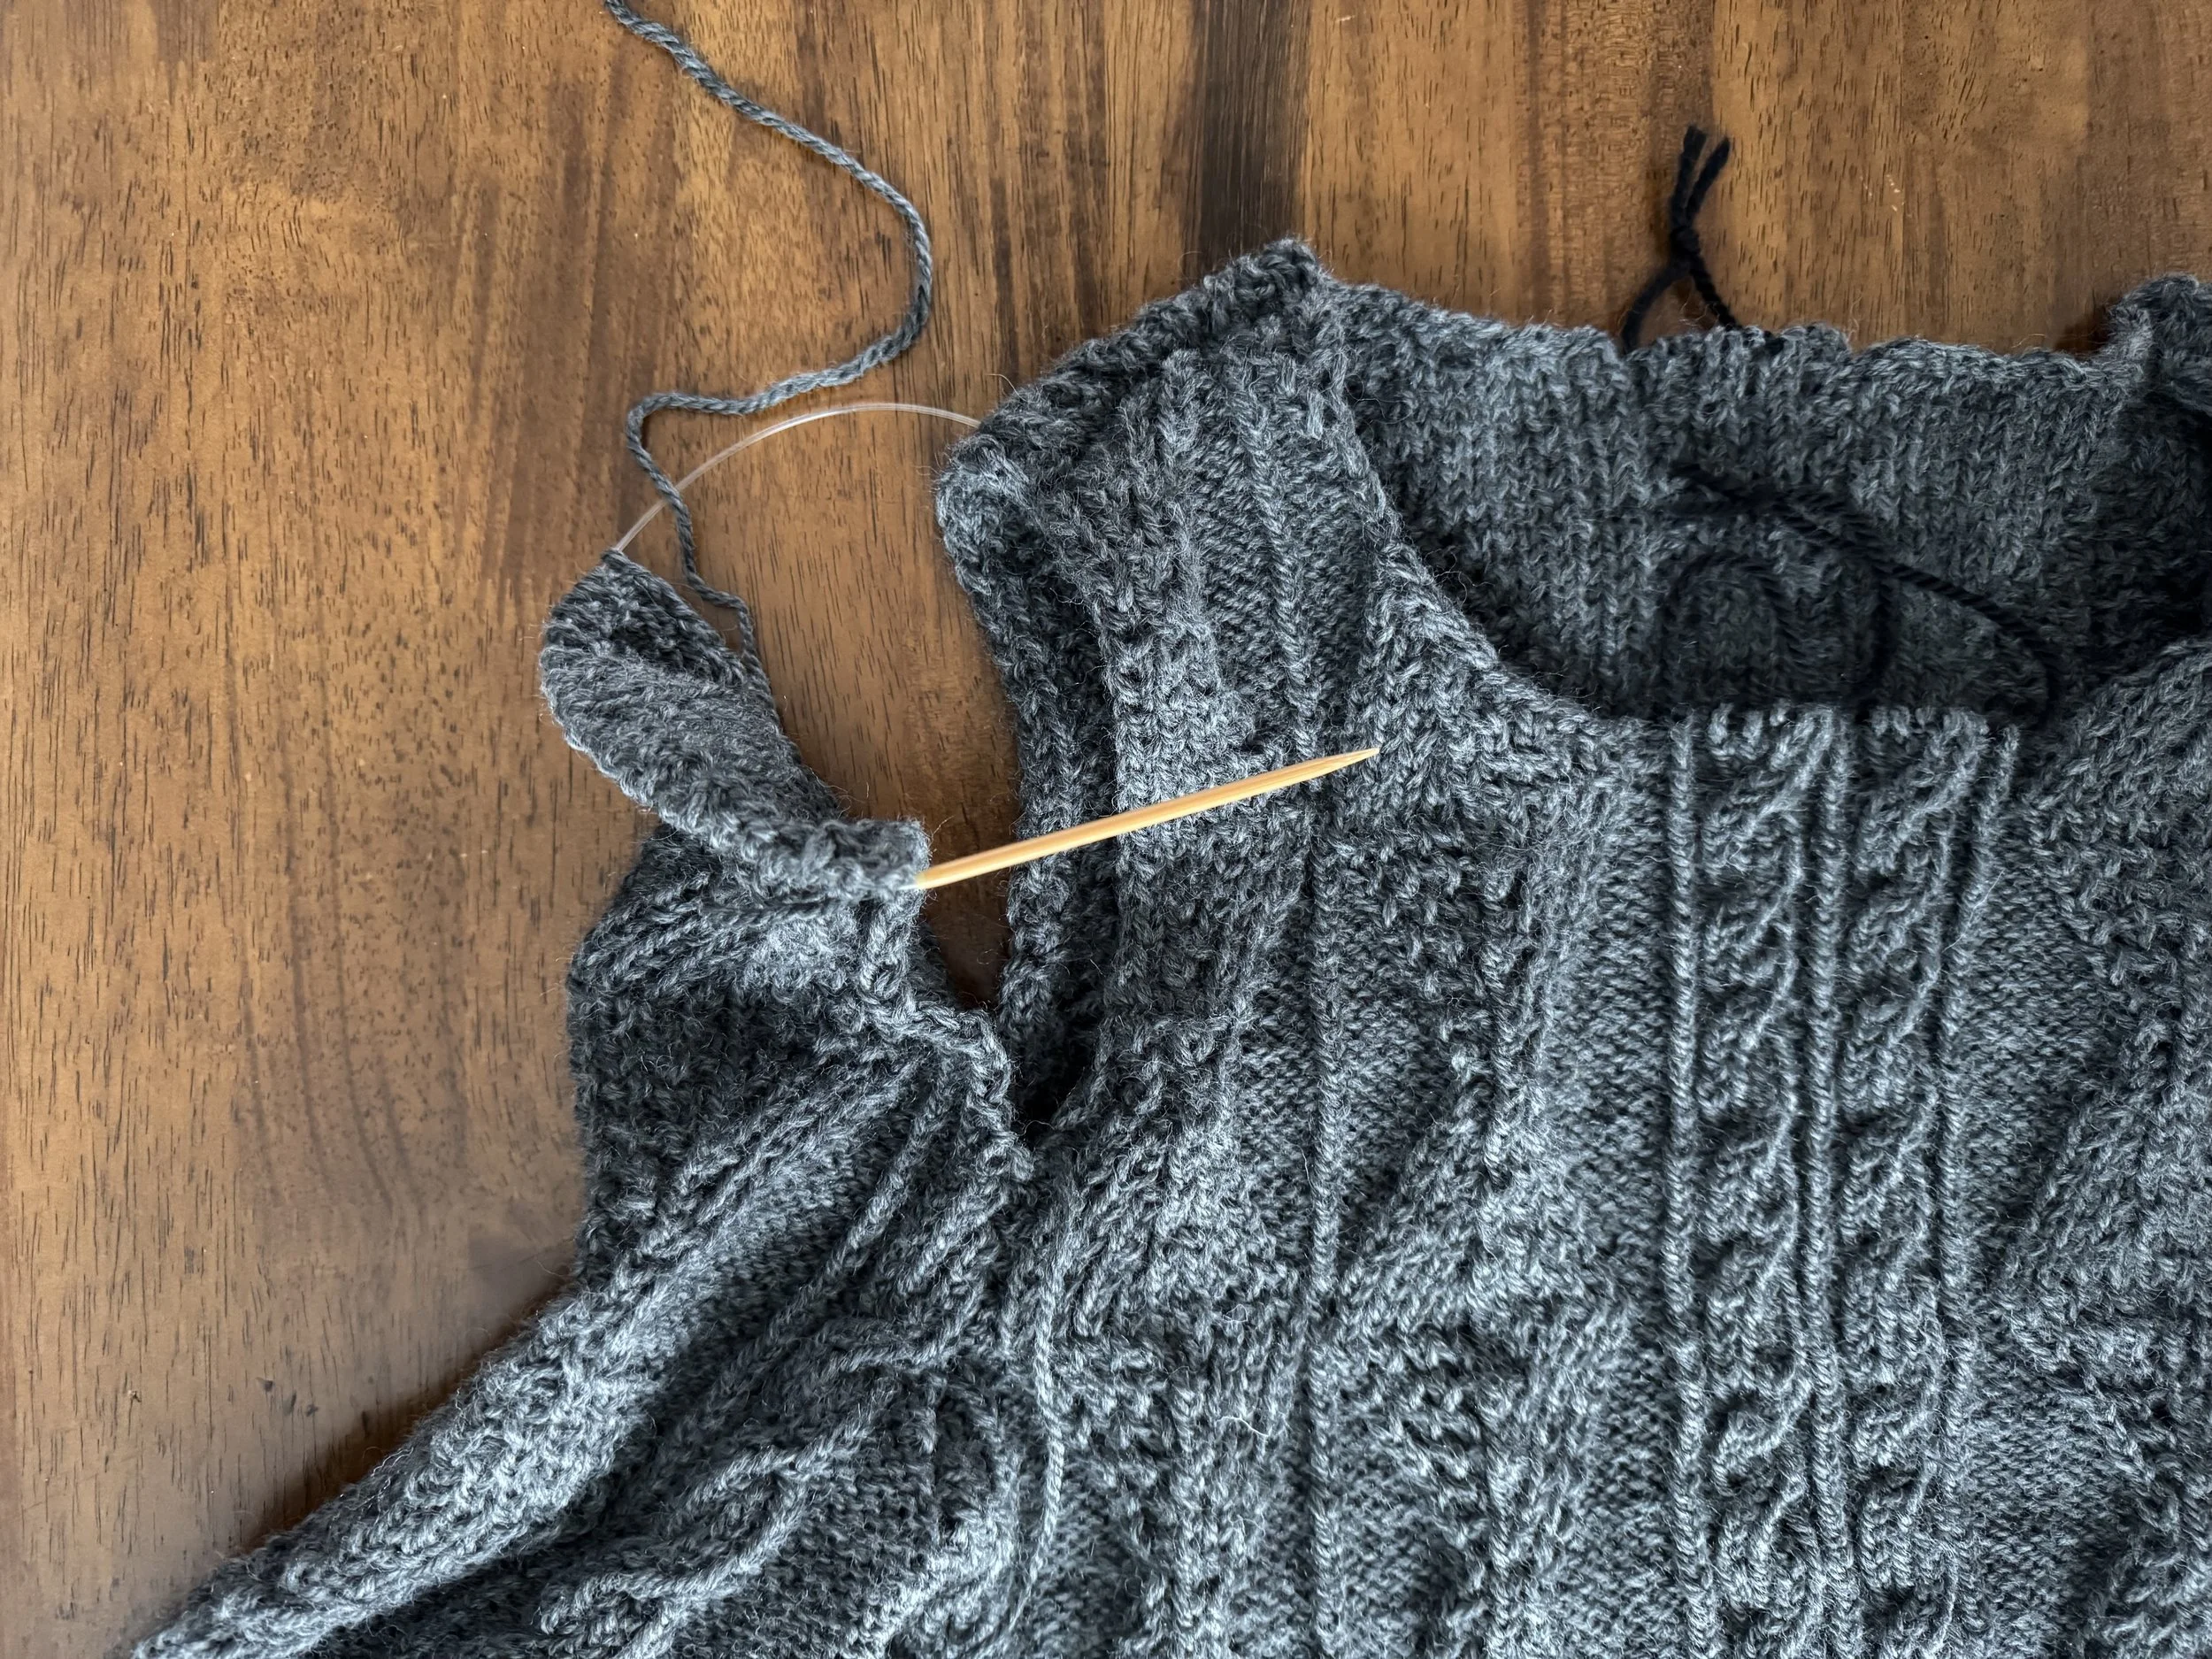
now for the neck
The second shoulder finished itself up just fine - amazing how things match up if you make sure to have the same number of stitches on both parts, and don’t just wing it.
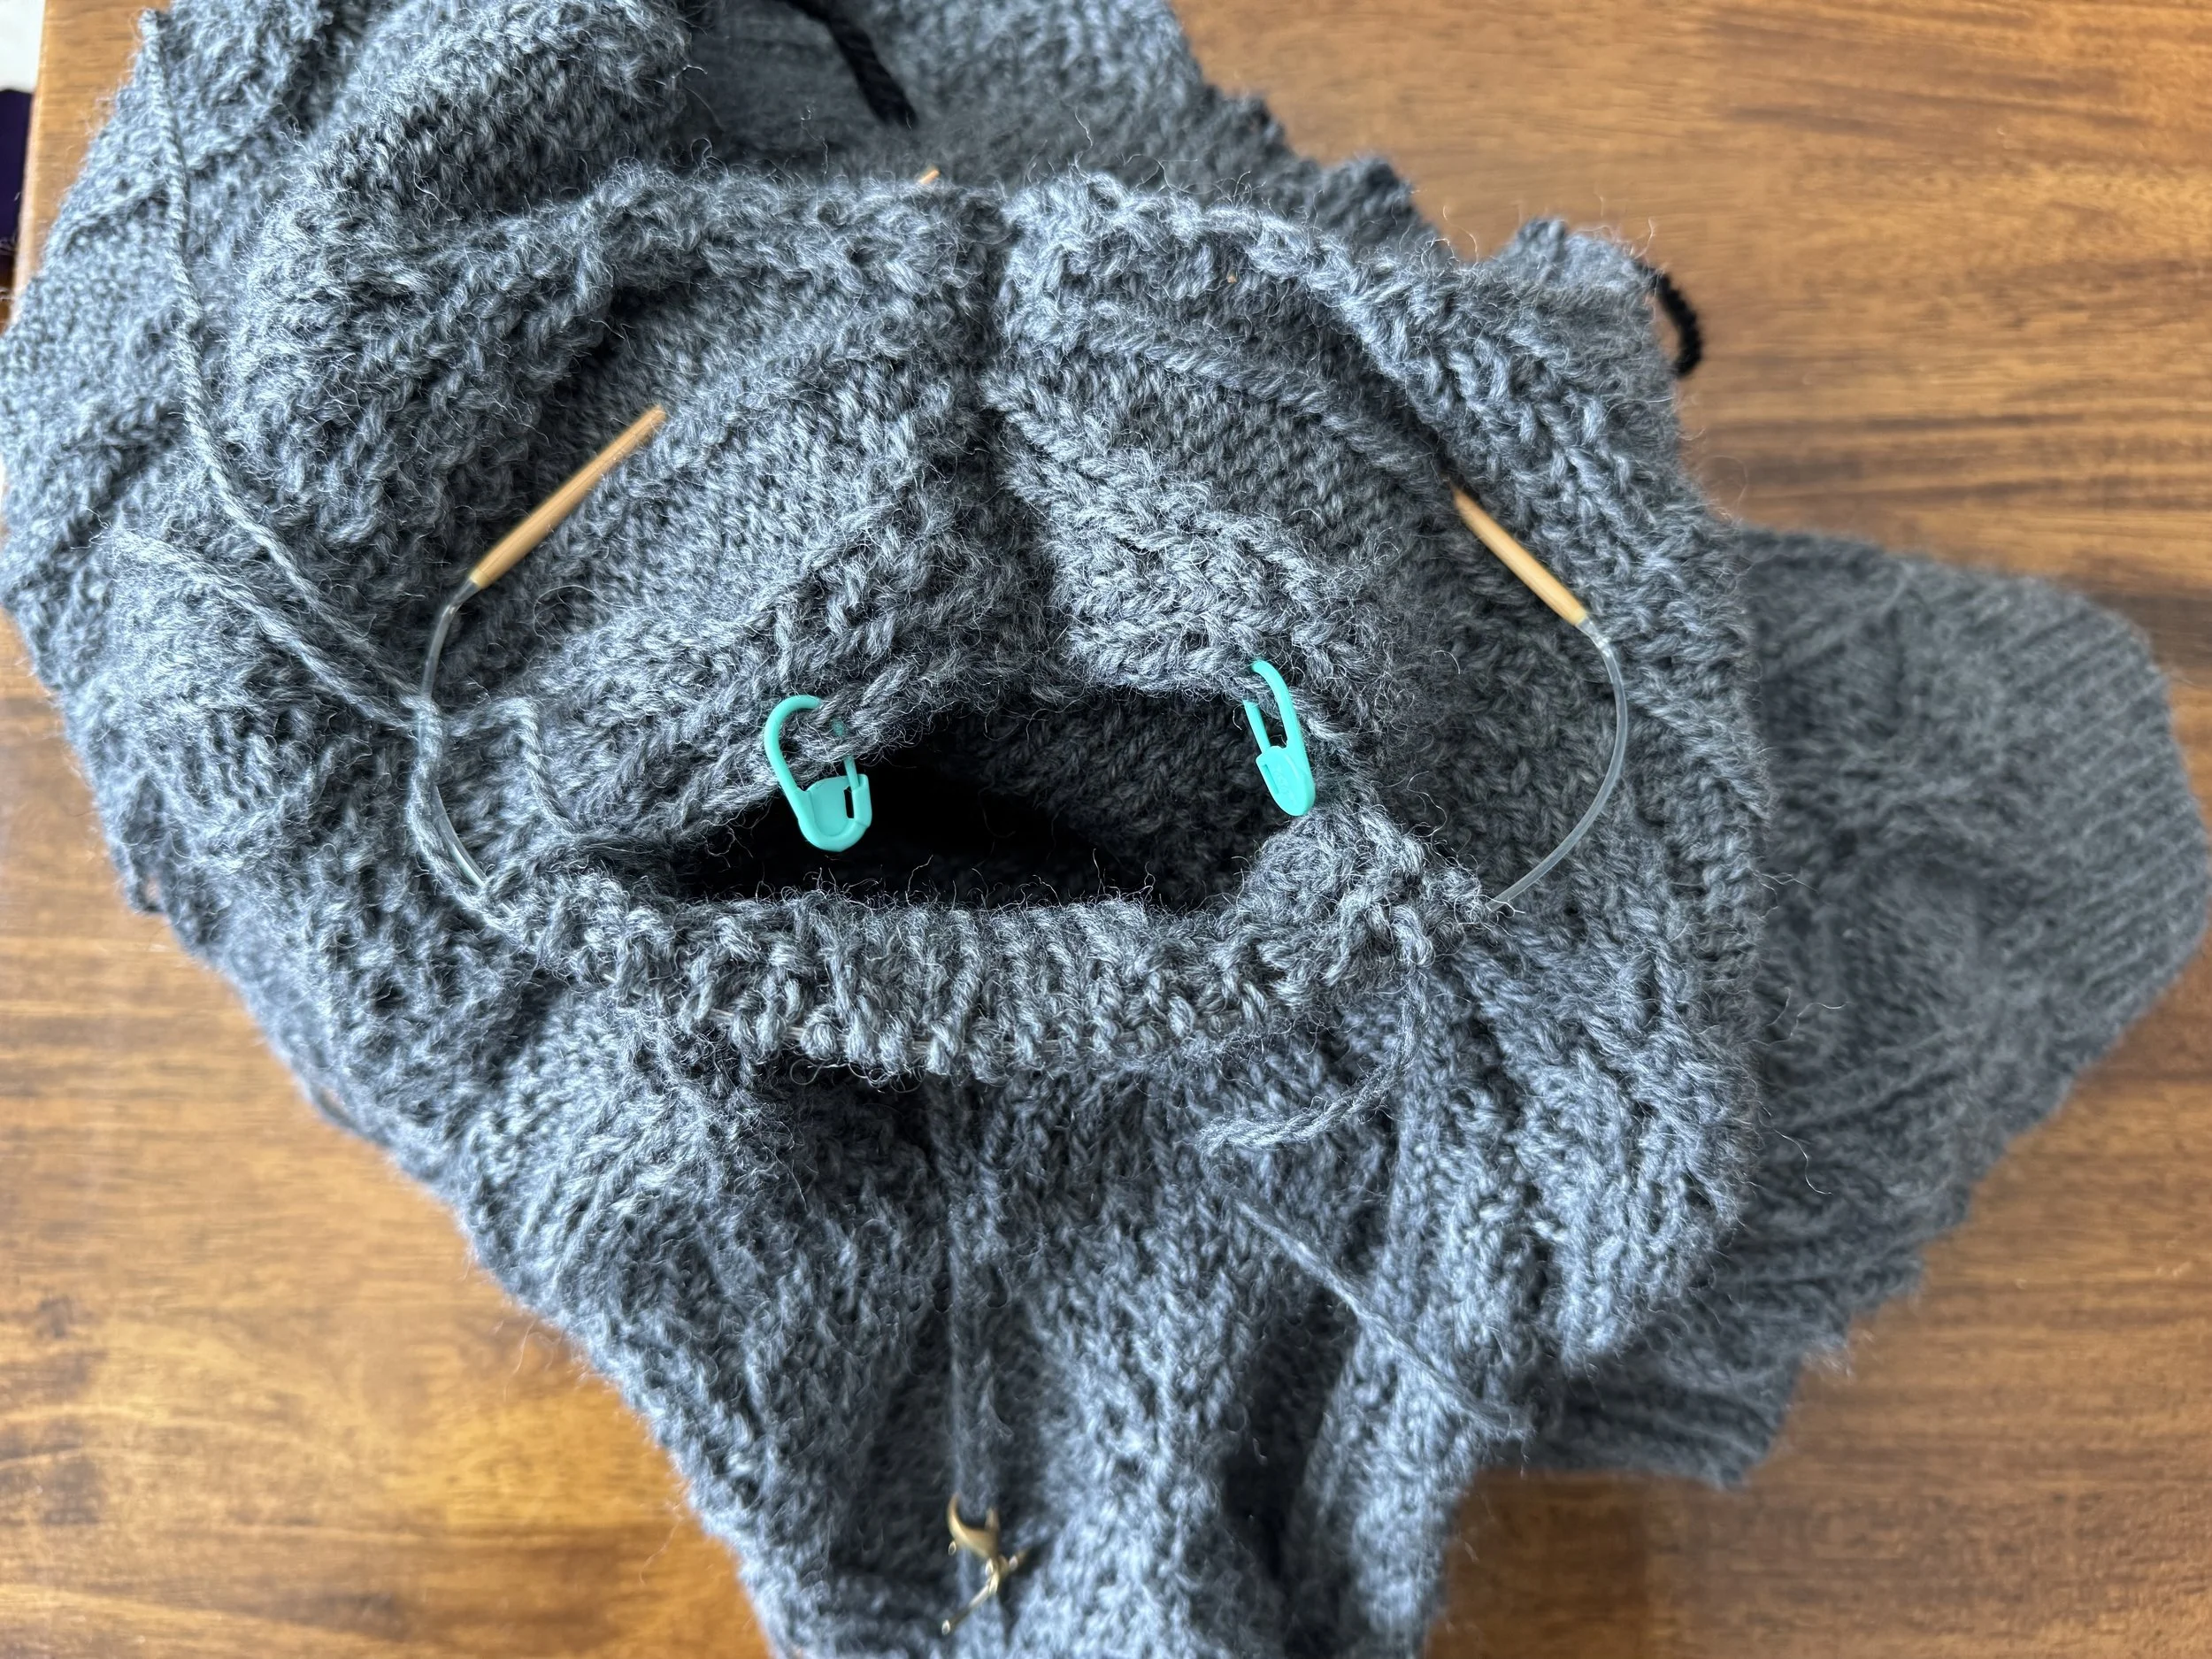
Now I am picking up every stitch on the flat parts of the neck opening but on the curved parts I am picking up two of every three stitches. I am ashamed to say that I did not count my stitches, but I made sure to end up with an even number on the first k1p1 round. Not hard: if you have an odd number, you either purl the last two stitches together or add a stitch for your last purl, whichever seems more perfect to you.
-
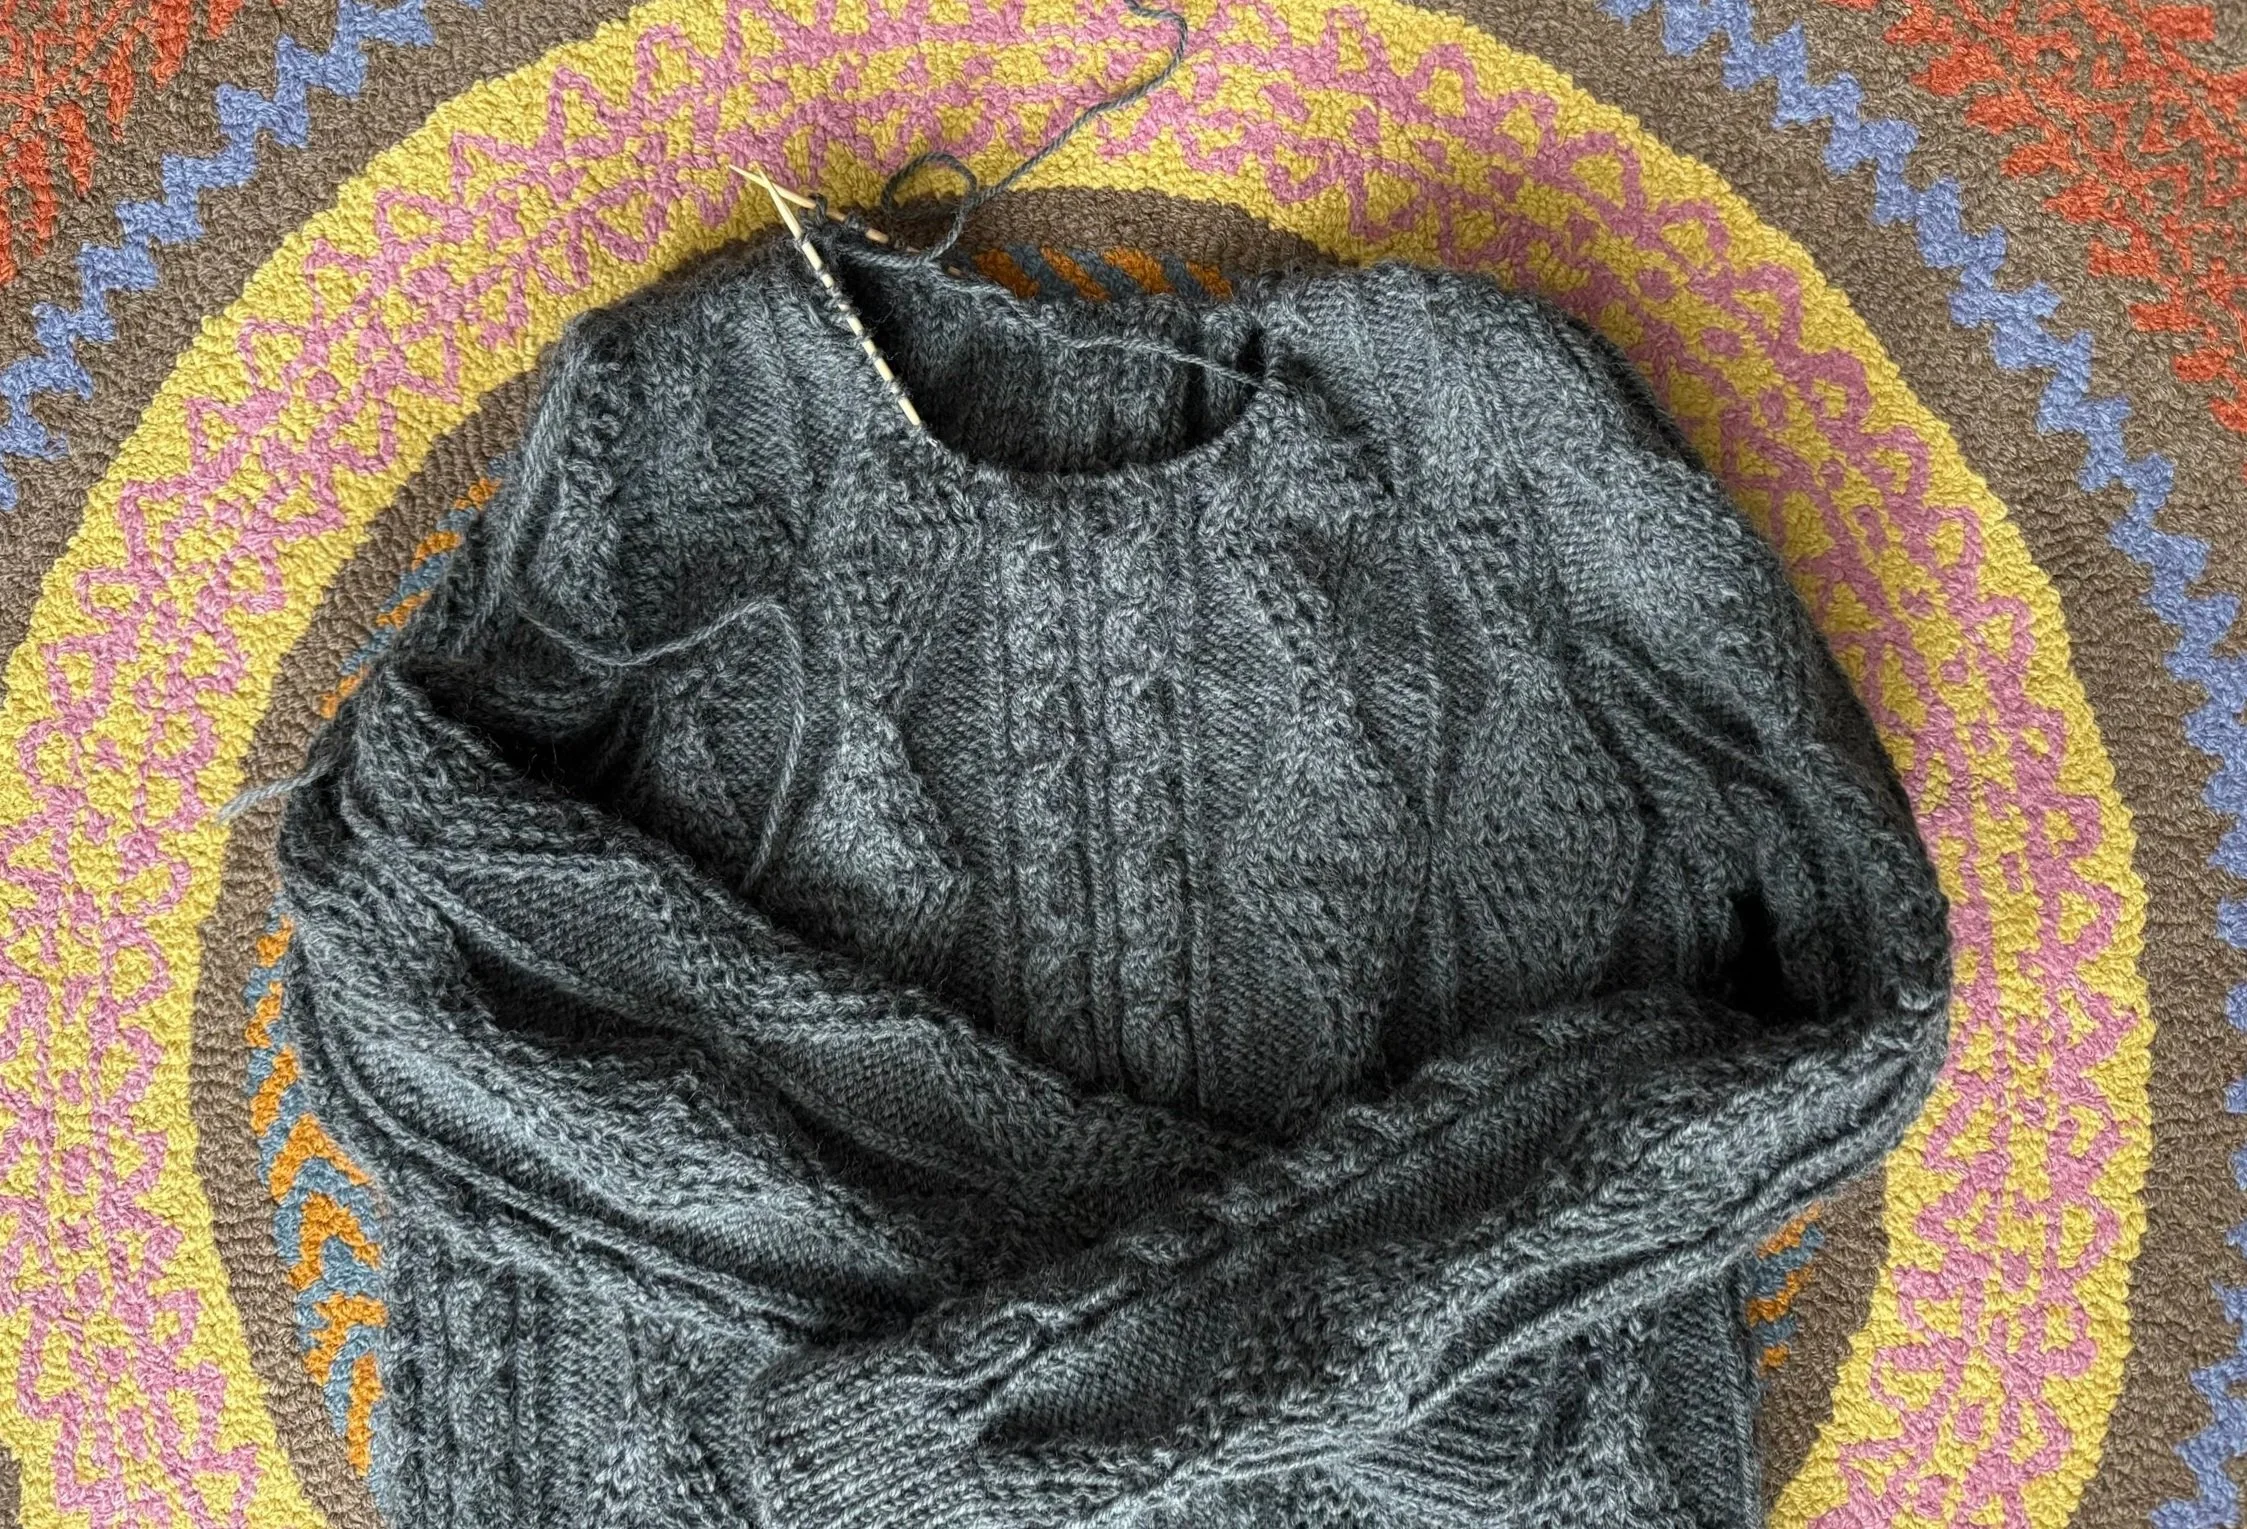
seven rounds of ribbing
After I worked about 1.5”, I bound off in knit, pretty loosely. When I was about halfway done with the binding off, I put it on, just to make sure that the thing fits easily over my head.
-
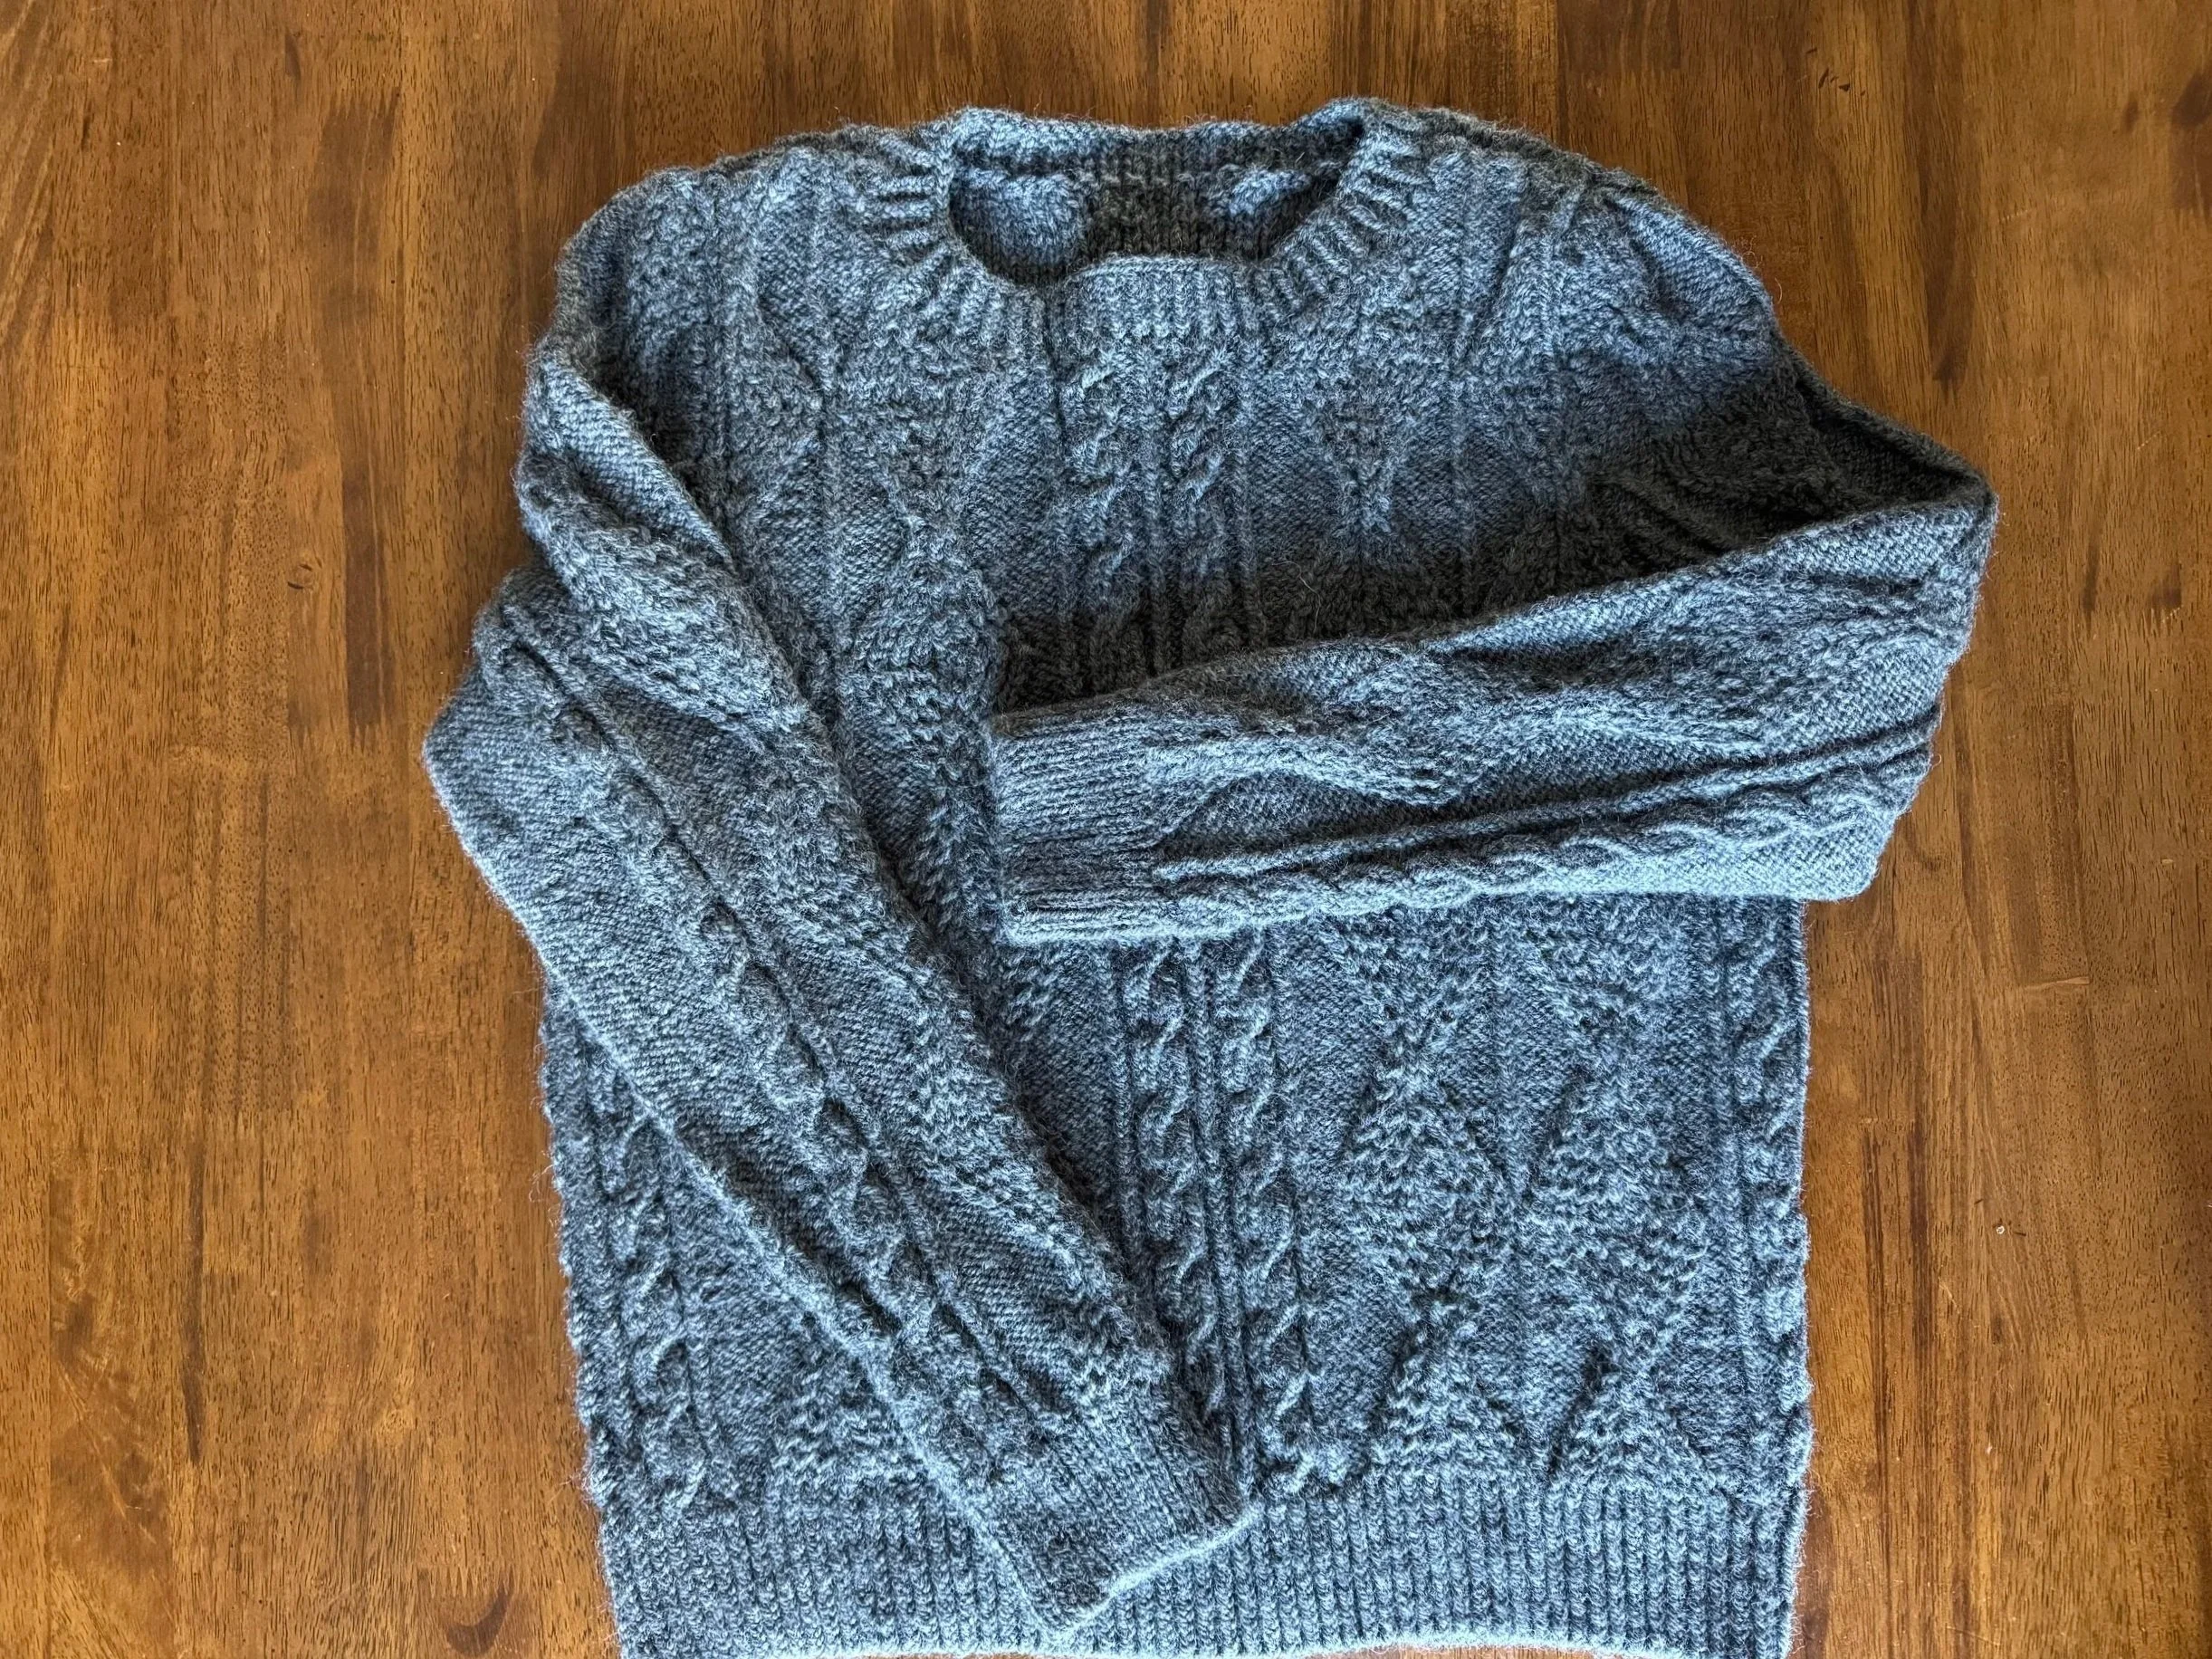
And here we are
I wet-blocked it but it still seemed a bit floppy, so I took the plunge and ran it through a gentle cycle in the washing machine. It felted up a bit and the tighter fabric feels better, and it barely shrank. I will try to be brave and post a photo of myself wearing it.
-

too cold outside
She will have to wait for a couple of days before we can release her - hoping she likes dandelions and sugar water.
-
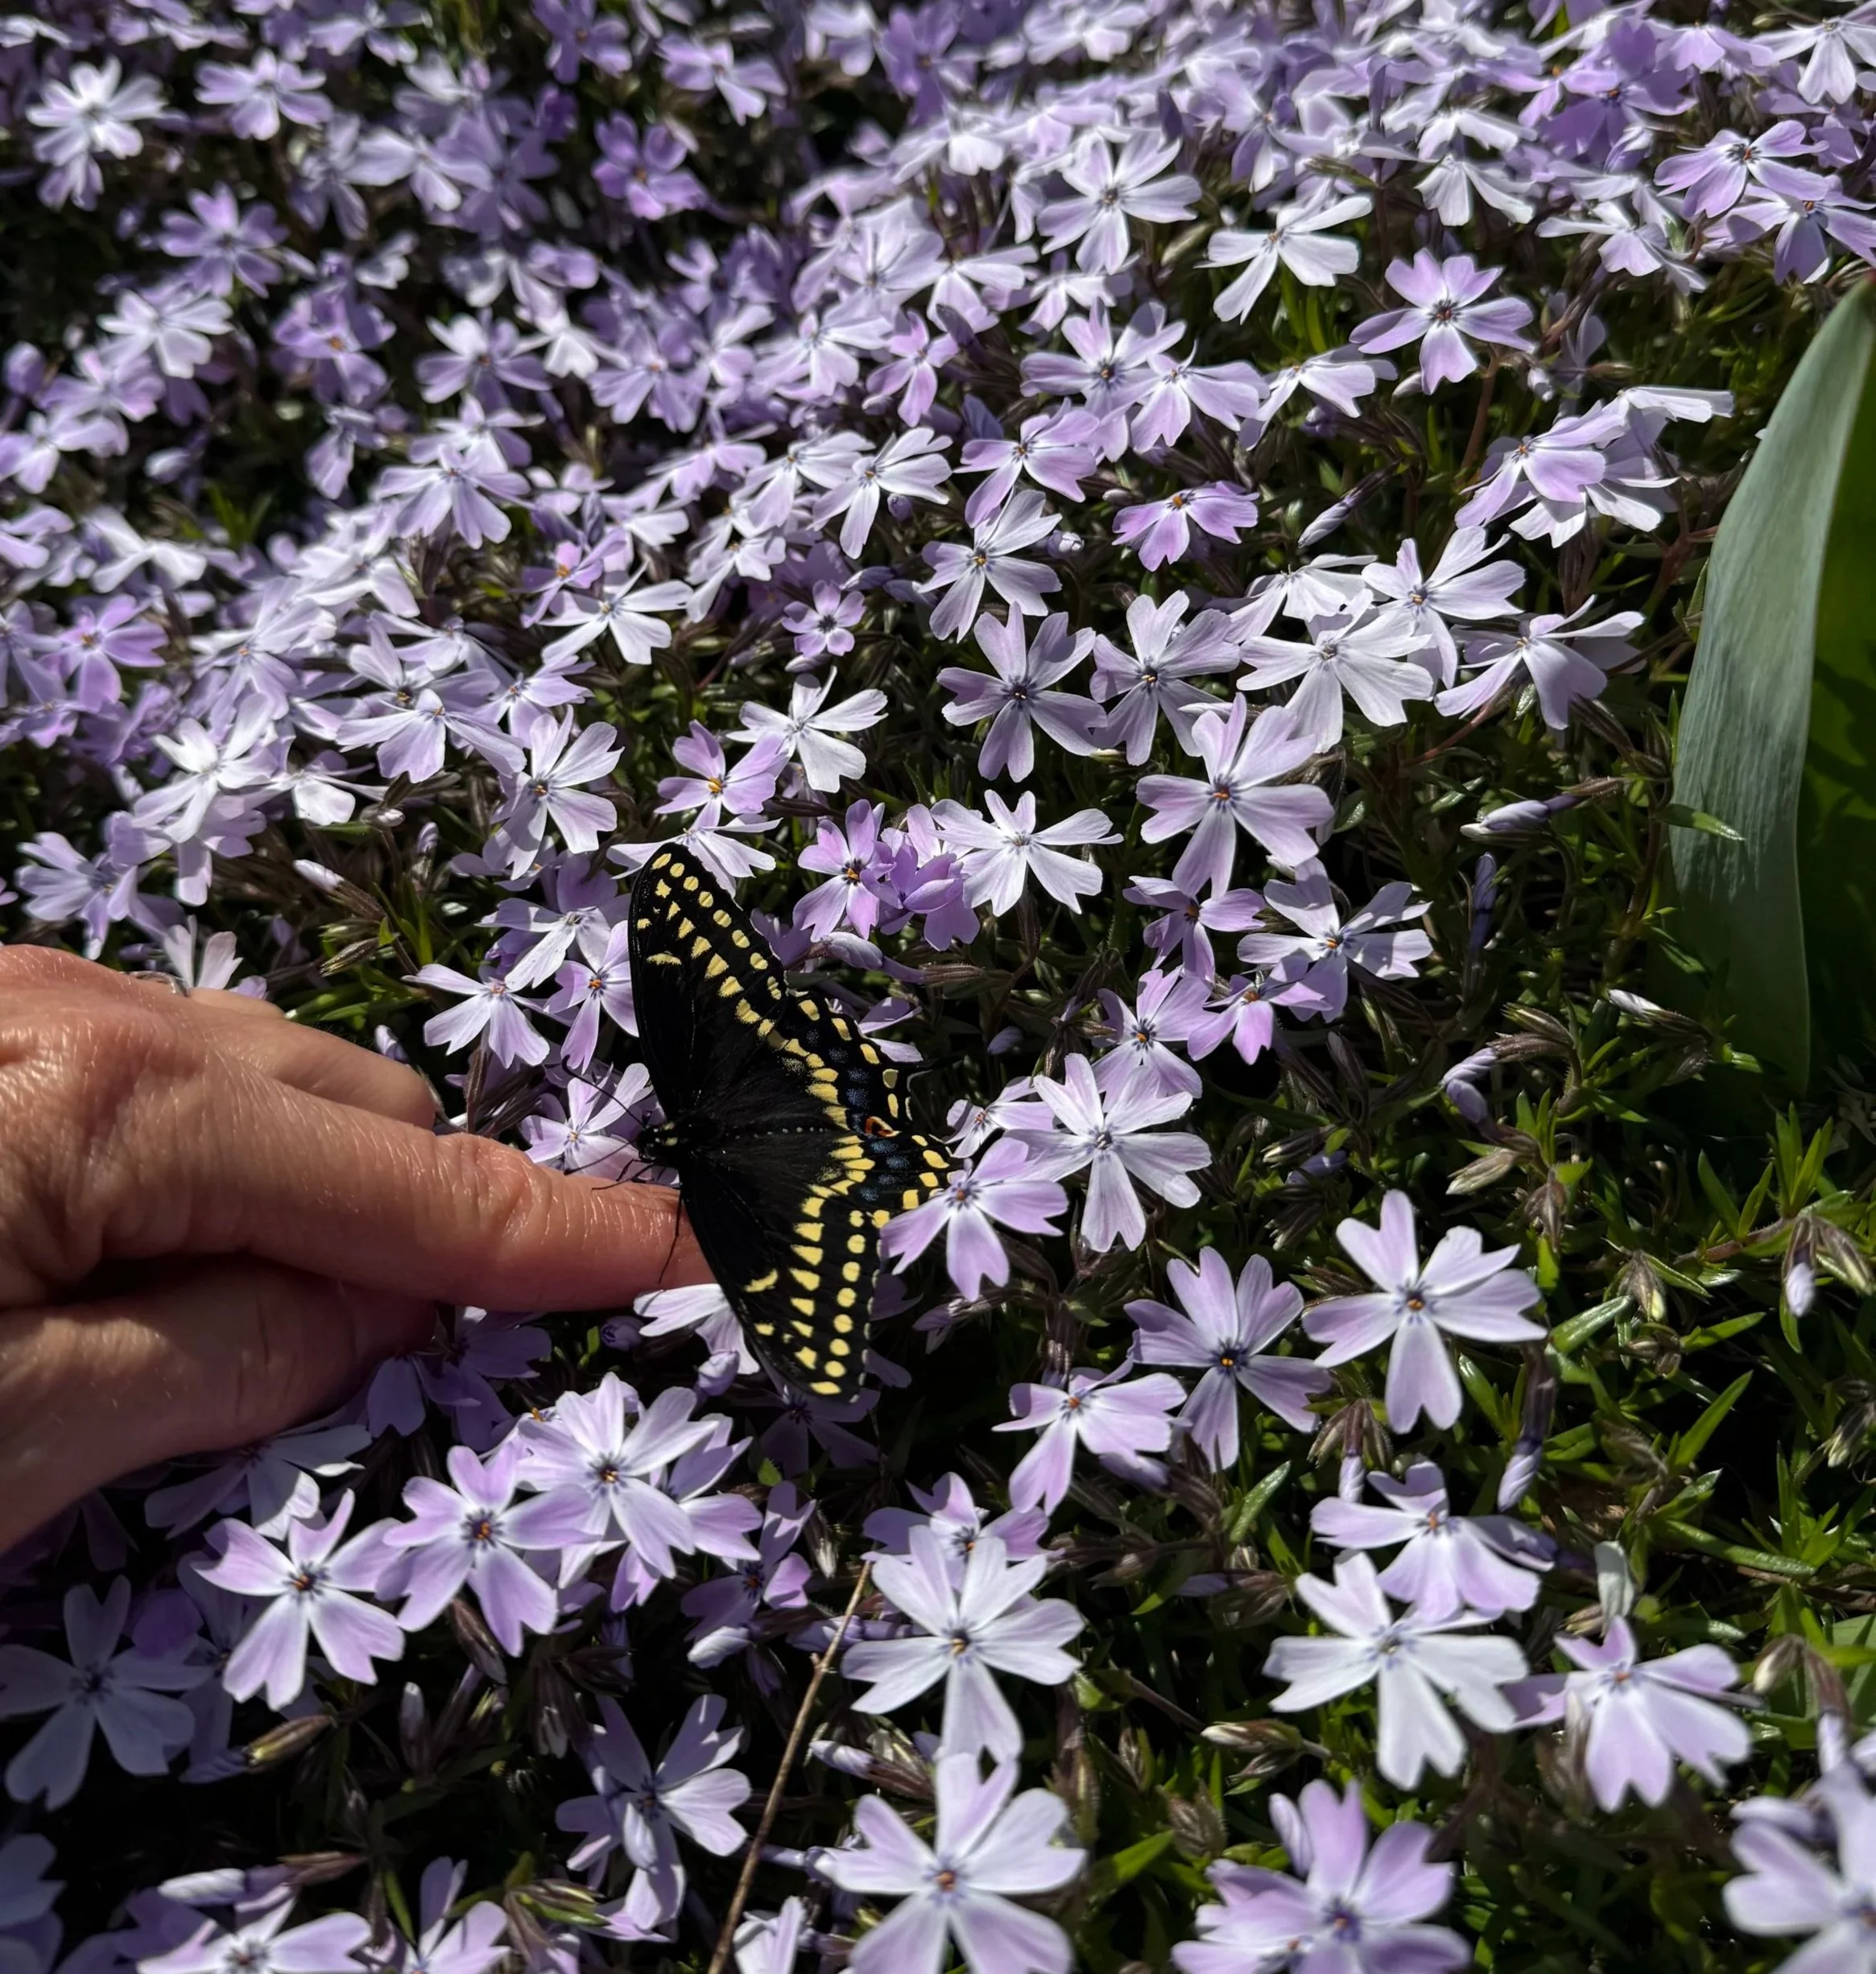
goodbye
She survived three days in a glass container and now she is free.